Idle not low enough and rough

1983 JEEP CJ7
111,000 MILES • 4.2L • 6 CYL • 4WD • MANUAL
Advertisement
Avatar
CJA31186
  • MEMBER
  • 89 POSTS
More pics...
May 10, 2017 at 4:10 PM
Avatar
CJA31186
  • MEMBER
  • 89 POSTS
Ignition Module Pics..
May 10, 2017 at 4:12 PM
Advertisement
Avatar
CJA31186
  • MEMBER
  • 89 POSTS
Also, I got the carburetor today. I am assuming I will have to do the baseline adjustments with the air mixture screws and idle screws before install.
May 10, 2017 at 4:13 PM
Avatar
CJA31186
  • MEMBER
  • 89 POSTS
Can I use the vacuum setup from the other post, or are you going to arrange it differently for my situation? I think the only difference would be I would have the brake booster connected to a port that you recommend to keep plugged. If that is not the case, I will wait to see your vacuum diagram.
May 11, 2017 at 5:31 PM
Avatar
CJ MEDEVAC
  • CERTIFIED EXPERT
  • 11,004 POSTS
Tired!

I made this to help. (I think I got it all right!)

In the pic, "My fuel inlet" is the same as yours, Mine just has a piece of tubing bent towards the fuel filter in THIS 1st PIC!

Other pics

Canister will not have vacuum, I eliminated mine and it's lines

I KEPT THE GREEN ONE coming from the Fuel Tank/ Liquid check/ and Roll over check. I extended it with fuel line. You will see it high on my firewall with a fuel filter that let's it breathe. I included a pic on fuel tank vent system so you could see how it is set up.

Lat pic

Bowl vents, you cannot cap these off, if you do, every time you stop and shut the Jeep off a lot of fuel will BOIL out of very hole in you carb! This has to breathe!

The finger is pointing at the tee, on the bottom of the tee add a fuel filter that the carb can breathe thru (like the one on my firewall) The other end of the filter(s) do not hook to nuthin'! It's just there to keep dirt daubers and trash out of the lines.

ANY QUESTIONS? Just ask!

I'll get to the ignition soon as I can! Mother's Day weekend, gotta go to Hotlanta to see her Mama.

I'll hang with you every chance I get!

The Medic


May 11, 2017 at 7:48 PM
Avatar
CJ MEDEVAC
  • CERTIFIED EXPERT
  • 11,004 POSTS
PICS LOST ABOVE

I try 'em again! (5 more should show)

The Medic
May 11, 2017 at 7:51 PM
Avatar
CJ MEDEVAC
  • CERTIFIED EXPERT
  • 11,004 POSTS
Dang it!

1st one did not show. Here it is, the one you wanted most.

The Medic
May 11, 2017 at 7:54 PM
Avatar
CJA31186
  • MEMBER
  • 89 POSTS
For the pcv valve do I need to get a different one? I found a T shape one that's bigger and should fit my current size grommet. I also have the original one that is not t-shaped. What do you recommend?
May 11, 2017 at 8:46 PM
Avatar
CJA31186
  • MEMBER
  • 89 POSTS
If I get rid of the charcoal canister will I start getting a strong gas smell from the fumes?
May 11, 2017 at 8:47 PM
Avatar
CJ MEDEVAC
  • CERTIFIED EXPERT
  • 11,004 POSTS
You will soon have a 1979 look alike engine,

Obtain a 1979 Jeep CJ-7 PCV and appropriate grommet.

PCVs allow different airflow's thru 'em, they are sorta matched to the carb's air/ fuel needs, basically the PCV is a regulated vacuum leak. Too much or too little air would especially affect your idle mix.

I hope you saw the vent line 'high' on my firewall with the fuel filter (screen/ breather). Being under the hood, I have never smelled fuel inside or even with my face a foot away.

I too, dislike those kinda smells, I kicked my exhaust out the side behind my rear driver's side wheel. Works great there!

Originally it was straight out of the back, the 'drafting affect' of a square back/ non-aerodynamic Jeep rolled the choking exhaust fumes into the back/ cockpit of the Jeep.

I'm headed to Hotlanta in the morning, may not see you tomorrow, I hope you have things to work on till I get back- NO SLACKING!

The Medic
May 12, 2017 at 7:32 PM
Avatar
CJA31186
  • MEMBER
  • 89 POSTS
Thanks for your response again. Enjoy hotlanta..haha. I'm going to try and install the carb this weekend with the vacuum setup you showed me in the picture. One question on the fuel line canister stuff. Which line will get the gas filter on the end of it. My canister has 3 lines hooked up to it right now.
May 12, 2017 at 7:40 PM
Avatar
CJA31186
  • MEMBER
  • 89 POSTS
Oh and one other thing. What do I do with the other pcv breather towards the back of my valve cover closer to the fire wall that currently hooks into the air filter?
May 12, 2017 at 7:56 PM
Avatar
CJ MEDEVAC
  • CERTIFIED EXPERT
  • 11,004 POSTS
Review the pics I sent.

If you are not sure, don't mess with it yet!!!

The 'KEEPER' IS:

Its the one that looks GREEN (may be dirty) LOOKS LIKE A LITTLE PEOPLE GARDEN HOSE! It also is sorta stiff!

You can verify this by following it back to the Roll Over check valve.

Once we get overwhelmed with replies, I understand how much of a pain it is to go back, I'm posting several pics you can see the correct hose. "MY GREEN HOSE" can be seen in each pic. (sending 5 pics, I hope!)

How's your end of this cyber-sation going?

Do I explain it well enough so that even your Ma-in-Law could do it?

The Medic
May 12, 2017 at 8:07 PM
Avatar
CJA31186
  • MEMBER
  • 89 POSTS
Yes you explain everything very well! Everything seems simple and straight forward. Should be able to get everything hooked up this weekend. Just as long as I have time to get out there for a couple hours.
May 12, 2017 at 8:12 PM
Avatar
CJA31186
  • MEMBER
  • 89 POSTS
Also, on my current pcv hose going to the carb there is some kind of an electrical sensor t'd into the line with wires going into it. Can I get rid of that and just have a direct pcv hose from my valve cover to the carb for the setup we are Doing?
May 12, 2017 at 8:19 PM
Avatar
CJ MEDEVAC
  • CERTIFIED EXPERT
  • 11,004 POSTS
The one on the rear.

BETTER NOT BE A PCV!

It should be a grommet and a fitting 45/ 90/ whatever elbow and hose- air can free flow both ways

A PCV is a check valve-air only one way-as it would be installed it would not LET REPLENISHMENT AIR flow from the breather to the valve cover

The REAL PCV is sucking all of the crappy Combustion Gasses out of the engine, it needs Fresh Air from the breather from the other Valve cover hole.

Think of it like this-

If you plugged the other hole with your thumb- the REAL PCV would eventually suck a vacuum on the whole engine (provided all seals are good).

When it sucks that vacuum, the engine idle starts running rough, WHY? WHY? WHY?

The suction is there! / The PARTIAL AIR FLOW TO THE CARB HAS STOPPED! (the other needed air comes thru the carb's throat) You just cut off some of the combustion air needed for idle!

These 2 air flows are sorta buddies, the engineers deemed that it needed so much air from each source to Idle and the PCV system operate correctly.
*
*
HERE"S A TRICK! IN THE FUTURE REMEMBER THE TRICK! DON"T ASSUME IT"S A PCV!

If you do have a PCV in the rear hole, take it out (this may have hindered your set up in the past)

Grind the metal bottom off of it until the guts all fall out!

NOW YOU HAVE AN ELBOW- NOT A PCV- It will fit in the grommet and now allow airflow! Yep sorta looks nice and fits well. However, it would make a feller like me check it out closer!

Leave the new Real PCV in the front hole untouched!

Are you learning stuff? Does it fall into place?

The Medic

May 12, 2017 at 8:34 PM
Avatar
CJ MEDEVAC
  • CERTIFIED EXPERT
  • 11,004 POSTS
Yep!

Direct nipple to hose to nipple! Everything is a straight shot!

That other stuff is not needed (it helped Mr. Computer)

Take it loose, roll up the wires out of the way!

New carb got a 'lectric choke? That wire will be a "Keeper".

The Medic
May 12, 2017 at 8:39 PM
Avatar
CJA31186
  • MEMBER
  • 89 POSTS
Ok excellent. It's my mistake for assuming it is a pcv. I will double check to make sure there is no pcv in the rear hole and that it allows free air flow both ways.
May 12, 2017 at 8:44 PM
Avatar
CJ MEDEVAC
  • CERTIFIED EXPERT
  • 11,004 POSTS
Looky Here!

My new one came in today!

The Medic
May 12, 2017 at 8:46 PM
Avatar
CJA31186
  • MEMBER
  • 89 POSTS
Should I keep that rear hose that I thought was a pcv hooked into the air filter?
May 12, 2017 at 8:48 PM
Avatar
CJ MEDEVAC
  • CERTIFIED EXPERT
  • 11,004 POSTS
Last post is screwy for some unknown reason-

that is my fresh air not "LOOKY HERE"

"LOOKY HERE" was 'spota be these 2 pics

The Medic
May 12, 2017 at 8:51 PM
Avatar
CJA31186
  • MEMBER
  • 89 POSTS
Nice valve cover!
May 12, 2017 at 8:52 PM
Avatar
CJ MEDEVAC
  • CERTIFIED EXPERT
  • 11,004 POSTS
Yes,

Fresh air from breather to rear valve cover hole. Like mine in a pic or two back.

Ain't my new $26 cover perty!

The Medic
May 12, 2017 at 8:54 PM
Avatar
CJA31186
  • MEMBER
  • 89 POSTS
What? Only $26? How do you find these prices? That carb I bought was only $96 and after I bought it the price went up to $126.
May 12, 2017 at 8:55 PM
Avatar
CJ MEDEVAC
  • CERTIFIED EXPERT
  • 11,004 POSTS
You seem to be hanging with the right feller huh?

You are EZ to help out!

Check out this junk and lemme know what you think. This is an East Coast parts store!

http://www.2carpros.com/questions/2001-dodge-neon-milage-just-want-put-fliuds-their-locations

The Medic
May 12, 2017 at 9:13 PM
Avatar
CJA31186
  • MEMBER
  • 89 POSTS
Haha yeah that looks good. I am actually a member of that speed perks thing. I am also a member with pep boys and auto zone. Definitely a good way to find discount codes by googling too.
May 13, 2017 at 4:33 AM
Avatar
CJA31186
  • MEMBER
  • 89 POSTS
Ok I got the '79 carb installed. I have a the distributor vacuum going where you told me and the pcv going to the location you told me as well. All other ports capped. Charcoal canister is unhooked with the hose from the roll over check valve waiting to get a fuel filter on it. Two other breather hoses from carb are also waiting for the filter. There was a hose coming from the egr valve to the air filter that I removed and capped EGR valve port. Also the brake booster runs to a port on the manifold. That port had another t1t with hose coming out that I didn't even know where it should have been hooked up. I removed that and capped it too. Only brake booster is going into that now. Can I now remove all of these other hoses that are no longer part of the system? A lot of them have wires hooked into them through connection pieces that can easily be unhooked. Just didn't know if I could unhook them yet or not. Now that this is done what is next?
May 14, 2017 at 5:17 PM
Avatar
CJ MEDEVAC
  • CERTIFIED EXPERT
  • 11,004 POSTS
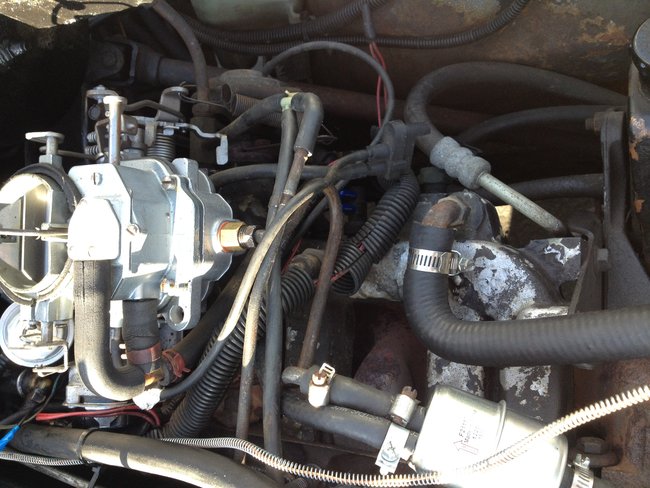
Lets look thru the air cleaner snout. Is it wide open thru there? No little doors closed that would block air from getting to the carb?

Let's leave the hoses on the air cleaner for the time being (just not hooked to any vacuum)

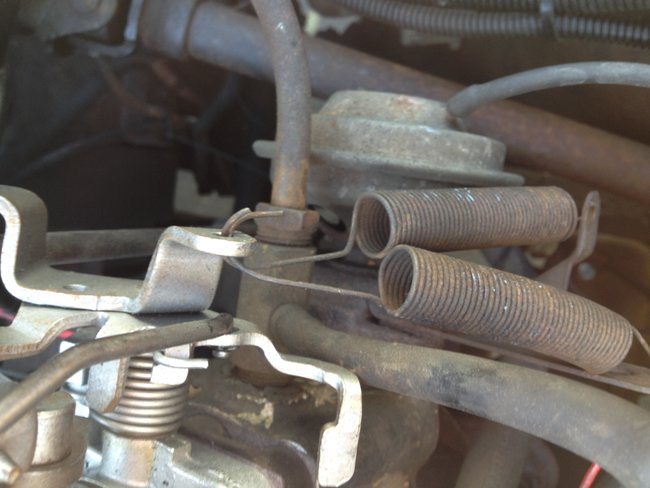
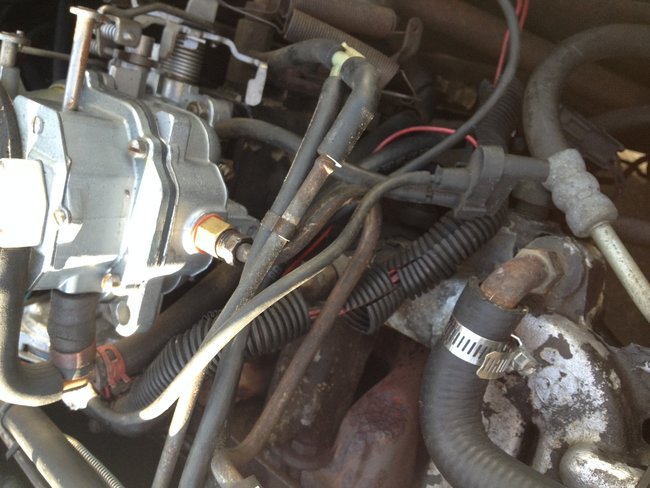
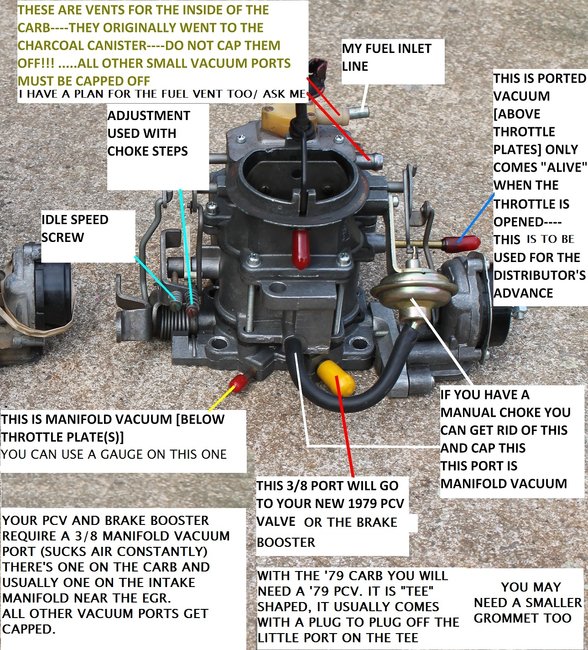
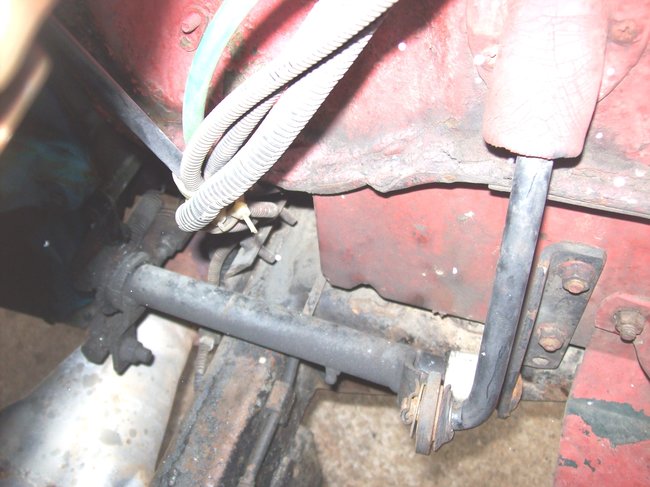
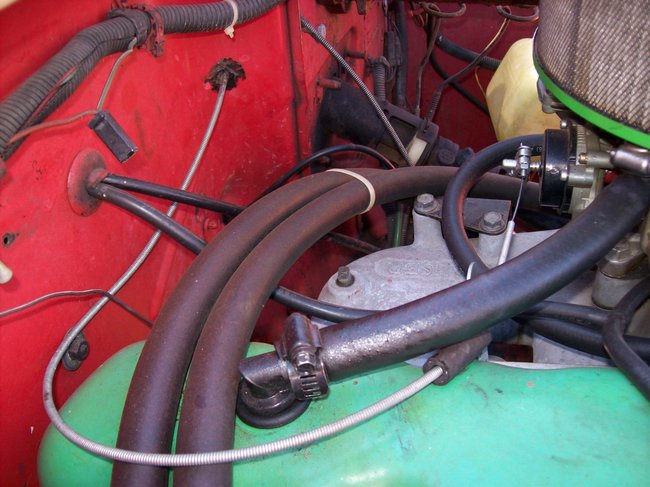
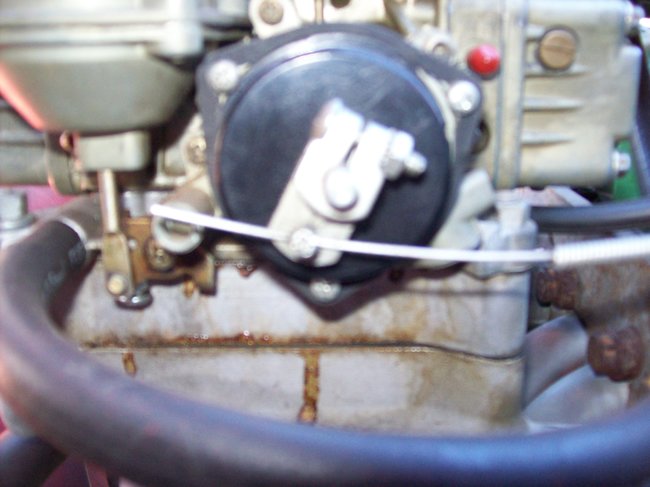
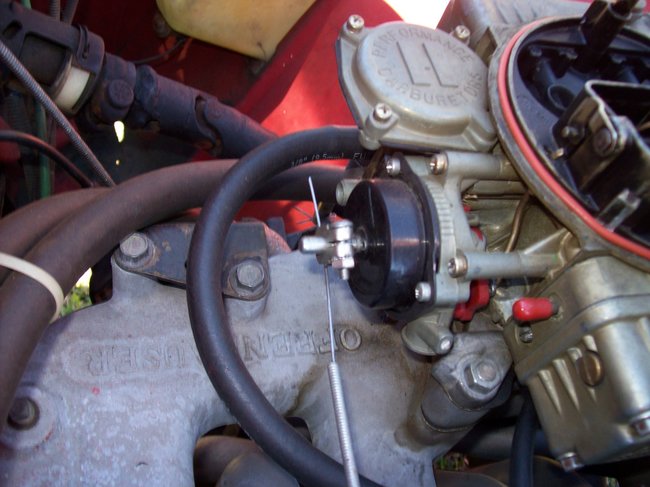
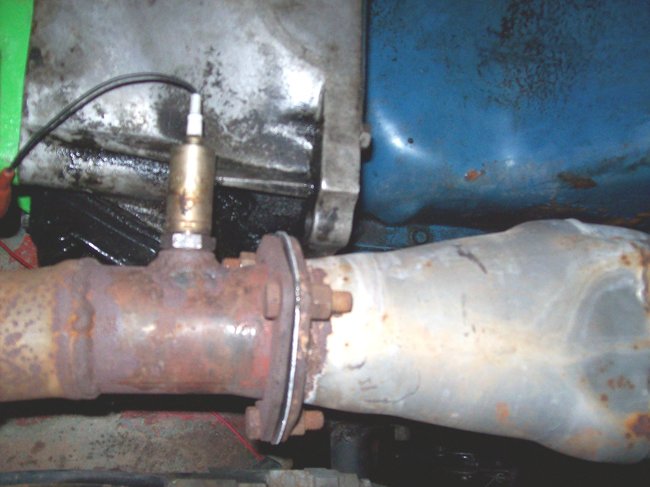
EGR is not needed (If you had headers, it would not work with them...hence it is not a necessary part) You done good taking the line off of it! Just for info, if you took the whole unit off, you would have to make some modifications to plug it's holes off. As it sits (hopefully fully closed) It will be just fine.

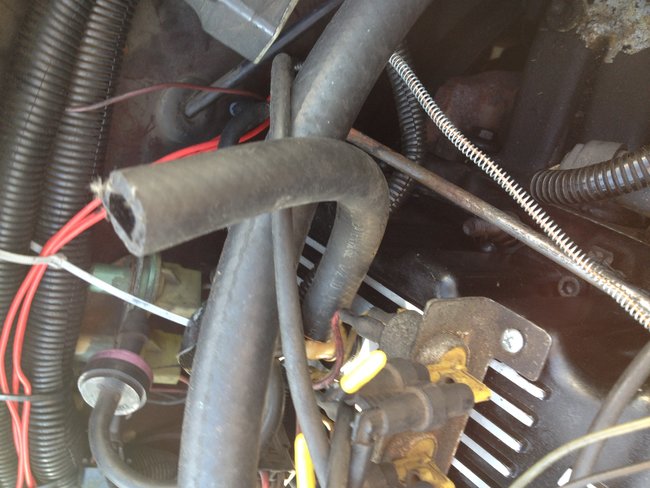
Yes, all unused carb and intake vacuum ports should be capped. Do what you wish with the ports they used to operate, they don't suck air, capping might look nicer and also keep those "know it alls" from pointing out a naked port/ but it really is unnecessary to cap 'em.

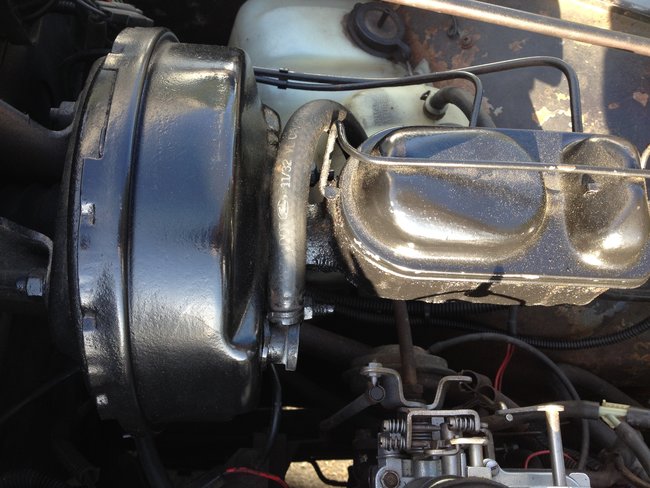
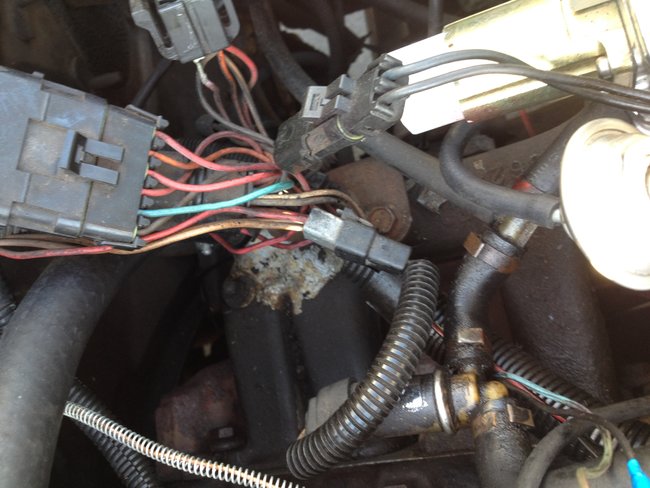
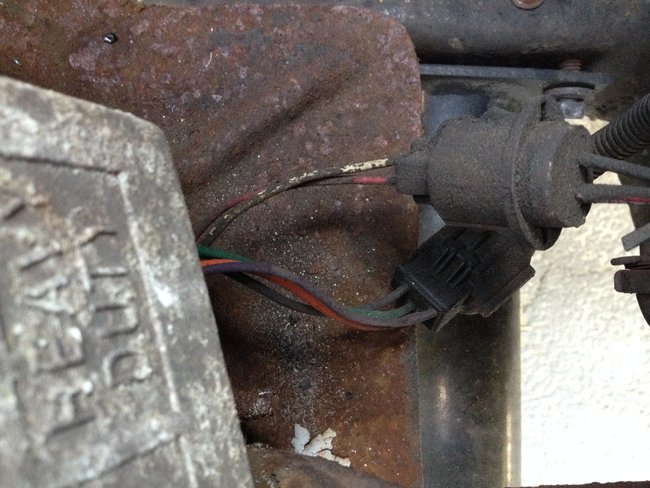
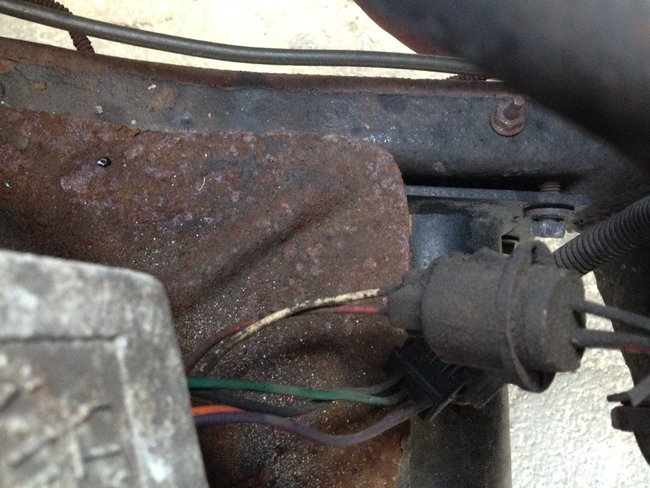
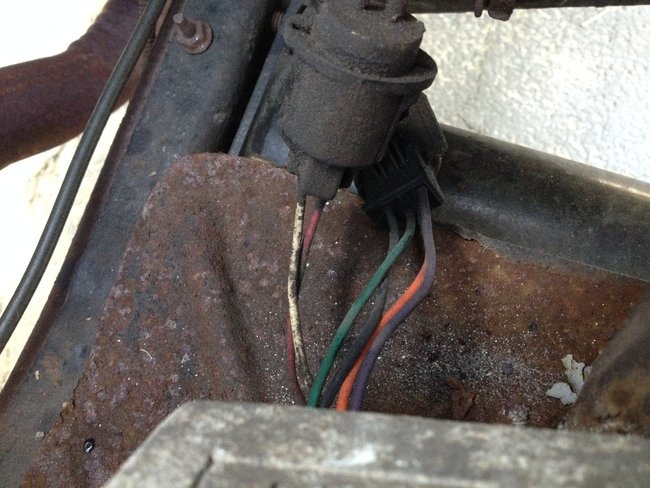
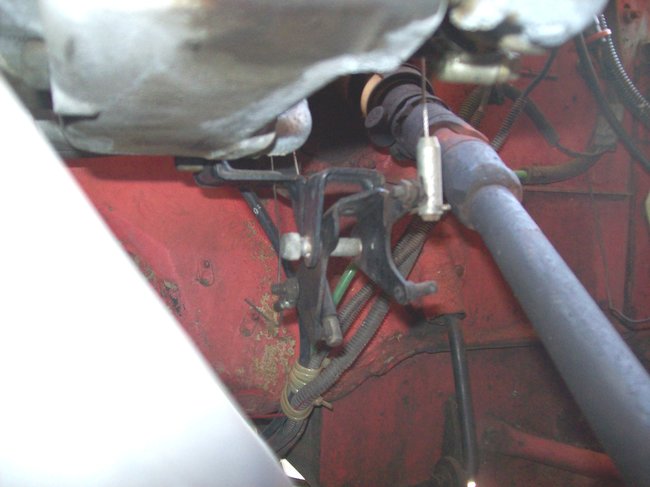
Everything dangling can be taken loose and the wires can be rolled up out of the way (if it makes things look prettier, take those pesky wires out of the wire looms so they will roll up smaller. Insure none of that stuff will Rub Raw on something or get melted on the engine or exhaust manifold.

IMPORTANT!

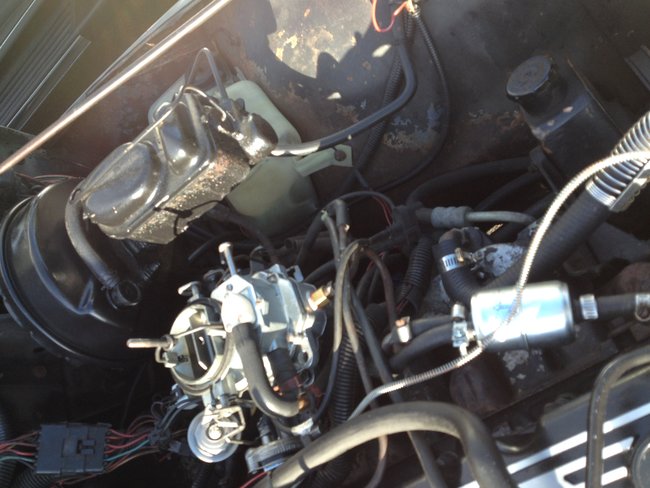
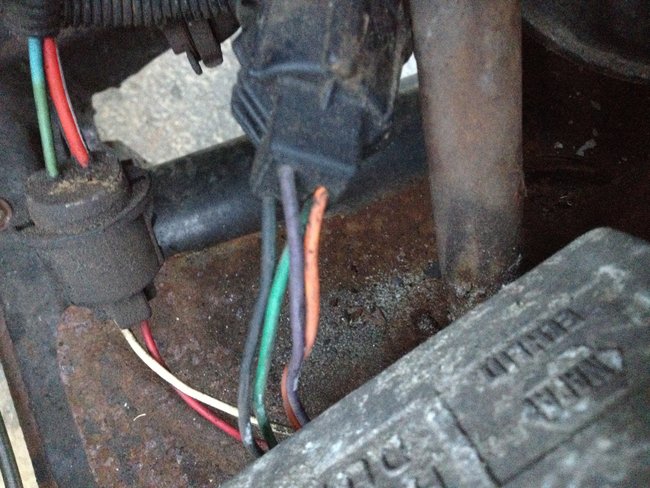
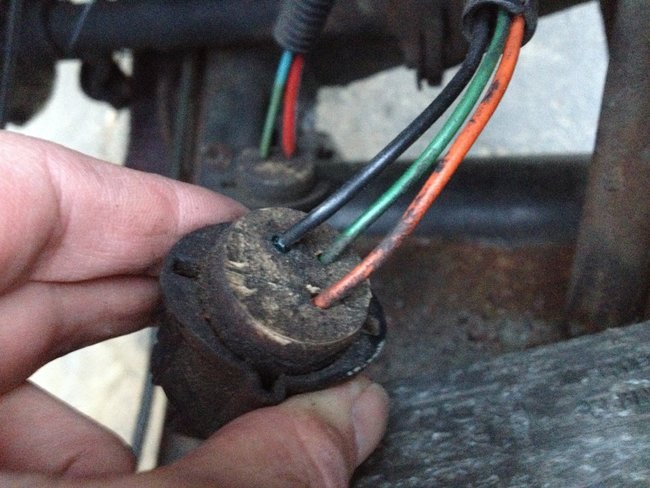
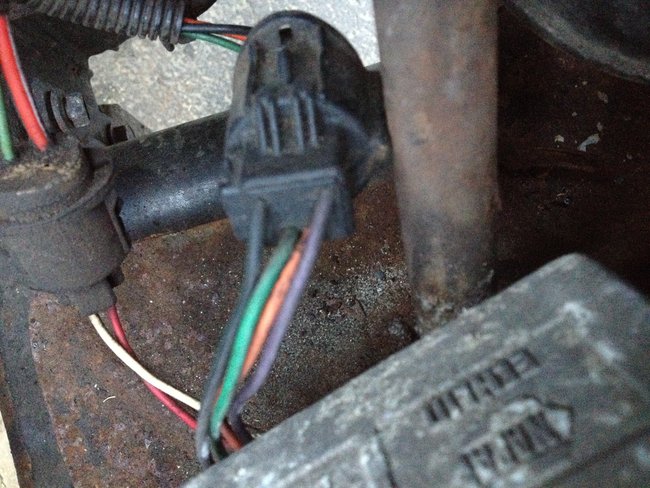
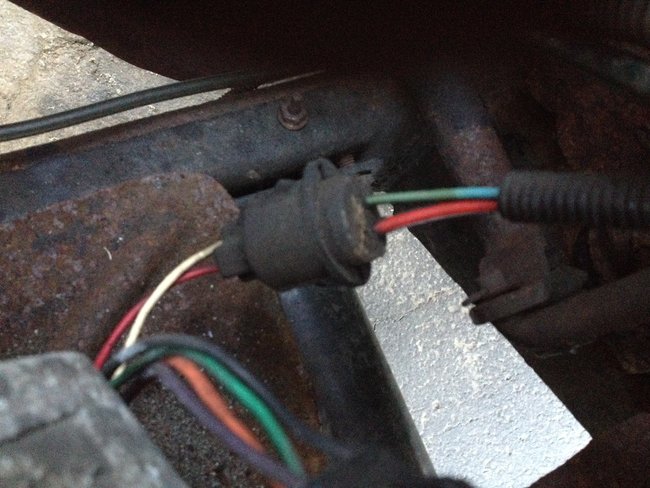
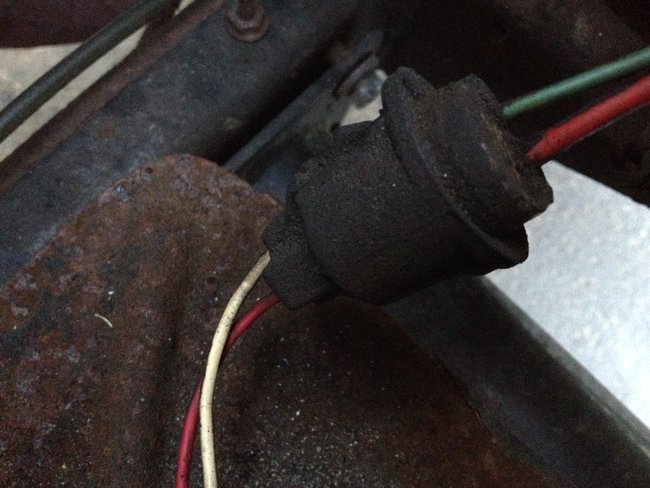
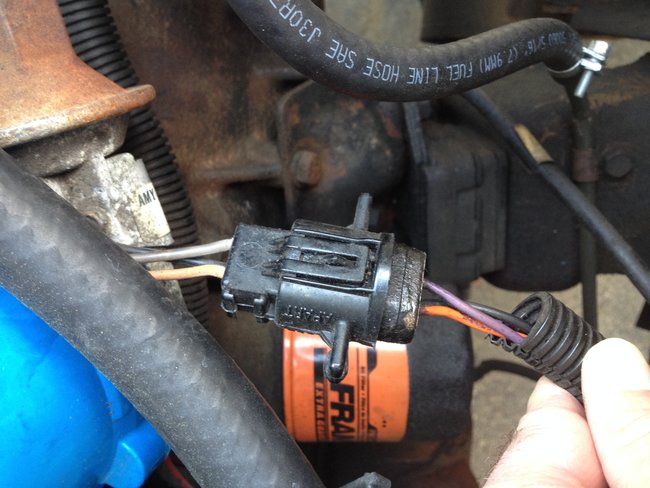
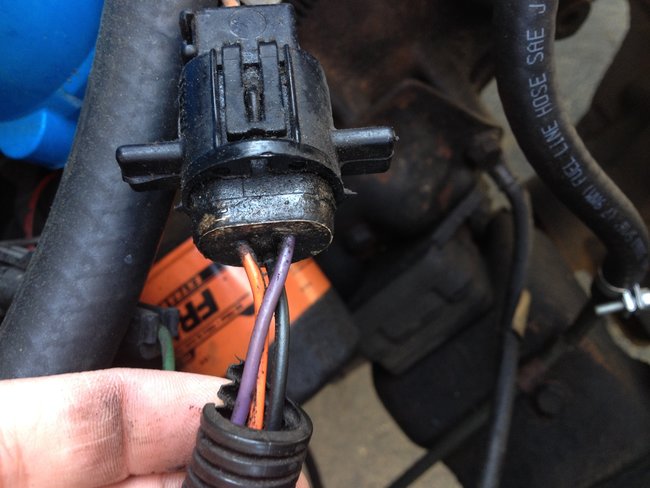
Pretty much the only wires on the engine that are needed will be for the distributor/ coil/ the temperature sending unit (on the head-should be a purple wire w/ a stripe)

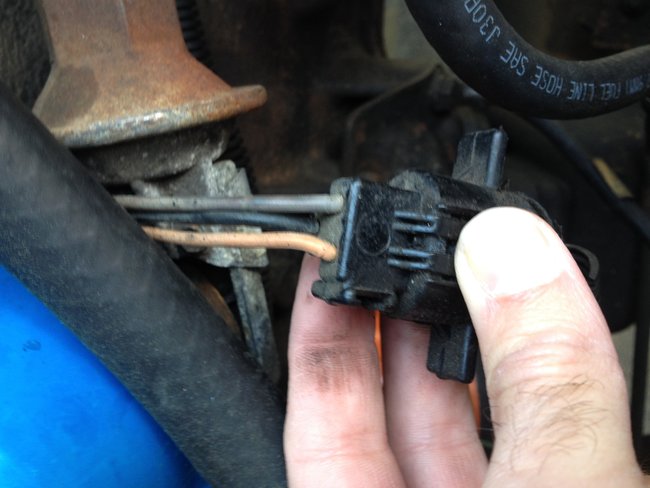
The oil pressure sender (passenger side of engine, low, and near the bell housing, purple wire)

Mr. Choke (I prefer a manual choke- I decide when to use it, less things that need adjustment, less worries of it getting hung up)(we can discuss this later if you wish)

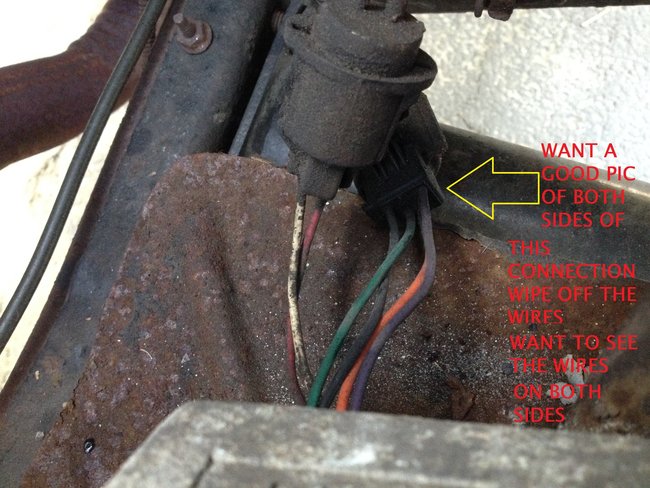
Any thing you are not sure of- point at it and send a pic!

Sometimes I make mistakes, Check and correct me if I miss something!

Later you might even remove some of the unused crap that is screwed into the block and head and replace them with brass or steel tapered (plumbing) plugs just to pretty it up more. (save it for a rainy day)

Is it looking more spacious and simple under the hood now?

Are you confident with this whole deal?

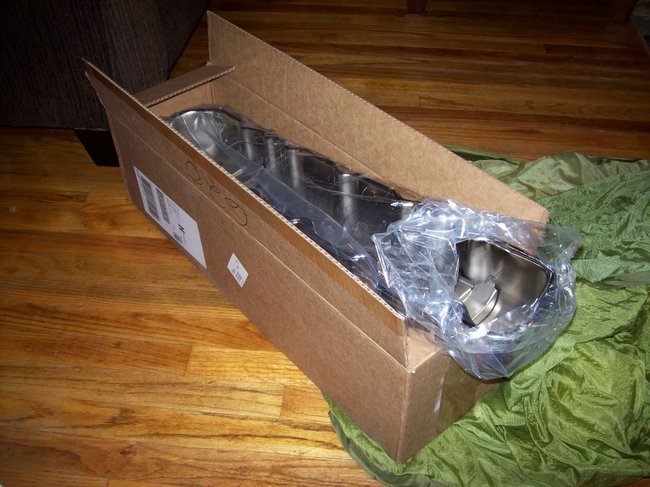
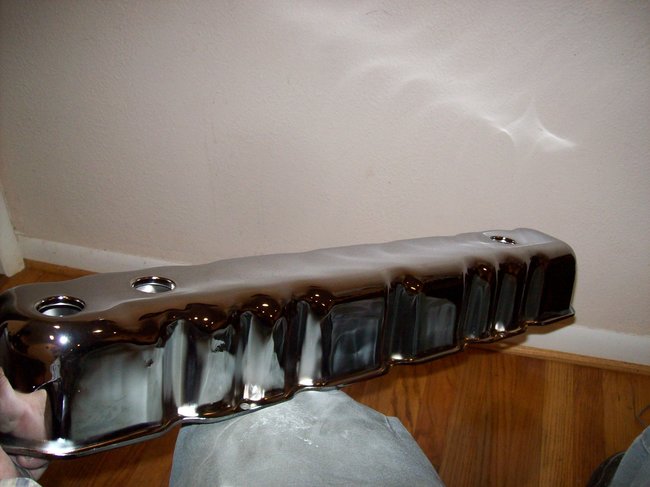
Got my valve cover on while ago! Pic soon.

The Medic

May 14, 2017 at 6:57 PM
Avatar
CJA31186
  • MEMBER
  • 89 POSTS
Yes looking better under the hood. I will just remove all of those old vacuum actuators and hoses that are now unused, along with unplugging those wires and removing them from the looms. I also noticed two sensors on carb side near the manifold. Im guessing I dont need those either? They attach similar to the way the temperature sending unit wire attaches near the valve cover towards the fire wall on the block. Ok, how do we start tuning this new carb and setup?
May 14, 2017 at 8:10 PM
Avatar
CJA31186
  • MEMBER
  • 89 POSTS
Or how do i go about disconnecting the computer and adjusting the ignition module? Im thinking that would come before tuning?
May 14, 2017 at 8:13 PM
Avatar
CJ MEDEVAC
  • CERTIFIED EXPERT
  • 11,004 POSTS
Need a good pic/ gotta see the wires

See pic below

The Medic
May 14, 2017 at 9:47 PM
Avatar
CJ MEDEVAC
  • CERTIFIED EXPERT
  • 11,004 POSTS
Send me a pic of the distributor connection too.

I wanna see the wires on both sides of connector.

The Medic
May 15, 2017 at 6:07 PM
Avatar
CJA31186
  • MEMBER
  • 89 POSTS
Ignition module pics... Man now you tell me to get pics of the distributor wires?...i have to wait until tomorrow now...haha.. Just kidding. Im anxious to get this underway. I have more pictures of the igniTion module wires so let me know if this is enough.
May 15, 2017 at 6:16 PM
Avatar
CJ MEDEVAC
  • CERTIFIED EXPERT
  • 11,004 POSTS
Forgot your question above.

Any sensors, other than the 'keepers' can be disconnected.

Let's get it running good, then if you want to later, you can unscrew the sensors and plug off the holes.

Let's keep the O2 sensor installed, you can use it to run a air/ fuel ratio gauge if desired (that's all it runs). On my '77, I had to drill a hole in my exhaust/ install a bung/ install an O2 sensor. With my Holley 390 CFM carb, it's been very useful in "Jetting" it correctly. Even if you don't need to jet (your BBD is just fine), it's a cool gauge, mine's on my steering column.

Without having it run yet, are you sorta impressed with a brand new, inexpensive, Plain Jane BBD? You gonna return the other one?

The Medic
May 15, 2017 at 7:21 PM
Avatar
CJA31186
  • MEMBER
  • 89 POSTS
Yes definitely impressed. Ive been wanting to get rid of all those pesky hoses and wires for a long time now just didnt how to get it done right. Really enjoying this! Did you see my pics of the ignition module wires? Everything clear enough?
May 15, 2017 at 8:15 PM
Avatar
CJ MEDEVAC
  • CERTIFIED EXPERT
  • 11,004 POSTS
Good pics!

Waiting on 'stributor,

Mainly want to see all wires at once on either side (colors and positions) fine, if it takes a few shots.

The Medic
May 15, 2017 at 9:47 PM
Avatar
CJA31186
  • MEMBER
  • 89 POSTS
Ok. If I get a new ignition module, should I be getting one that would be for a 1979 jeep cj7 or do I buy one for a 1983 cj7? Also, any particular brand?
May 16, 2017 at 4:14 AM
Avatar
CJA31186
  • MEMBER
  • 89 POSTS
Here are the distributor wires.
May 16, 2017 at 6:06 AM
Avatar
CJ MEDEVAC
  • CERTIFIED EXPERT
  • 11,004 POSTS
Good deal!

Got in pretty late, I'll try to get you some ign info tomorrow.

Sorry!

The Medic
May 16, 2017 at 7:15 PM
Avatar
CJA31186
  • MEMBER
  • 89 POSTS
No problem. One other thing. I bought a new ignition module because the one on there seems like it should be replaced. However, I can't get those bolts out. They are stuck on there. I sprayed them with PB Blaster today and still can't move them. They are threaded into the ignition module holes, so there is no nut on the other end. Any other suggestions before I drill them out?

Other than that everything else is ready to go. New PVC is in with new vacuum hoses connected. Fuel filter is on the carb breather and also on the green looking hose that used to go to the charcoal canister.
May 16, 2017 at 7:34 PM