Inconsistent curb idle and low power at hi RPMs

1985 JEEP CJ7
14,000 MILES
Advertisement
Avatar
CJ MEDEVAC
  • CERTIFIED EXPERT
  • 11,004 POSTS
OK--STILL WAITING TO HEAR FROM COMPANY ABOUT YOUR AXLE INSTRUCTIONS

I MADE SOME PICS ON WHAT YOU ARE HAVING PROBLEMS WITH

I TOO WAS IGNORANT ABOUT STUFF TOO, I ADMIRE YOUR WILLINGNESS TO TAKE ON THIS BIG TASK AND WANTING TO DO IT TEXTBOOK PERFECT!

HOW AM I DOING TEACHER-WISE?

LET ME KNOW WHAT YOU THINK ABUT THESE PICS---I'LL BE UP TILL ABOUT MIDNIGHT....WORKY AT 07:30 IN THE MORN

THE MEDIC
Jul 18, 2012 at 1:34 AM
Avatar
HANG EM HI
  • MEMBER
  • 71 POSTS
That outer ring just turned out to be the pinion oil seal. I thought I had already removed it but turns out I just pried the rubber inside of the seal out. Axle disassembly is finished. I'm waiting on my shims, bearings, crush sleeve, pinion nut, and marking compound to come in the mail. In the mean time I'll clean up the axle housing and repaint it. My plan is to only replace the bearings on the pinion. The carrier bearings look fine and that's one less thing I have to buy or press. I'll shave off the inside of the old bearings so they slip on and off real easy. That should make it a lot easier as I move the shims around while setting up the gears.

Got any ideas how to get the bearing off of the pinion? Or how to get the races out of the housing? See pic below. I can probably find access to a press if I need one.

Here's a great site I found on how to set up gears. They have lots of other stuff on there too. Very detailed and informative.
Jul 18, 2012 at 3:03 PM
Advertisement
Avatar
HANG EM HI
  • MEMBER
  • 71 POSTS
Found the bearings for my one piece axles: http://www.quadratec.com/products/52401_100.htm

The tech online said that both bearing race openings should face towards the differential. That means that not only did Joe-shmoe forget to preload the pinion, but he also installed one of the wheel bearings backwards. Also, it's stupid of me not to replace the carrier bearings so I went ahead and ordered all new bearings for everything back there.

I found a good group of guys who love to help people restore things here in Raleigh They also are willing to do some pressing for me. So we're good to go! It might take me a while to make sure everything is matched up correctly, but we're going to do this rebuild right. And yes, you're doing a great job teaching, Medic. I really appreciate it.
Jul 18, 2012 at 4:35 PM
Avatar
CJ MEDEVAC
  • CERTIFIED EXPERT
  • 11,004 POSTS
YOUR FORWARD BEARING SHOULD SLIP OFF AND ON

YOUR REAR ONE WILL PRESS ON AND REMAIN THERE

THERE ARE SHIMS UNDER THE REAR RACE---THESE ARE FOR THE DEPTH ADJUSTMENT

YOU SAID "SHAVE THE OLD BEARING"---I DON'T SEE THE NEED, THE OLD BEARING IS WORN....YOU NEED TO DO ALL OF YOUR "SETTING UP" WITH THE NEW BEARINGS, THEY WILL BE WHAT STAYS INSIDE WHEN YOU ARE DONE

HOW'S THIS?

http://www.youtube.com/watch?v=Up5vZzuq8CM

HERE'S THE COLLAR----THE CHICKEN FOOT PIECE CAN BE A STEERING WHEEL PULLER OR A HARMONIC BALANCER PULLER

"HARBOR FREIGHT" WILL HAVE A CHEAP CHINESE VERSION OF BOTH TOOLS

I SHOULD BE UP AGAIN THIS EVENING TILL MIDNIGHT IF YOU WANNA CATCH UP

I DID THE EXACT SAME THING WITH "WILLY", I KEPT SAYING, "I'M IN THIS FAR, HE DESERVES THIS NEW ITEM".....I SAID THIS OVER AND OVER FOR TWO YEARS.....UNTIL HE WAS AT THE TOP OF LIST IN MY "INVESTMENT PORTFOLIO"!

I AM SENDING YOU MORE ALBUMS--IN A FEW MINUTES---SOME OR ALL MY WIND UP IN YOUR SPAM, SO BE ON THE LOOK OUT!

THE MEDIC

Jul 18, 2012 at 6:41 PM
Avatar
CJ MEDEVAC
  • CERTIFIED EXPERT
  • 11,004 POSTS
THIS IS SORTA WHAT I WAS TALKING ABOUT....AT ADVANCE AUTO

THIS ONE JUST HAS ONE "RIB" ON THE END (WHICH IS FINE!)

THE BARBED ONE HAS MULTIPLE RIBS IN THE N.IPPLE

THIS IS A TAPERED (PLUMBING THREAD)

I BELIEVE YOU SAID THE N.IPPLE ON THE "LIQUID CHECK VALVE WAS BROKE OFF

IF YOU WILL CUT IT OFF FLUSH (A HACKSAW BLADE WILL WORK)

THEN SELECT A DRILL BIT ABOUT THE SAME SIZE AS THE "TIP" OF THIS FUEL FITTING (REMEMBER IT'S TAPERED, THE TIP OF THE THREADS IS THE SMALLEST PART)

JUST BARELY DRILL INTO THE PLASTIC AS NOT TO DRILL INTO THE GUTS OF THE CHECK

IF YOU WILL HEAT THE BRASS FITTING (JUST ENOUGH TO BEGIN MELTING THE PLASTIC---TEST WITH THE PIECE YOU CHOPPED OFF), YOU SHOULD BE ABLE TO MAKE YOUR OWN THREADS ON THE PLASTIC, SCREWING THE FITTING IN. YOU NEED ONLY JUST "THREAD" JUST INTO THE BODY

LET IT COOL IN THE PLASTIC---SPRAYING IT WITH WATER WILL COOL IT IT FASTER

GO TO THE KNOWLEDGE BASE...I THINK THERE IS A CT AWAY VIEW SO YOU WILL KNOW WHAT THE INNARDS LOOK LIKE

THIS DOES NOT REALLY HAVE PRESSURE ON IT---YOU JUST DON'T WANT SLOSHING FUEL TO GET OUT

THE MEDIC
Jul 22, 2012 at 4:24 AM
Avatar
HANG EM HI
  • MEMBER
  • 71 POSTS
Sorry I've been MIA for a while. It's because I've been working on this sucker, and am making some decent headway. I had no idea how hard it was to pull/push bearings and races. The amount of force I've had to put on this axle...well...let's just say I might owe someone a new floor.

I'm finally starting the gear setup. This is going to take a lot of time since it's the most involved part of the rebuild and also the most fine tuned. Tried twice today, and both times the markings on the gears (see photo) weren't centered on the gear tooth. I'm getting there though. First time the marks were too high, coast side towards the toe and drive side towards the heal. Second time, exactly oposite but not so bad. Third time's the charm I think. I'll keep you posted.
Jul 25, 2012 at 11:48 PM
Avatar
CJ MEDEVAC
  • CERTIFIED EXPERT
  • 11,004 POSTS
I AM SO.....PROUD???......RATHER EXCITED THAT YOU AND grizzly93 TAKE THIS STUFF TO HEART AND STRIVE FOR PERFECTION!

MOST DIYers WANT TO JUST WANNA "GET BY".....MAKE IT GO JUST A LITTLE LONGER.....

---"WE"--- WANNA PASS 'EM ON DOWN TO THE GREAT-GRAND-YOUNGINS IN SERVICEABLE CONDITION!

ONCE YOU FINISH THIS OPERATION....YOU WILL BE THE MAN. AS YOUR REPUTATION EXPANDS PEOPLE WILL WANT YOU TO DO EVERYTHING FROM A SEAL TO INSTALLING LOCKERS. YOU WILL STILL HAVE TO "LEARN" THE DIFFERENT AXLES YOU WORK ON.

THE LOCAL AUTO SHOPS WITH "MECHANICS", .....I MEAN 90% 0R MORE OF THEM DO NOT GO TO THE TROUBLE THAT YOU ARE. "GET BY"...30,000 MILES IS WHAT THEY SHOOT FOR....TAKE THE MONEY AND RUN!

MORE SPECIALIZED SHOPS AND THE OTHER 10% WILL DO IT THE RIGHT WAY.....THESE ARE JUST MY OPINIONS, I AM PRETTY GOOD AT JUDGING PEOPLE...I MEAN SCRUTINIZING PEOPLE

I WANT YOU TO PLEASE TAKE MANY MANY MANY PICS OF WHAT YOU ARE DOING, EVEN AS YOU ARE INSTALLING SHIMS, LUBING STUFF, PAINTING, ETC.

IT'S BEEN A WHILE SINCE I BROKE INTO ONE AND "I" HAVE NO INNER DIFFERENTIAL PICS...I NEVER THOUGHT ABOUT TAKING ANY BEFORE I STARTED HERE. WITH YOUR PERMISSION I'D LIKE TO COPY AND USE SOME OF YOURS IN FUTURE POSTS TO AID OTHERS OTHERS.

AFTER YOUR DISSEMBLANCE MIX UP OF THE SHIMS, HOW LONG DID IT TAKE YOU TO GET YOUR SIDE SHIMS BACK IN PLACE IN ORDER TO GET YOUR GEAR MESH RIGHT AGAIN?

FUNERAL FOR WIFEY'S GRANDMA IS TOMORROW MORNING, MAYBE I CAN 2CAR MORE SOON AFTER.....AND FIX THE RUST ON MR. JEEP THAT I HAVE BEEN PUTTING OFF SO LONG

AT WORK TODAY......I HAD CUSTOMER WHO JUST COULD NOT UNDERSTAND THAT HIS DEFECTIVE "LIFETIME WARRANTY STARTER" COULD NOT BE HONORED

HE SEEMED REALLY SAD AS HE HUNG HIS HEAD....HE WOULDN'T EVEN LOOK UP

I THINK OUR COMPETITOR CHARGED HIM AN "ARM AND A LEG" FOR SOMETHING ELSE.....THEY LET HIM KEEP THE "LEG" AS A "DISCOUNT"

I REALLY FELT SORRY FOR HIM WHEN HE SORTA LOST HIS HEAD BEFORE HE AND HIS DRIVER LEFT

(I REALLY TOOK THESE PICS TODAY AT WORK)

THE MEDIC

Jul 26, 2012 at 3:58 AM
Avatar
HANG EM HI
  • MEMBER
  • 71 POSTS
Haha, what? Poor guy, has to ride around with a creepy headless passenger all day.

It wasn't too hard to figure out which shims to use on the carrier. I just split them 50-50 at first. Measuring backlash isn't that hard to do. I did end up having to reduce the number of overall shims from the carrier stack. Everytime I would put the carrier in place, it would warp at least two or three of the shims because it was such a tight fit. Removed maybe 0.008'' of shims and it fit in there great. No warps but still plenty of preload. The new bearings I installed might be a little bit larger than the old ones I guess.

One thing to note, everytime you change your pinion depth, the backlash changes too. I forgot about this the second time I set the gear up, and there was so little backlash that the gears wouldn't even turn. If someone is ever doing this setup, I also recommend having plenty of crush sleeves. I've already burned through half of the sleeves I bought and am hoping I don't have to buy more.

Also a super import factors is that, when you're checking the gear marking compound like in the previous photo, you HAVE to load the gears. I installed one of the axle shafts and locked up the case gears with a towel and got my roommate to hold onto the hub while I turned the pinion. Should take around 40-50 ftlbs to turn the pinion to get an accurate reading. The first time I checked the gear markings I forgot to load the gears. The second time I did load the gears and it really did make a huge difference.


I'll also be sure to take more pictures.
Jul 26, 2012 at 2:30 PM
Avatar
CJ MEDEVAC
  • CERTIFIED EXPERT
  • 11,004 POSTS
ON YOUR END---DO YOU HAVE EVERYONE UP TO SPEED ON WHAT YOU ARE DOING?

THE MEDIC
Jul 26, 2012 at 8:53 PM
Avatar
HANG EM HI
  • MEMBER
  • 71 POSTS
Yeah I'll give an overall update. The problem was that my rear axle would whine whenever I would decelerate. I figured it was an issue with the pinion positioning, but I wasn't sure. After trying to cheat, I decided to just yank the whole axle out and do a full rebuild. When I pulled the axle shafts, I was pleasantly surprised to find that someone had replaced them already with one piece axle shafts. That saved me $300. However, one of the wheel bearings was installed backwards.

The whining was because there was ZERO load on the pinion. Once the ring and carrier were removed, the pinion and yoke flopped around with no resistance at all. Now that could have been because Joe-Shmoe didn't do his research and never crushed the sleeve that sits in between the bearings in the pinion. Also, the pinion nut could have simply rattled loose after 80,000 miles.

Either way, I am now replacing ALL of the bearings, repainting the axle housing, cover, and break backing plates, cleaning everything, and reassembling it correctly. I've already done two setups with the differential and am very close to getting the right number of shims. Before I do the last two setups (I only have 4 crush sleeves), I am going to replace all of the bearings. I was using set up bearings so it was real easy to slide them on and off. I plan on having it rebuilt and lubed up by Friday! We'll see if that actually happens.
Jul 30, 2012 at 6:19 PM
Avatar
CJ MEDEVAC
  • CERTIFIED EXPERT
  • 11,004 POSTS
WELL I SORTA MEANT....DO YOUR HARDCORE...HANG WITH YOU...THRU THICK AND THIN BUDDIES UNDERSTAND WHAT YOU ARE DOING?

YOU KNOW, YOU COULDA HAD A REALLY AWFUL PROBLEM AS THIS FELLER DID

http://www.2carpros.com/questions/1979-jeep-cj5-clutch-problems

NOW DON'T THAT MAKE YOU FEEL BETTER???!!!

THE MEDIC
Jul 30, 2012 at 6:31 PM
Avatar
HANG EM HI
  • MEMBER
  • 71 POSTS
Actually, most of my roommates hate the fact I've trashed their ping pong room and made the house smell like gear oil. One or two of them help out from time to time, but no. Most of them don't understand. A couple of them listen while I explain, but most just glaze over.
Jul 30, 2012 at 7:15 PM
Avatar
CJ MEDEVAC
  • CERTIFIED EXPERT
  • 11,004 POSTS
LIKE GRANPA USED TO SAY, "JEALOUSY WILL GET YOU NOTHIN'!"

THE MEDIC
Jul 30, 2012 at 7:24 PM
Avatar
HANG EM HI
  • MEMBER
  • 71 POSTS
Well crap! As I was smashing down crush sleeve number three (I'm getting good, got the torque at exactly 20 in-lbs), I sheered off one of the bolts that goes into the yoke. Looks like it's time to upgrade from my strap and bolt yoke to a u-bolt style yoke.

http://www.jeeptech.com/axle/aub.html

The ting about working on these older cars is you always end up breaking more stuff than you fix. At least at first...
Jul 31, 2012 at 12:54 AM
Avatar
CJ MEDEVAC
  • CERTIFIED EXPERT
  • 11,004 POSTS
EXACTLY WHY YOU SHOULD HAVE 'EM MAKE YOU A HOLDING TOOL AT THE HIGH SCHOOL MACHINE SHOP OR TECH SCHOOL MACHINE SHOP

DOWN AT THE WELDING SHOP--A PLASMA WIZARD MIGHT WHIP YOU ONE OUT WITH THE PLASMA CUTTER IN A FEW SECONDS---I DO SUGGEST YOU MAKE THE HANDLE AT LEAST 4 FEET LONG.... MINE IS TOO SHORT AND I HAVE BEEN CONTEMPLATING A "2 BOLT-ON" EXTENSION

WHAT DO YOU MEAN "UPGRADE"????

I RECKON 1940 TO ABOUT 1981......WE ALL HAVE "U-BOLTS" ON OURS....THOSE STUPID STRAPS AND BOLTS WERE SUPPOSED TO BE THE UPGRADE FROM LIKE '82 ON UP........I RECKON THIS SOMEHOW GOT AN ENGINEER A NICE RETIREMENT ALONG WITH THE CRAPPY COMPUTER SYSTEM HE CAME UP WITH

THE BEST IMPROVEMENT THEY EVER DID (STARTED IN 1979)WAS UPGRADING THE PRESTOLITE IGNITION SYSTEM TO THE MOTORCRAFT

DOIN' GOOD, KEEP THE PICS COMING!

THE MEDIC
Jul 31, 2012 at 2:58 AM
Avatar
HANG EM HI
  • MEMBER
  • 71 POSTS
The 300 transfer case was a huge upgrade for later models too. And the fact they didn't offer V8s. Other than that, you're right. Lot's of the "upgrades" turned out to be terrible ideas.

Here's a little photo update. Show's the cleaning and painting of the axle housing. The Por-15 rust preventative system works great. The cleaner is water soluble which means you can dilute it. That stuff burns though, so gloves are a must. The prep and ready will etch the rust, so you don't need a sand blaster. Takes a few days for the paint to harden, but once it does, it's rock solid. Looks pretty sleek too. Finally got around to buying a new CJ-7 emblem plate. Can finally show off her name.

The latest round of gear set up shows the drive side close to the root and close to the toe. Coast side is close to root and close to heel, which means I need less pinion shims and a couple more crush sleeves. At least two more, one for the final set up and one more to check the pattern. I'll probably buy four.

Pics showing where the bolt sheered off too. The bolt that sheered was a replacement Johnny-preowner installed. It's smaller than the other three so no wonder it broke off. That yoke holder works real well though. It's got slots for a 3/4'' and 1/2'' drives, so either my 2 ft or 4 ft breaker bar will fit. That 4 ft bar is a must for crushing sleeves. Takes all of my body weight on it to get it to turn a couple of degrees.
Jul 31, 2012 at 5:30 PM
Avatar
HANG EM HI
  • MEMBER
  • 71 POSTS
Always make sure you brush your teeth? Get it?
Jul 31, 2012 at 5:32 PM
Avatar
CJ MEDEVAC
  • CERTIFIED EXPERT
  • 11,004 POSTS
BET THE BOYS DON'T WANNA PIC-NIC ANYTIME SOON!

YOUR BROKEN BOLT MAY NOT HAVE ANY THREAD PRESSURE ON IT----A DREMEL TOOL AND A CUTOFF DISC MAY POSSIBLY CUT YOU A SCREWDRIVER SLOT IN IT SO YOU CAN SCREW IT OUT-----IN REALLY TIGHT SPOTS, I HAVE CHEWED THE CUTOFF DISC DOWN REALLY SMALL, BY GRINDING ON SOMETHING ELSE 1ST---THEN CUT THE SLOT

I LIKE YOUR QUEST TOWARD PERFECTION

THE MEDIC
Jul 31, 2012 at 9:41 PM
Avatar
HANG EM HI
  • MEMBER
  • 71 POSTS
Well one more hitch it seems. Once again. It's almost like the axle knows it's close to being fix but it just doesn't want the fun to be over so it breaks something else. Bent and torqued through the yoke holder. Guess that's what I get for only paying $20. I'll be more careful with the next one.
Aug 1, 2012 at 2:04 AM
Avatar
HANG EM HI
  • MEMBER
  • 71 POSTS
Actually wait...I can just pick up a 1/2'' to 3/4'' drive conversion. Duh.
Aug 1, 2012 at 2:07 AM
Avatar
CJ MEDEVAC
  • CERTIFIED EXPERT
  • 11,004 POSTS
WHY DON'T YOU FIND A "SACRIFICIAL" SHORT 1/2 DRIVE SOCKET (EVEN GRIND IT SHORTER) AND HAVE THE WELDING SHOP WELD IT ONTO YOUR HOLDER----THE WELDING SHOP MIGHT EVEN HAVE A TRASHED OUT SOCKET IN THEIR INVENTORY

INSURE THE "SQUARE" IS ORIENTED THE RIGHT WAY

MIGHT EVEN HAVE 'EM "BEEF UP" THE BACK SIDE TOO!

PROBABLY JUST A FEW BUCKS--I'D DO IT FOR FREE IF YOU WERE CLOSE BY!

THE MEDIC
Aug 1, 2012 at 2:53 AM
Avatar
HANG EM HI
  • MEMBER
  • 71 POSTS
The 1/2'' to 3/4'' drive works great. That 3/4'' square is huge. It'll take a lot to strip through it.

Good news! I've got the correct shims (to the best of my knowledge). Pictures bellow show the final gear marks, dead center. Or...close enough. And a pic of the pile of used crush sleeves it took to get me there. As soon as my new yoke and crush sleeve comes in I'll be ready to tighten things down for the last time. Thank goodness. I can see the light at the end of the tunnel.

Last pic is of the liquid check valve's brand new barbed hose fitting. Your method worked like a charm.
Aug 2, 2012 at 10:57 PM
Avatar
CJ MEDEVAC
  • CERTIFIED EXPERT
  • 11,004 POSTS
SO..........YOU'LL BE ABLE TO TAKE ME FOR A NICE QUIET RIDE SOON?

WEAR PATTERN IS PERFECT!

FILLER UP WITH 85W-90 OR 80W-90 AFTER YOU GET IT BACK ON

IS THERE ANYTHING YOU HAVE ASKED THAT I FAILED TO ANSWER?

YOU HAVE SAVED YOURSELF A BUNDLE.......NOT TO MENTION THE TASK HAS BEEN DONE CORRECTLY AND TO PERFECTION, YOU WILL SELDOM FIND SOMEONE WHO WILL TAKE THE TIME TO DO IT BY THE BOOK, AND MAKE IT OPERATE AND LAST, AS IT SHOULD

KEEP ASKING....THE CJ FORUMS ARE SLOWING DOWN AGAIN

THE MEDIC
Aug 2, 2012 at 11:41 PM
Avatar
HANG EM HI
  • MEMBER
  • 71 POSTS
Question. I was going to fill up the transfer case with fresh oil, but as I was tightening the drain plug, it just kept going and going. There was a very small pop at one point (maybe 15 ft-lbs of torque on the plug at the time), and some old RTV gasket sealer came out of the threads, but that was it. Eventually when it started to become easier to tighten, I didn't just keep turning and push it through. I pulled it out and there wasn't any damage to the threads. A little extra oil came leaking out when I pulled out the plug.

I tried putting it in gain, and it gets a little hard to tighten, but definitely doesn't make it up to 20 ft-lbs (which is the torque spec for the drain plug). Is this normal? Do I just put some RTV on the threads, and tighten her up? Or is there a piece of metal potentially clinking around inside of my t-case? And yes, I was using a torque wrench.
Aug 4, 2012 at 10:06 PM
Avatar
CJ MEDEVAC
  • CERTIFIED EXPERT
  • 11,004 POSTS
RVT IS FINE

WHAT ABOUT TRYING ANOTHER PLUG?

I'M NOT SURE WHAT STYLE YOU HAVE--YOU MIGHT HAVE A "FEMALE SQUARE" THAT YOUR RATCHET FITS IN, YOU MIGHT HAVE A FEMALE TORX, YOU MIGHT HAVE A "MALE SQUARE HEAD" THAT A WRENCH OR 8 POINT SOCKET FITS ON------AND THERE MAY BE A MAGNET INCORPORATED INTO IT

I HAVE A MODEL 20 TRANSFER CASE AND A T-150 3 SPD TRANNY

MY TRANSFER CASE HAD THE "RATCHET SQUARE PLUGS" AND NO MAGNET---I REPLACED THE DRAIN AND THE FILL WITH 1/2" NPT (PIPE TAPERED THREAD)....TECHNICALLY "NATIONAL PIPE THREAD"----WITH HEX HEADED BRASS TAPERED PLUGS. THEY SEEM EZer TO REMOVE

THE TRANSMISSION DRAIN HAS A MAGNET MADE INTO THE PLUG, IT IS THE "MALE SQUARE HEAD", THE FILL IS THE SAME WITHOUT A MAGNET...I LEFT THEM BOTH ALONE...SEE 1ST PIC

YOU DON'T THINK YOU (LAST FELLER) HAS CRACKED YOUR CASE ACROSS THE HOLE FROM OVER TIGHTENING? CLEAN THE IMMEDIATE AREA WELL WITH A WIRE BRUSH, THEN RUB YOUR CRUDDY FINGER ALL AROUND THE HOLE AND SEE IF YOU EXPOSE A CRACK WITH THE CRUD

YOU CAN ALSO "TAP" THE HOLE AGAIN TO CLEAN IT UP----THIS IS USING A TAPERED TAP (NPT)---YOU MUST STOP WHEN IT GETS A LITTLE TOUGH TO TURN--IF YOU START CUTTING INTO THE THREADS, YOU BETTER STOP!......FAILURE TO STOP WILL RESULT IN A STRAIGHT THREADED HOLE IN WHICH A BOLT WILL GO THRU, A PLUG WOULD BE USELESS!!!


SEE MY ANSWER ON January 09, 2012 AT THIS POST (ROUGHLY NEAR THE END)

http://www.2carpros.com/questions/1992-ford-crown-victoria-aod-transmission-time-shift-2nd-gear-roughly-30mph-locks

IF YOU ARE CONCERNED ABOUT THE INSIDE OF THE CASE----BY ALL MEANS REMOVE THE BOTTOM COVER AND LOOK (I WISH I HAD!) YOU CAN CUT A NEW GASKET OUT OF GASKET MATERIAL, AND USE THE MINIMAL AMOUNT OF RVT TO SEAL IT!!!!
Aug 5, 2012 at 3:31 AM
Avatar
HANG EM HI
  • MEMBER
  • 71 POSTS
Good grief! After reading your t-case horror story, I'm definitely just going to remove the bottom cover and take a look just to be sure. The diff cover had a TON of RTV all up inside the edges. Hopefully there isn't gobs of it in the t-case as well.

Another question. How important is it to realign your drive shaft at it's original point relative to the rear differential? I may have mucked up my markings when I was pushing out the u-joint yesterday....
Aug 5, 2012 at 1:39 PM
Avatar
CJ MEDEVAC
  • CERTIFIED EXPERT
  • 11,004 POSTS
I DO DO TRY TO REALIGN MY STUFF LIKE IT WAS

BUT WHO KNOWS WHAT HAPPENED BEFORE ME?

I'VE BEEN AROUND MANY THAT DID NOT TRY THIS PRACTICE....I'VE NOT SEEN ANY VIBRATION ISSUES ON THEIRS.

MAYBE IT JUST REALLY MATTERS A LOT WITH A LONG DRIVE SHAFT ON OTHER RIGS

WHAT DO DO YOU DO WHEN YOU INSTALL A BRAND NEW ONE??????

REMEMBER I DON'T DRIVE TRAINS (NOT AN ENGINEER)!!!

DRIVE ON SOLDIER.......CROSS THAT BRIDGE IF NEED-BE!

THE MEDIC
Aug 5, 2012 at 2:32 PM
Avatar
HANG EM HI
  • MEMBER
  • 71 POSTS
I really can't think of why it would be important to keep things aligned. Your angle between the diff and the t-case is important, but rotating a drive shaft or yoke won't change that. Oh well. Hopefully it's not a big deal...

Had a busy day today! Dropped the gas tank, checked for leaks, and put it back in. Putting that sucker back in was quite a challenge. Good news - no leaks other than that liquid check valve. Bad news - there was no reason to drop the tank. The hoses all looked great except for the ones going to the check valve and roll over valve. Either way, I'll take the peace of mind.

Removed the bottom cover to the t-case. No problems, looked clean. Replaced the gasket and bolted it back in. Put a little bit of RTV in. Going to let that harden up before I put more oil again. Made more work for myself a second time, but again, those extra hours of work are worth the peace of mind. Pic is halfway through the gas tank overhaul. Gas tank is on right side of jeep. Rough work.
Aug 6, 2012 at 12:34 AM
Avatar
CJ MEDEVAC
  • CERTIFIED EXPERT
  • 11,004 POSTS
MAY BE I'M TOO LATE

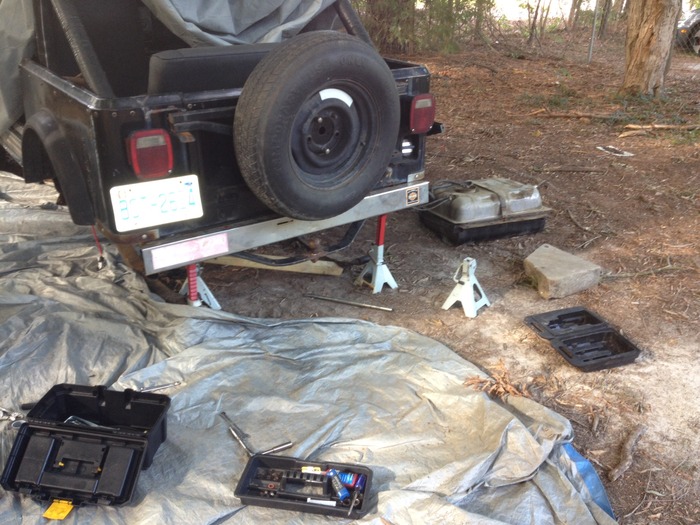
THE TANK NORMALLY RUSTS OUT (MEGA PIN HOLES) UNDER THE PLASTIC COVERS WHERE SAND AND DIRT GETS TRAPPED UNDER IT, THEN IT GETS WET AND STAYS THAT WAY A WHILE

ON OTHER JEEPS I'VE HAD AND OTHERS I'VE HELPED ON, WE SPRAYED/BRUSHED THE TANK WITH RUST RESTORER/TRANSFORMER STUFF AND THEN COATED THEM WITH UNDERCOATING

I USED TO DRIVE 70 MILES A DAY BACK AND FORTH TO WORK, THEN "MY OWN DRIVING", I GOT TIRED OF FILLING UP EVERY DAY WITH THE 15 GALLON TANK. I OPTED TO GET THE 21 GALLON POLYETHYLENE (TOPPED OFF, IT REALLY HOLDS 22 GALLONS!)

I REALLY LIKE IT---IMPROVED RANGE IS NICE!

WHEN I WAS IN THE ARMY, I ALWAYS HAD TO MAKE A FUEL STOP SOMEWHERE BETWEEN SAVANNAH, GA (HUNTER ARMY AIRFIELD) AND MY HOMETOWN NEAR GREENVILLE, SC. IT ALWAYS MADE ME FEEL LIKE I WAS WASTING TIME WHILE TRYING TO GET HOME ON FURLOUGH, WHEN IT TOOK ME AN ADDITIONAL 30 MINUTES TO GET OFF THE INTERSTATE AND FIND A GAS STATION!

LAST YEAR I MADE THE SAME TRIP (1987 WAS THE LAST TIME), TO GO SEE A RANGER BUDDY......FELT SO GOOD TO ARRIVE IN SAVANNAH, WITH FUEL TO SPARE, WITH NO STOPS ALONG THE WAY.

I'M NOT A HERMIT, I DO TRAVEL IN MY JEEP UP THIS WAY, IT'S JUST THAT THIS TRIP REALLY HIT HOME, WITH THE OVER-SIZED TANK

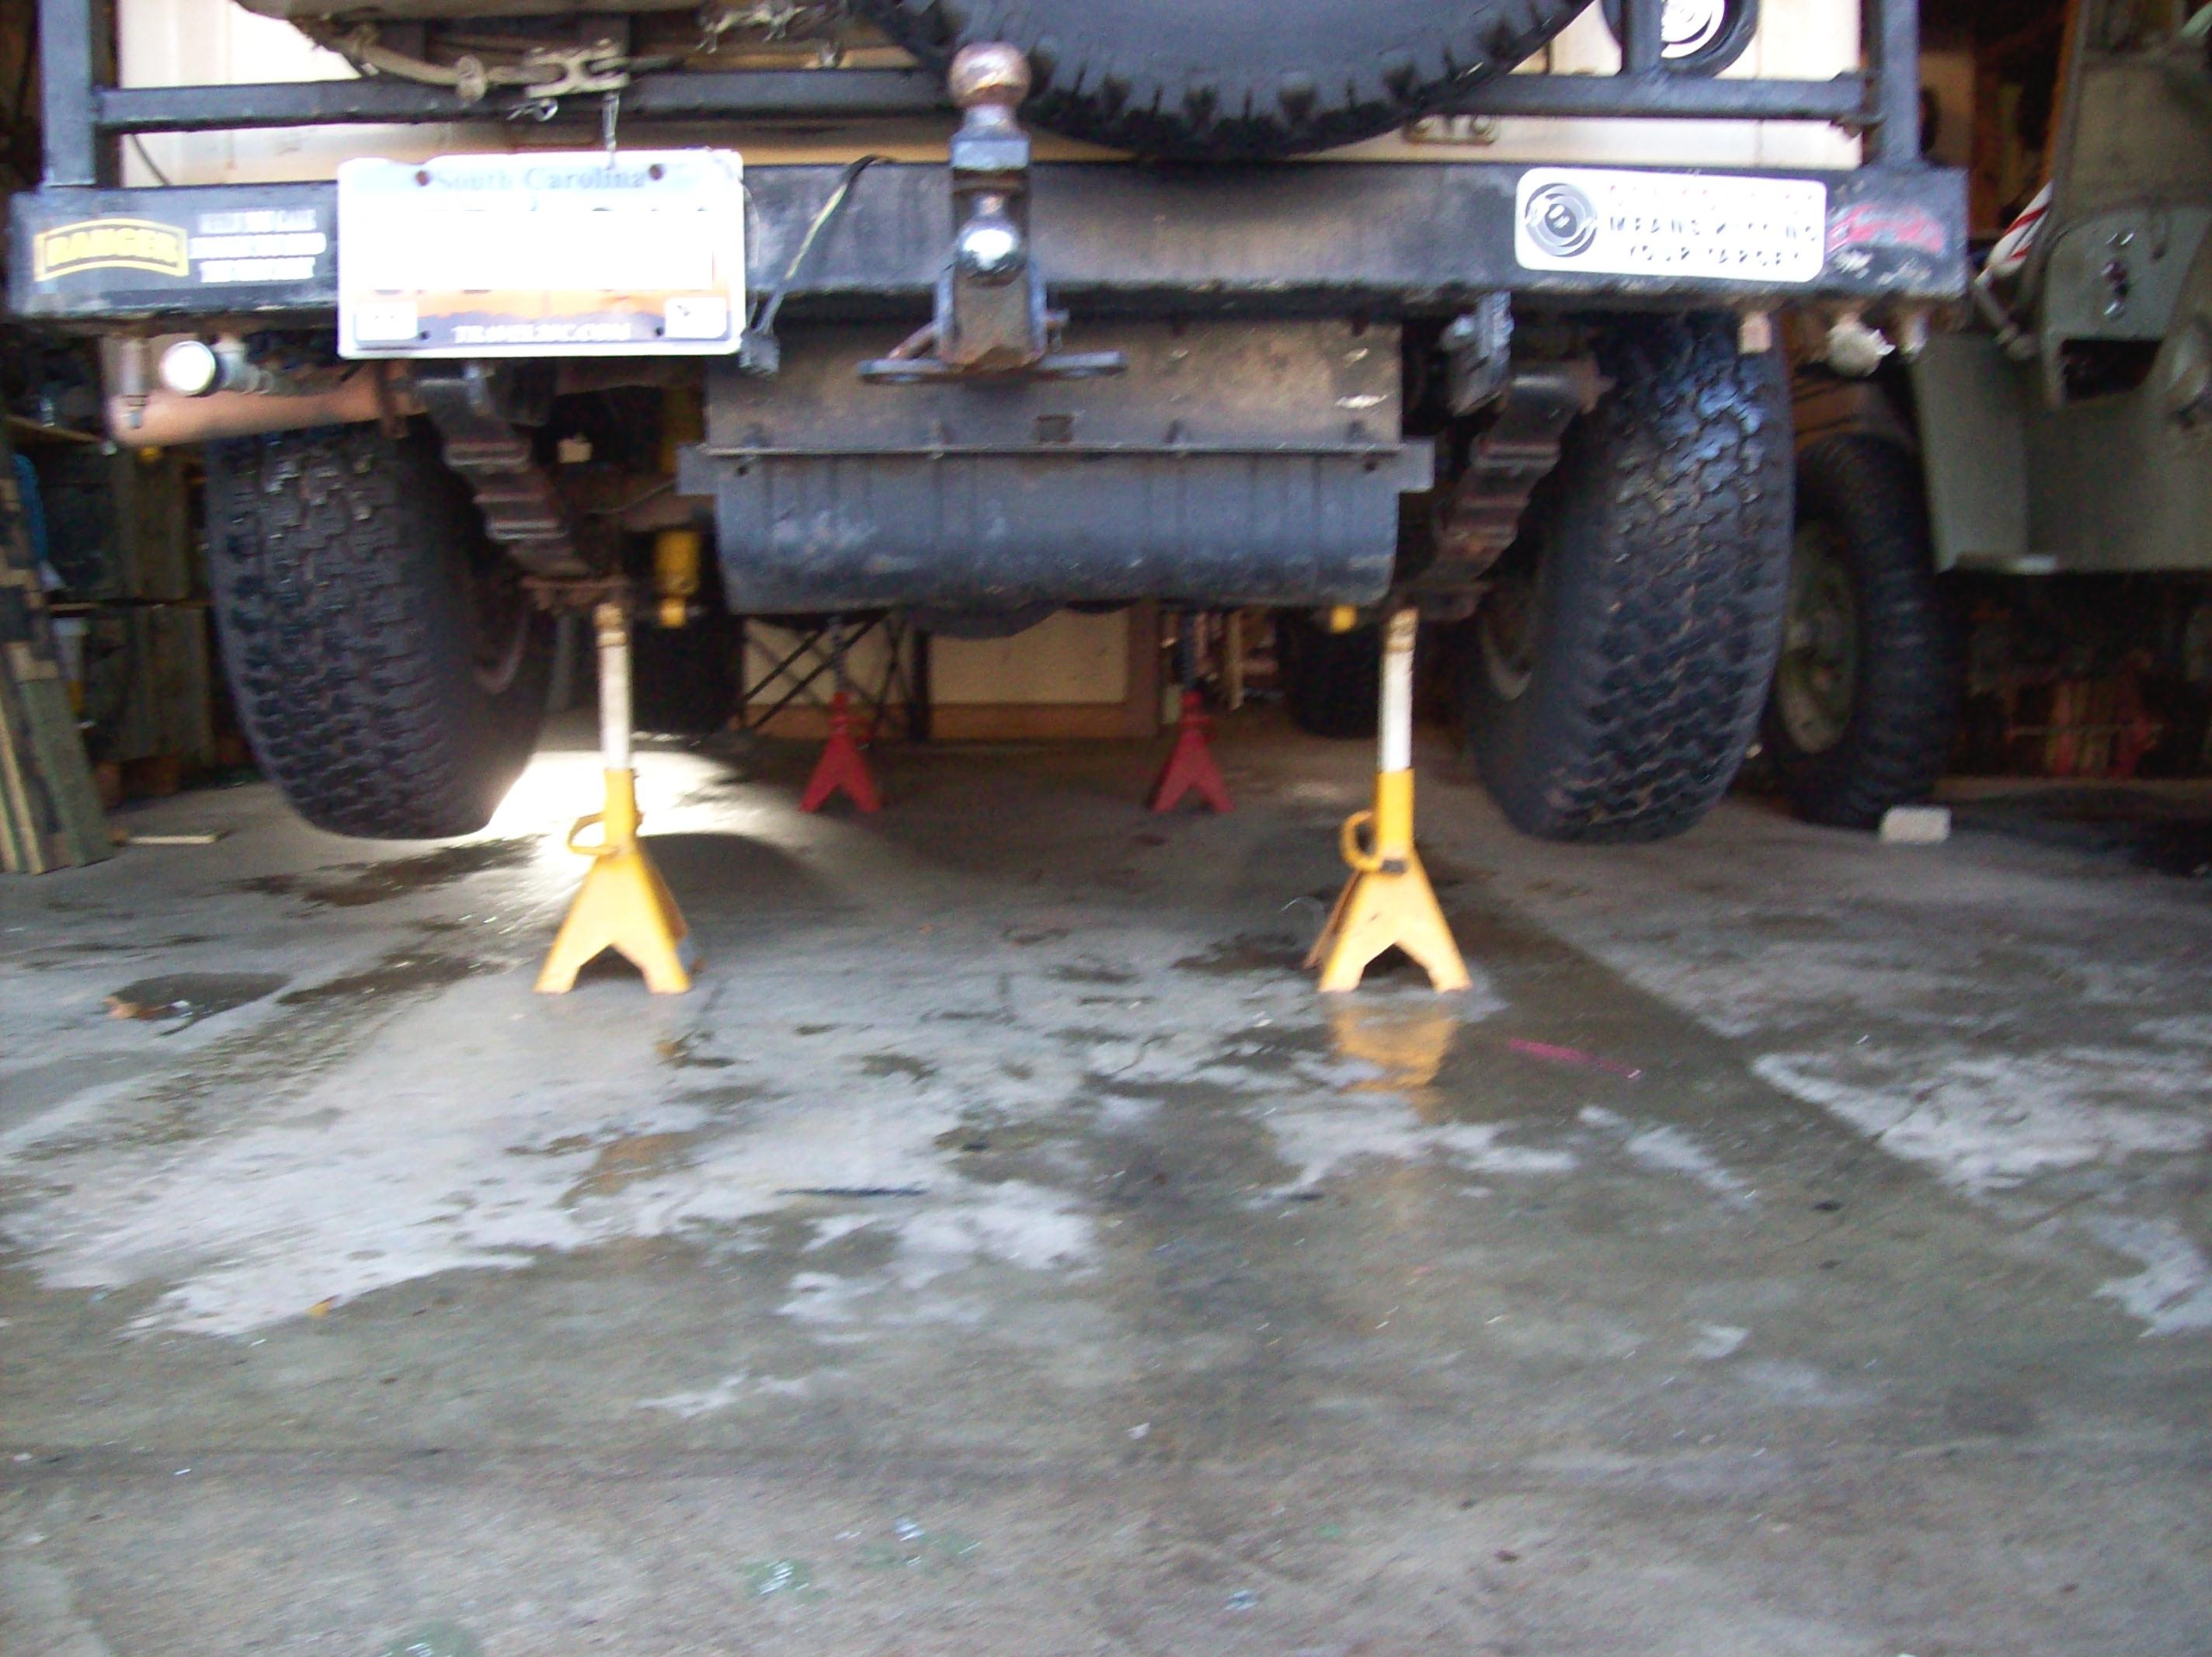
THE ONLY DRAWBACK I SEE WITH THE BIG TANK, IS THAT IT RIDES LOWER THAN THE 15 GALLON TANK, EXTREME 4X4ing, ESPECIALLY IF IT'S ROCKY TERRAIN IS YOU MAY SMACK IT AROUND MORE, OR IT MIGHT DRAG OR HANG YOU UP. I HAD MY FEEL OF ALL OF THAT WITH MY 1ST THREE CJ 5s. I STILL WILL GO 4 WHEELING, USUALLY THRU NECESSITY OR EXPLORING, BUT THE "TRASHING OF MY JEEP" IS NO LONGER PART OF THE PROGRAM!

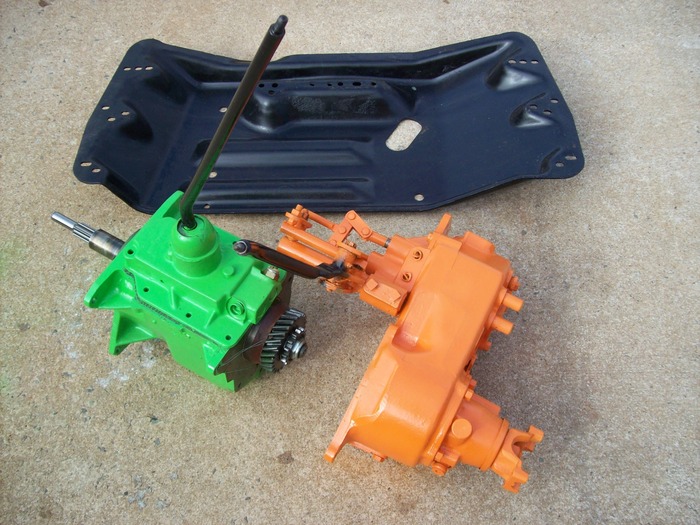
THE POLYETHYLENE TANK IS STILL PROTECTED WITH THE ORIGINAL TANK'S SKID PLATE, THE NEW TANK COMES WITH EXTENSIONS WHICH ALLOW IT TO HANG A FEW INCHES LOWER

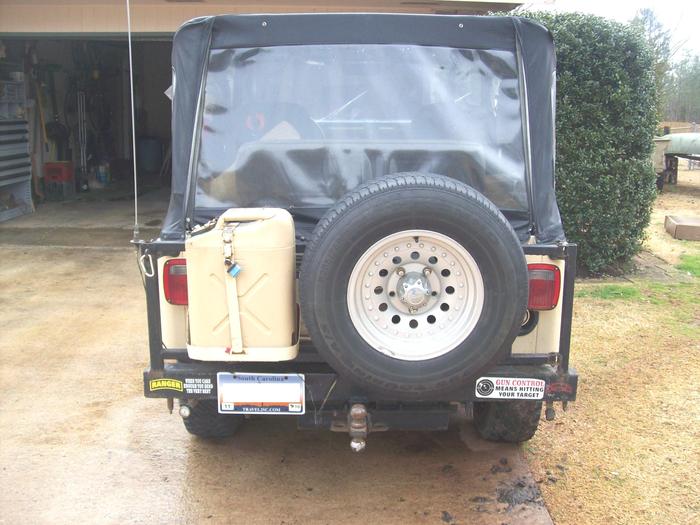
NOW, WITH A "NORMAL" FULL FUEL LOAD, I HAVE 22 GALLONS IN THE TANK, AND 5 MORE GALLONS IN MY GERRY CAN ON THE BACK

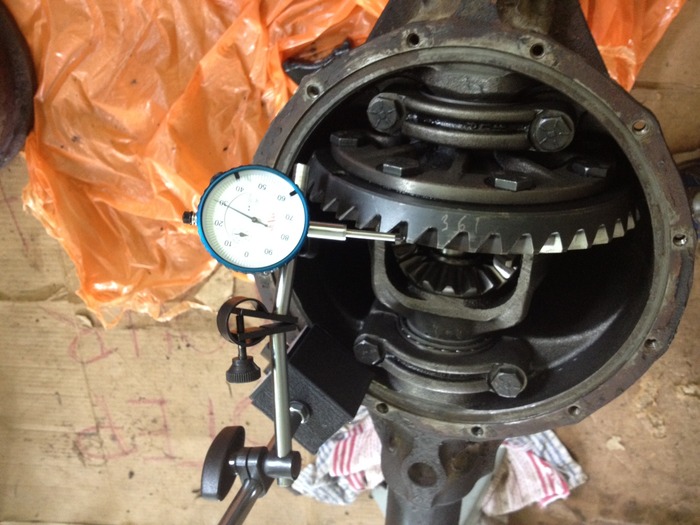
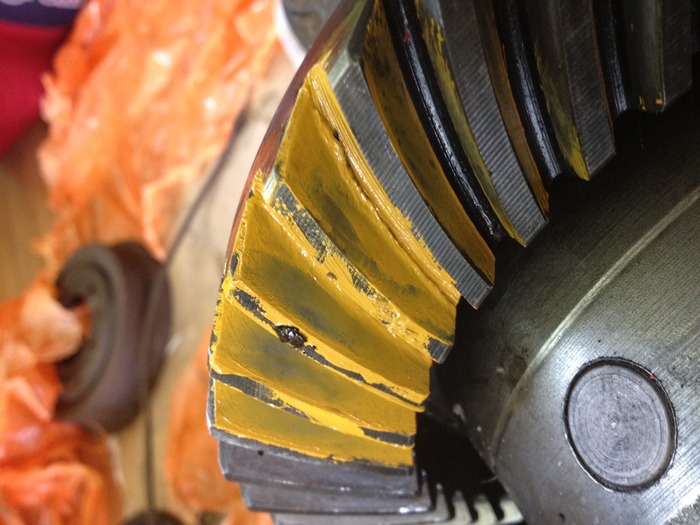
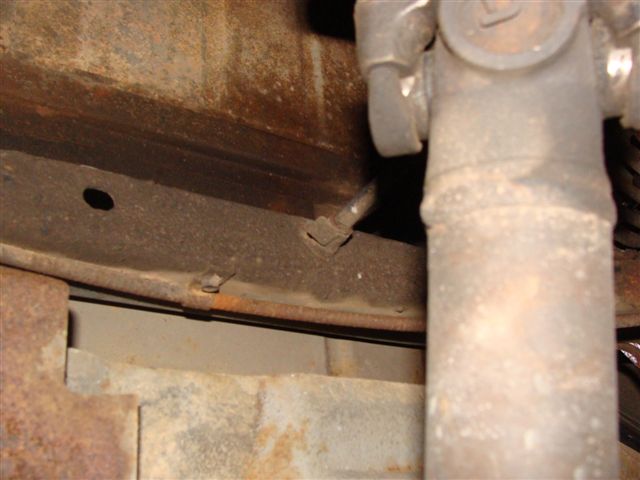
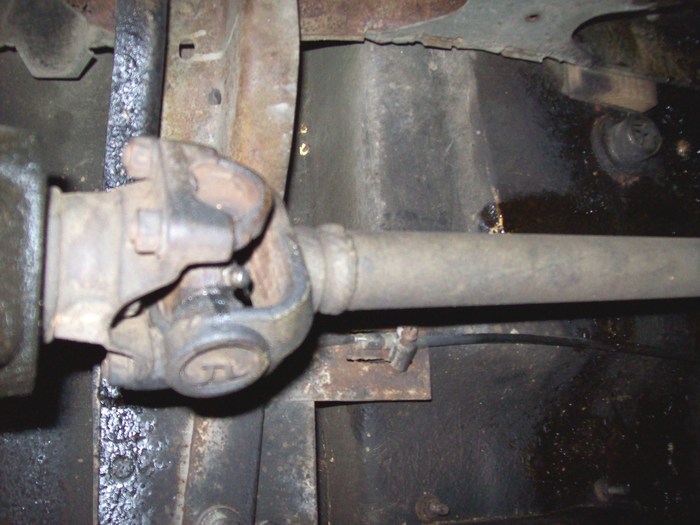
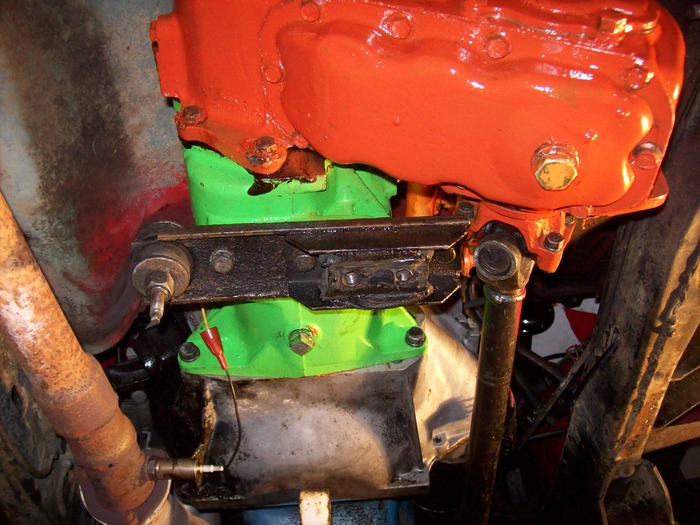
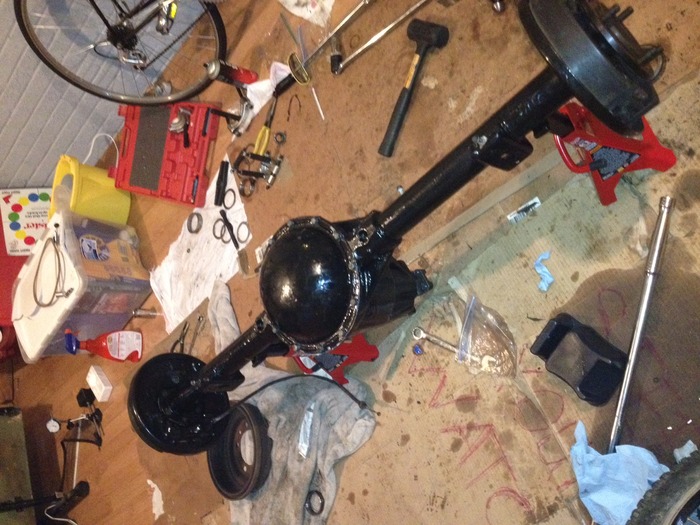
THE ONLY PROBLEMS WITH DRIVE SHAFT VIBRATIONS I HAVE EXPERIENCED IS "BAD U-JOINTS" AND "SIDE TO SIDE PLAY" IN THE "WORN" TELESCOPIC PART OF THE SHAFT......DON'T WORRY--BE HAPPY!

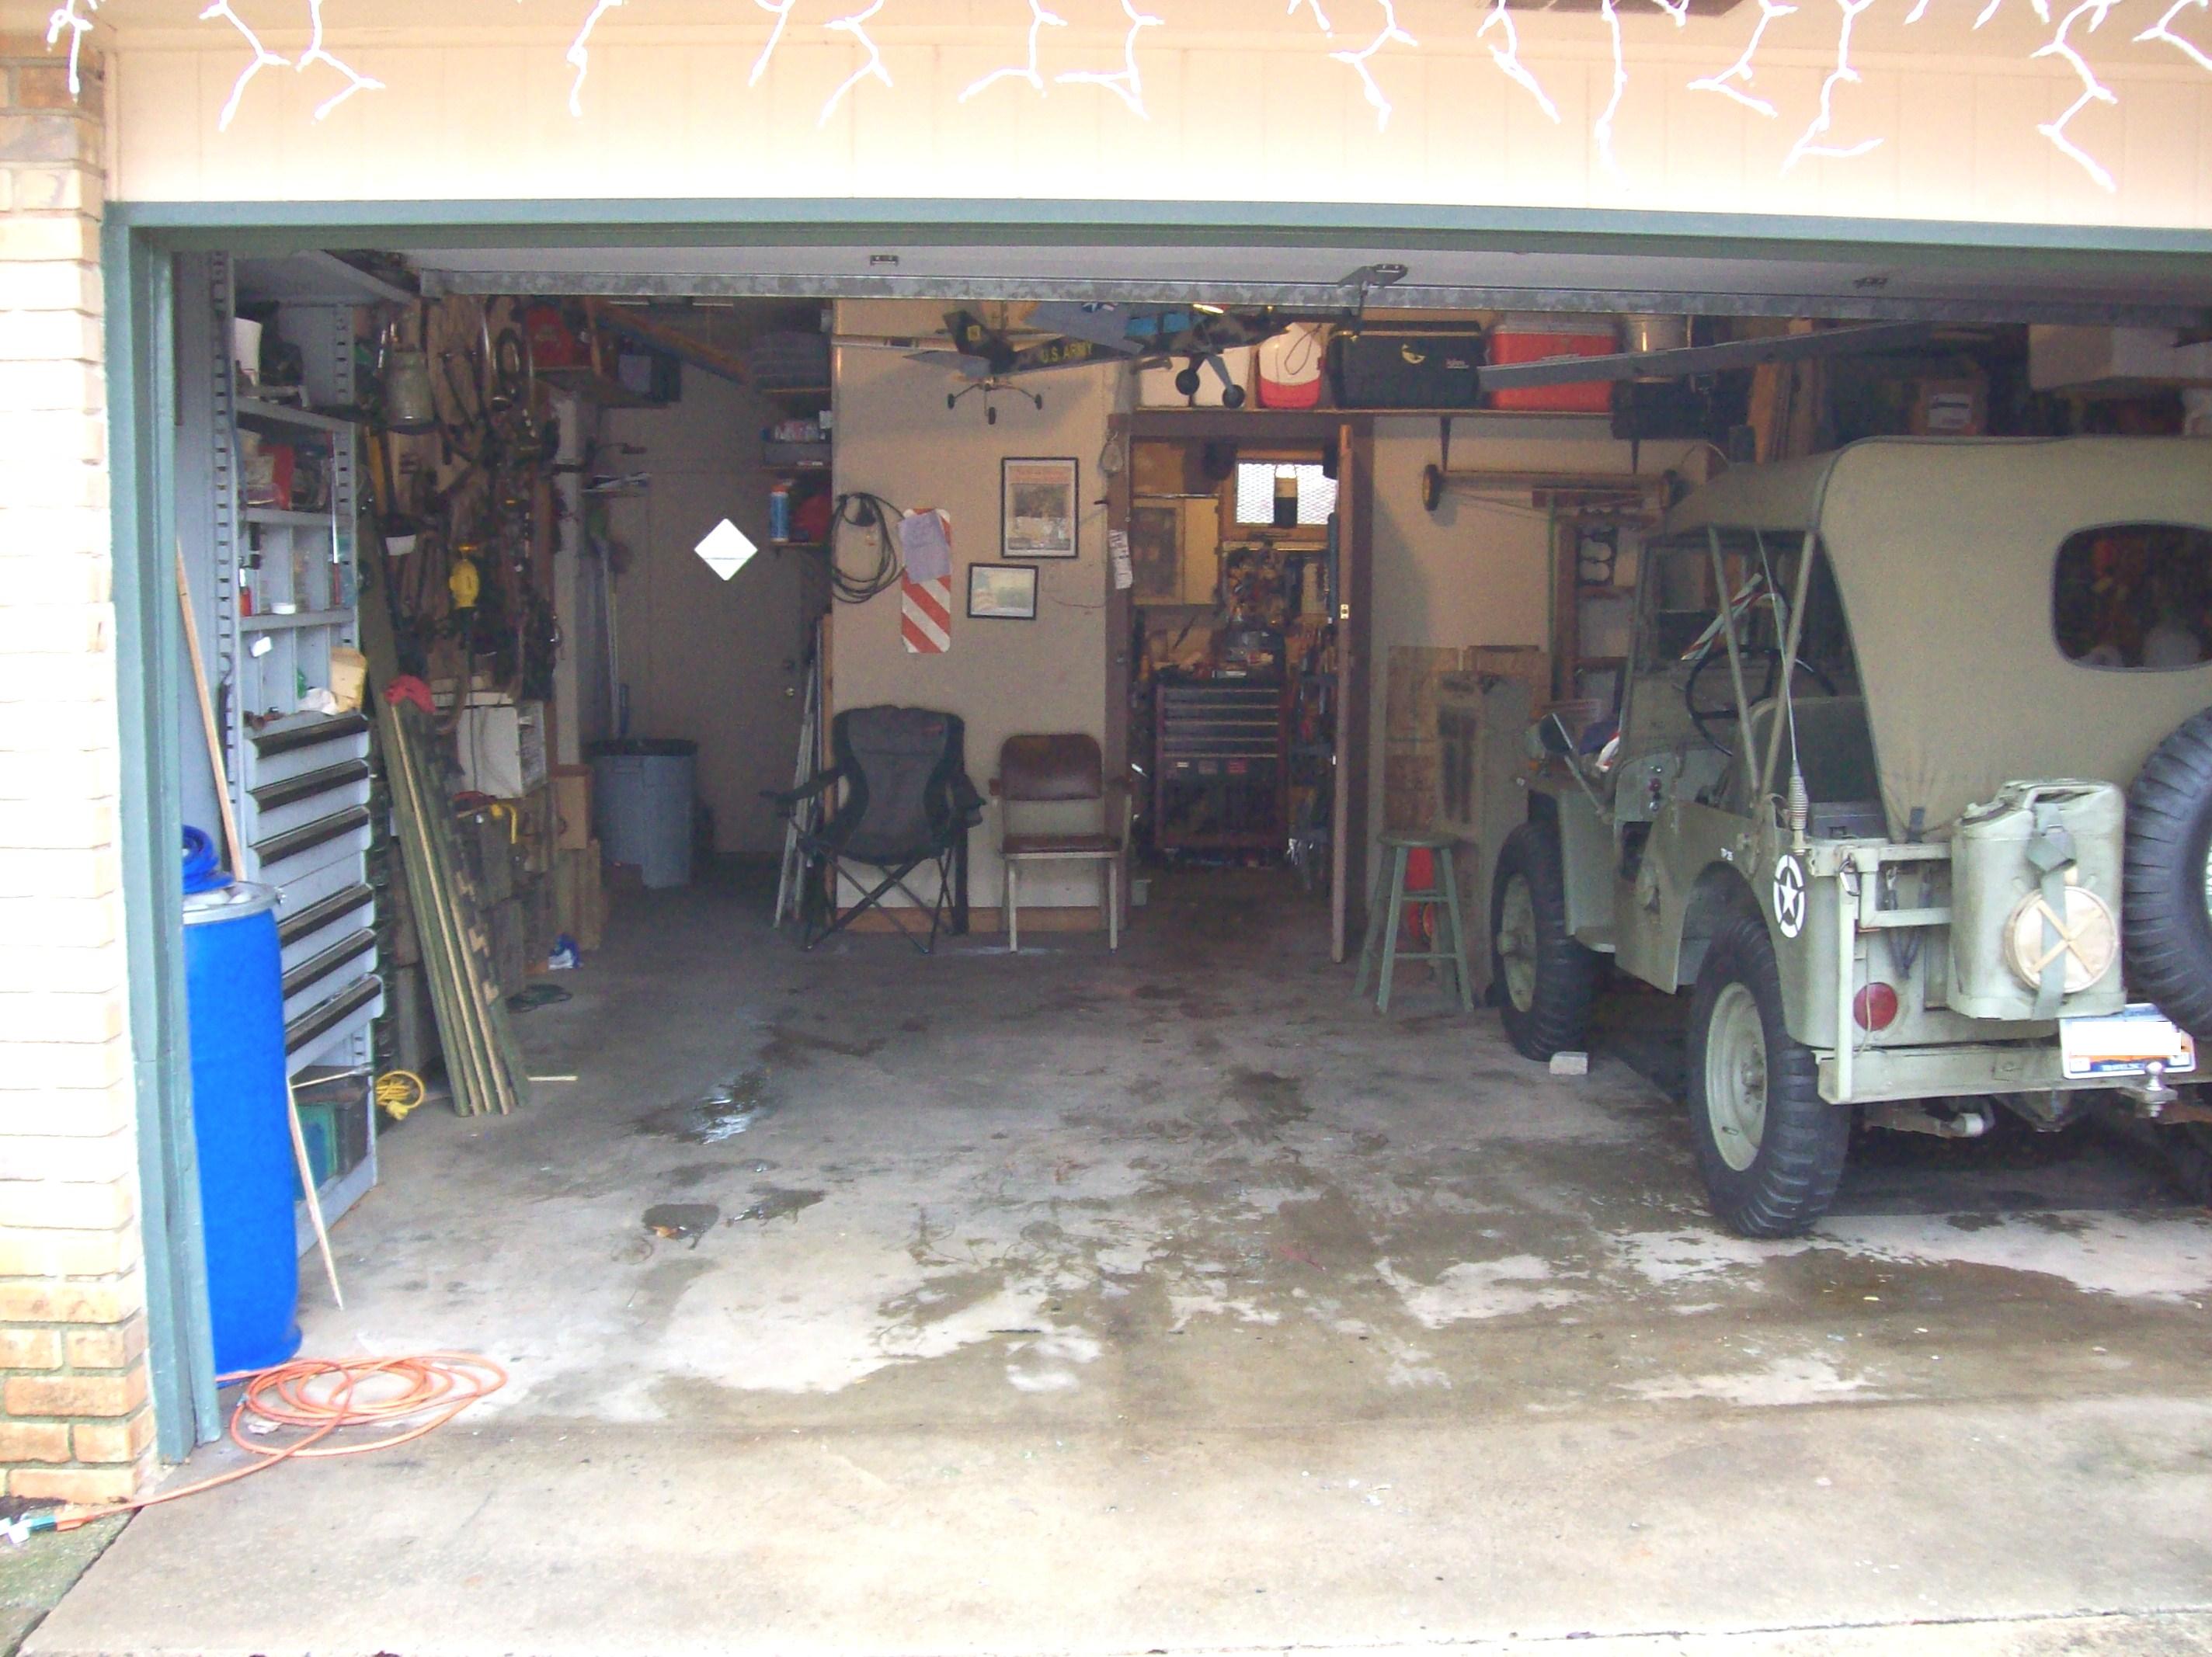
I'M GLAD THAT 7 YEARS AGO I BOUGHT US A HOUSE....COMPLETE WITH A 2 CAR GARAGE......I FEEL FOR YOU, I DID IT YOUR WAY FOR 24 YEARS

YOU JUST DON'T KNOW HOW MANY TIMES I THOUGHT ABOUT ONE OF THESE AND A KEROSENE HEATER SUITABLE FOR THIS SIZE

http://www.superiorportablebuildings.com/fabric-covers/portable-garages-for-sale-one-car-shelter-king.htm

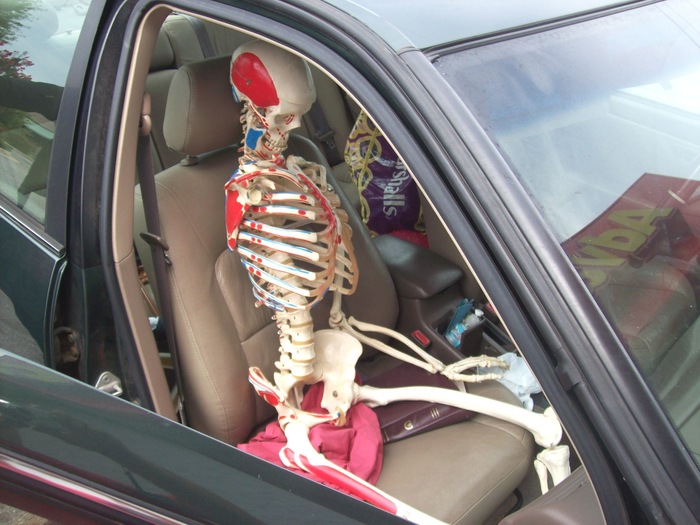
WHEN WILL IT BE TIME TO TAKE ME FOR A RIDE?

THE MEDIC
Aug 6, 2012 at 3:39 AM
Avatar
HANG EM HI
  • MEMBER
  • 71 POSTS
You don't know how bad I want a garage. Tried to find one for the next house I'm moving into, but can't afford the extra rent. At least this next house has a paved driveway. Won't be wallowing around in the dirt anymore.

Ugh. I'm waiting on one part to come in and the manufacturer is taking forever. Still hasn't shipped. One little yoke is all I need and I can be done. I want to drive my jeep so badly!
Aug 7, 2012 at 2:33 PM
Avatar
CJ MEDEVAC
  • CERTIFIED EXPERT
  • 11,004 POSTS
WHAT YOKE?

WHAT'S WRONG WITH THE OTHER ONE?

E.T.A. FOR THE ONE YOU ORDERED?

WHATCHA THINK ABOUT THE BIG TANK?

THE MEDIC
Aug 7, 2012 at 6:08 PM
Avatar
HANG EM HI
  • MEMBER
  • 71 POSTS
It's the yoke that I broke a bolt off inside of. The upgraded u-bolt yoke. Probably could have just fixed it easy, but i found a good deal. Turns out it shipped yesterday and should be in tomorrow. Hopefully will be driving her by Saturday.

Funny story, ran into a guy at Advance the other day who had sheared three of his bolt and strap bolts off in his yoke going to his pinion in his 95' wrangler. He was asking a rep there how to take off the pinion yoke, and the poor rep had no idea. He overheard me mention to someone I had a CJ, and he asked me about it. Got to explain to him about preload and all that jazz. I told him to look up how to change out a pinion oil seal if he wanted to remove his yoke. Kind of fun to yammer on about preoloading bearings while the advance autopart cashier's eyes glaze over (not that you'd ever do that though, medic).

I'm going to hold off on increasing tank size until I figure out what exactly I'm going to be doing with my jeep. Since I already have a reliable car, most likely my jeep will slowly become more of an offroad warrior as I upgrade and mod her. Knowing that, I'll probably wait on the larger tank. Now if I end up taking her on a lot of beach trips, I may reconsider. Now I know how to drop a tank, it will only take an afternoon to switch out a new one. Thanks for the advice though.
Aug 7, 2012 at 6:24 PM
Avatar
CJ MEDEVAC
  • CERTIFIED EXPERT
  • 11,004 POSTS
NOT ALL OF 'EM (VEHICLES) USE A CRUSH SLEEVE, SOME USE SPACERS AND SHIMS TO ACHIEVE PROPER PRE-LOAD---THEY SIMPLY GET SET TO A SPECIFIC TORQUE ONCE THE SHIMMING IS FIGGERED OUT.....I DON'T KNOW ABOUT THE WRANGLERS, I'VE NEVER HAD A REAR END ISSUE WITH ONE, I TRY TO STICK WITH THE CJs!

YOU SHOULDA PUT THE OLE BOY ONTO "THE KNOWLEDGE BASE"----IT COVERS THE CJs, WRANGLERs, CHEROKEEs, AND TRUCKs......I THINK THAT WOULD'VE MADE A BIG IMPRESSION!

I REALLY LIKE TO IMPRESS THE '79 ON UP CJ OWNERS WITH EXPLAINING THE PROPER WAY TO USE THE HEAT CONTROLS AND THE --"I NEVER NOTICED THAT"-- VENT CONTROL WHICH PUMPS OUT MEGA AIR BETWEEN YOUR LEGS AND ONTO THE PASSENGERS LEGS.....SO MANY HAVE OWNED ONE FOREVER AND THOUGHT THE 2ND K.NOB BELOW THE FAN, PULLED TO THE "1ST STOP" WAS "VENT" AND ONLY 1/4 OF THE WAY OUT (THOUGHT TO BE HALFWAY) WAS HEAT........NO WONDER THEY COMPLAIN ABOUT BEING COLD, THEY'VE BEEN CHEATING THEMSELVES OUTTA "FULL HEAT" FOREVER!

THE MEDIC
Aug 7, 2012 at 6:49 PM
Avatar
HANG EM HI
  • MEMBER
  • 71 POSTS
IT'S ALIVE!!!!!!!

Drover her today and absolutely no whining. I can finally coast! Had to wrestle through it though. Sheered another bolt off the OTHER yoke, but was able to drill it out and now everything is good to go. I've noticed a small fluctuation in power, but I'm hoping it goes away after a few miles. Maybe has something to do with removing the gas tank?? Can't smell gas anymore either. Pic of restored axle below.

So good to finally be driving her again. Now onto cosmetic issues.
Aug 12, 2012 at 3:03 AM
Avatar
CJ MEDEVAC
  • CERTIFIED EXPERT
  • 11,004 POSTS
WONDERFUL!!!

VACUUM PROBLEMS MAY BE HINDERING YOU....THEY'LL NEED TO BE SQUARED AWAY 1ST

.......THEN LET'S GET YOUR CARB AND TIMING RIGHT

TELL ME WHERE YOU WANNA START

SEND ME SOME MORE (MANY) DIFFERENT ANGLES OF PICS UNDER THE HOOD AND WELL LIT---REMOVE THE BREATHER FOR THE PICS

I FEEL SURE YOU DID AN OUTSTANDING JOB ON THE DIFFERENTIAL

THE MEDIC

Aug 12, 2012 at 4:13 AM
Avatar
HANG EM HI
  • MEMBER
  • 71 POSTS
Well I take that back. She appears to be driving fine. No power problems. I retimed the engine right after I put the axle back in. I didn't check the mixture, but I'll do that at some point. Quick question - what does engine ping sound like? The engine clicks a lot when I'm accelerating, but I'm pretty sure that's normal.

Just as a refresher, set the idle at 680 after she had warmed up. Killed the engine and plugged the vacuum advance. Loosened the nut by the distributor cap. Started the engine, and at 680 RPM set the advance to 8* +/- a degree or two. Sound right?
Aug 13, 2012 at 2:09 PM
Avatar
CJ MEDEVAC
  • CERTIFIED EXPERT
  • 11,004 POSTS
PINGING IS PRE-IGNITION....THE EXPLOSION OCCURS TOO EARLY, AND THE PISTON IS DRIVEN DOWN ON THE ROD WHILE STILL IN "COMPRESSION" OR EXACTLY AT THE TOP OF THE STROKE.....IT SHOULD HAPPEN "JUST" AS THE PISTON IS STARTING DOWN ON THE POWER STROKE......THE EXPLOSION THAT IS!!! THE ACTUAL "CALL" FOR THE SPARK HAPPENS EARLIER TO GIVE THE ELECTRICITY TIME ENOUGH TO FIRE THE PLUG AT "JUST" THE RIGHT TIME


DID YOU PLUG OFF YOUR VACUUM ADVANCE WHILE YOU WERE TIMING? WAS IDLE SPEED 680 RPMs WHILE TIMING?....DID YOU PUT THE VAC ADVANCE BACK ON WHEN YOU WERE FINISHED?

WHEN YOU WERE FINISHED WAS YOU IDLE SPEED SET BACK TO 680 RPM?

ARE YOU USING PORTED VACUUM OR MANIFOLD VACUUM TO THE VACUUM ADVANCE (FOR ME--MANIFOLD VACUUM [CONSTANT VACUUM] WORKS BEST ON MY SET UP) ONCE I HOOK MY VACUUM LINE BACK ON (IT IS ADVANCED ALL THE TIME) MY RPMs GO WAY UP AND I MUST IDLE IT BACK DOWN TO "MY" IDLE SPEED, WHICH IS 700 RPM (20 RPM IS NO BIG DEAL!)

LET'S LOOK AT "MAY 13" ON DOWN TO THE END----SEE ALL THE LINKS IN "MAY 30" THEY EXPLAIN STUFF WELL----IN GRIZZLY93'S POST

http://www.2carpros.com/questions/1982-jeep-cj7-ignition-problem-spark-distributor-cap

HERE'S TWO MORE----SAME FELLER ASKING BOTH---HE HAS A 304----THE METHODS ARE THE SAME AS A SIX CYLINDER----THE ONLY DIFFERENCE IS 2 EXTRA CYLINDERS (AND NO ROOM!) AND THE CONFIGURATION OF THE MARKS, ETC......IN THESE POSTS I DID USE PICS OF MY 258 TO TRY TO CONVEY THE METHODS TO HIM


http://www.2carpros.com/questions/1980-jeep-cj7-v8-wont-start


http://www.2carpros.com/questions/1980-jeep-cj7-timingtuning-problem-with-a


LET ME KNOW WHEN WE NEED TO DO THE LAND-LINE COMMO THING AGAIN---I SHOULD BE GOOD THIS EVENING FROM ABOUT 19:00-23:30 HRS EASTERN THIS EVENING.......STILL GOT MY #?

THE MEDIC
Aug 13, 2012 at 3:20 PM
Avatar
HANG EM HI
  • MEMBER
  • 71 POSTS
It's going off the manifold vacuum, not the ported vacuum. I did not check idle after reattaching the vacuum line. That wouldn't make it ping, though, would it? I won't have time to talk tonight unfortunately. Maybe later on in the week. I'll keep you posted.

But that clicking sound is definitely pinging, right?
Aug 13, 2012 at 5:38 PM
Avatar
HANG EM HI
  • MEMBER
  • 71 POSTS
By the way, yes I did plug my vacuum while timing. Yes the idle was at 680 during timing. Also the "clicking" doesn't happen at idle, only when I'm accelerating.
Aug 13, 2012 at 5:42 PM
Avatar
CJ MEDEVAC
  • CERTIFIED EXPERT
  • 11,004 POSTS
ROGER

CLICKING IS REALLY MORE LIKE A 2-5 SECOND "CLATTER"

MOST LIKELY THIS IS A TIMING ISSUE

HEAR ME OUT!

WE WILL GO OVER HOW TO CHECK TO SEE IF BOTH ADVANCES WORK CORRECTLY SOON

I STILL WANNA KNOW WHETHER YOUR VACUUM ADVANCE LINE IS "MANIFOLD VAC" (CONTINUOUS S.UCKING) OR IS IT "PORTED VAC" (IF YOUR IDLE IS CORRECT, PORTED VAC WILL ONLY S.UCK WHEN YOU OPEN THE THROTTLE UP JUST A LITTLE OR MORE??????

YOU CAN TEST FOR EITHER WITH YOUR FINGER OR YOUR TONGUE OR USING A VACUUM GAUGE----YOU CAN STICK ONE IN THE LINE SIMILAR TO THE WAY I HOOK INTO THIS PORT ON MY INTAKE (PIC 1)

I'M PRETTY SURE YOU SAID THAT YOU ARE SORTA EXEMPT FROM THE EMISSIONS TESTING

ALL OF THE OLD VACUUM CRAP ON YOUR RIG IS MOST LIKELY NOT WORKING AS IT DID 20 YEARS AGO, WITH THINGS NOT WORKING AS THEY SHOULD BE, EFFICIENCY IN A GOOD BURN, PROBABLY IS SUFFERING

I THINK THAT MAKING YOUR ENGINE RUN THE BEST IT CAN, WOULD REDUCE BAD EMISSIONS FROM YOUR ENGINE......TESTED OR NOT!

HOW DO YOU FEEL ABOUT SNATCHING ALL OF THE "CRAP" OFF, JUST LEAVING ONLY THE NECESSARY VACUUM LINES AND ELECTRICAL STUFF???

I AM MAKING YOU SOME EZ TO SEE VAC DIAGRAMS ELIMINATING THE CRAP...I WILL POST 'EM SOON

THE MEDIC
Aug 13, 2012 at 9:59 PM