Hi Mark:
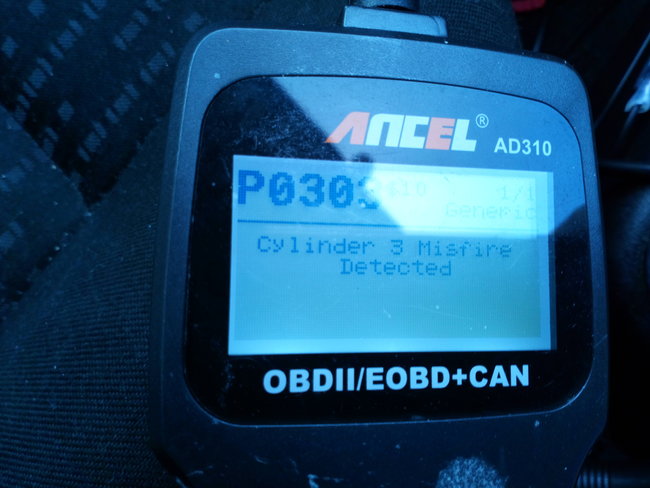
I wish I had a better answer, but you have done all the basic checks to remedy the issue. The only thing I can think is that the variation in compression is causing it.
I wish I had an easier answer.
_______________________________
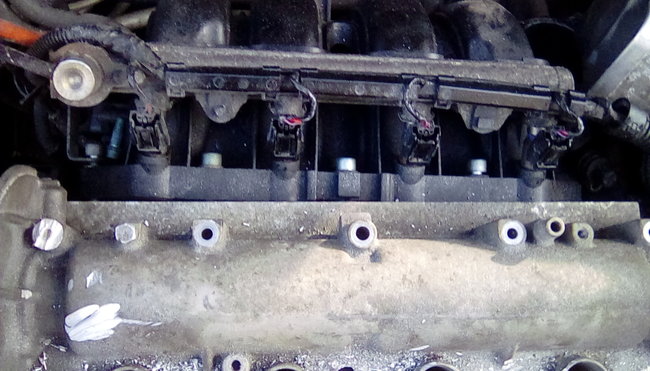
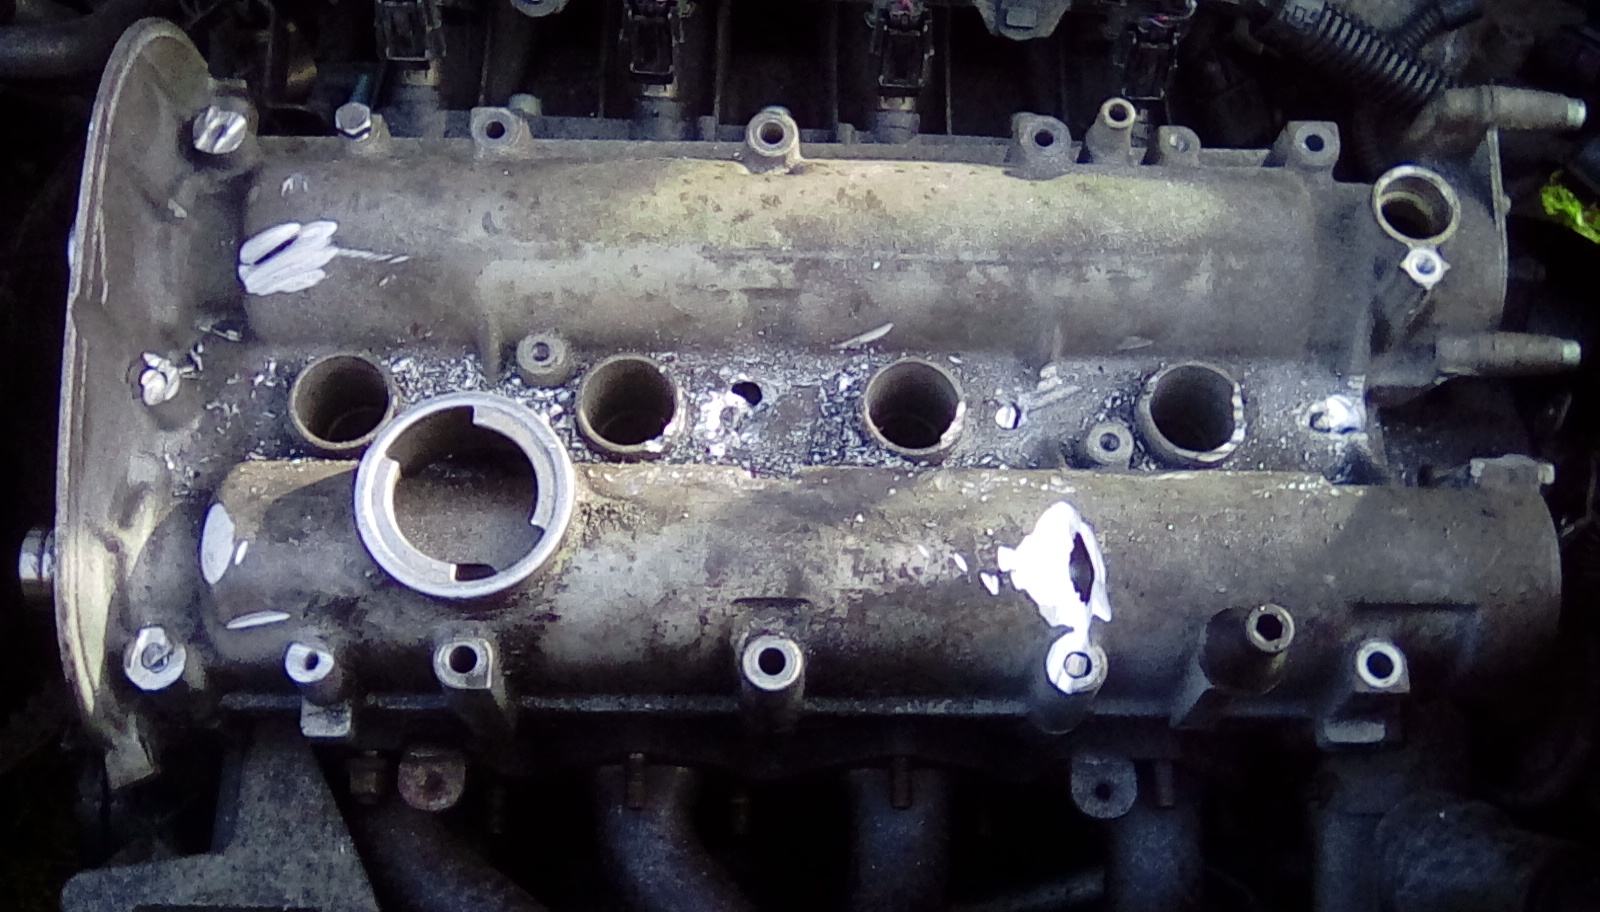
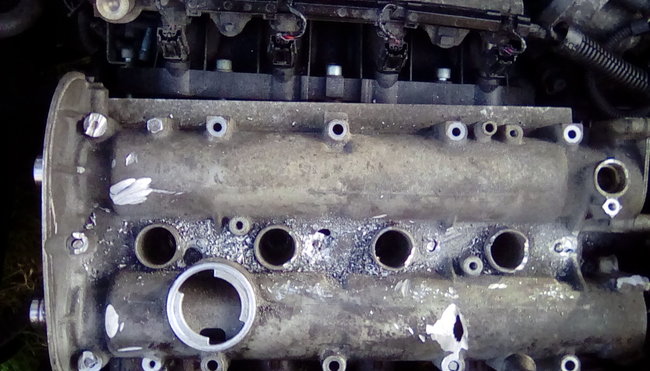
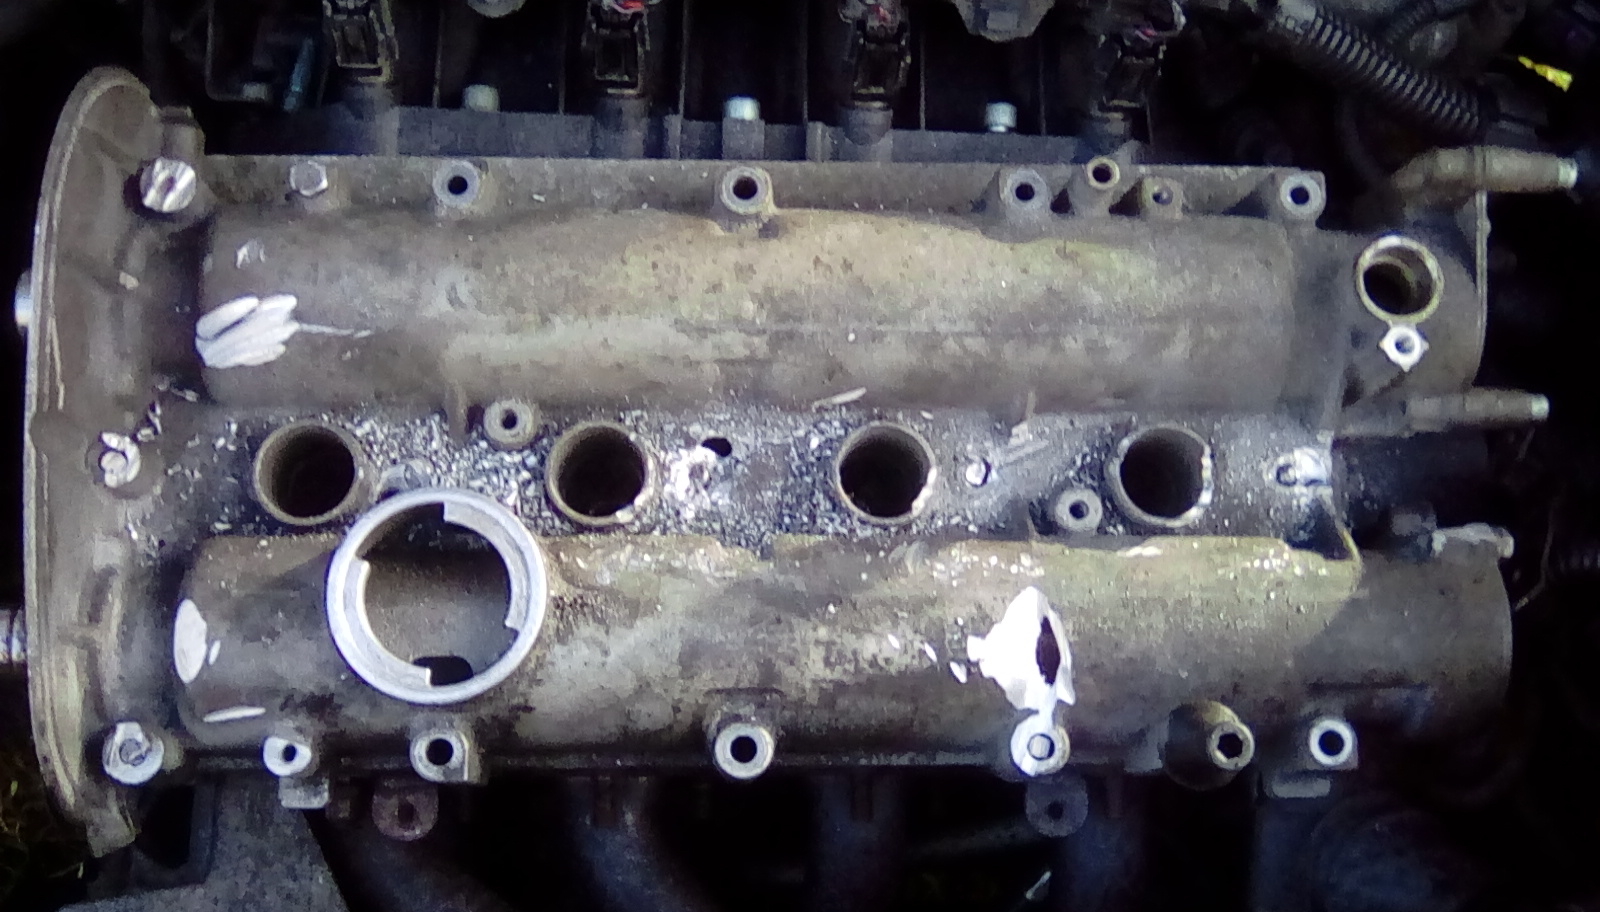
I don't know if you need them, but here are the directions for removing and replacing the cylinder head. All attached pictures correlate with these directions.
___________________________________________
Cylinder head, removing and installing
Note:
^ When installing an exchange cylinder head with camshaft, lubricate running contact surfaces between hydraulic lifters and camshaft cam surfaces before installing cylinder head cover.
^ The plastic packing pieces for protecting the open valves must not be removed until immediately before installing the cylinder head.
^ If the cylinder head is replaced, all the coolant in the system must also be replaced.
imageOpen In New TabZoom/Print
Engine codes AEG, AVH, AZG, BEV
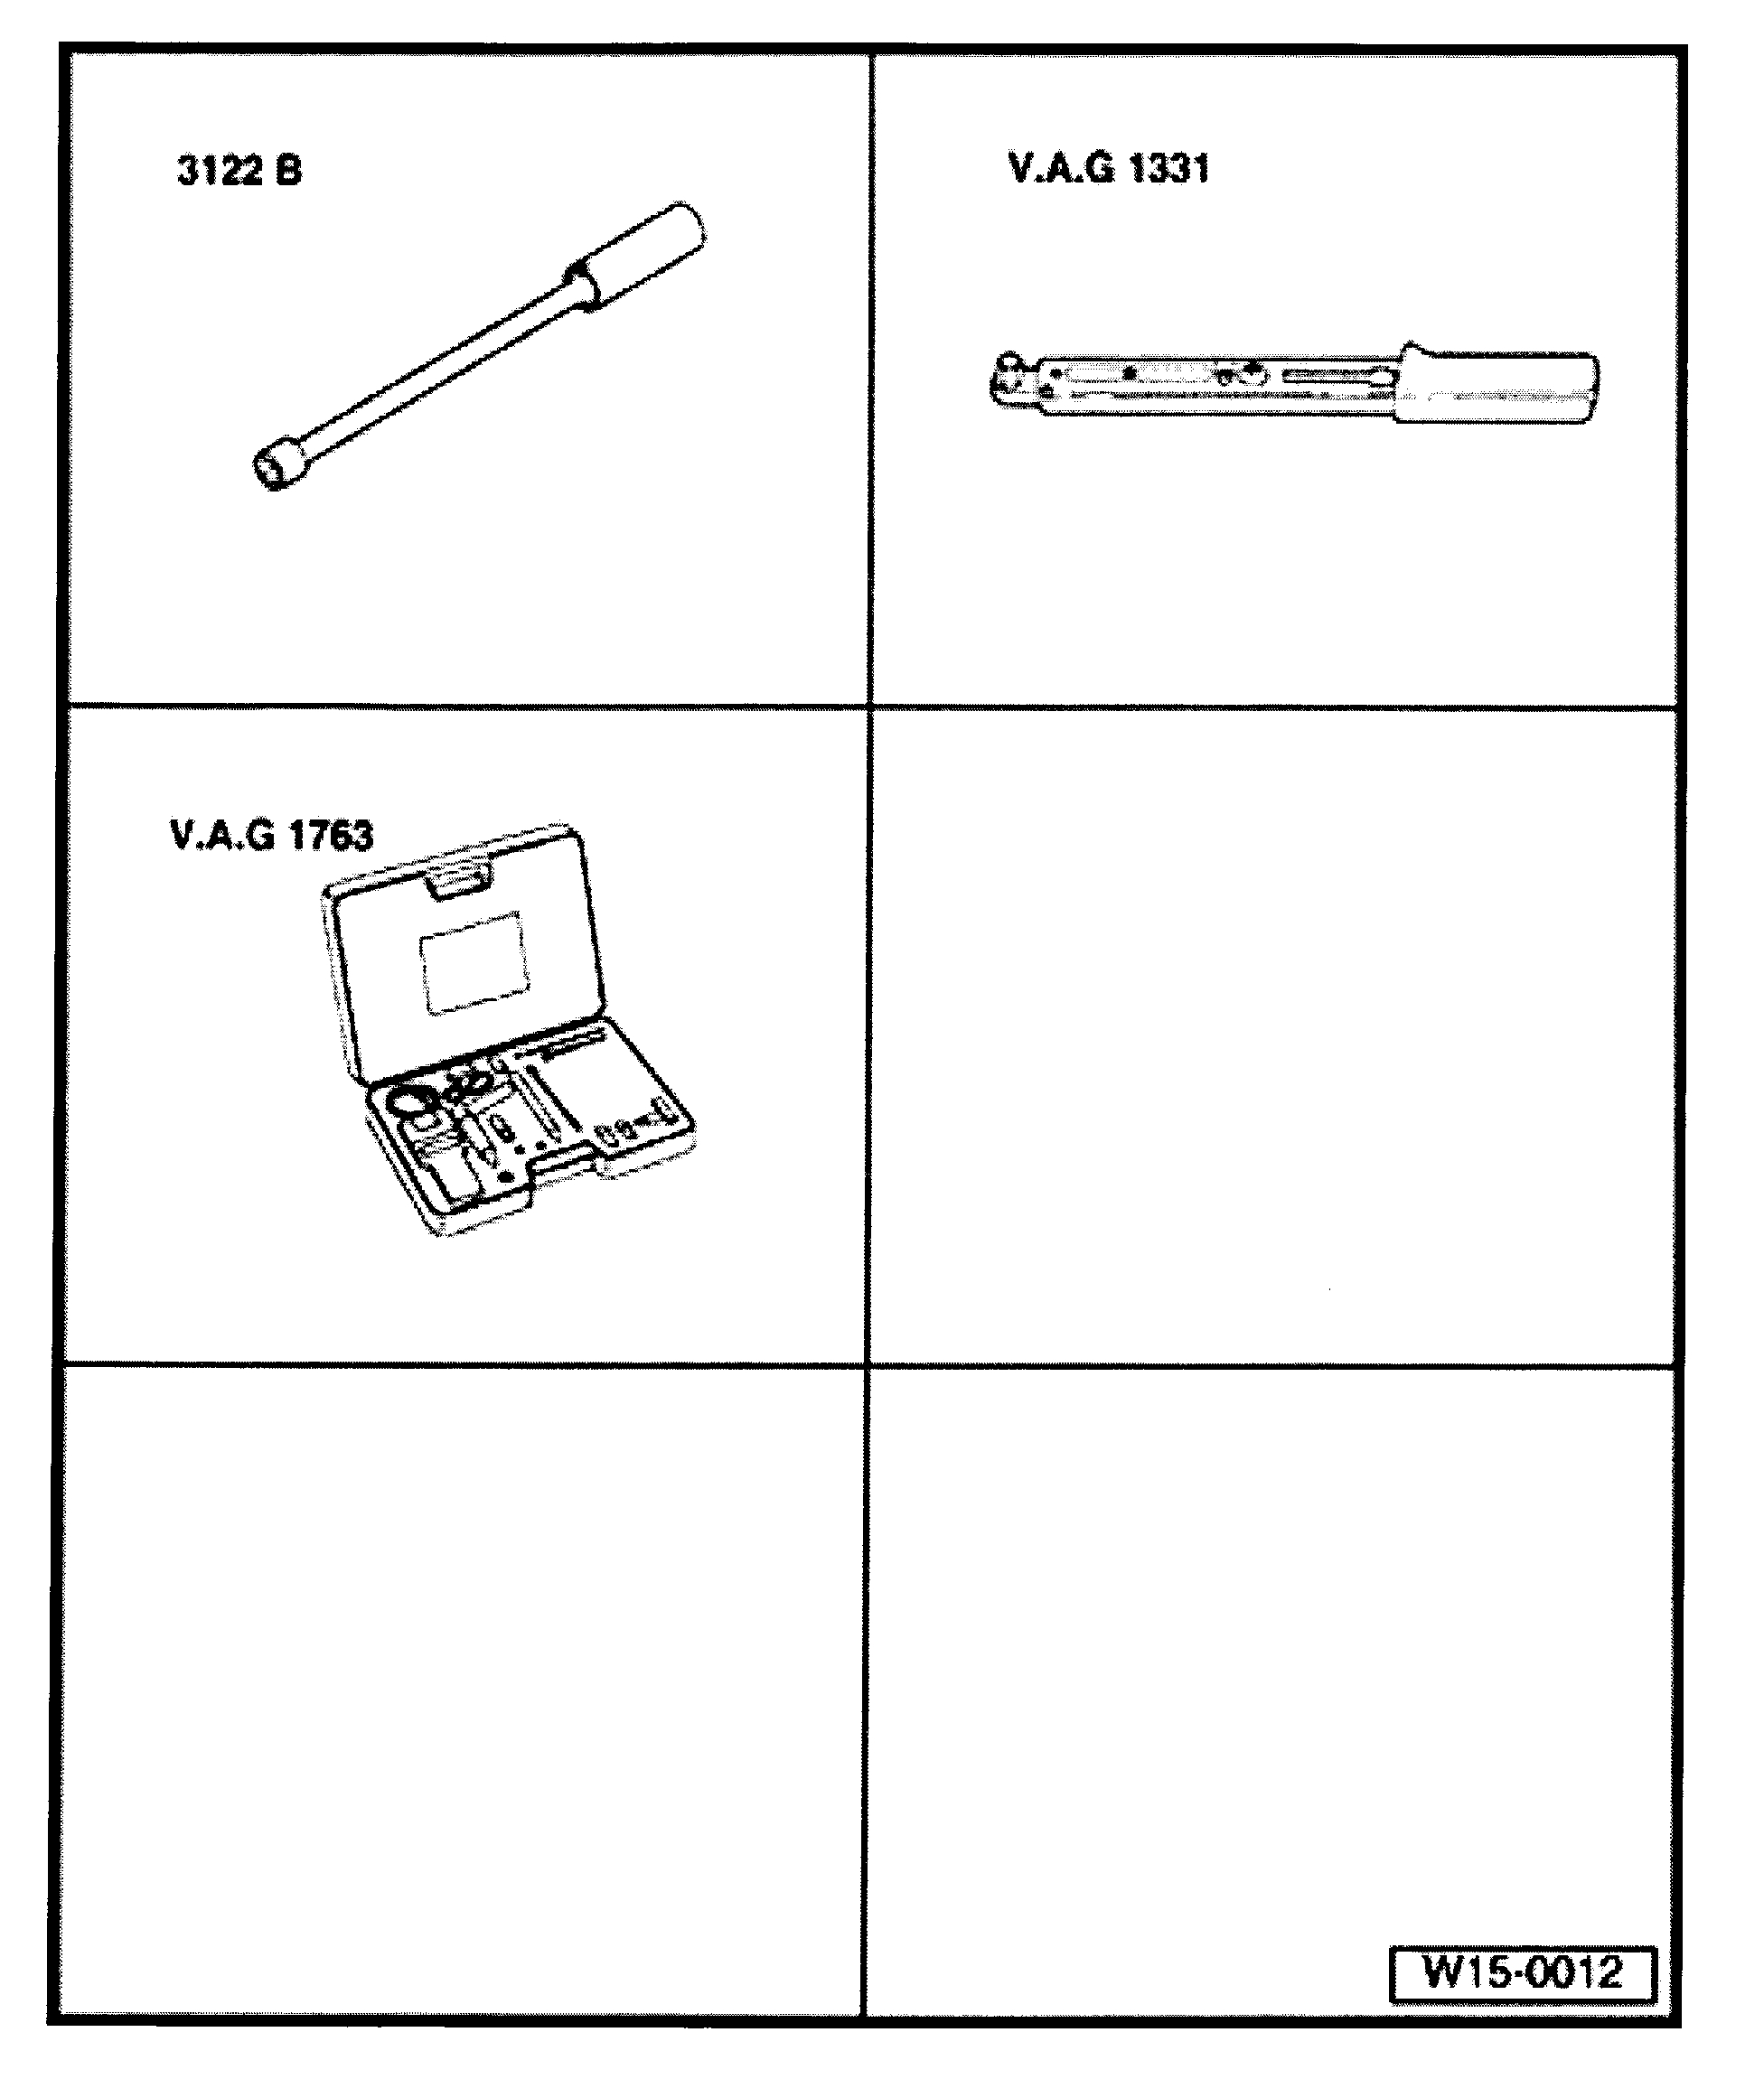
Special tools and equipment
^ V.A.G 1306 Drip tray
^ V.A.G 1332 Torque wrench (40 to 200 Nm)
^ VAS 5024 Assembly tool for spring-type clips
^ 3450/2A Guide pins
^ 3450/3 Removal tool
^ 3452 Key (for Polydrive cylinder head bolts)
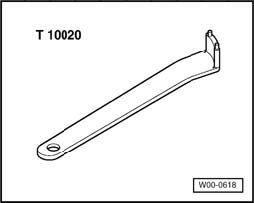
^ T10020 Two hole pin wrench
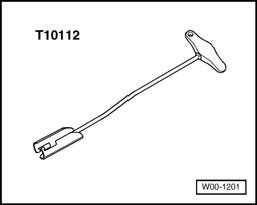
^ T10112 Fitting tool
Requirements
^ Engine must only be hand touch warm.
Removing
CAUTION! When performing repair work, especially due to the confined conditions in the engine compartment, pay attention to the following:
^ Route all types of lines (e.g. for fuel, hydraulics, EVAP system, coolant, refrigerant, brake fluid and vacuum) as well as electrical wiring so that the original positions are restored.
^ Ensure sufficient clearance to all moving or hot components.
Note: During this procedure the battery Ground strap must be disconnected. Therefore, please check first whether a coded radio is installed. Obtain the radio code first if necessary.
- With ignition switched off disconnect battery Ground (GND) strap.
- Remove engine cover.
- Drain coolant.
WARNING! The fuel system is under pressure! Before opening the system place a cloth around the connection. Then release the pressure by carefully loosening the connection.
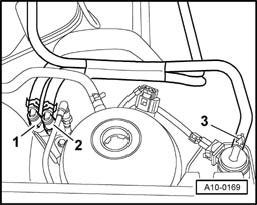
Engine codes AEG, AVH, AZG, BEV
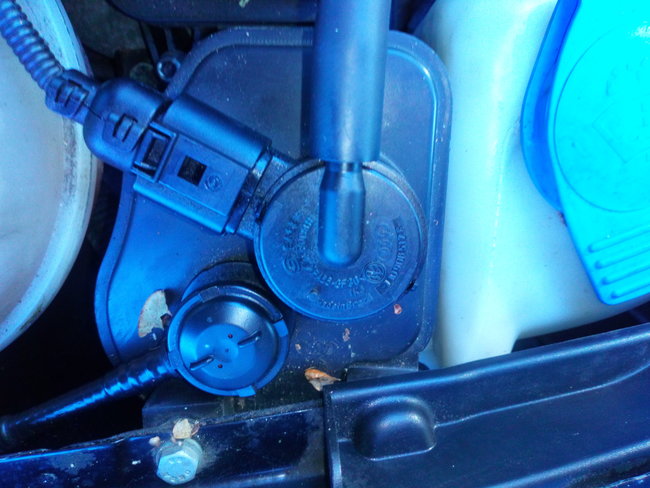
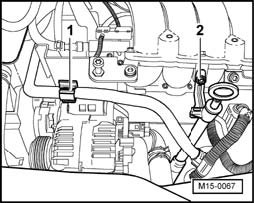
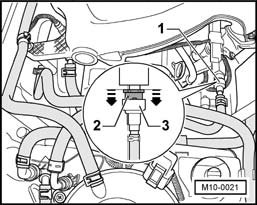
- Pull fuel supply line -1- and fuel return line -2- off connections
- Disconnect hose -3- from solenoid valve for Evaporative Emission (EVAP) Canister Purge Regulator Valve
Engine code BEV
- Pull fuel supply line -1- off union by pressing locking ring -2- into union -3-.
Continued for all engines
- Seal lines to avoid contamination of fuel system.
- Remove air cleaner with intake hose and secondary air line.
- Remove intake manifold upper part.
- Disconnect all necessary coolant, vacuum and intake hoses from intake manifold upper part/cylinder head.
- Pull off/discount all electrical connections/wiring as necessary from cylinder head and lay aside.
Note: Seal the intake ports in the intake manifold lower section with clean cloths.
- Remove connections with coolant hoses.
- Remove suction and pressure lines from secondary air pump motor.
- Remove pressure line retainer.
- Unbolt secondary air pump motor bracket and remove.
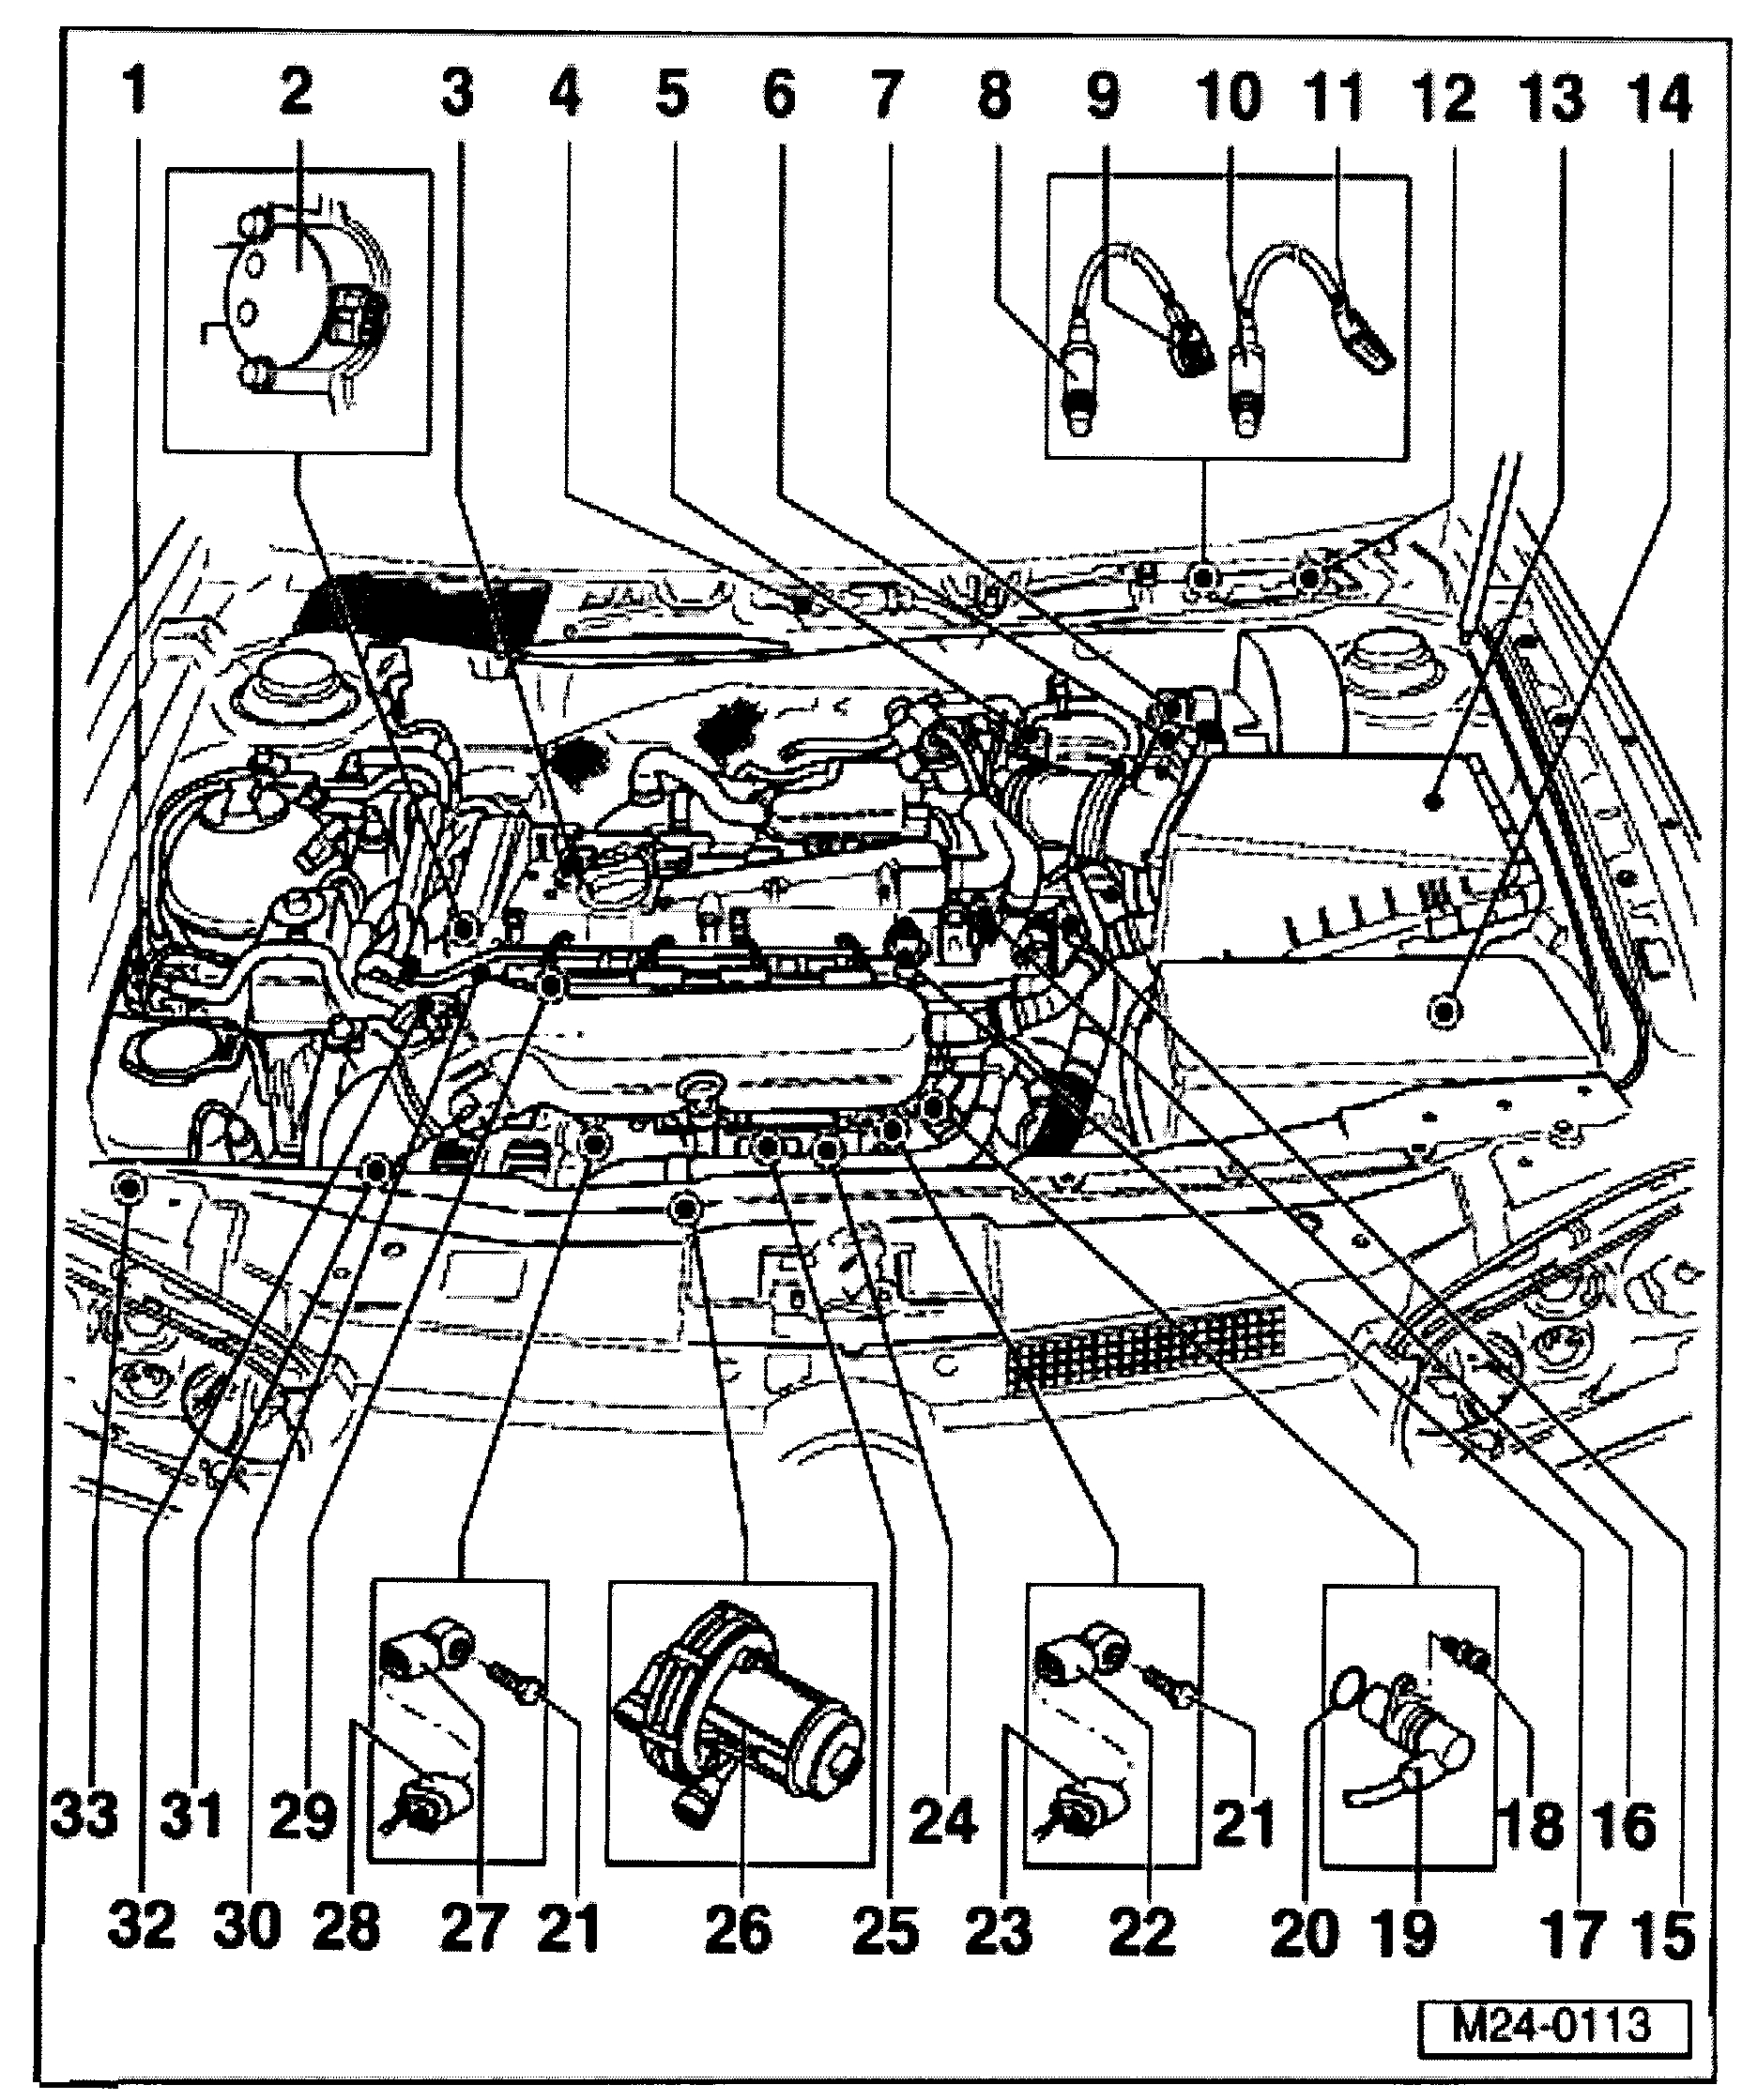
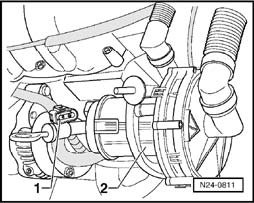
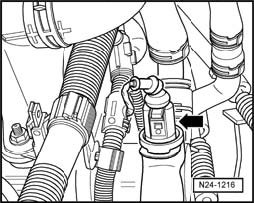
- Disconnect following connections:
^ -1- for Secondary Air Injection (AIR) Pump Motor -V101- -2-.
^ Camshaft position (CMP) sensor -G40-
^ Knock Sensor (KS) 1 -G61-
^ For injectors -N30-, -N31-, -N32-, -N33-, (unclip cable guide).
^ Engine Coolant Temperature (ECT) sensor -G62- (arrow).
- Knock Sensor (KS) 1 -G61- from clip on generator bracket.
- Remove wiring harness from fuel rail and lay to one side.
- Unclip wiring harness on left next to cylinder head.
- Disconnect wiring from spark plus using tool T10112.
- Unclip return line from clip -1-.
- Remove bolt -2- from oil dipstick retainer.
- Remove cover for Heated Oxygen Sensor (HO2S) connector.
- Disconnect Heated Oxygen Sensor (HO2S) -G39- connector and take wiring harness off heat shield.
- Disconnect front exhaust pipe with catalytic converter.
- Take off poly V-belt.
- Remove bracket from poly V-belt tensioning element.
- Remove toothed belt guard upper part.
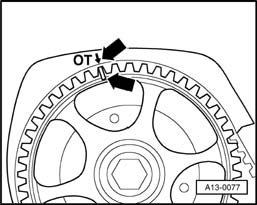
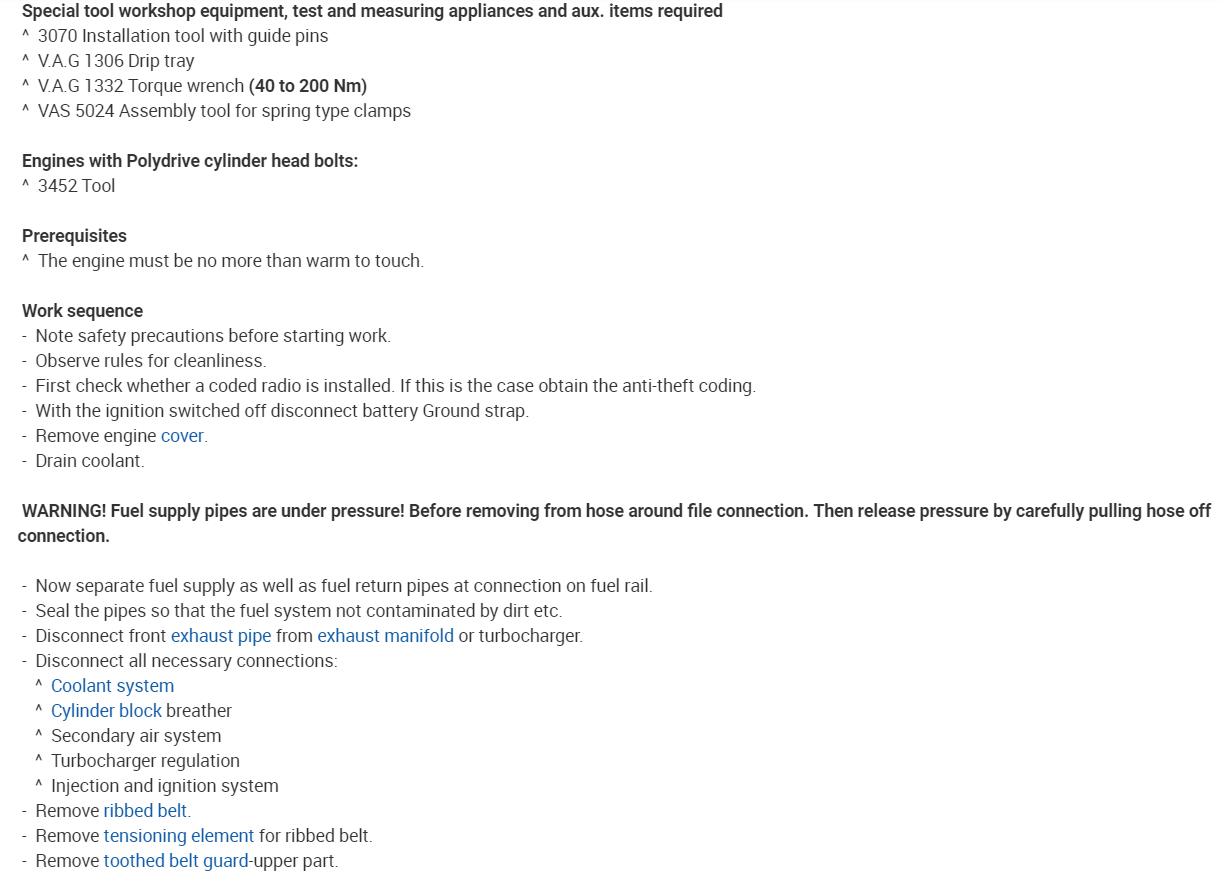
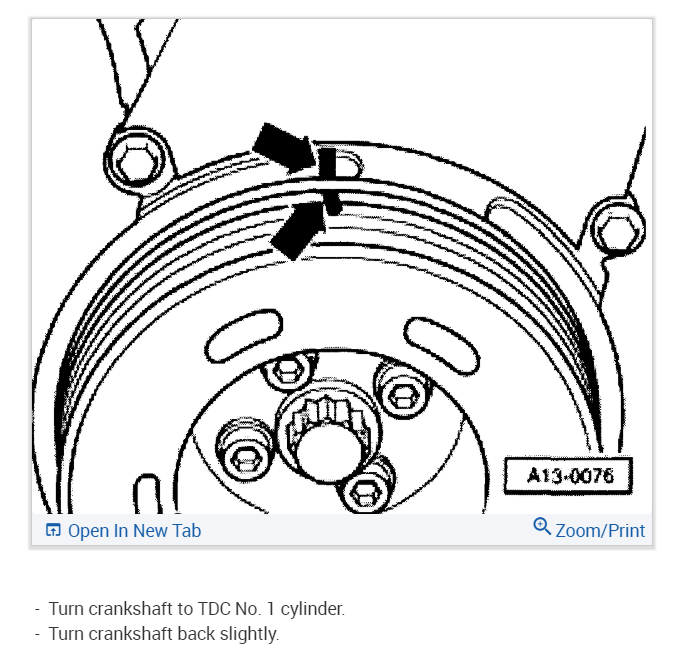
- Set camshaft pulley to TDC No. 1 cylinder by turning crankshaft 1. Mark on camshaft pulley must align with (arrow) on toothed belt guard.
- Loosen tensioning roller and remove toothed belt from camshaft pulley.
- Turn crankshaft back slightly.
- Remove cylinder head cover.
- Remove upper bolt from rear toothed belt guard.
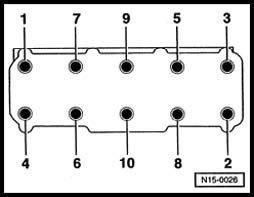
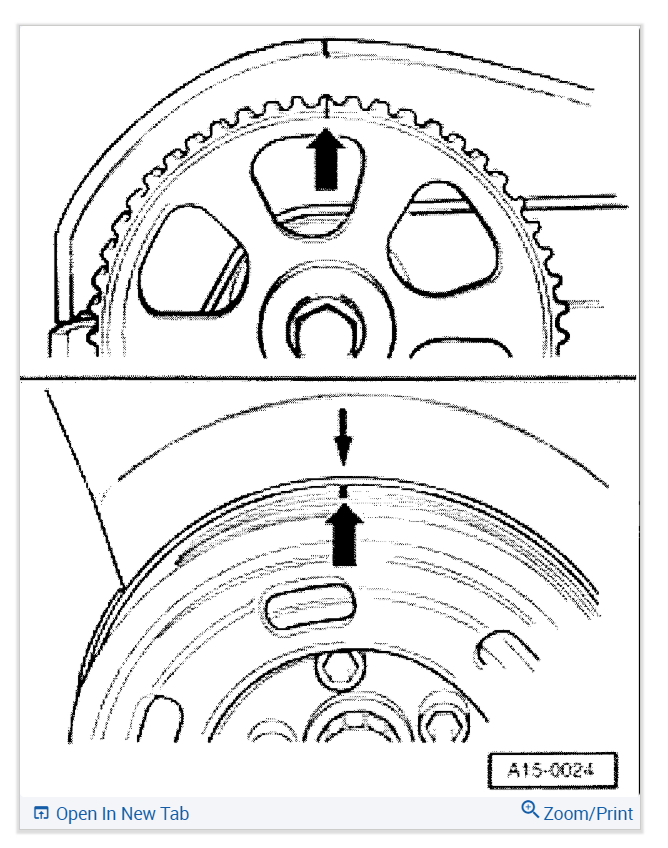
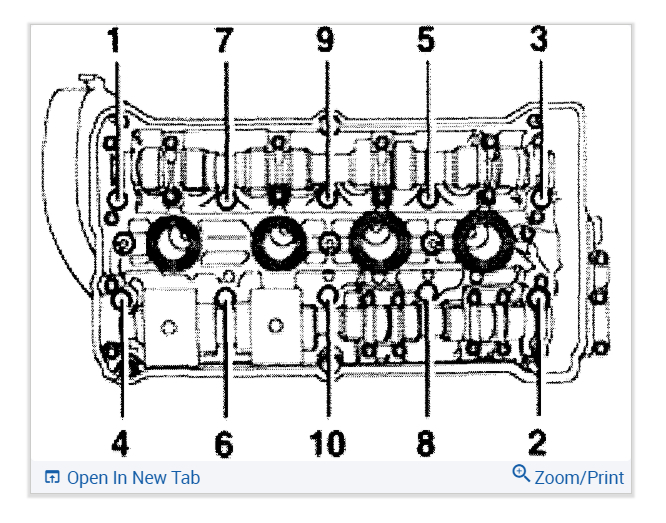
- Loosen socket head bolts in sequence given and then remove.
Note: Use key 3452 for polydrive cylinder head bolts.
- Carefully lift cylinder head off.
Note:
^ Always replace bolts.
^ There must be no oil or coolant in the cylinder head bolt pockets in the cylinder head.
^ Do not remove new cylinder head gasket from its packing until immediately before installing.
^ Handle new gasket with extreme care. Damage will cause leakage.
^ Place cleans cloths in cylinders so that no dirt or emery cloth particles can get in between cylinder wall and piston.
^ Also prevent dirt and emery cloth particles from getting into coolant.
^ Carefully clean sealing surfaces of cylinder head and cylinder block. Ensure thereby that surfaces are not scored or scratched (if abrasive paper is used, grade must not be less than 100)
^ Carefully remove metal particles, emery residue and cloths.
- If crankshaft has been turned: Set No. 1 cylinder piston to top dead center and then return crankshaft back slightly.
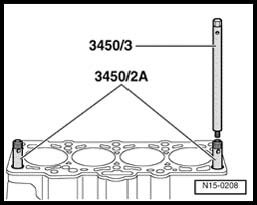
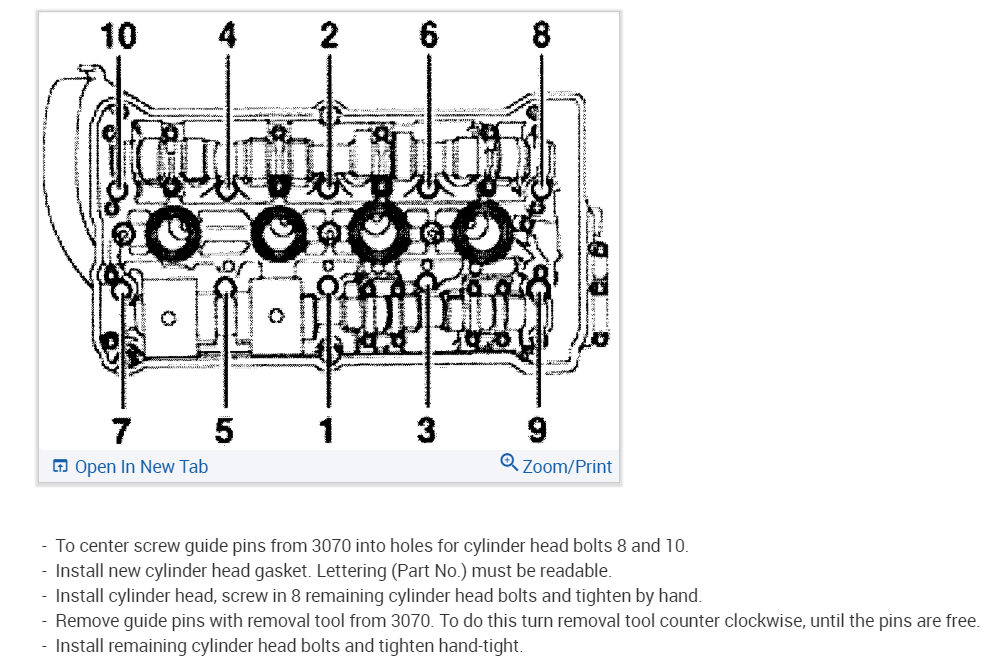
- To centralize, screw guide pins from 3450/2 A into front outer threaded holes for cylinder head bolts.
Note: Part number must be visible.
- Install new cylinder head gasket.
- Install cylinder head, screw in 8 remaining cylinder head bolts and tighten by hand.
- Remove guide pins through bolt holes with removal from 3450/3. To do this turn removal tool counter-clockwise, until pins are free.
- Install remaining cylinder head bolts and tighten hand-tight.
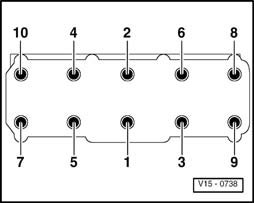
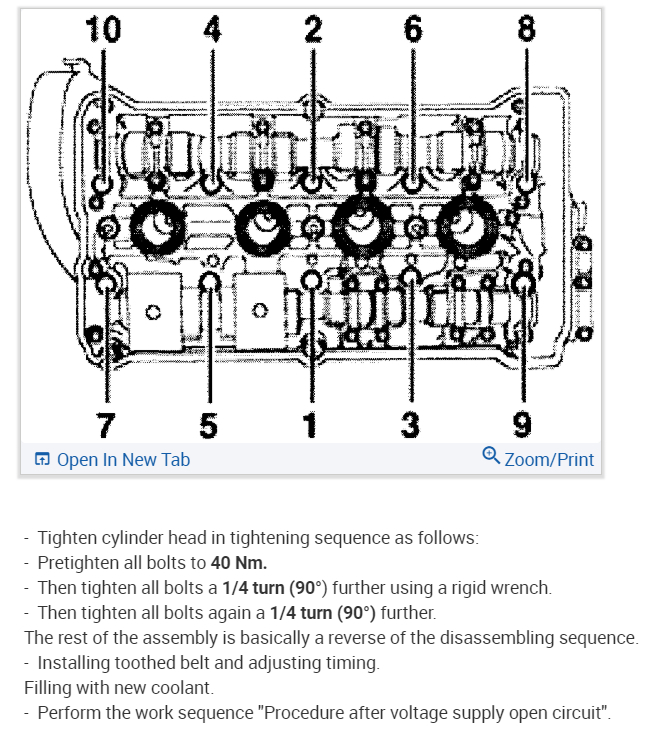
- Tighten cylinder head in tightening sequence as follow:
- Pretighten all bolts to 40 Nm.
- Then tighten all bolts 1/4 turn (90°) using a rigid wrench.
- Then tighten all bolts again another 1/4 turn (90°).
Further assembly is the reverse of the disassembling procedure.
Note: When turning the camshaft the crankshaft must not be at TDC. Danger of damage to valves/piston crown.
- Install cylinder head cover.
Tightening torque: 10 Nm
- Install toothed belt and set timing.
- Install poly V-belt tensioning element.
Tightening torque: 25 Nm
- Install poly V-belt.
- Install front exhaust pipe with catalyst to exhaust manifold.
Note: Reinstall wiring/lines to their original positions.
- Fill with new coolant.
- Connect battery Ground (GND) strap.
Vehicles with throttle (accelerator) cable
- Adjust throttle cable.
Continued for all models
- Adapt engine control module to throttle valve control module.
- Test drive vehicle and read Diagnostic Trouble Code (DTC) memory.
- If DTC memory was erased or engine control module has been disconnected from permanent positive supply, regenerate readiness code.
Engine code BBW
Special tools and equipment
^ V.A.G 1306 Drip tray
^ V.A.G 1332 Torque wrench (40 to 200 Nm)
^ VAS 5024 Spring-type clip pliers
^ 3450/2A Guide pins
^ 3450/3 Puller
^ 3452 Key (for polydrive cylinder head bolts)
Removing
CAUTION! When performing repair work, especially due to the confined conditions in the engine compartment, pay attention to the following:
^ Route all types of lines (e.g. for fuel, hydraulics, EVAP system, coolant, refrigerant, brake fluid and vacuum) as well as electrical wiring so that the original positions are restored.
^ Ensure sufficient clearance to all moving or hot components.
Note: During this procedure the battery Ground strap must be disconnected. Therefore, please check whether a coded radio is installed. Obtain the radio code first if necessary.
- With ignition switched off disconnect battery Ground (GND) strap.
- Remove engine cover.
- Drain coolant.
- Remove right side sound insulation.
WARNING! The fuel system is under pressure! Before opening the system place a cloth around the connection. Then release the pressure by carefully loosening the connection.
- Disconnect fuel supply line (at connection -1-. To do this slide securing ring -2- in union -3-.
- Seal lines to avoid contamination of fuel system.
- Remove intake manifold upper part.
Note: Seal the intake ports in the intake manifold lower part with a clean cloth.
- Remove connections with coolant hoses.
- Disconnect coolant hose from cylinder head.
- Remove intake and pressure lines for secondary air pump motor.
- Disconnect these connections:
^ Camshaft variable timing adjustment valve.
^ For Secondary Air Injection (AIR) Pump Motor -V101-.
^ For injectors -N30-, -N31-, -N32-, -N33-, (unclip cable guide).
^ Camshaft position (CMP) sensor -G40-
^ Knock Sensor (KS) 1 -G61-
^ for Spark plugs (using T10112)
- Remove bracket with secondary air pump motor.
- Disconnect all necessary electrical wiring of cylinder head and move aside.
- Disconnect front exhaust pipe with catalytic converter.
- Disconnect connector for Heated Oxygen Sensor (H2OS).
- Take off poly V-belt.
- Remove poly V-belt tensioning element.
- Remove bracket from poly V-belt tensioning element.
- Remove toothed belt guard upper part.
- Remove cylinder head cover.
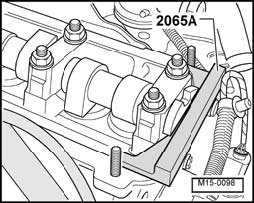
- Turn crankshaft until camshaft is positioned at TDC No. 1 cylinder.
It should be possible to move setting bar 2065 A in camshaft groove.
- Remove tool.
- Loosen tensioning roller and remove toothed belt from camshaft pulley.
- Turn crankshaft back slightly.
- Remove upper bolt from rear toothed belt guard.
- Loosen socket head bolts in sequence given and then remove.
Note: Use key 3452 for polydrive cylinder head bolts.
- Carefully lift cylinder head off.
Installing
Note:
^ There must be no oil or coolant in the cylinder head bolt pockets in the cylinder head.
^ Do not remove new cylinder head gasket from its packing until immediately before installing.
^ Handle new gasket with extreme care. Damage will cause leakage.
- Place clean cloths in cylinders so that no dirt or emery cloth particles can get in between cylinder wall and piston.
- Also prevent dirt and emery cloth particles from getting into coolant.
- Carefully clean sealing surfaces of cylinder head and cylinder block. Ensure thereby that surfaces are not scored or scratched (if abrasive paper is used, grade must not be less than 100)
- Carefully remove metal particles, emery residue and cloths.
- If crankshaft has been turned: Set No. 1 cylinder piston to top dead center and then return crankshaft back slightly.
- To centralize, screw guide pins from 3450/2 A into front outer threaded holes for cylinder head bolts.
- Install new cylinder head gasket.
- Install cylinder head, screw in 8 remaining cylinder head bolts and tighten by hand.
- Remove guide pins through bolt holes with removal from 3450/3. To do this turn removal tool counter-clockwise, until pins are free.
- Install remaining cylinder head bolts and tighten hand-tight.
- Tighten cylinder head in tightening sequence as follow:
- Pretighten all bolts to 40 Nm.
- Then tighten all bolts 1/4 turn (90°) using a wrench.
- Then tighten all bolts again another 1/4 turn (90°).
Further assembly is reverse of the disassembling procedure.
Note: When turning the camshaft the crankshaft must not be at TDC. Danger of damage to valves/piston crown.
- Install toothed belt and set timing.
- Install poly V-belt tensioning element.
- Tightening torque: 25 Nm
- Install poly V-belt.
- Fill with new coolant.
- Connect battery Ground (GND) strap.
- Adapt engine control module to throttle valve control module.
- Test drive vehicle and read Diagnostic Trouble Code (DTC) memory.
- If DTC memory was erased or engine control module has been disconnected from permanent positive supply, regenerate readiness code.
__________________________________________________________________
If you don't mind, let me know the results and what you find. I wish I was able to help more.
Take care,
Joe
Images (Click to enlarge)
Oct 28, 2018 at 7:11 PM