Hi,
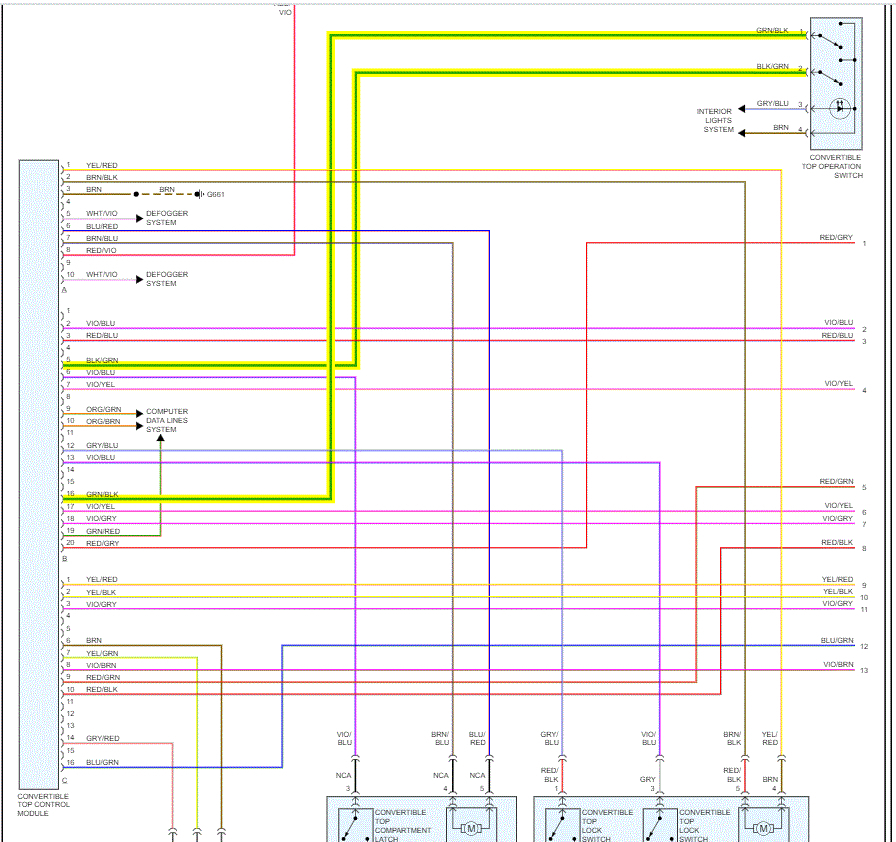
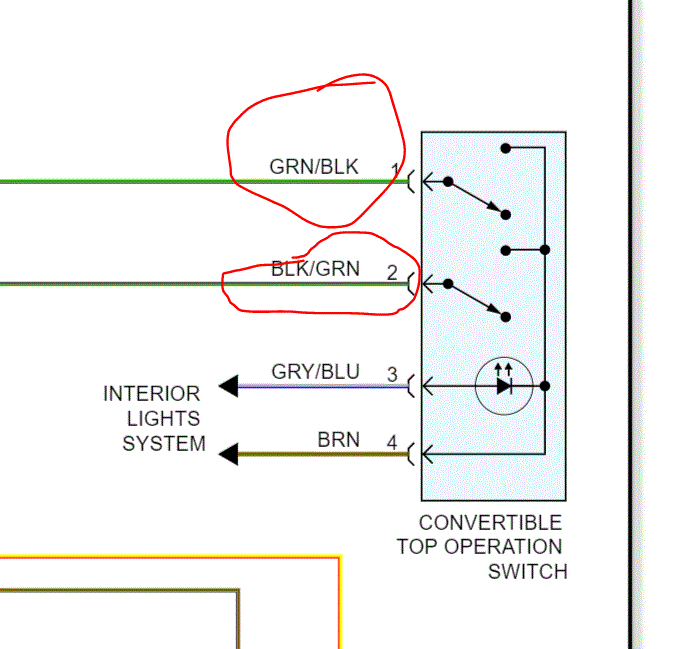
I found a technical service bulletin related to this code and an inoperative top. Take a look through it and let me know if it helps. Note that you will need to check the convertible top control module number which is located behind the side panel, rear seat passenger side.
This TSB does explain why this is happening as well:
_____________________________________
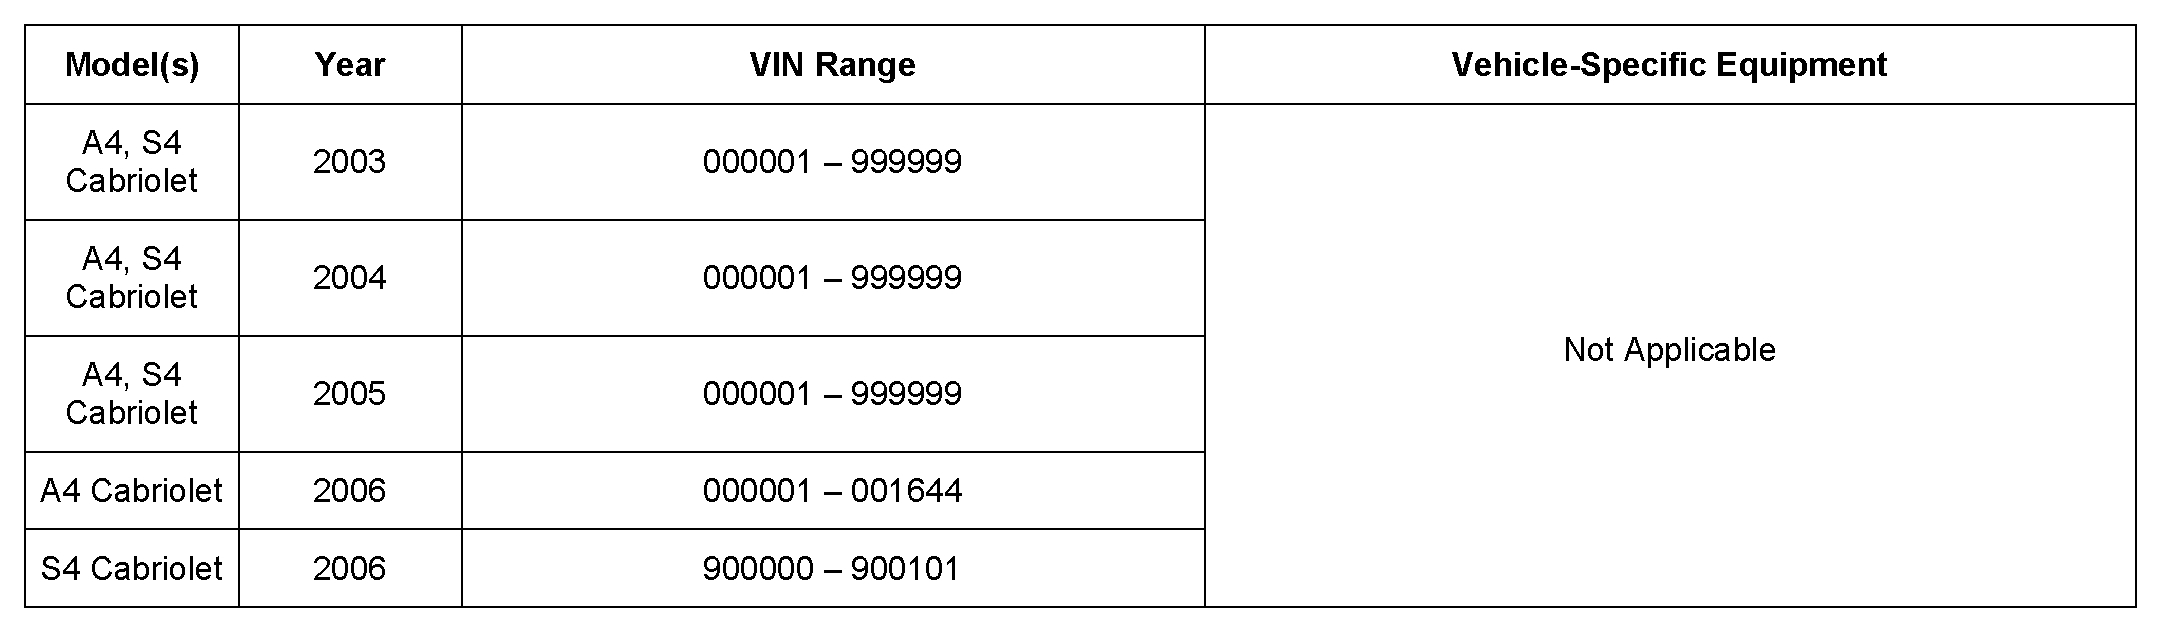
2006 Audi A4 Cabriolet (8H7) L4-1.8L Turbo (AMB)
Body - Convertible Top is Inoperative/DTC 2000
Vehicle Body and Frame Technical Service Bulletins By Symptom Body - Convertible Top is Inoperative/DTC 2000
BODY - CONVERTIBLE TOP IS INOPERATIVE/DTC 2000
61 08 05
2010940/5
December 1, 2008. Supersedes Technical Service Bulletin Group 61 number 07-10 dated October 9, 2007 for reasons listed below.
61 Convertible top inoperative
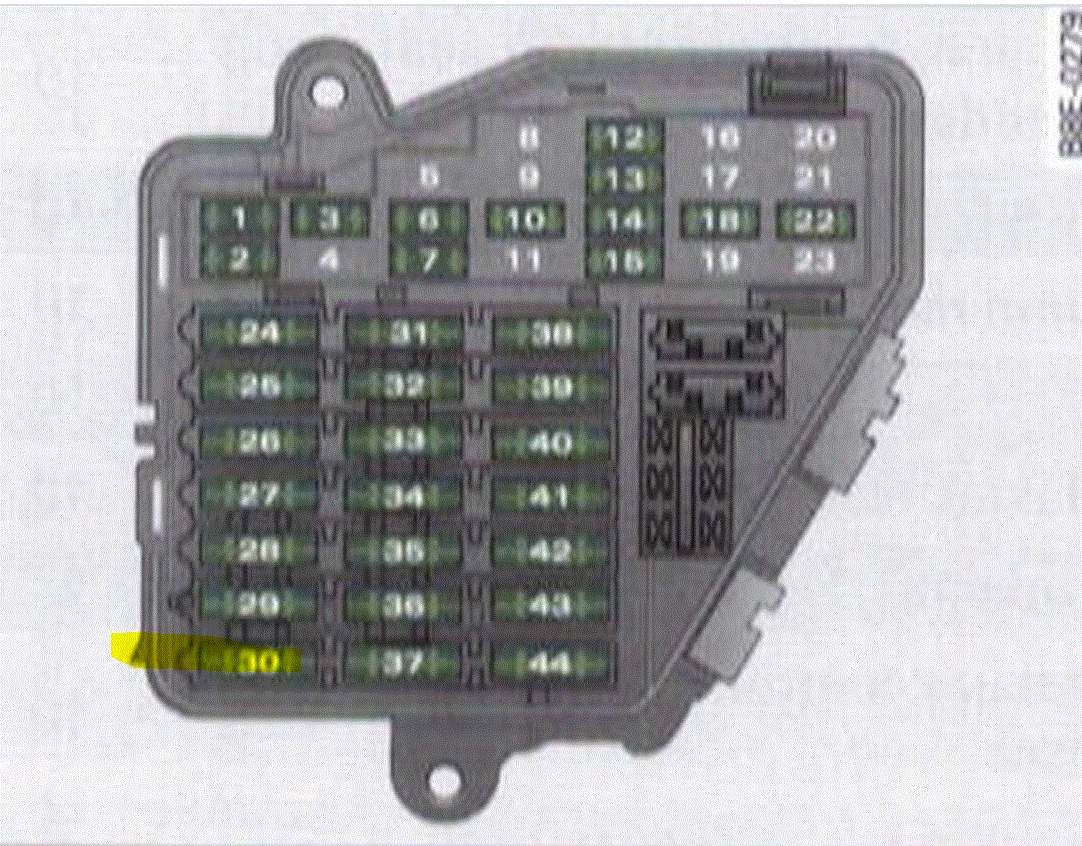
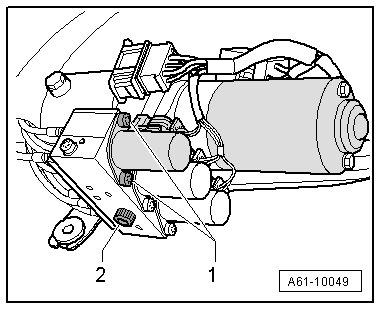
pic 1
Condition
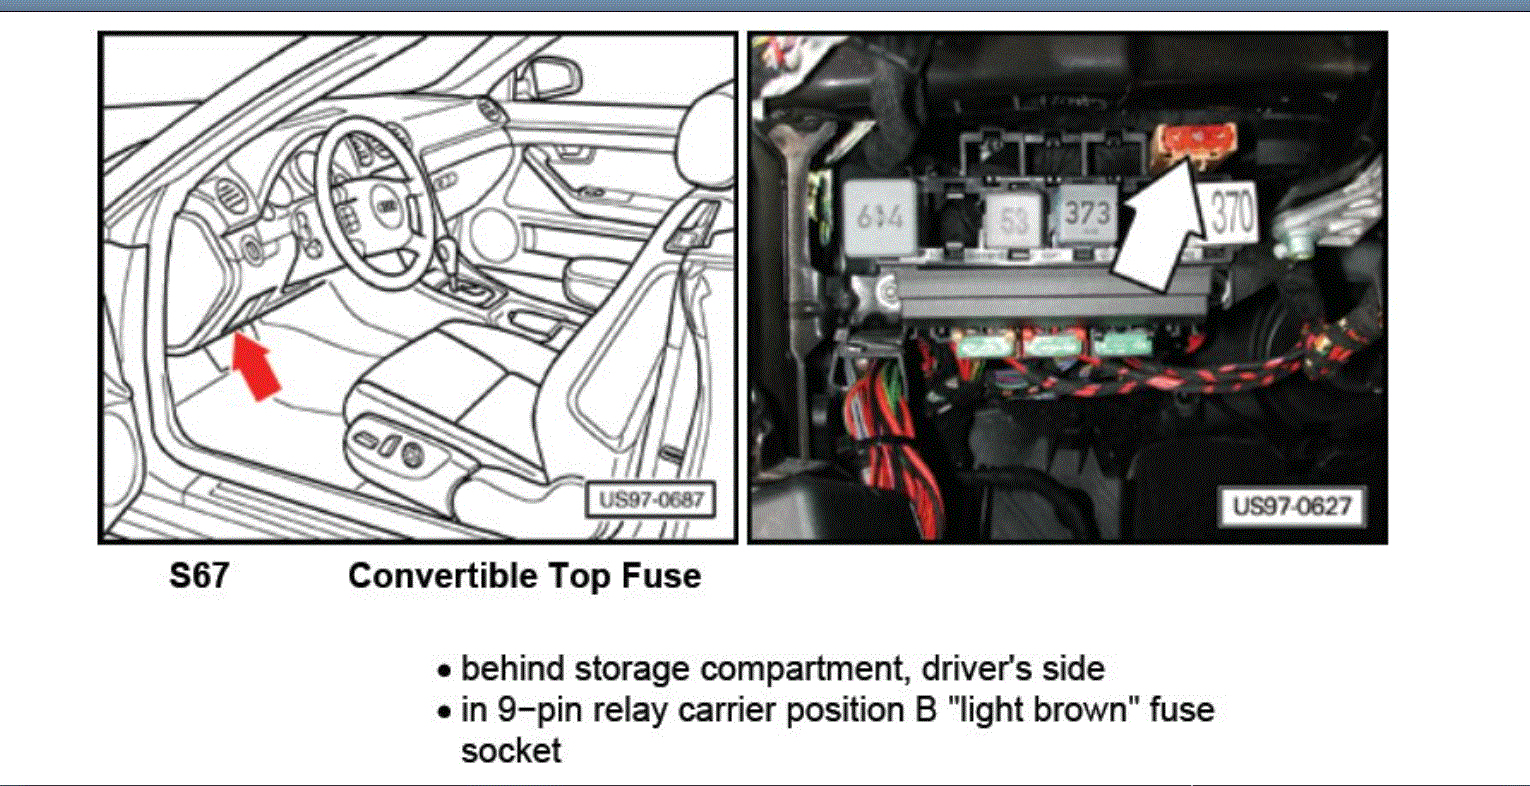
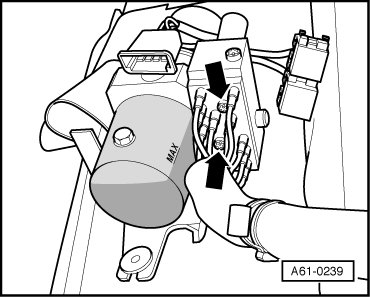
pic 2
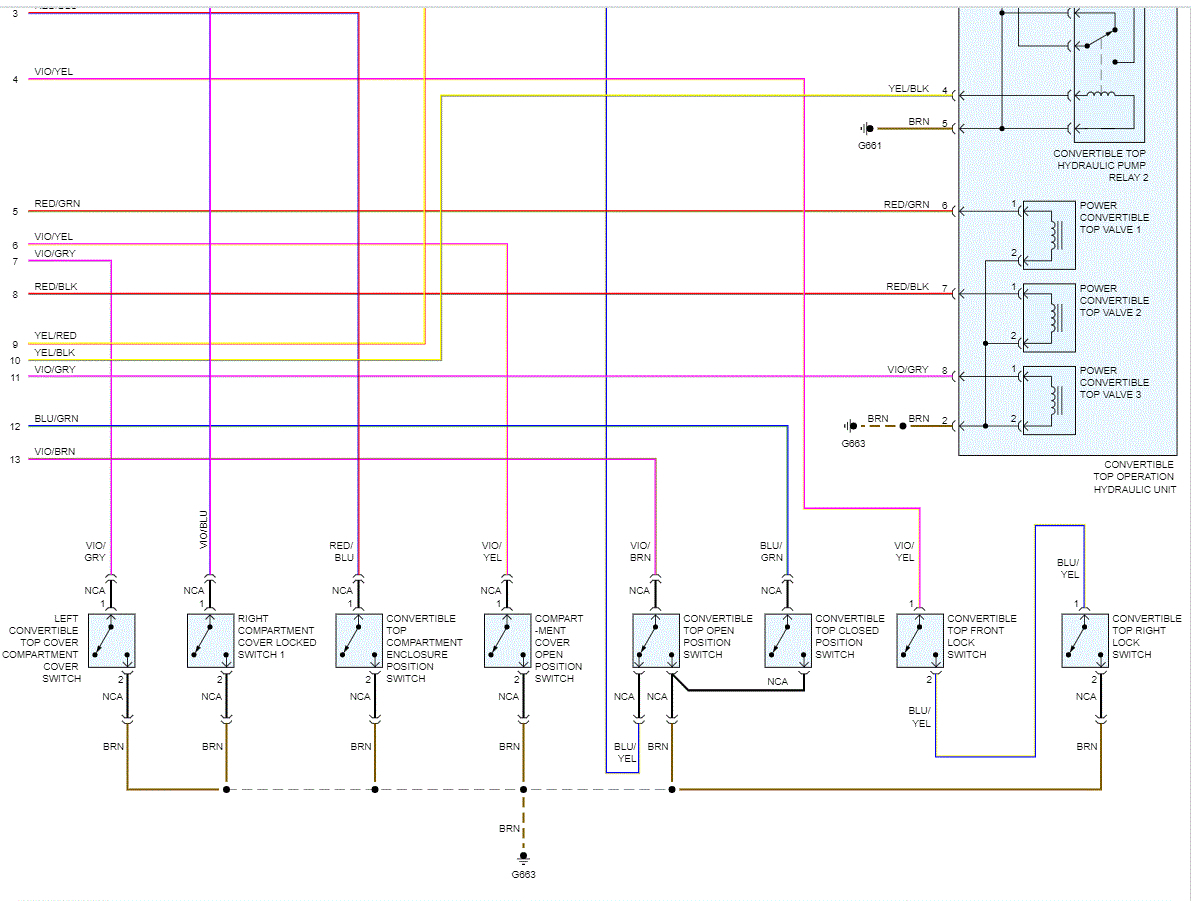
During opening sequence, tension bow has fallen out of range and top operation ceases. DTC 2000 (Switch position incorrect signal) will be stored in the Convertible Top Control Unit. This condition is more common when the vehicle is on an incline with the front of the vehicle elevated, such as when parked in a sloped driveway.
DTC 2000 will be the only fault present for this bulletin to apply. If there are any other faults in the convertible top control unit, these malfunctions must be corrected first. Only after these are corrected and the above condition is still present, accompanied by DTC 2000, should you continue.
Only technicians who have successfully completed Self Study Program 991203 - The Audi A4 Cabriolet and course number 991202 - Audi A4 Cabriolet Introduction are permitted to service the A4 Cabriolet. If you have not completed these prerequisites, do not continue with this bulletin. Have the case dispatched to a qualified A4 Cabriolet technician.
Technical Background
During the opening phase of the convertible top run, the front lock lifts from the windshield and the tension bow lifts to a vertical position to allow clearance for the convertible top box lid to open. The lid is then unlatched. During the unlatching of the top box lid and at the point when the tension bow is vertical, the opening strategy calls for the hydraulic pump to shut off momentarily. During this "off period" the tension bow is not under pressure and can slowly drift backwards before the top box lid can unlatch completely. Within this time period, the tension bow may have exceeded its plausible operating range. This will cause the top operation to cease. DTC 2000 (Switch position incorrect signal) is stored.
Production Solution
Optimized Convertible Top Operation Control Module beginning with software 9.0, part number 8H0 959 255B.
Service
1. Address the Convertible Top Operation Control Module and check the control module part number. If the vehicle is already equipped with Convertible Top Operation Control Module 8H0 959 255B, this Technical Service Bulletin does not apply. Any malfunction in the convertible top system with this part number module installed will likely not be related to the subject matter contained in this Technical Service Bulletin. Carry out the appropriate diagnosis and repair relevant to the failure according to the information in ElsaWeb.
2. Should the top operation fail under the conditions outlined in the Condition, do not clear fault memory. Diagnose as follows:
a. Check battery and charging system condition by performing a test with the Midtronics tester. Print results.
b. Check and adjust, if necessary, the convertible top box lid and puller tabs according to the specifications in ElsaWeb.
c. If the top is currently not operating, fully open and fully close the top manually. Power operation should resume.
d. Perform the Guided Fault Finding test plan completely for DTC 2000, checking all five top positions (test of import conv. top positions w. spec. values). Save and print this diagnosis log.
e. If the VIN of the subject vehicle is after VIN 8H_5K009649 for A4 Cabriolet and after VIN 8H_5K901294 for S4 Cabriolet, please also save and print measuring value blocks 6 and 7 to the test plan protocol.
3. If all four of these conditions are met:
- Battery tests good.
- All other top components are without malfunction.
- Convertible top box lid and puller tabs are correctly adjusted.
- All five top positions tested reveal that all switch positions in measuring value block 1 are as specified (no switch implausibility found).
Continue with diagnosis as follows:
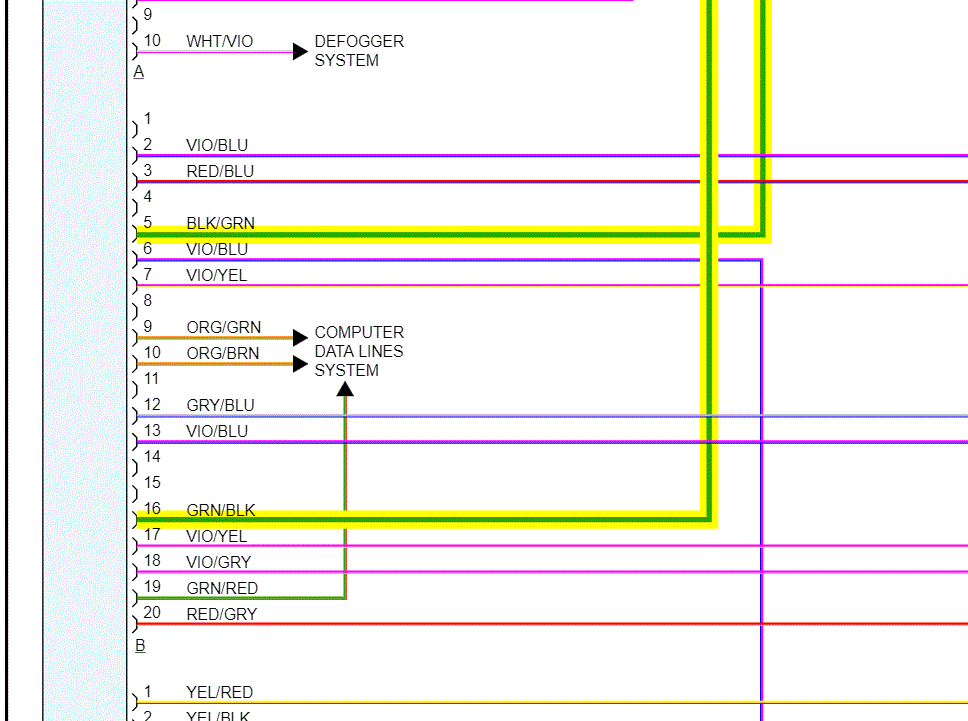
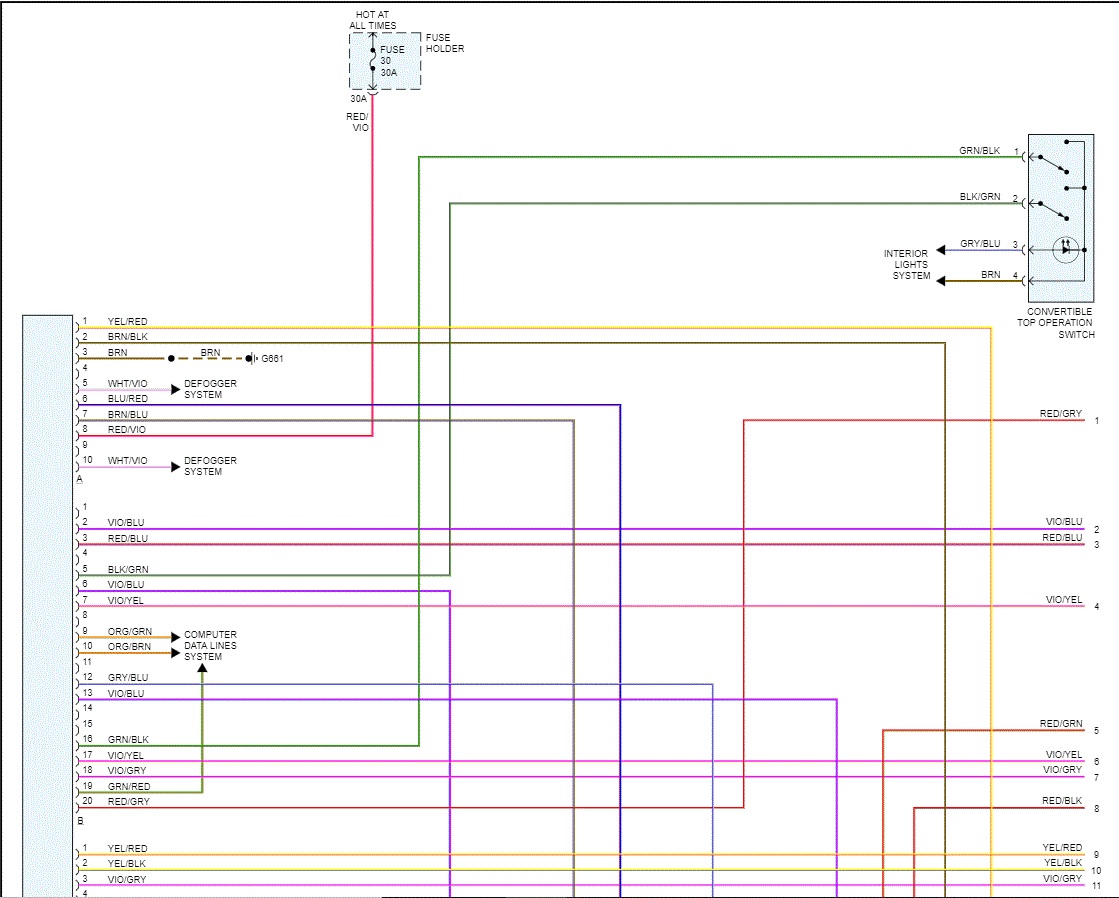
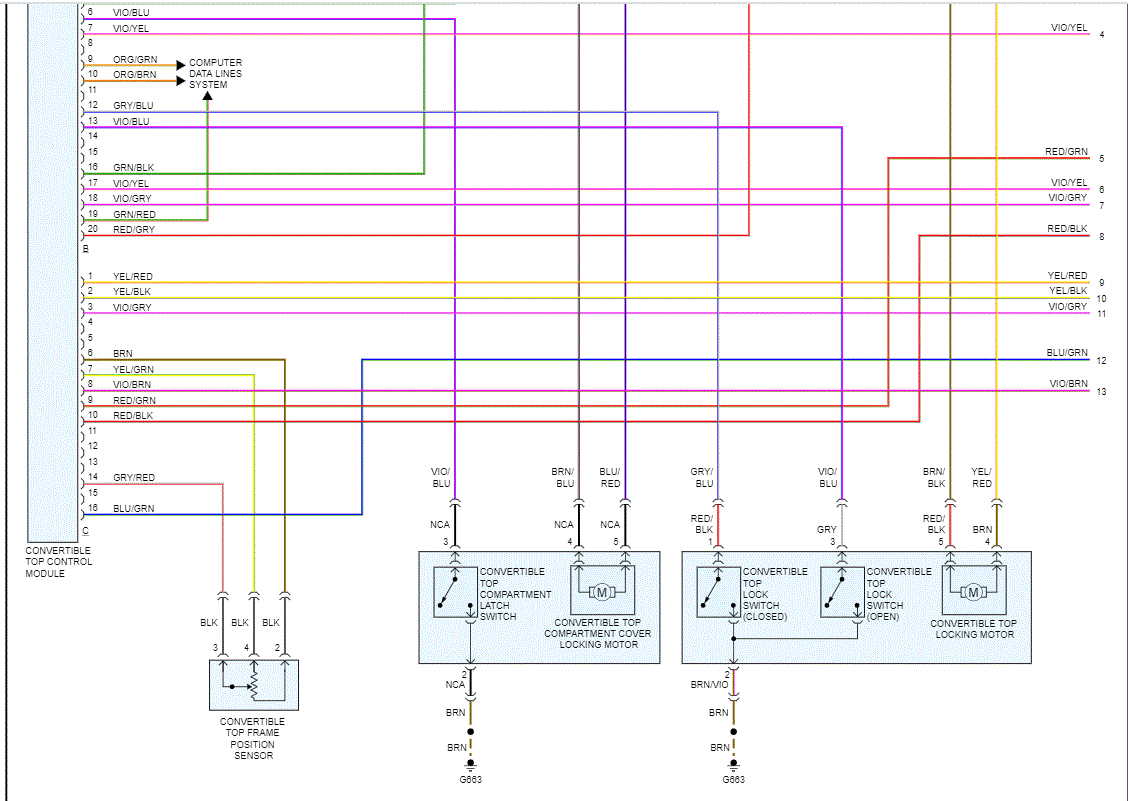
a. Connect the diagnostic tester and address 26-Convertible Top Operation Control Module. View MVB 1, field 4. This is the value for Convertible Top Frame Position Sensor G356.
b. Move the top into position 4 from test of import conv. top positions w. spec. values. This position has the tensioning bow up and the cover closed.
c. Turn the key off. MVB 1 will stay live. The tensioning bow can now be moved freely.
d. With the tensioning bow held to its uppermost position note the value for G356 in field 4. Write this value down.
e. At this time note the switch positions in field 2, specifically position 6 (3rd from left). This character will read 1 with the tensioning bow in its uppermost position. Slowly move the tensioning bow down while observing position 6. When this character changes to 0 note the G356 value in field 4 and write this value down.
f. Subtract these two values. If the difference is less than 22, replace Convertible Top Frame Position Sensor G356 (8H0 959 613) with the improved version, which is identified with a yellow dot.
g. After installation, perform J256-adaptation-Convertible top frame position sensor in Guided Fault Finding.
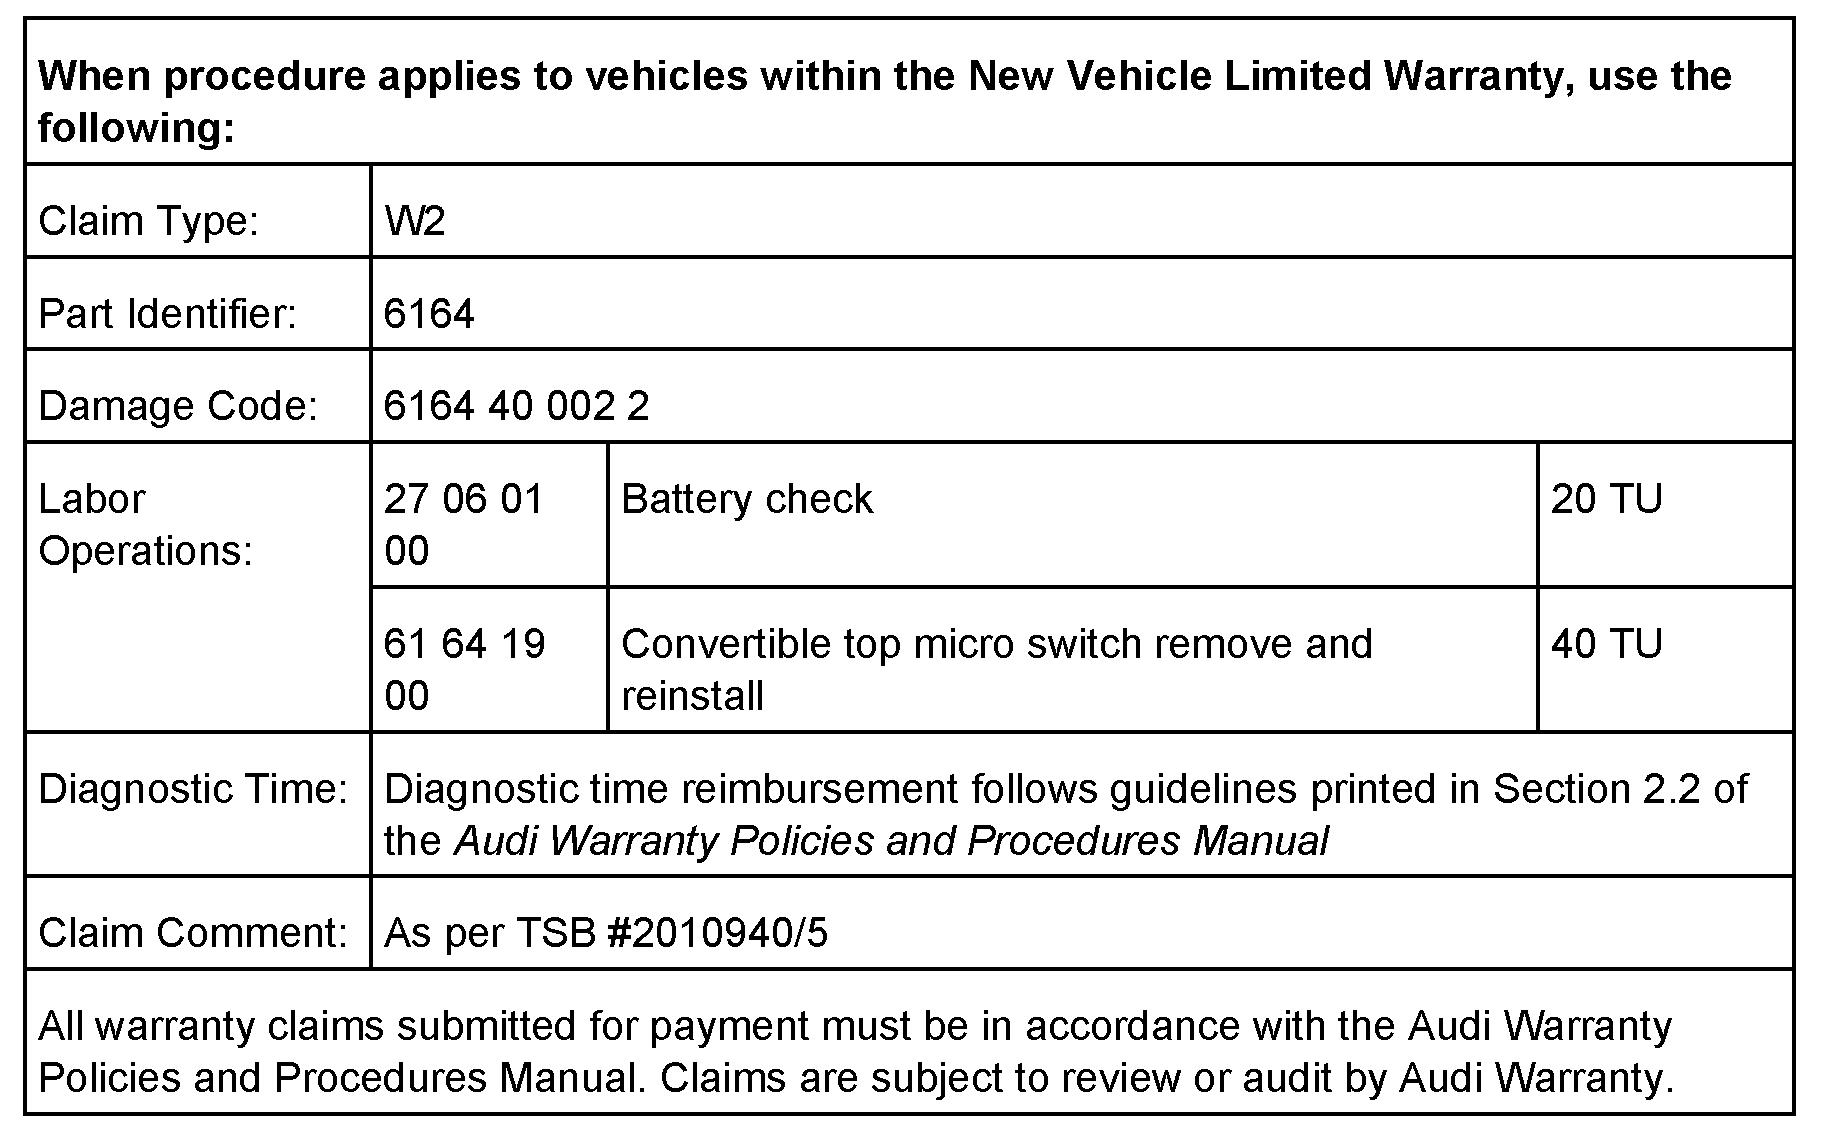
Warranty
Replaced Convertible Top Frame Position Sensors requested by the Warranty Test Center must have a copy of the Guided Fault Finding diagnosis protocol attached. Requested sensors that have Guided Fault Finding diagnosis protocol that does not support this symptom as described in this Technical Service Bulletin or is not attached to the requested sensor will be denied.
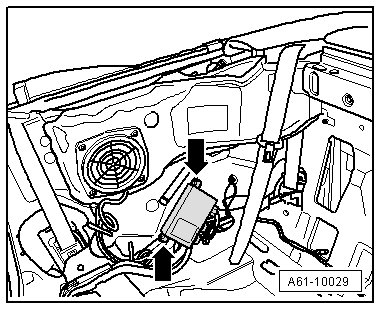
pic 3
Required Parts and Tools
Description Part No:
Convertible Top Frame Position Sensor8H0 959 613
All part and service references provided in this TSB are subject to change and/or removal. Always check with your Parts Dept. and service manuals for the latest information.
__________________________________
Let me know if this helps.
Joe
Images (Click to enlarge)
Sep 14, 2020 at 5:58 PM