Timing/Tuning problem with a CJ7

1980 JEEP CJ7
150,000 MILES • V8
Advertisement
Avatar
CJ MEDEVAC
  • CERTIFIED EXPERT
  • 11,004 POSTS
Here's what I have finally gotton motived and written!


All Righty Then,

I’m gonna sorta explain how some of this works, it will give you a BASE, to kinda build on.

Unfortunately MOST people start at the Top and try to work in, instead of understanding how the machine works 1st, before they “GO IN”!

Some of this I will leave for you to figure out on your own, before I just “Hand It To You”!---For now how the cam works for 1 cylinder (it’s the same for the other 7 CYLINDERS, except staggered out over 360 degrees of travel, of the crank)

The cam gear is traveling at ½ the rate of the crank, WHY????, That gives the Piston, 2 Ups and 2 Downs, for every CAM 360 Degree rotation (NOT CRANK, THE CAM)-----THE CAM OPENS THE VALVES AND CLOSES THEM, Each valve is opened or closed, at a correct time, while the ENGINE ROTATES 2 FULL TURNS to complete one cycle (remember the other 7, follow along doing the EXACT SAME THING at staggered intervals, ! (we just only reference the 1st one as a Calibration point) -----THAT’S WHY IT’S A 4 STROKE!!!! THINK ABOUT IT!---IF YOU CANNOT GET THIS IN YOUR HEAD, DO NOT MOVE ON……THIS IS THE MEAT ANND POTATOES OF ENGINE OPERATION!

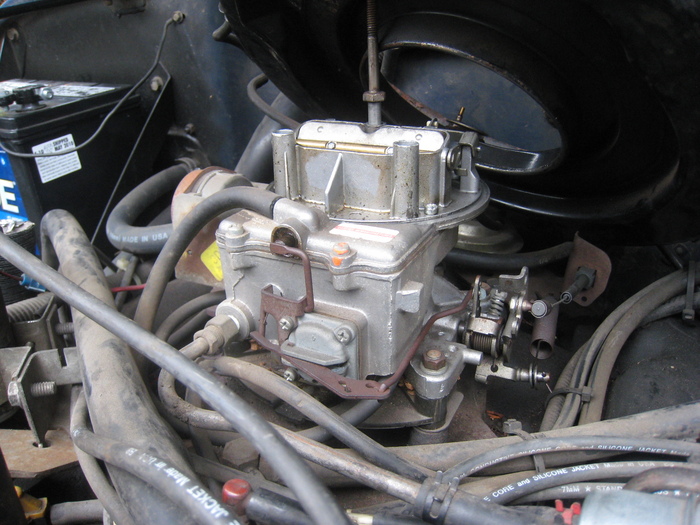
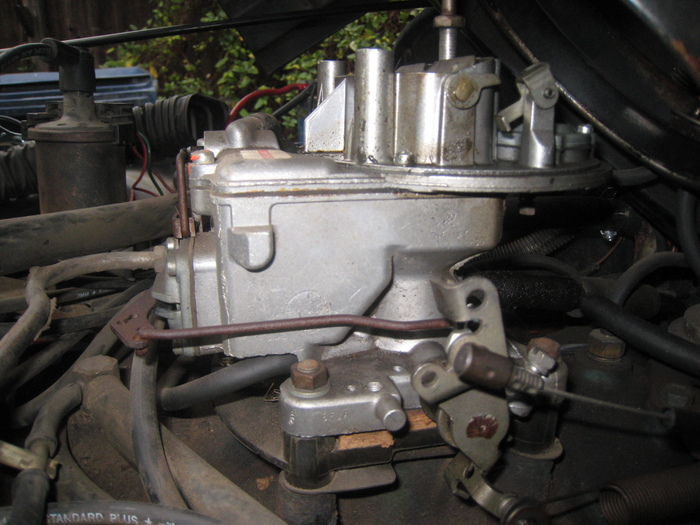
The Deal With Vaccum

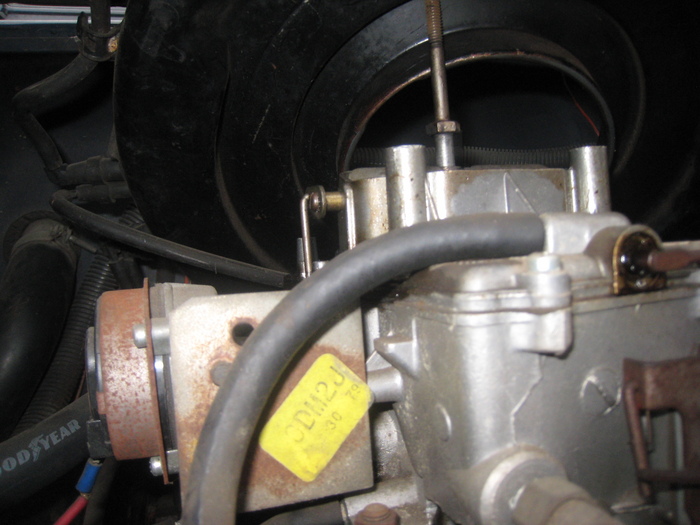
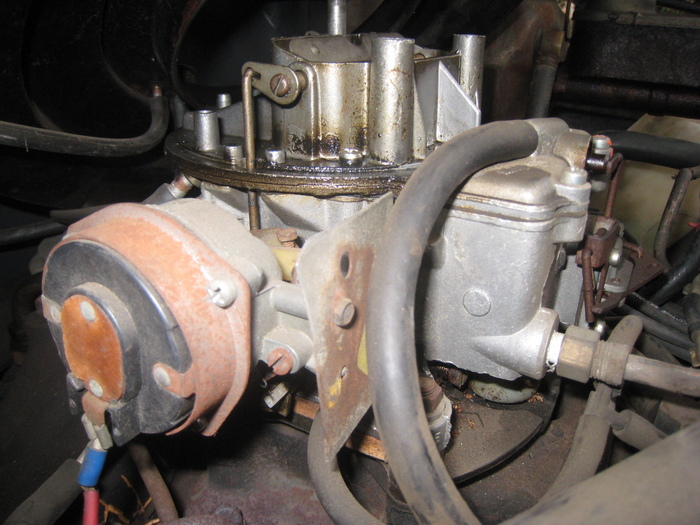
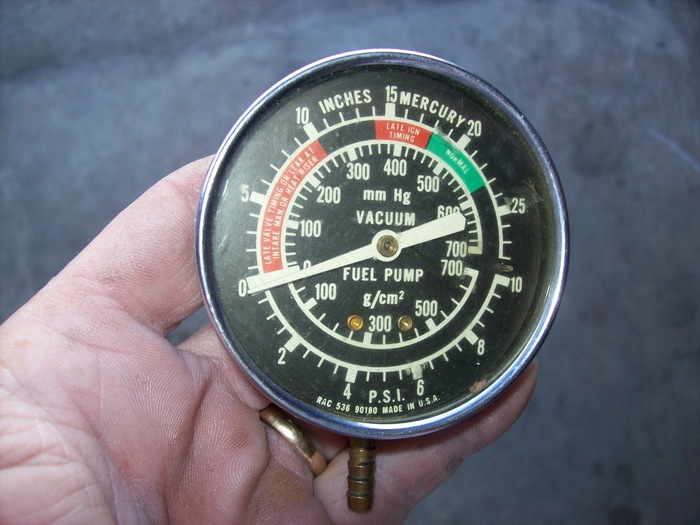
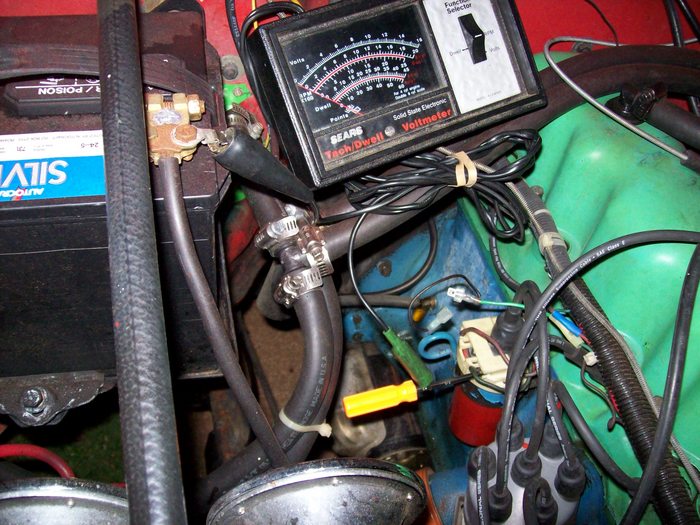
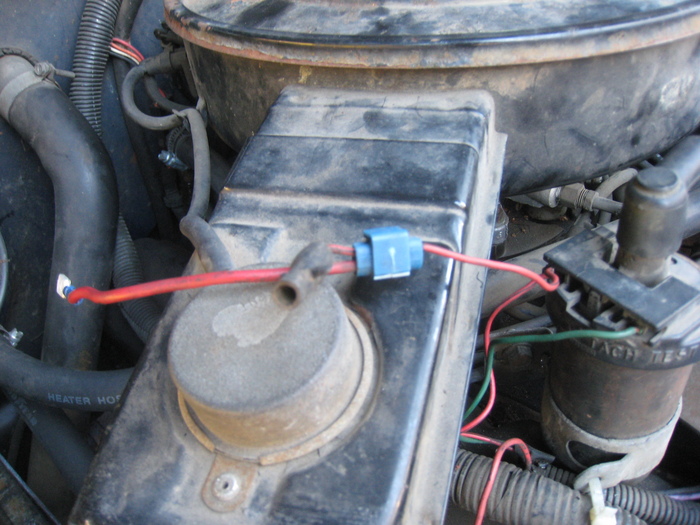
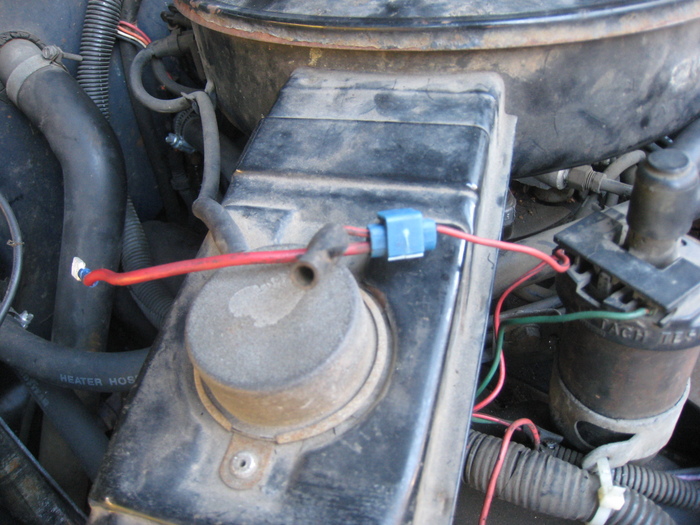
All engines produce vacuum, PERFECT VAC is 30 Hg (Un-achievable man)----A WONDERFUL ENGINE, will range between 20-22 Hg (“Inches Of Mercury”, is the way you say “Hg” for everyone to understand!)……Since its already present, Auto Engineers use it to run engine components, and other stuff too! Things like, Distributor Vacuum Advance, Warm up Doors, switches, and emission controls and other engine things, POWER BRAKE BOOSTER (if you have one), On a lot of new things, the HEATER Doors and Controls. Thank goodness a CJs Heater is all MANUAL with CABLE CONTROLS, Look in the FORUMS for the Cherokee and other “Comfort Vehicles” a lot of ‘em are having problems with the “AUTOMATED HEATER CRAP”!...........Not a “Comfort Rig” with no heat in the Dead of Winter!!!

4 CYCLE-----This is how this works!

I will start with the POWER STROKE, The EXPLOSION just occurred the PISTON is heading down (intake and exhaust valves are closed (because of cam), THIS IS THE WHOLE REASON FOR THE ENGINE!.....This is the POWER or DRIVING FORCE!

In order for the system to repeat, the Power Stroke, it must do some other stuff next!

Now we got EXPLOSION WASTE to get rid of, Thus on the way back up, ONLY THE EXHAST VALVE OPENS (cam action), and the Piston pushes out the “Exhaust” into the exhaust manifold, and on out the tailpipe. THIS IS THE EXAUST STROKE!

No it’s headed down again!---The Exhaust Valve Closes, and the INTAKE VALVE OPENS (cam action), it begins SUCKING IN A PERFECTLY MIXED AIR/ FUEL MIXTURE (From Perfect Carburetor Action, WE WANT IT THAT WAY ANYWAY!)……….THIS IS WHERE THE ENGINE VACUUM COMES FROM!!!!!!!!!! Cylinders doing this in rapid succession!

Next the cylinder is full, it hits bottom, The INTAKE AND EXHAUST VALVES CLOSE (cam) and the Piston starts back up…….it’s Compressing the Air/ Fuel Mix, in an “Air Tight Cylinder” (to make a good, powerful Explosion!) THIS IS THE COMPRESSION STROKE!

Now this is the part that is tricky!

Hear me thru!

When the piston reaches the EXACT TOP (TDC), and STARTS DOWN (After Top Dead Center, ATDC)—THE SPARK PLUG IGNITES THE MIXTURE and POWER STROKE BEGINS AGAIN!!!

BUT WHY????---WE GOT IT FIRING AT 8 BTDC!-----HOW CAN THAT BE????.........

Well if the ACTUAL EXPLOSION took place before TDC, the engine would want to ATTEMPT TO RUN BACKWARDS! (This situation is also called “Detonation” or “PINGING” (which sounds like a ball peen hammer on an anvil) It’s actually the explosion hammering on the Piston, Rod, and crank, as its really wanting to go backwards….This occurs when you are timed TOO MUCH BTDC!...........The explosion process is a little more complicated than this, but this is the MAJOR STUFF!

Timing explanation is next!

With ADVANCE IN THE TIMING, as car people know it, we are telling the spark when to occur-----WE ARE NOT MAKING IT OCCUR!.....OCCURENCE NEEDS TO HAPPEN AT THE SAME POINT (or close to it) every time the PISTON IS HEADING DOWN!

Using “STUPID TERMS”……….Lets say your engine is sitting still, at “0” RPM, at “2 DEGRESS ATDC” I WILL CALL THIS, “0 MPH, Miles Per Hour”, IN STUPID TERMS (Locked and loaded with a compressed fuel mix)-----If you shoot a spark, the mix will explode and the piston will travel down……….RIGHT? Electricity travels about 200 MPH (basically) THIS WORKS!!!

What about now, Your engine is doing 700 RPM, (STUPID TERMS) 700 MPH………the spark must get to “2 DEGREES ATDC at the same time it did at “0 MPH”----------HOW?, YOU SAY………….TELL IT TO SHOOT SOONER, WE CANNOT SPEED UP ELECTRICITY, SO WE JUST “LEAD IT SOONER”, or “SHOOT IT SOONER”, Or in car terms “ADVANCE IT”

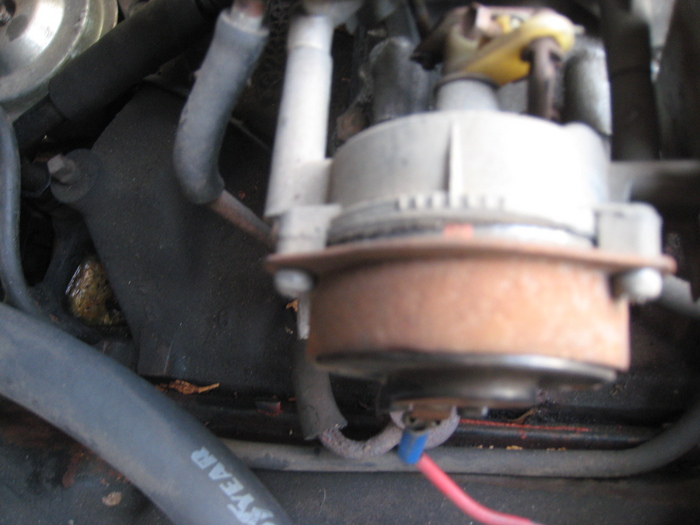
As it gets faster and faster, that’s where the internal distributor CENTRIFAGAL ADVANCE slowly adds advance, as engine speed increases (sorta a self adjusting advance!)

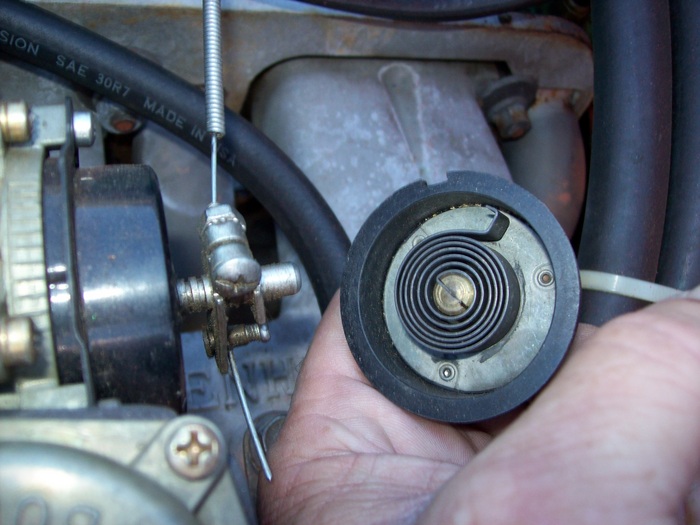
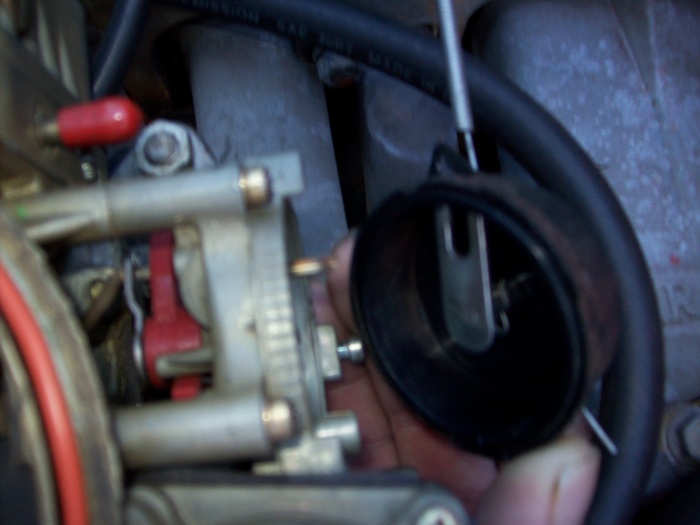
Then we have vacuum advance, sorta a New thing back in maybe the 40’s, it not only helps with fuel economy, it kinda helps the Centrifugal Advance, it too sorta self adjusts……….When everything is wonderful and you are traveling down the road, EZ and “NO LOAD”, Vacuum is high (let’s say 20 Hg) You are Mega Advanced, and all is great!...............Then you start pulling a steep hill, RPMs are the same (Centrifugal Advance is the same, Remember, it works off of engine speed)………….But Vacuum is dropping, the Vacuum Advance starts Dropping off, (Towards TDC, or back into the Power End of your Explosions, You are still in BTDC, Just Not as far back!

DOES THIS ALL SORTA MAKE SENSE NOW?????

THE MEDIC…………..with sore fingers!
Jan 16, 2011 at 11:15 PM
Avatar
KOEBES
  • MEMBER
  • 77 POSTS
Sorry about your sore fingers, but that was definitely worth it. I supplemented your explanation by moving graphics out of wikipedia.org (looking up "crankshaft" and "internal combustion engine"). YOu lost me initially with the cam moving a 1/2 the speed of the crankshaft, but looking at the graphics of the working of the engine you clearly could see all this and your explanation out of a sudden made everything perfectly clear.

Everything from then on made sense, too. I really appreciate it. You are very good in explaining. Ever thought about writing : CJ Maintenance for Dummies: a reference for the rest of us.'?

Let them fingers heal
Jan 16, 2011 at 11:56 PM
Advertisement
Avatar
CJ MEDEVAC
  • CERTIFIED EXPERT
  • 11,004 POSTS
This is Dual overhead cam (its got 2 cams, that act as our 1 does)

The operation of strokes is the same, This is also a 4 cylinder

Once you get the hang of this one SEARCH FOR OTHERS-4-6-8 Cylinders

You will see how complicated thing have become!

If you want to find one like ours, look for: A CARBURETOR, A SINGLE CAM, BEING A 8 CYLINDER FOR YOU!

A lot of these show Fuel Injection, Many are long and informative, and swing around to show you views!

http://www.youtube.com/watch?v=_y6PS-2j2Ug&feature=related

IN YOUR SEARCH IN YOU TUBE USE "ANIMATED ENGINE" ANIMATED 6 CYLINDER, ANIMATED 4 CYCLE ETC........WARNING, this can become addictive!

I want you to test Vacuum at idle, engine at operating temp.....See my diagrams above.

Then I want to make sure Vacuum lines look wonderful, ALL UN-USED T.I.T.S ARE CAPPED OR PLUGGED WITH A SHORT HOSE AND A BOLT

And TIMING is confidently right! (CHECK WITH A LIVE LINE (20 Hg?), THEN HOOK YOUR OLD ONE BACK ON.......EVEN A NEW DISTRIBUTOR MIGHT NOT WORK RIGHT, WE JUST WANT TO VERIFY IF DOES GO FULL TRAVEL, WITH THE "LIVE LINE", REGARDLESS WHAT THE "PORTED ORIGINAL" DOES

WE STILL HAVE NOT VERIFIED, VACUUM LINE LOCATIONS, ARE YOU ABLE TO COMPARE YOUR LOCATIONS WITH ONE OF YOUR VACUUM DIAGRAMS IN YOUR MANUALS, TO "MAYBE" VERIFY THEY ARE CORRECTLY HOOKED UP?......REMEMBER TO USE THE DIAGRAM FOR YOUR YEAR AND ANY OTHER SPECIFICS ABOUT YOUR JEEP, SUCH AS: 49 STATE, 304, YEAR, WITH OR WITHOUT CERTAIN ACCESSORIES.

We will move on to carb tuning

I want good close carb pics, well lit, even using a Shop light if you must! A MIRROR, IF NEED-BE!

You can always come back an Tweak stuff to make it better, that we have already covered

YOU MUST GET USED TO THIS STUFF.

EVERYTHING IS DONE AT OPERATING TEMP!

YOUR CARB LOOKS REALLY CLEAN, IS IT NEW OR REBUILT RECENTLY?

The hole you "STEP INTO" may be Warm up stuff not operating right, could be ACCELERATOR PUMP on the carb, out of adjustment, Heck, the choke may be partially closed---at operating temp (ain't dealt with that yet!)......IT MAY BE TIME FOR A REBUILD (even though I can, please do not make me do that, thats ONE on ONE--in the same shop, ME FUSSING AT YOU CONSTANTLY!)

Its usually EZer to buy a rebuilt one, (Even a Holley or other, NEW IN THE BOX)

I like Holley, its EZ to Jet, Usually is OK, to use straight out of the box (It needs to be road tested to see if it's Mixing Correctly, THIS IS ANOTHER TEST WE WILL DISCUSS LATER!). Parts are local or overnight, with a Holley, and Local fellers are usually familiar, and can assist you in getting stuff corrected!........Even Dragstrip people can aid in getting it Street Worthy for your needs! (they take pride in their JETTING KNOWLEDGE, and will aid you in a second)

IT'S JUST LIKE EVERYTHING ELSE, YOU MUST FIND THE RIGHT GUY THAT KNOWS IT INSIDE OUT, AND WILL HELP ----YOU----DO IT, NOT DO IT FOR YOU!

Generally a NEW FACTORY CARB, Is built better, and with new parts, than the one "Jim Bob" slung together, Friday after lunch, at the rebuild facility, using Clean OLD Parts!

OK, GET MY PICS UPDATE ME ON OPERATION NOW, AT OPERATING TEMP (DO NOT WORRY ABOUT WHILE COLD YET, WE WILL ADDRESS THAT SOON), ADD ANYTHING ELSE IN ABOUT WHAT I HAVE MENTIONED THAT YOU KNOW ABOUT (THIS MAY HELP WITH THE CARB ADJUSTMENTS). REMEMBER, AT OPERATING TEMP!

YOU CAN SEE WHY I WANT "YOUR PICS", I CAN MODIFY THEM AND SHOW YOU STUFF.

YOUR TURN,

THE MEDIC
Jan 17, 2011 at 3:08 AM
Avatar
KOEBES
  • MEMBER
  • 77 POSTS
Taking your suggestion from the photograph: the easiest nipple to use for testing purposes, I hooked up the T and with the engine running at idle the vacuum was -19 mm Hg. I guess that's excellent. Then I made sure the engine remained tuned at +8 degrees without vacuum and then hooked up the distributor's vacuum hose to that active line; it advanced to +21 degrees. I guess that's good, too.

Now everything is connected the way it was.

The carburator (pics will follow) is a rebuilt one. I think my son put it in in 1999.

Thanks for the photo with the suggestion where to test the vacuum. Made all the difference
Jan 17, 2011 at 8:19 PM
Avatar
KOEBES
  • MEMBER
  • 77 POSTS
Here are the pics
Jan 17, 2011 at 8:33 PM
Avatar
KOEBES
  • MEMBER
  • 77 POSTS
Correction: that were -19 INCHES Mercury or Hg
Jan 17, 2011 at 10:11 PM
Avatar
CJ MEDEVAC
  • CERTIFIED EXPERT
  • 11,004 POSTS
Just got back from a 140 mile round trip with Willy, Went to a 4X4 Sorta Does it all place, way back in the "Sticks", in Pickens, S.C.

It is still snowy, icy and muddy up there, at the base of the mountains!

They were really nice to me and the owner gave me a Super Spectacular deal on a looks to maybe be a Entire Serviceable Used Transfer Case, minus shift linkage.....I may be walkin' in High Cotton really soon............Either he's that nice of a feller, Felt sorry for me, or just wanted rid of me! (Maybe Willy, impressed him!)

I went by the "Home-place" and retrieved my top out of the woods (been there 15 or more years, cause I just don't drive Willy in the Winter!)

It needs painting (not now!), I reworked the sides to fit over my summer top hardware, and I weather stripped the doors. It's a sight! (1953 Sears "Allstate" Aluminum top, made by Grumman Aircraft!) It was New in the box, when the feller sold it to me, in 1992,.......$50!!!

We will "TUNE" your carb as soon as I write it up in "WORD", then copy and paste it in here......REALLY SOON!...Gotta work on Mr. Jeep for a bit, before I play! (a couple or 3 days)........please understand!

The "Happy Now" Medic

Here's My "Vintage 140 mile, at 45 MPH, Trip"!

1) Modifying and installing, last resort, with 2 of 4 vehicles down......Warmth!

2) The original 20 year old, homemade "SAHARA BREEZE" (wood edition!)

3) I have one of these, made out of sheet metal in "Mr. Jeep" as backup heat.

4) Ain't that.....Sorta Pretty?......Its, "Take your coat off" Hot in there now!

5) Hatchback

6) "Butterfly Doors" (See, it ain't a new thing, only for "High End" sports cars!-----With "Ratchet Up Windows"! (blow this up, and check 'em out)

7) This is what it looks like to Drive a "REAL JEEP"!

8) This is what it looks like if you are "With"...."Me and Willy"!

9) Tis is what you do when the plastic holding the mirror, Rots out!...GPS "Rubber Banded" above it!

10) This is leaving my NEWLY FOUND, HARD TO FIND, JEEP PARTS SANCTUARY!..........He does it all, and he has a lot of older parts, IT'S EVERYWHERE!, IT'S EVERYWHERE!........Gotta find you, one of these, in your area!!!

Jan 18, 2011 at 1:10 AM
Avatar
CJ MEDEVAC
  • CERTIFIED EXPERT
  • 11,004 POSTS
I want a few shots in between the CHOKE SPRING HOUSING, and the CARB BODY-----Close and in FOCUS (above, front, and rear, if possible)

YOU DONE GOOD!!!!!!!!!!, GETTING THE TOOLS, YOU ARE THE 1ST, I HAVE HELPED, THAT HAS BEEN THIS ENTHUSIASTIC!

DRIVE-ON, NEW JEEP BUDDY!!!!!!

WON'T YOU TAKE A 3 DAY PASS, NOW!....YOU DESERVE IT!........THIS ONE'S ON ME, ARE YOU HAVIN' FUN?.....THIS, LIKE A NEW HOBBY FOR YOU NOW?

THE MEDIC
Jan 18, 2011 at 1:33 AM
Avatar
KOEBES
  • MEMBER
  • 77 POSTS
Very impressive. That aluminum hard top by Sears, was that made for a jeep or did it just fit? I remember a photo of a British MP Jeep crossing the iron curtain as the fist allied vehicle after the Berlin Blockade ended in '48: it had a metal hard top and metal doors - it was deep winter. Yours looks a lot like that.

The photos will be coming some time tomorrow. No need to rush anything; the jeep's been up and running; took my wife out for a bite to eat; used the jeep; her comment: it runs better than before.

So no hurry. Work on your transmission. 3 days or more of "time-out" is fine.
Jan 18, 2011 at 2:28 AM
Avatar
CJ MEDEVAC
  • CERTIFIED EXPERT
  • 11,004 POSTS
Not ready yet with the carb stuff, I've got a buddy coming over to help me go over, my newly acquired transfer case and check end-play and such on the output shafts, before I put it in.

Before I throw my suggestion on you I want you to Get your Jeep to operating temperature, then take your vacuum line off of the DISTRIBUTOR, then CONNECT your new toy, Mr. Vacuum Gauge to the line. I want to know if vacuum is present and how much? (no need for a tee, just the gauge on the line)

I thought maybe you might want to try something....I have my "6 cylinder" set up this way, and it runs really well!

In the pics before, I showed you how to test MANIFOLD VACUUM, using a "TEE" and some vacuum hose.....Letting everything remain being hooked up, but the GAUGE was connected to the "New Line" that you gained with the tee.

This time do the same hook up, except this time do this:

1) remove and cap off the distributor vacuum line with a bolt

2) It might take a longer hose from the "tee", but instead of installing the gauge on the line, hook that line to the Distributor.

3) Now your distributor will be getting full Manifold Vacuum constantly (at idle, anyway).......This will Vac Advance the distributor fully at idle and at normal High Vacuum Times while running.

4) When you do this, Idle speed will increase (mine smooths out greatly!), Tune it back down to 700 RPM, using your Tach.....A previous pic, showed you the "IDLE SPEED SCREW" (idle screw) in which you will back your speed down with.

5) I know we haven't done the Carb yet, but run this a while, like this, just to see if you get Running/ Driving improvement...........DO NOT JUMP OUT IN TRAFFIC, UNTIL YOU KNOW IT WORKS and PROVES ITSELF!!!....I'D HATE TO HEAR THAT YOU GOT HIT BY A TRUCK, WHEN YOUR JEEP HIC-CUPPED 5-6 TIMES AND STAMMERED, 'CAUSE YOU DID NOT HEED MY WARNING!!!!!!

6) IF IT'S NOT WORKING WELL---PUT IT BACK TO THE WAY IT WAS!!!!

7) If this, in some kinda way will not get you thru an emissions test, put it back (at least till it does) SO WHAT I'M SAYING IS---REMEMBER WHAT YOU DID, AND UP YOUR IDLE SPEED BACK TO 700 RPM, IF YOU DO PUT IT BACK!........Do not forget to plug the "OLD" distributor line.

Let me know how it does.

I believe things may change a little when we Tweak your Carb (for the better)

We will get to that soon!!!

Here's my newly acquired case in the "Rough" The Yoke was a little loose...........Thats it on the left, I figured I'd clean and paint it, before we got oil on it, when we are messing with it! I still have to steal the linkage, plugs, and vent off of the cracked one. I repainted my "Hardtop", with 5 cans of spray paint. I'll get you a pic of that soon.

I KNOW, I KNOW.....We'll get to your carb!!!.....Yours runs, Mine Don't (yet!)

The Medic


Jan 21, 2011 at 4:40 AM
Avatar
CJ MEDEVAC
  • CERTIFIED EXPERT
  • 11,004 POSTS
I'm tired of going thru the motions to review your 1st Question, so I am linking it in here, so I can just click on it, to see it!

https://www.2carpros.com/questions/1980-jeep-cj7-v8-wont-start

The Medic
Jan 21, 2011 at 3:51 PM
Avatar
KOEBES
  • MEMBER
  • 77 POSTS
Nice looking and nicely painted transmission. I hope you're on the road soon again.

Here in the S. Fr. area is spring like weather: I am tempted to take off the doors and everything short of roof.

Okay: here's what I did. I ran the jeep on many errands cruising back on the interstate; it was at optimal operating temperature; I disconnected the vacuum hose from the distributor; connected it to the gauge: -21 inches Hg. If I increased the RPMs so did the negative pressure. So that's good!

I then realized that at optimal operating temperature it was running at 860 RPMs. Played with the idle screw until it was 700 RPM, looked at the timing; was off by 2-3 degrees; readjusted. Running fine.

This kind of choke I have I cannot find in any manual. Anyway: I looked at the choke valve in the morning before starting the car: it was standing vertical, straight up. I started the engine and it closed as it should.

I took some pictures but they don't come out that well. The close ups are so blurry that they are useless.

Anyway, here they are.

No hurry; the jeep is running well
Jan 21, 2011 at 10:26 PM
Avatar
CJ MEDEVAC
  • CERTIFIED EXPERT
  • 11,004 POSTS
ALL RIGHTY THEN!

CARB ADJUSTING IS REALLY CLOSE TO READY!!!

WHEN I SEND IT, IT'S GONNA BE LONG!!! (TOO LONG!), I WILL SEND IT, "A LITTLE, SOME PICS, A LITTLE, SOME PICS" SO DON'T "BUTT IN", TILL I HAVE ALL OF IT TO YOU!.....I WILL SAY, "I AM FINISHED AT THE END"

NOW LET'S SEE IF YOU PACIFIC COAST FELLERS CAN PERFORM A TASK, WITH NOTHING BUT PICS???? HERE THEY ARE!!!

THE MEDIC
Jan 22, 2011 at 1:34 AM
Avatar
KOEBES
  • MEMBER
  • 77 POSTS
Those pics are great!!!!
I will try it first thing tomorrow morning
Jan 22, 2011 at 5:30 AM
Avatar
CJ MEDEVAC
  • CERTIFIED EXPERT
  • 11,004 POSTS
PEAKING OUT YOUR BBD CARBURETOR (and others)


As you know, I am a Knit-Picky, Drill Sergeant Type; Wife says I’m “A.n.a.l” (wonder why, she has to be so mean?)……..At the end of this “NOVEL” I will kinda, Sum it all up, and it will then, sound EZ to do!

I want to verify our “Accelerator Pump” is still providing, A good squirt into both barrels!
ENGINE IS OFF! Look into Carb.

With a flashlight (NOT a “BIC” lighter!), Slowly pull your throttle back, you should see 2 “PERTTY” squirt gun streams of fuel, shoot, one into each barrel---Equal size, to each other!

This fuel AIDS in your engine, getting a burst of energy, to “GO”, Every time you push the gas pedal, WITHOUT THIS, YOUR JEEP WILL HESITATE and maybe die, EVERY TIME YOU ACCELLERATE! (This could maybe be one reason, for a hesitation)If we do not get 2 even squirts, Carb may/should be repaired (rebuild) or replaced………..This may be the “HOLE”, that you say you are falling into, Lets get the Mix right, then we will play with the Accelerator Pump!


Ready to tune Mr. Carburetor?
Remove your air cleaner assembly………Cap/ Plug off any vacuum lines/ T.i.ts you disconnected (on the engine end) when you remove it!
THIS 1ST PART IS IMPORTANT!!!
1st thing we are going to do is figure out where we are set now, just in case we have to come back to this point.

Go to the front of your Carb, there are 2 “Mixture” screws (some carbs the adjustment may be somewhere else), they may be exposed, or they might be inside a little Tunnel.

When we move these screws, we are going to do it slow.

WHEN! We bottom out, we are going to GENTLY TOUCH BOTTOM (NO MORE THAN THAT, NO FORCING!!!, Just an EZ touch)

If someone in the past has “Went Too Tight” our orifices may be “WALLERED OUT” (one orifice may be larger than the other, air flow will be exponentially more than the other) and precise adjustment may not be achieved.

This is why we need to know our exact position NOW! Just so it will run (if we have to put it back)

IF adjusting correctly, ---“Just Ain’t Happening”---(even if we cannot do this right, due to the previous DUMMY FACTOR Destroyed or over-tightened the screws). Still, Experimenting with your “Disaster Carb”, still may improve it a little!)

The next thing we need is a screwdriver; it must be LONG/SHORT ENOUGH to get to these screws, in your little “Obstacle Course” in front of the screws (stay away from the FAN!) It must fit the SCREW SLOTS WELL! (Slipping out, without knowing, means you lost your count!)

You may want to mark the Screwdriver handle with Tape ETC. so that you have 4 ------DIFFERENTLY MARKED------ increments (1/4 TURN MARKs for Reference! I PREFER 2, 180 degree marks line up with the screwdriver blade) we will be counting Turns, as you get better with this, you will graduate to 1/8 increments! You will be able to watch the flats of the screwdriver and have no need for marks!

I have whipped up a “Beginner Type” adjustment/counting screwdriver---with a piece of tape and a marker. MINE has 1/8 marks, But ONLY the “¼” increments are labeled with numbers.

As you rotate MINE, COUNTERCLOCKWISE---it reveals “0”, then “¼”, then “½”, then “¾”, then back to “0” (THIS WOULD BE THE COUNT AS YOU ARE BACKING OUT ON A SCREW!) ----“GOING IN”, you just gotta keep up with increments!

MY “0” and “½”, CORROSPOND WITH THE THIN PARTS OF THE SCREWDRIVERS BLADE (NOT THE FLATS, but this really makes no difference)

I MUST REMEMBER, GOING THE OTHER WAY (CW), I MUST TRANSLATE THE INCREMENTS “BACKWARDS”!

YOU CAN MARK IT ANYWAY YOU WANT! ! ! (RED MARKER “IN”---BLACK MARKER “OUT”---(in this optional scenario, My BLACK “1/4”; would also be my RED “¾”, My BLACK “¾” would also be my RED “1/4”.

AS LONG AS YOU AND YOUR ASSISTANT UNDERSTAND………DO AS YOU WISH!!!
Jan 22, 2011 at 6:58 AM
Avatar
CJ MEDEVAC
  • CERTIFIED EXPERT
  • 11,004 POSTS
I stole and revised, most of this from a previous post of mine, I have no clue why Many words are LINKS????


DURING THIS WHOLE PROCESS, YOU MAY WANT TO PERIODICALLY, REMOVE THE SCREWDRIVER AND VERIFY THE POSITIONS OF THE ACTUAL SCREW SLOTS IN THE CARBURETOR!.....and you have not slipped off, and turning nothing!

I AM SHOWING A 2 BARREL 6 CYLINDER “CARTER BBD CARBERATOR” IN MY PICS


We are going to call the screw ON THE DRIVERS SIDE-----NUMBER 1 SCREW (1st PIC).

The other will be NUMBER 2 SCREW (2nd PIC).

NUMBER 1 is the most important, because #2 is just going to be “ALONG FOR THE RIDE”, during every adjustment. (Whatever you do to #1, ……..You will do to #2 Also!)

Jan 22, 2011 at 7:07 AM
Avatar
CJ MEDEVAC
  • CERTIFIED EXPERT
  • 11,004 POSTS
If there are plastic limiter caps over the mixture screws, find a home for both, in the woods behind your house!

To see where we are now, Install screwdriver in #1 watching your reference marks, turn it CLOCKWISE IN, till it touches bottom, EVER SO GENTLY!....YOU WILL BE COUNTING, I LIKE COUNTING ½ TURNS…….EXAMPLE, I MAY HAVE “6”—1/2 TURNS AND “1”--1/4 TURN ( IN REALITY THIS IS 3-1/4 FULL TURNS)

Insure Your “Too Wide” Screwdriver, scraping the sides, is not FOOLING YOU! [Get one that fits easily into the “Tunnel”], you will be counting the turns, ACCURATLY down to the 1/8th (yours will vary DRASTICALLY, from mine!) Throwing “STUPID” Numbers, mine is: 4-1/8 “Full Turns” or 8-1/8 “1/2” Turns----RECORD THIS NOW, before you forget!..............Then Do #2………..4-1/4 Turns (or 8-1/4 “1/2” Turns-----RECORD IT TOO!

We want the Jeep to somewhat run decently, in order to adjust the mixture screws----so let’s start with #1 at 3-1/2 Turns BACKED OUT------#2 is along for the ride, Bring him out 3-1/2 turns too! (He will follow from here on out)

CRANK UP VERIFY IT WILL RUN

WE WANT THE JEEP TO IDLE….IT MAY BE POORLY…… we just want to maintain an idle, this SHOULD improve as we adjust! You may sorta back out to whatever your #1 “Originally” was close to [going in], such as maybe it was 3-1/4 turns going in, Just to start out EVENLY, Bring both screws “OUT” to 3-1/4 ( Always remember to put #2 at same setting as #1)

TURN OFF YOUR JEEP NOW, SO WE CAN CONTINUE, ------if we are good!

LET ME KNOW IF THINGS ARE ---NOT--- GOING WELL AT THIS POINT!

We have 2 ways to set the Carb, Vacuum Gauge or Dwell/Tach meter (Either way will work). For now we will use the DWELL/TACH METER. I like this method for several reasons: You can see “MICRO” movements of the needle, you can adjust Idle, up or down to RE-ZERO where you are at, and it’s a tool you already need! (no need for both, vacuum gauge and tach)

Peak Vacuum should = Peak RPM

After you get good with the 6 cylinder scale, you can just watch the tip of the needle (more precise) on the “GENERIC” outer scale (on my meter, it’s the voltmeter scale) to MAXIMIZE Precise, minute adjustments……….the tip of the needle would be observed for improvement, but the “4” or “6” or “8” cylinder scale is used to “REZERO” back to correct Idle speed, or a Good reference mark that is close to idle speed

I have sorta rigged my meter so ONLY the 6 cylinder scale shows ”AND” the top scale (voltmeter) shows. Basically: to find 700 RPM quickly, and maybe “Just a Tweak off of 700 SLIGHTLY” to line up on a really CLOSE-BY voltmeter line [the up-most scale on my meter] (the most sensitive end of the needle)


Pic 1) You can use a vacuum gauge to adjust, Pic 2) You can use a Tach/ Dwell Meter to adjust, Pic 3) You can cover the scales that do not pertain to your engine, and mark reference points (so you do not get confused)
Jan 22, 2011 at 7:22 AM
Avatar
CJ MEDEVAC
  • CERTIFIED EXPERT
  • 11,004 POSTS
Regardless which you use, insure you have plenty of light on the front of the carb. And your meter is lit well from behind you. I usually SQUINT ONE EYE (like firing a weapon) to LINE UP ON MY “ZERO MARK” to watch needle changes, as they move UP or DOWN………We are shooting for UP!
Now , as an experiment, we will move our Number one screw “IN” ---1/2 a turn---then we will back it out ½ a turn (where we started) then we will Back “OUT” ½ a turn……………Just to keep both screws even, turn it back in ½ a turn
WHAT WE HAVE JUST DETERMINED IS: WHICH WAY MADE AN IMPROVEMENT??? THIS WILL DETERMINE WHICH WAY WE WILL GO, TO KEEP IMPROVING…………..Both screws will stay with each other (in turns) as we go in the “Improving Direction”

If you feel more comfortable, stay on the cylinder scale for your # of cylinders, you can just use 700 RPM, and remain lower on the needle, instead of at the tip

I’m a plumber, I wanted to see if this Tach Method was as good as using the vacuum gauge, we had a Job Going at work, that had this real expensive vacuum gauge going in. The gauge was very sensitive, and was about a foot in diameter, lots of increments, compared to my automotive vacuum gauge, which is about 3 inches. Minute changes are FAINT and Hard to detect, on it.

I sorta borrowed it, for a day, before it was installed. We hooked it to my Jeep, along with the Dwell/Tach, I adjusted my Carb., using the Giant Vacuum Gauge. Then we maxed it out with my Dwell/Tach meter. I came up with nearly the same settings. So I’m pretty much sold with the TACH method!............Another use the one you want to, its all about improving the needle on either one!

ACTUAL TUNING

Insure no other device is touching, or will EVER, hold our throttle open (remove or adjust it so that it will never affect the throttle)..The only 3 exceptions being: The Idle speed Screw, and the one beside it (choke fast idle, on a 6 cylinder), and if you have A/C, any high idle solenoid that jacks up idle, to compensate for A/C compressor load.

Hook up your Dwell/Tach meter.

CRANK and warm engine to operating temperature.

Now check to see if the choke is fully open. CHECK and INSURE, High Idle is not touching (holding the throttle open, NOT EVEN SLIGHTLY!!!)

You SHOULD be back to NORMAL IDLE!YOUR METER IS SET TO TACHOMETER (RPMs) or Vacuum gauge is properly attached, if you use it instead

Insure the throttle arm is closed (by spring) and you cannot physically make it close any more. The Idle Screw should be contacting the stop….. When you are warm, verify we are idling at 700 RPM, Or MAKE IT HAPPEN (environmental changes could slightly affect this from last adjustment, and FOR SURE, our moving the mixture screws to the new starting point!)

Its decision time, we must pick our meter ZERO POINT. (I’m using the 6 cylinder scale for my RPMs, this is a 258, I’m using as an example)

On my meter, at this speed (700 RPM), I am really close to a mark on the upper scale [tip end, sensitive part of the needle), If your meter is like mine, the mark I chose, is at the tip of the needle (4 VOLTS, Since I am referencing off of the Voltmeter scale) this is ever so slightly DOWN, from this original idle mark.( In other words, I’m not quite at 700 RPM, using the 4 Volt mark, slightly off is OK!)

Every time you re-zero your IDLE SPEED, for now, Will be “4” on voltmeter scale (700 on the RPM scale). You already know, it is really slightly under 700 RPMs

We are running, and at temp,

We may be “stumbling” a bit,

on meter is ZERO for Idle speed (or “700”),

The carb will NO longer be referred to as: 3-1/2 turns---out; on both screws…...It is now ZERO, on both screws! (Unless we get confused and must start over, then you run ‘em both in, back out your initial turns, at that point we will call it “ZERO” again!)

OUT IS “RICH”………..IN IS “LEAN”

CALL THIS: “WHICH WAY DO I GO?”We are going to play with NUMBER 1 mixture screw, Insert your screwdriver and

SIMULTANEOUSLY! (TURN, WATCH METER, and WATCH SCREWDRIVER INCREMENTS!)

Give the screw “¼” Turn Clockwise (slowly)

Did we improve on “4”, going in from Zero, (our basically 700 RPM reference, at the tip of the needle)?

NOW, RETURN TO ZERO with #1 (CCW ¼ Turn)

Now turn it CCW ¼ Turn [from zero]

Did “4” improve, in that direction?
Return ¼ turn CW, Just so we are back to our Zero starting point! (now both screws are at same turns out……We should know now, which way we will be turning both, to get needle improvement)

You must move slowly, allow engine several seconds (5-10) to fully react, when you adjust!

WHICH WAY MADE AN IMPROVEMENT?...... IN or OUT?

THIS NEXT, IS AN ASSUMPTION, and BASED ON RON’S JEEP (this is my neighbors Jeep carb, in these pics)----otherwise you should understand the process, going in!

WE (RON and I) HAD IMPROVEMENT BACKING #1 OUT, ¼ Turn from “ZERO” [actually #1 is now 3-3/4 off the bottom, do not worry about that, Zero is what we call that now!], NOW WE HAVE SORTA ESTABLISHEDBACKING OUT---IMPROVES RPM! (Or opposite, maybe for you)

WHAT WE DO TO #1WE DO TO #2! BACK HIM OUT ¼ TURN, TOO! ---RPM will probably improve with #2 (actually we are really at 3-3/4 OUT, both screws, but we keep this out of mind)

OUR METER NEEDLE IS NOW ABOVE THE “4”, We are off of our reference mark!!! [Climbing] (Improvement, w/BOTH screws!)

RE-ZERO IDLE SPEED [“IDLE SCREW”] Back Idle Back Down to our mark “4” AGAIN (SO WE CAN DETECT IMPROVEMENT EASILY, AGAINST THE “4” Mark or Line!)

We are going to say, EVERTHING IS BACK TO ZERO AGAIN---WE HAVE JUST ESTABLISHED A “NEW” ZERO, WHEN BOTH SCREWS WERE EQUALLY POSITIONED (forget 3-3/4, if you mess-up, you can always, re-bottom the screws, counting the turns as you go, set both screws the same, AND CALL THAT, YOUR NEW ZERO!)

NOTE: Most beginners get messed up trying to keep up with their turns, That’s why I call both screws, being moved equally “Zero”, No counting necessary, just equal turns of both screws

Just remember----whatever you Finally “tweak” #1, reach over and do #2 the same increment.

Call it zero (each turn of #1, will be a fresh start!)

CONTINUEING WITH ADJUSTMENT!

We are going to continue to back out, ¼ at a time as before, REMEMBER TO DO #2 EACH TIME!

We are finally going to HIT and Probably---BACK OUT PAST---Our “SWEET SPOT” (Meaning: PEAKED OUT! NO CHANGE IN, NO CHANGE OUT)

When our “Zero, does not improve or goes downhill (decreases in RPMs) WE WILL STOP MAKING THESE, “COARSE”, CCW, ¼ Turn Adjustments!

We are TOO FAR OUT NOW (not by much, and we are TOO RICH!)

CALL THIS: “RE-TWEAKING”We are going to EASE back in Toward the “SWEET SPOT” (clockwise)[opposite what we were doing]----this time at 1/8 or 1/16 increments, #2 will follow along, each “Finished” process will be called ZERO, as before!.. RE-ZERO OF THE METER [idle speed, just so you will have a line to reference, and detect the slightest needle movement]

IT IS UP TO YOU, when we are this close to Finish, If you can detect needle movement, don’t worry about resetting the meter to 700

Watching the meter and FINE ADJUSTMENT amounts---IS REALLY CRITICAL AT THIS POINT!

When your RPM, MAXES OUT---you are sitting on the “SWEET SPOT”Stay there! (Both screws)

AT THIS POINT, YOU MAY WANT TO “MAKE SURE” ,as long as you keep #1 and #2, EVEN,----and BACKING-UP or GO FORWARD EVENLY,..as long as you approach the “Sweet Spot” from the “RICH” side [screw in to find the SPOT, NOT OUT],

PLAY ALL YOU WANT! (Screws even at all zero points!, IN or OUT)Confused? Go back to a known start point!

This will really impress your friends later, when you “Show Out”.

Re-zero Your IDLE to “4” Or 700 RPM (last time) Throttle up a few times, insure, we “Settle back to 700 RPM IDLE setting, when engine stabilizes.
To sorta SUM this whole Novel up: Find and record where you are “SET” now---Then EVENLY move the 2 mixture screws, “OUT”, SLIGHTLY TOO FAR—The Move them “IN” slowly to find the Best–Peaked out position on your Tune up instrument….You can do this over and over, until you are HAPPY, with your final setting!............Yes saying it like that was, way too Simple!

SHUT HIM DOWN

ARE WE RUNNING SUPER NOW?!Lets leave idle set at 700 RPM, just is sorta a good even speed![especially to help warm up]......If you get a lot of tailpipe “Rumbling” or “Popping” during DECELERATION (foot completely off of gas) you may want to drop idle slightly. I WOULD STAY ABOVE 650 RPM (so it won’t cut off) and BELOW 750 RPM (STAY IN IDLE CIRCUIT, NOT ON PRIMARIES)!

LET ME KNOW HOW IT GOES, TELL ME YOUR/MY PROBLEM AREAS SO I CAN TRY TO GET IT/EDIT RIGHT, FOR THE NEXT POOR SOUL THAT MIGHT READ IT!

THIS IS FOR A 258 6 CYLINDER WITH A STEPPER MOTOR CARB We have disabled many things on your rig, Carb. Replacement recommendation is: A 1979 ERA BBD. I also like a manual choke. Let you pick when you need it, there are fewer automatic things messing up, if one is installed…… (Insure your choke is functioning properly, whatever set-up you have…………… ”Take off “the breather cover and inspect whether it goes closed, when the throttle arm is actuated, WHEN IT IS HAS NOT BEEN RUNNING---(AND IS “COLD”, LIKE ON A COOL MORNING!)

I WANT YOU TO TELL ME ALL OF THE DRAMA, HEARTACHE, AND ANY “SCRATCHING OF THE HEAD EXPERIENCES” CAUSED BY MY ANSWERS!”. SO I CAN IMPROVE---NEXT GUY MIGHT UNDERSTAND THE SITUATION!

Correct terminology for stuff, I sorta made a name up for----Can be found in your manual!
Wash your engine (inexpensively and well) with “Purple Power” Let it sit for about 5 minutes, KEEP IT OFF OF EXTERIOR PAINT! Rinse with a hard stream of water. (Rinse body well too, IN CASE SOME GETS ON IT). If you soak dist. cap (a lot) and trouble cranking up, Remove cap and dry it out.

Close your hood----ONLY OPEN IT NOW, FOR YOUR FRIENDS TO ADMIRE IT!
We will play with your accelerator pump next………IF WE NEED TO.
Now while driving, does it Hesitate, when you give it pedal?

What’s Next Boss?
I was told by a “Big Guy” that we had the Longest Question/ Answer session so far; he was well pleased and Loved it! (How could you not Love me?)…..Lets make it a record, Keep throwing stuff at me.
I HAVE ONE MORE THING YOU MAY WANT TO CAN TRYLET ME KNOW, IF YOU WANT TO SEE IT---I HAVE PICS ON STAND-BY

IT’S SORT OF A FIELD, ON THE VEHICLE, CARBURATOR CLEAN-OUT, PROCEDURE! (May improve your “Sweet Spot”), I found it works well, when you find idle running crappy, for no reason!

I am finished with adjusting the mixture screws!!!

The is a big ruckus going on in the Garage, where both of my Jeeps are at..........I guess I'll have to run 'em all off again, before my Wife wakes up!


The Medic

Jan 22, 2011 at 7:29 AM
Avatar
KOEBES
  • MEMBER
  • 77 POSTS
Nice stuff when you're in the garage alone after hours.

These instructions are AWESOME; I have to digest them first. But I identified screw #1 and #2. I think I have to read your instructions 4 times, and probably print them out, before I attempt to tune this carburator. But your idea with a tape around the screwdriver and marking it in 1/2, then 1/4s and then 1/8s is great.

In the meantime the CJ is dripping cooling fluid like crazy: the fluid drips off the harmonic balancer and seems to come from the passenger's side, just above the timing marks. I have no way to lift the car to see what's going on; if I can't find what it is I might have a shop take a look at it. from above it looks dry, from below it is wet, can't pinpoint the leak
Jan 22, 2011 at 10:08 PM
Avatar
CJ MEDEVAC
  • CERTIFIED EXPERT
  • 11,004 POSTS
Sounds like the Water pump

Use a bright light and a small mirror to look for it!

Many times, they drip from a small hole on the bottom of the pump, when they start going bad.

You gonna do this replacement yourself?

It's not real hard!!!!!!!!!!!!!!!!!!!!!!!!!!!!!!!!!!!!!!!

This is it at Advance Auto (price w/ my zip code)

http://shop.advanceautoparts.com/webapp/wcs/stores/servlet/product__5421322-P_54_R%7CGRPCOOLAMS_1391319109___?zoneAssigned=1

All you would need extra is maybe 2 gallons of antifreeze ( I mix mine 70% Coolant, 30% Water, then pour it in, to be assured it is 70/30. If I add later, it's poured in already mixed 70/30.....always right, no matter what capacity is needed)

And some "Indian Head" or other brand gasket shellac

Maybe $55 or so, total, unless you want to replace the hoses/ belts, while you're in there.

How much would a shop out there charge?.......I feel it would be MUCH!

This would be a GREAT, 1st Jeep "MECHANICAL" repair!

It's not real complicated (YOUR REAR BRAKES ARE A LITTLE MORE COMPLICATED, BUT I COULD GET YOU THRU THAT TOO!), and it's basically like removing a bolted on cover, once you get the belts, fan and hoses off.

I KNOW AND YOU KNOW,.............YOU'RE THE MAN!!!!!!

I WILL GIVE YOU CONFIDENCE, IF YOU LACK IT.........GET DOWN, AND KNOCK OUT 50!!!

You could have it finished in 3 Hours or less (me, 1-1/2 hours or less)...(And I take pics and clean to perfection)...If you stay on it!

It's just like building a MODEL CAR, like when you were a kid, 'cept it's bigger!

Yes..........I will help you!

Got decent SAE Wrenches and a DECENT 3/8 Drive socket set?

If it is the pump, WHEN YOU PICK UP THE REPLACEMENT, A re-manufactured one is FINE!.....Unless a new one is close in price, stick with the REMAN!

It's a small job like this that will make you feel good, and save you money.

Just please let me know what "THEY" would nail you, to do this EZ task.

The Medic
Jan 23, 2011 at 1:31 AM
Avatar
KOEBES
  • MEMBER
  • 77 POSTS
I will get a mirror and take a look at it. The other leak behind the carburator I showed on the photographs seems to me more related to a leaking hose connection. That should be easily fixed.

Today I ventured again in changing oil and oil filters, both on the Jeep and the 1986 VW Vanagon I bought 2 months ago. I gave it up because to deal with the used oil became a problem. Now I found out that the garbage collection picks up used oil in the proper containers (they are gallon milk containers with a green top) every week; just place the container and the old oil filter next to your recyling stuff garbage can - gone. No extra charge.

Again, I will take a mirror and look at it tomorrow. BTW, reading all the manuals I found out the 304 must be timed in California 5 degrees BTDC.

Carburator still listed as a work project; how do you cap those vacuum intakes of the engine; can you buy little round wedges or other kind of stoppers or is it "improvise the best you can"?
Jan 23, 2011 at 2:29 AM
Avatar
CJ MEDEVAC
  • CERTIFIED EXPERT
  • 11,004 POSTS
OK,

A lot of auto shops take in your used oil, they burn it in special heaters for WARMTH, in their shop.....I take it 3 buckets at a time (15 gallons) to a Engine rebuilding company

The California Specs are for Vehicles {{{{{{Designed and Sold}}}}}} for/ in California (their Vacuum line system is usually different than 49 states)

I would continue to tune Your Jeep for the region it was built for....That should make it run as efficient as it was designed to be.............Deviations may make it, not run efficient, and Emission testing may show its not burning efficiently (I know little about the way they test)

I like Vinyl Vacuum caps----Rubber ones rot---Next best is "Fuel Line" with a bolt crammed in it!

Most parts stores have them, you might call around to find one with "Vinyl Caps"......Many have a "HELP!" section, the caps there are usually Rubber.

Now, give me a Nice Essay on how things have worked out, What about the Choke door I just went over? Has the recent stuff helped, when are you going to do the carb, so we can finish the choke? How are you running.....ETC ETC.......I Crave Info!!!

I'm gonna throw in a Carb Pic with some on it (most were installed on it, to keep the Dirt Daubers out, while it is stored) The Screw being turned is is the idle on a Carter BBD 2 BBL (this is my old carb, I have a 4 bbl on my 258 6 cylinder now).....On this carb is the other screw is for the high idle steps (choke related) Your steps are BETWEEN the CHOKE and CARB......There are 2 adjusting screws there, DO NOT MESS WITH THEM, TILL CARB IS TUNED, I WILL INSTRUCT YOU ON HOW THAT WORKS TOO!

The Medic
Jan 23, 2011 at 3:57 AM
Avatar
KOEBES
  • MEMBER
  • 77 POSTS
I better copy this test before posting because it was rejected the first time

The choke adjustment:
I loosened the screws until the black housing turned
I touched the throttle: choke closed
Touched throttle again: Choke open
While having the choke open with the throttle fully open rotating the black housing did nothing
While having the choke closed while releasing the throttle, rotating the black housing did nothing.

There is a red mark on the black housing and on the body a prominent line with degrees CCW and CW.
I aligned the red marking with the center line.
I will leave the engine cold and uncranked in case we need to repeat the task
Jan 23, 2011 at 6:06 PM
Avatar
CJ MEDEVAC
  • CERTIFIED EXPERT
  • 11,004 POSTS
ROG,

The adjustment needs to be made with the throttle held back (open) and engine cold----then tighten the screws......Then Test!

Have you taken the thing apart before?

Your spring may be broke, or just not grabbing the Tab.

It's EZily checked

1) Lay out a towel or something under and around it..........YOU WILL DROP THE SCREWS MULTIPLE TIMES!

2) Mark the top of the retaining ring with a marker, they usually only line up with the screws, ONE WAY!......and it only springs into the black cap, ONE WAY!

3) Take out all 3 screws....the cap should almost fall off.

This is what it looks like inside....See the TAB in Pic 1, protruding from the aluminum housing, to the right?

The spring has a hook on it, it GRABS the TAB, if it's installed just before the TAB and slightly rotated

(disregard the cap in pic 1, its my MANUAL CHOKE, it takes the place of the spring)

The cap you have will look like PIC 2

Just put it back on, and rotate to catch the Tab, then re-install your retaining ring and screws.......Then attempt the adjustment in the previous pics.

Like I said before, I like being in charge of when the choke is on or off, that's why I like a manual choke, I takes time to get used to it. Pulling it is no problem, it's remembering to Adjust/ or pushing it in, after you get to Op-Temp!

PIC 3 shows the cap provided with the manual choke kit, I had to install the shaft in it to the proper depth ETC (instructions), The TAB Just rides in the Forks (Nothing is permanently modified, so you COULD put it back, if you kept your original parts!)

You know, I have a Walmart Album, all about this....Did you see it, still have it, or do I need to re-send it to you?

The Medic
Jan 23, 2011 at 8:27 PM
Avatar
KOEBES
  • MEMBER
  • 77 POSTS
Thanks. I will take a look at the spring and report back.

I got your Wal-Mart album about installing a manual choke. Thanks a lot!
Jan 23, 2011 at 8:51 PM
Avatar
KOEBES
  • MEMBER
  • 77 POSTS
Took it all off. There was a tab that with a slot where the spring would fit in. I made sure the spring was slotted through that slot.

Now: with the choke closed (everytime I open the throttle the choke stands nearly vertical = open), I turned the black housing CW until the choke barely opened; moved back just a tad. Tightened everything. Now the red marker has moved 3 marks CW.
I hope I did it correctly. If not, I will repeat
Jan 23, 2011 at 9:10 PM
Avatar
KOEBES
  • MEMBER
  • 77 POSTS
Took it on the road.
Died twice after starting. Then I could back it out swiftly out of the driveway; minor hesitation when heading forward overcome by stepping on the accelerator. At the first traffic light using "normal" gas pedal action, the car nearly came to a complete abrupt stop with the giant hesitation. Now it is running fine, probably better than ever.

Should I test the electric cable going to the choke?
Jan 24, 2011 at 2:03 AM
Avatar
CJ MEDEVAC
  • CERTIFIED EXPERT
  • 11,004 POSTS
The wire into the cap is nothing more than a little heater, to help the spring warm up faster and the choke come off faster.

Now you sorta know the technique of how it works, you might want to tension it shut a little more than I told you at 1st.

I'd say maybe after 2 miles of driving (from stone cold), it should be standing vertical.....Your Jeep is probably at operating temp in that amount of time, and the choke should not still be closed (or even partially closed)

If you are at operating temp and the Door is not Vertical,

Kill your engine, loosen the screws slightly---hold the Throttle arm open, twist the black cap a little, until the "Door" is "just" standing Vertical (w/ just a little spring tension) ----Then release the throttle

Next morning (Do not touch the accelerator) while its cold, open the top (it should be vertical), move the throttle and the Choke should close completely up (full choke, for a cold start).......again get to operating temp and see if it got pulled completely "Off", while it is running (it should be full vertical)

I'm not sure if the wire to the choke, remains "Hot" Constantly, it probably will be as soon as you start up, that would be the time to check it.......if not check it after a little warming up.

What about that water pump?....You game?......Is it the water pump leaking?

The Medic
Jan 24, 2011 at 3:50 AM
Avatar
KOEBES
  • MEMBER
  • 77 POSTS
Let me do all that tomorrow. I'm not sure whether the choke is vertical at operating temperature. Will report back tomorrow.

Bought myself at Autozone one of those mirrors with a telescope handle. Still couldn't see anything. Maybe I need a light under the motor.

But - let's assume for a moment - it is the water pump. I have the tools you said I needed, for $55 or so I can get a new waterpump. If you help me putting it in, and I still have the manuals to make sure we're singing off the same page, I'd be happy to try it.

But - to reemphasize it - the jeep is running better than before. Maybe it's just because I want it that way, but there's more pick up in it.

BTW, did you get the transmission in your wife's car fixed? I know it was not a jeep. I just looked at a JC Whitney catalogue before putting it into the trash and there were transmissions for jeeps - $2,000 and up. I hope the guy at the jeep parts depot gave you a better deal, and I hope you're up on the road again in your CJ.

To me, a jeep is
1. a piece of America
2. a unique experience riding a car without doors and without a roof
3. a terrific way to explore nature by 4-wheeling in the Sierra Nevada

In Europe, having a small French car (a 2 CV), a two cylinder car with a canvas roof and a 2 (two!) cylinder engine, it was custom among those who drove that funny car, to wave at each other, when they passed on the highway.

Here CJ drivers wave at each other; no Wrangler drivers, no flat fender drivers (very rare, although occasionally you see Willy's like yours), just CJ drivers, and the more you advance from the coast into the Sierra Nevada, the more of them there are
Jan 24, 2011 at 4:53 AM
Avatar
CJ MEDEVAC
  • CERTIFIED EXPERT
  • 11,004 POSTS
We wave at each other too, sometimes the Wrangler guys too. More often, it's hard for me to see them, for all of the Females Gaulking at me and mine..........Wife says, I fantasize a lot.

Usually the only "pain" with the Water pump, is Brackets attached to the bolts that hold it on, on some rigs you gotta get into tight spots to get the other bracket bolts loose, in order to move the bracket out of the way to pull the pump. Good pics as you go may help you reassemble if it gets a little complicated.

This is how I put the exact bolt back in it's original spot, label and put in the sequence it was in, this is my tranny and transfer case stuff.

The Medic
Jan 24, 2011 at 5:43 AM
Avatar
KOEBES
  • MEMBER
  • 77 POSTS
Re. choke:
Drove it to operating temperature, checked position of choke valve with engine running: straight up or 90 degrees.
Will check in cold uncranked condition tomorrow
Jan 25, 2011 at 1:03 AM
Avatar
KOEBES
  • MEMBER
  • 77 POSTS
In cold condition: choke immediately fully closed once I touch the throttle. To get the choke to barely open a bit, I have to turn the black housing 45 degrees or more clockwise. Now it wouldn't start.

I think the spring is no longer good.

I also tested the cable. As you can see it's an odd cable: leaves the coil as a 2 mm cable, enters a splitter, and exists as thick 3 mm cable. The voltage at the coil was 12V with the ignition key in the "run" position, and 6 Volt at the connecting clamp for the choke. I am told (youtube) that you must have 8-12 Volts to operate the heating element and the spring.

Here's what I like to do:

- replace the connecting element on the coil: all those cable ends look ragged
- connect the coil to the choke with a 2 mm cable without any splitter or thicker cable in between
- replace the heating element and the spring in the choke.

What do you think?

BTW, to replace a water pump with system flush the local shop wants (with tax) $486.
Jan 25, 2011 at 10:47 PM
Avatar
CJ MEDEVAC
  • CERTIFIED EXPERT
  • 11,004 POSTS
I'm lookin' at my '71-'90 Chilton 1980 Schematics, The choke wire somehow goes thru a relay and a switch (I just glanced it over quick) IT DOES NOT COME OFF OF THE COIL!!!

My '77 had no electric choke heater, it used a tube that picked up heat off the exhaust manifold which entered the bottom of the choke housing--yours may still have that PORT on the choke housing.....Simple was EZer in my book!

The Coils voltage is Correct, with what you tested........It gets an initial Full Battery Boost off of the Solenoid ("I" Terminal) while the key is in the "Start Position" ...........After it starts, you release the key, "I" dies, and the coil receives REDUCED VOLTAGE, thru a RESISTOR WIRE that comes from the "ON" Position of the Ignition Switch.

------------For now, Try cracking your Choke open, When it's COLD, see How it does.

When it's not so cold here, many times I will Pump my pedal 3 times, and never pull the choke on (manual choke)......It maybe a little cold natured the 1st 3-4 minutes but after it gets warmer, no problem!

I would get yours off of the coil and redo it like it's supposed to be.....or CHANGE TO A MANUAL ONE!!!!

Definitely, Do the water pump yourself!!!.....It'll make you feel good, and save some $$$!

Messed with the Carb Yet???

The Medic

Jan 26, 2011 at 12:08 AM
Avatar
KOEBES
  • MEMBER
  • 77 POSTS
Looking at those Chilton wiring diagrams for a 1980 jeep I can't find anything that leads from somewhere to the choke thermostat.

anyway, I am having a hard time finding a replacement for that choke thermostat; one in NAPA parts on line for $37.50 looked exactly like mine; so when I wanted to pick it up at the local NAPA affiliate, the owner couldn't find it; when I called him from home later and gave him the part number, he stated it was for 6-cylinder jeep. I really don't think it makes any difference whether the choke thermostat is for a straight 6 or a V8.

No; haven't touched the carburator yet. Have to get up my courage and first of all get some screwdrivers of the right length that will allow me to work there.

So unless there is a contraindication, I will try to get the choke thermostat for a 6 cylinder from NAPA, install it, apparently the manual should tell you how many degrees it should be advanced or retarded (which I can't find anywhere), then connect it with a 2 mm wire to the coil (wouldn't know where else to,) and then see how that works
Jan 26, 2011 at 5:40 AM
Avatar
CJ MEDEVAC
  • CERTIFIED EXPERT
  • 11,004 POSTS
Most of the diagrams in our manuals are the same, look at a 1980. Look at the diagram with the Distributor and the Ignition Module shown in the center of it. Then look in the BOTTOM LEFT CORNER...It 2 related parts there, and follow a wire upward to a relay. E-1 and B-1, if your diagram is Graphed as mine is........A manual choke would cost you $12 or less!!!! No worries except, remembering to pull it on pushing it off!!!!! I still want to explain the HIGH IDLE STEPS, but I want the Choke and Carb adjusted before I do.....The steps are between the Choke spring housing, and the adjusting screw is at the bottom of it.....There is another screw at top, I think its Something Else...Tell you later, Don't mess with 'em
yet!!!


The Medic
Jan 26, 2011 at 3:44 PM
Avatar
KOEBES
  • MEMBER
  • 77 POSTS
I looked at the Chilton Wiring diagrams: they start with a 1971 jeep and end with a 1986 jeep. There are 3 diagrams for a 1980 jeep, 2 of which are duplicates. The distributor is at the bottom, not center here, and at the bottom left there is blower motor and switch etc.
The coil has a red cable coming in from the ignition switch, and a red cable leaving going to an unmarked device. I can't figure out what the symbol stands for: it's a box with a central line to midline that looks like an inverted T, then space, then a downward curved short line, on top of another vertical line ending in a dark triangle, which outside the box has a triangle on its head, not solid but in lines.
I think this means it a capacitor. Could that be the thermostat??

I know a manual choke would solve my problems; your Wal Mart instructions are well done. Let's see.
Jan 26, 2011 at 4:14 PM
Avatar
CJ MEDEVAC
  • CERTIFIED EXPERT
  • 11,004 POSTS
"IT'S ALIVE"---MR. JEEP IS ALIVE AGAIN!!!

I HAVE 15 MILES ON IT, I'M STILL A LITTLE GUN-SHY, I'M WORRIED STILL, IT HAD NO REASON TO LACK OIL IN THE TRANSFER CASE AND SHOULD HAVE LUBRICATED THE OUTPUT SHAFT, IN FACT, I DRAINED OUT THE ENTIRE AMOUNT OF OIL NEEDED TO CORRECTLY FILL IT,BEFORE I DROPPED IT THIS TIME. I HAVE A FRIEND WHO SAYS HE SAW SOMETHING SIMILAR WITH A TRUCK, WHERE A PIECE OF GASKET FLAKED OFF AND COVERED THE HOLE THAT OIL CIRCULATED IN....I'M STILL WORRIED, I PULLED OVER TWICE AND FELT THE OUTPUT HOUSING, TO SEE IF IT WAS HOT.

NO NOISES ALL SEEMS OK


WHAT ABOUT YOUR CHOKE ISSUES, MADE A DECISION YET?

IT WAS 26 DEGREES, WHEN I CRANKED UP THIS MORNING. I DID NOT USE THE CHOKE, 1ST PATTED THE GAS 3 TIMES AND HE CRANKED RIGHT UP.......WITHIN A MILE IT WAS RUNNING WELL, WITH NO SYMPTOMS OF BEING COLD (HALF CHOKE WOULD HAVE MADE IT BETTER, FOR THE 1ST MILE), BUT I WAS LAZY, AND I DO NOT "JUMP OUT" INTO TRAFFIC, UNTIL HE'S 100% OPER.TEMP.

THE MEDIC

LOOK, "WILLY" IS BACK IN THE GARAGE!!!---NOW WE GOT TO GET THE NEON I GAVE $250 FOR, 4 YEARS AGO, BACK OUTSIDE, AND GET WIFE'S ESCAPE'S TRANNY REBUILT (WAY BEYOND MY CAPABILITIES)AND GET IT BACK IN THE GARAGE!!!.........WHEN SHE GETS HAPPY, I WILL BE THAT WAY TOO (THATS HOW IT'S EXPLAINED TO ME!)THE NEON IS TOUGH, WE DROVE IT 3 MONTHS OFF AND ON, AND THE 23 YEAR OLD STEP-DAUGHTER, ABUSED IT FOR 4 YEARS, "WHILE SHE WAS GETTING ON HER FEET", AND WOULD NOT FIX HER OWN RIG.
Jan 27, 2011 at 12:46 AM
Avatar
KOEBES
  • MEMBER
  • 77 POSTS
Congratulations on your jeep!! I admire your color coded machinery; for novices like me: what is the green one?

At least you have a garage to work in. I have to rely on the ambient temperatures and weather.

Just got back from work in San Francisco and I am beat. I don't take a car to S. Fr.: you'd go crazy sitting in rush hour traffic for hours; instead I ride a foldable bike to the train station, read and work on the train, and then ride the bike up the hills to my job.

Thanks for your wiring diagram with the explanations; I printed it out, studied it, got lost, and will look at it again with a clearer mind tomorrow.

Do I need a choke in California? We don't have 26 degrees like you guys in SC, but it gets chilly (mostly 40 degrees, sometimes 32) in the morning. It is right now that foggy damp cold, that cuts through everything.

But again: congratulations on your working and running renegade. Now make your wife happy

Jan 27, 2011 at 2:43 AM
Avatar
CJ MEDEVAC
  • CERTIFIED EXPERT
  • 11,004 POSTS
IT SAYS IT'S A GROUND....I IMAGINE JUST BY LOOKING AT THE CONNECTOR, IT LOOKS LIKE WHATS ON THE OIL SENDER AND TEMP SENDER WIRE.....SO MY GUESS ITS THE SAME BUT, PUSHED DOWN OVER A "BOLT STUD" THAT IS A ON THE GROUNDED BODY OR ENGINE.

YES, I'D SAY YOU "NEED" A CHOKE, YOU NEVER KNOW WHERE YOU MIGHT WIND UP IN A JEEP.

THE CHOKE KIT COMES WITH A ANGLE BRACKET, THAT CAN BE SCREWED TO THE BOTTOM OF YOUR DASH (YOU DO NOT HAVE TO GO THRU THE DASH LIKE I DID)

IF YOU'RE SCARED, SAY YOU'RE SCARED!!!

GIVE ME 25, JUST FOR THE HECK OF IT!

AIN'T NOTHING TO PUTTING IT ON, YOU MUST REMEMBER TO DEPRESS THE GAS TO PULL THE CHOKE CLOSED (BEFORE YOU CRANK, THIS FREES UP THE HIGH IDLE STEPS)........THEN YOU ADJUST AS YOU GO, IF NEEDED......THEN CLOSE IT, WHEN YOU FEEL IT LAGGING, OR WHEN YOU REACH OPERATING TEMP. HOW HARD IS THAT?.....YOU MAY NOT EVEN NEED TO USE IT MUCH AT ALL..........YOU WILL LEARN WHEN YOU NEED A LITTLE OR A LOT OF CHOKE.......IT'S NOT SOMETHING YOU MESS WITH CONSTANTLY.

NOW PERFORM SOME OF THIS STUFF, AND LET ME KNOW HOW IT WORKS OUT.

THE MEDIC
Jan 27, 2011 at 4:10 AM
Avatar
CJ MEDEVAC
  • CERTIFIED EXPERT
  • 11,004 POSTS
SORRY I THOUGHT YOU WERE TALKING GREEN ON THE WIRING DIAGRAM!!!---THE GREEN IS MY T-150 3 SPEED TRANSMISSION, THE RED-ORANGE IS THE DANA MODEL 20 TRANSFER CASE----DUMMY!!!.........YOURS ARE SIMILAR, JUST NOT AS PRETTY!!!

THATS 100 FLUTTER KICKS.......I WILL GET YOU JEEP KNOWLEDGEABLE YET!!!

THE MEDIC
Jan 27, 2011 at 4:16 AM