Replacing The Coolant Pump
Draining the coolant
*Remove:
*the cap for the expansion tank
*the splash guard under the engine.
*Position a container under the engine drain cock. Drain the engine coolant.
*Avoid skin contact with the coolant.
*Transfer the container to the radiator drain cock. Drain off the remaining coolant.
*Close the nipples. Install the splash guard under the engine.
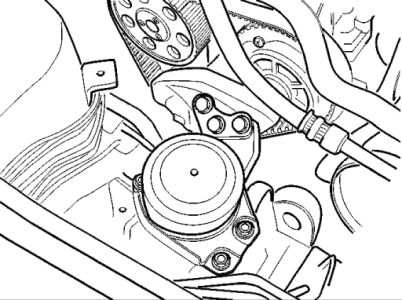
Removing the auxiliaries belt
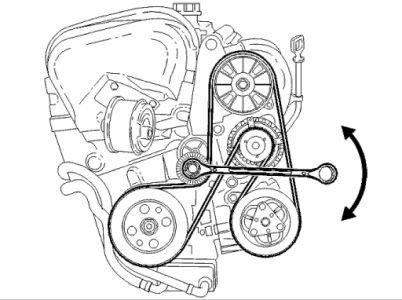
*Slacken off the auxiliaries belt by turning the screw on the tension reel clockwise.
*Remove the auxiliaries belt.
Removing the timing covers
Remove:
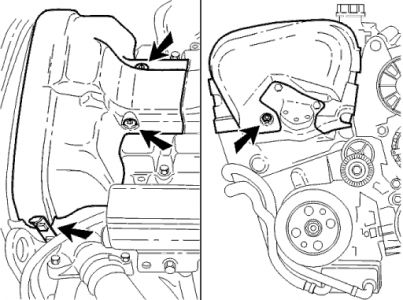
*the upper timing cover
*the front timing cover.
Installing the lifting beam and lifting hook
*Install the lifting beam and the lifting hook.
Removing the right-hand engine mounting
*Remove the right engine mounting.
Position the engine
*Position the engine according to the marking.
Removing the timing belt
*Remove the timing belt.
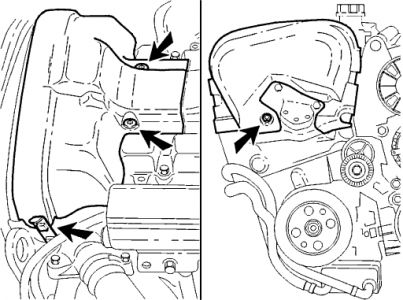
Removing the coolant pump
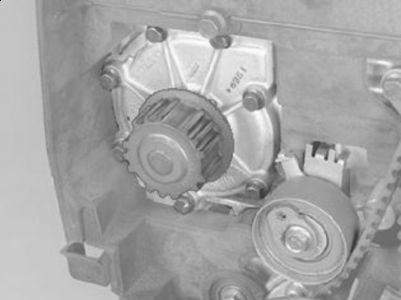
*Remove the screws
tap the pump wheel using the shaft of a hammer. *Remove the pump
*clean the gasket faces thoroughly.
Installing the coolant pump
Install:
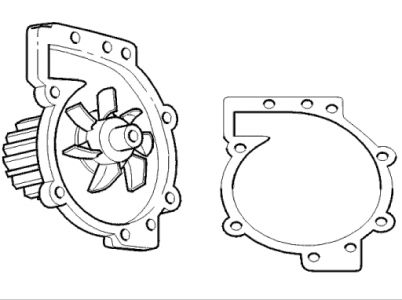
*a new gasket
*a new pump.
Tighten the screws. Tighten to 17 Nm .
Installing the timing belt
Install the new belt in the following order:
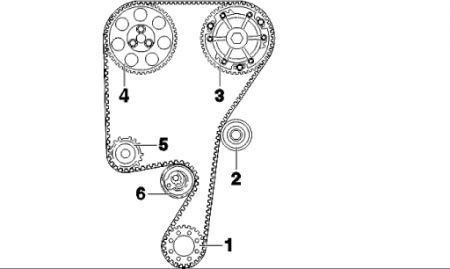
*crankshaft
*the idler pulley
i*ntake camshaft
*exhaust camshaft
*water pump
*belt tensioner.
Tension the timing belt
NOTE: This adjustment is to be made with a cold engine. Suitable temperature is approximately 20 degree C/67 degree F .
At higher temperatures (with the engine at operating temperature or a high outside temperature for example) the indicator is further to the right.
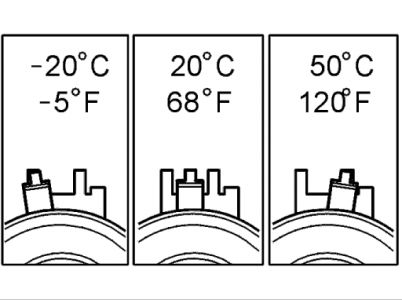
The above figure shows the position of the indicator at different engine temperatures.
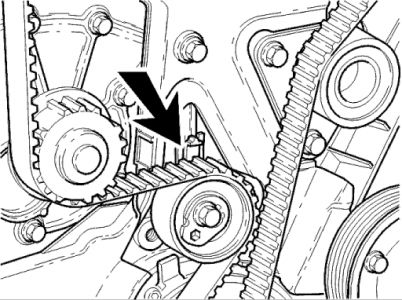
*Carefully turn the crankshaft clockwise until the timing belt is tensioned. The belt must be tensioned between the intake camshaft pulley, the idler pulley and the crankshaft
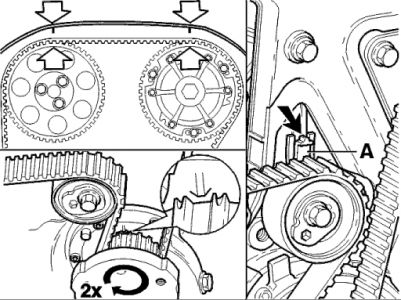
*Hold the belt tensioner center screw secure. Turn the belt tensioner eccentric counter-clockwise until the tensioner indicator passes the marked position.
Then turn the eccentric back so that the indicator reaches the marked position in the center of the window
*Hold the eccentric securely. Tighten the center screw. Tighten to 20 Nm .
Check that the indicator is in the correct position.
Check
Checking markings
*Press the belt to check that the indicator on the tensioner moves easily
*Install the upper timing cover
*Turn the crankshaft two turns. Check that the markings on the crankshaft and camshaft pulley correspond.
NOTE: Check that the indicator on the belt tensioner is within the marked area.
Installing timing covers
Install:
*the lower timing cover
*the front timing cover. Tighten to 12 Nm
*the auxiliaries belt.
Installing the right engine mounting
*Screw the engine mounting into place on the engine. Tighten to 67 Nm .
Install:
*the screws on the bracket for the bodywork. Tighten to 50 Nm
*the servo reservoir.
Finishing
Remove the lifting beam and lifting hook.
Install:
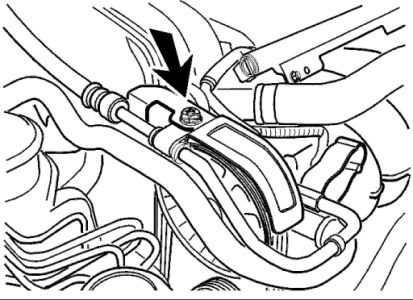
*the metal bracket for the power steering hose on the rotation protection for the auxiliaries belt
*the front wheel
*the auxiliaries belt.
Checking work
Function test:
*runs the engine to normal operating temperature until the thermostat opens
*top up the cooling system if necessary.
Check for leaks.
Jan 14, 2010 at 7:27 AM