Hi,
The upper intake won't be leaking oil. Actually, I don't think the bottom one would either, but it's possible
Here is the interesting part. To remove the valve covers, the intake needs to be removed first. So, plan to replace the valve covers knowing the intake will be removed as well. That way, you will have them all replaced. Also, once the upper is removed, you will be able to see if the lower is leaking.
Here are the directions specific to your vehicle. I will start with the intake and then move to the valve covers. The pics attached below correlate with the directions.
____________________________
Intake
2003 Ford Truck Explorer 4WD V6-4.0L VIN E
Procedures
Vehicle Engine, Cooling and Exhaust Engine Intake Manifold Service and Repair Procedures
PROCEDURES
Intake Manifold
Removal and Installation
1. Disconnect the battery ground cable.
2. Remove the air cleaner outlet pipe.
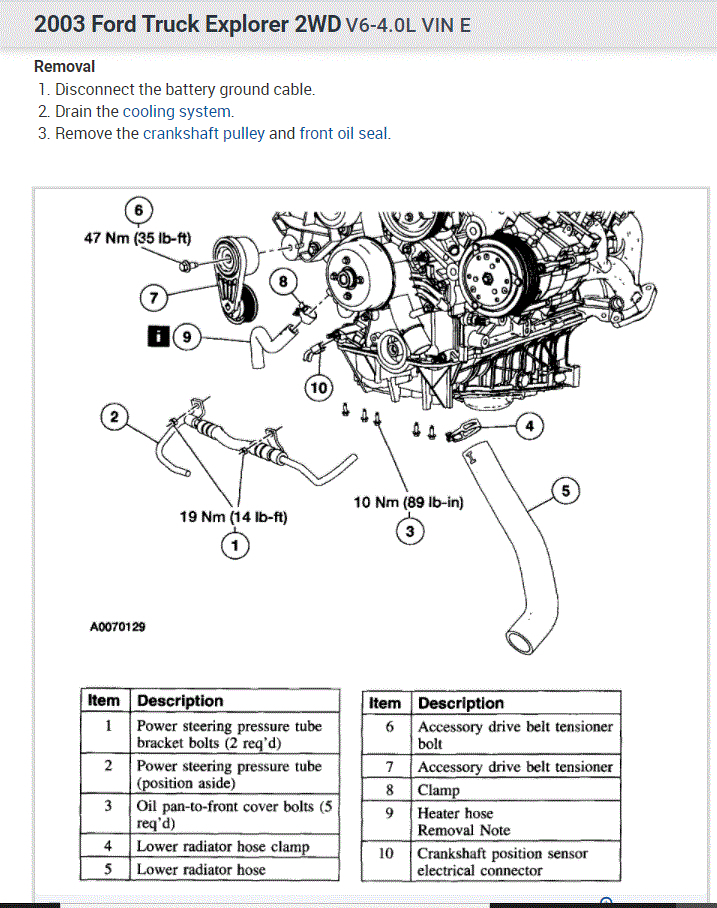
pic 1
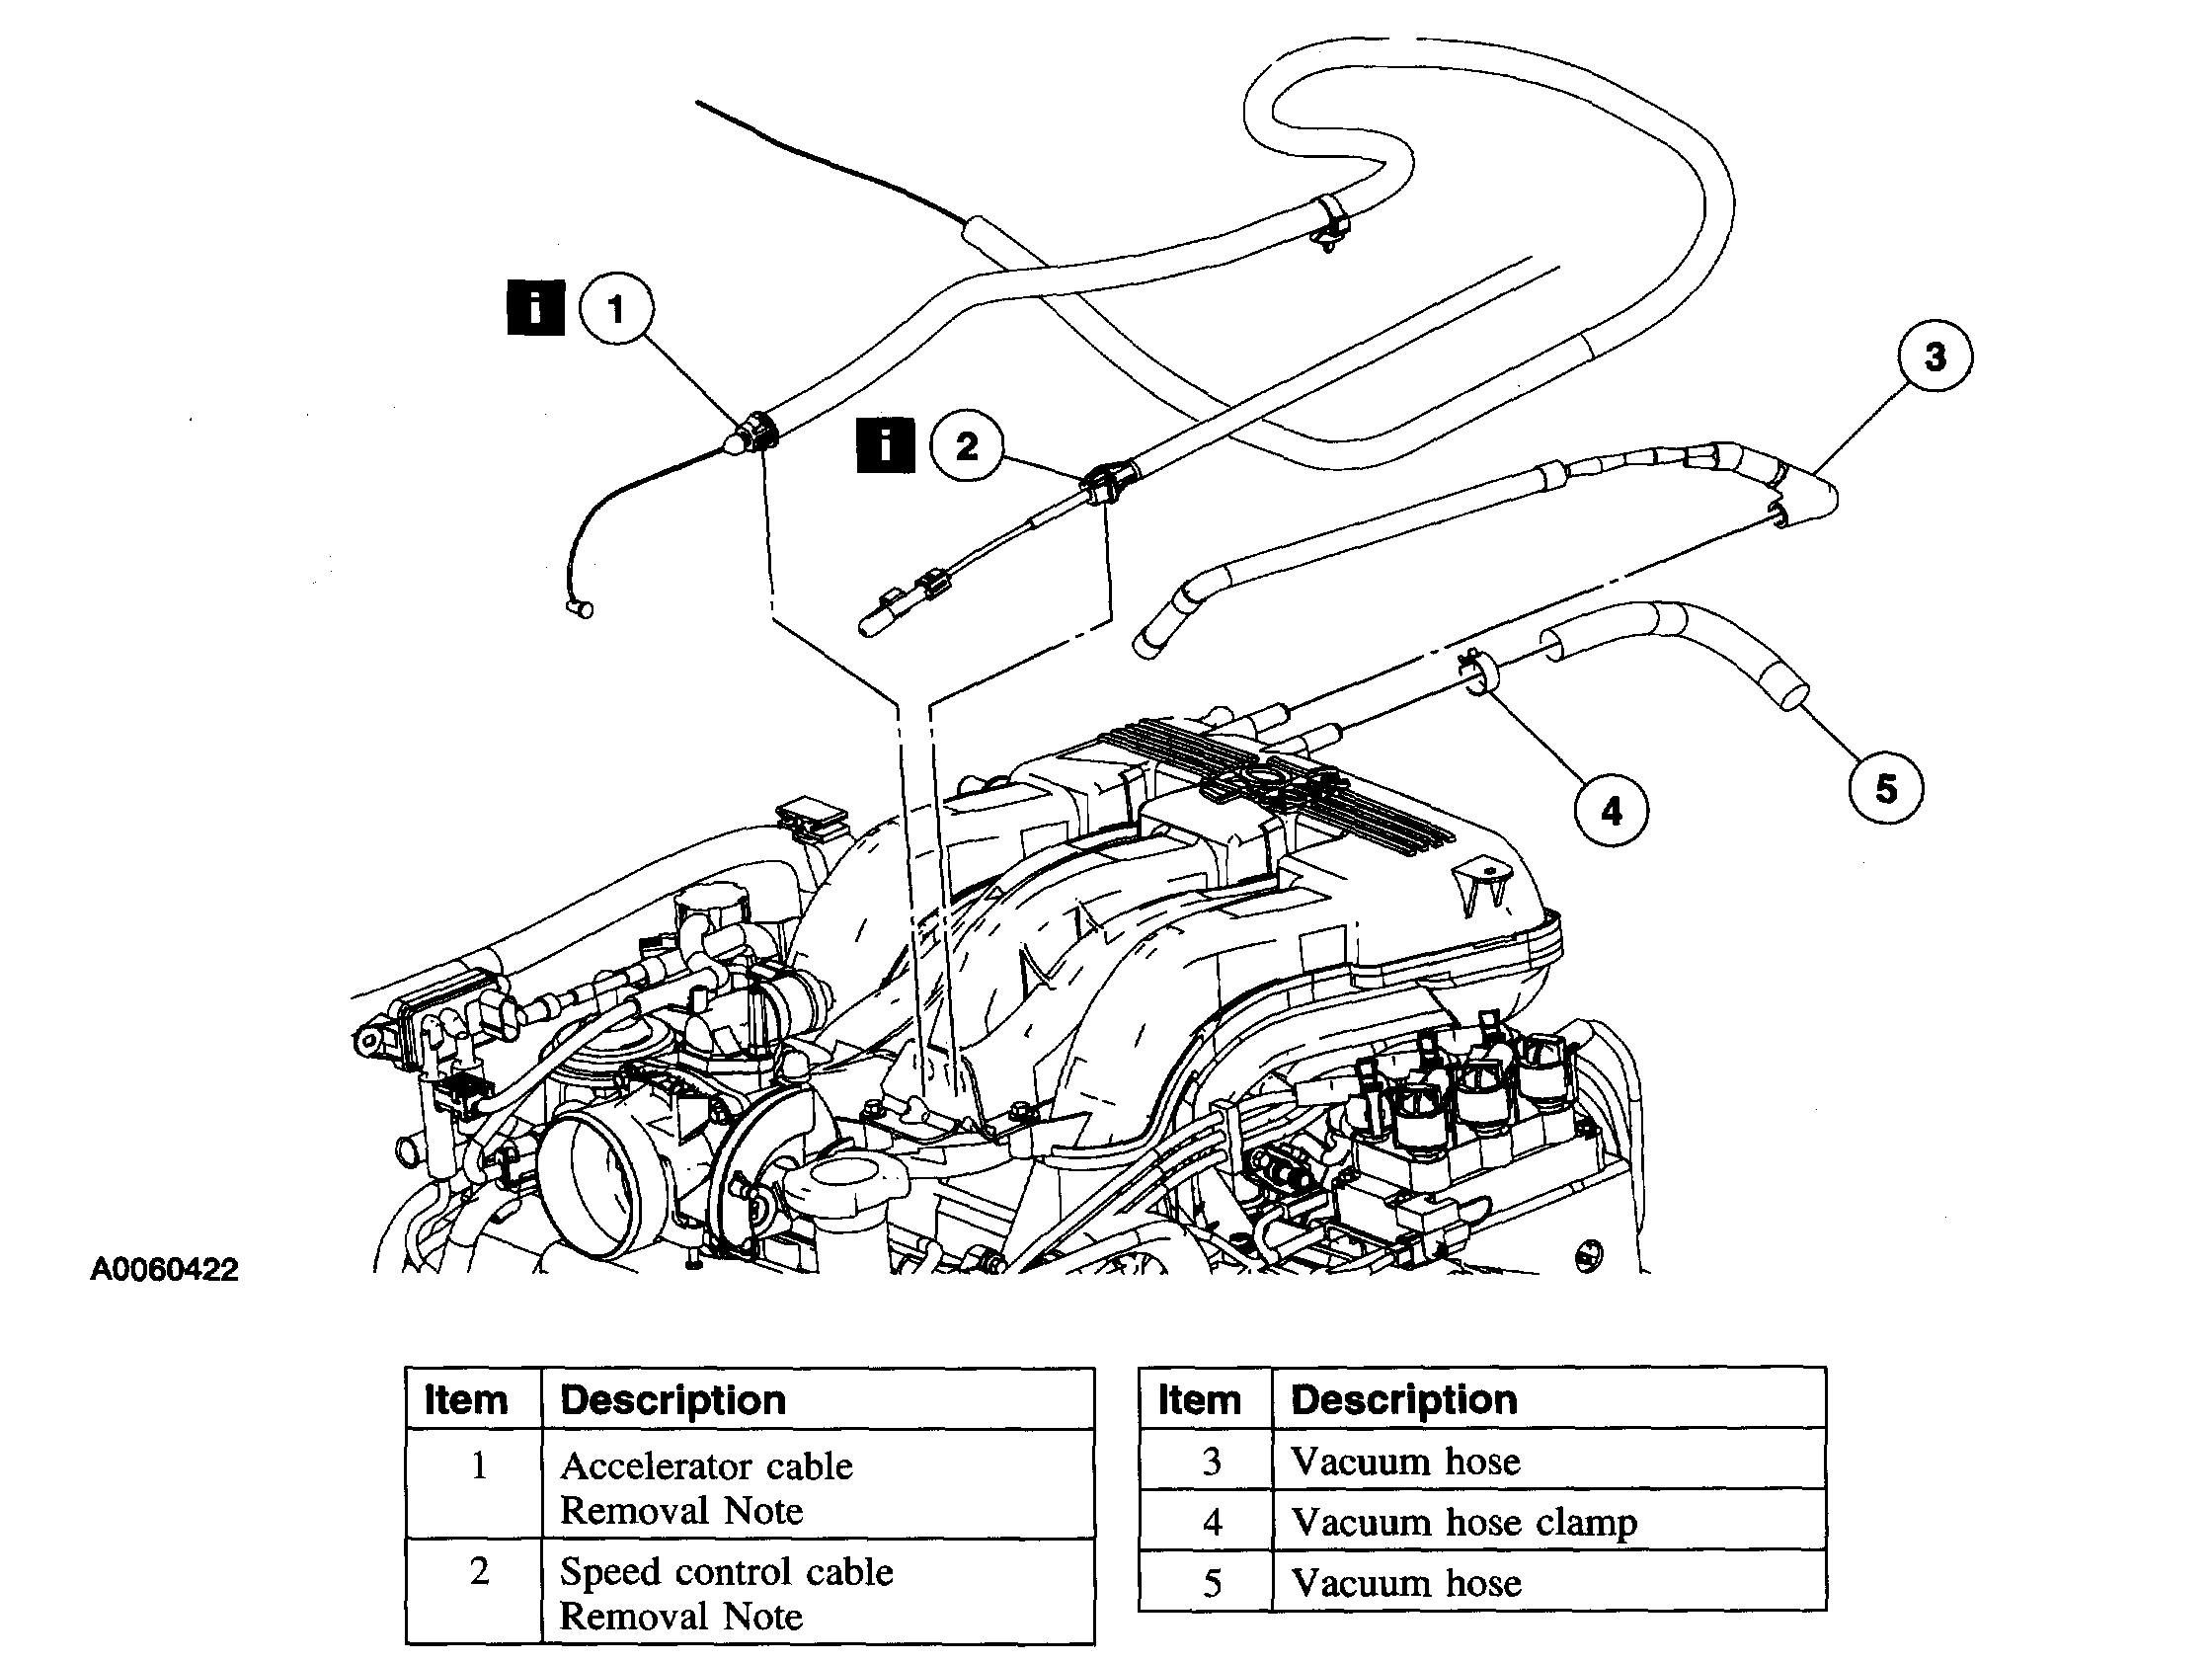
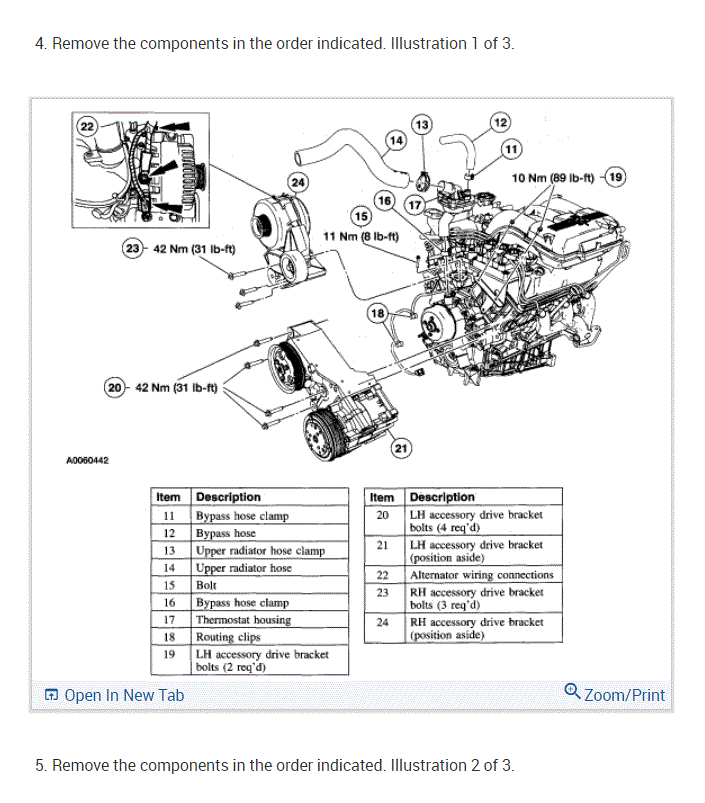
3. Illustration 1 of 4 Remove the components in the order indicated.
pic 2
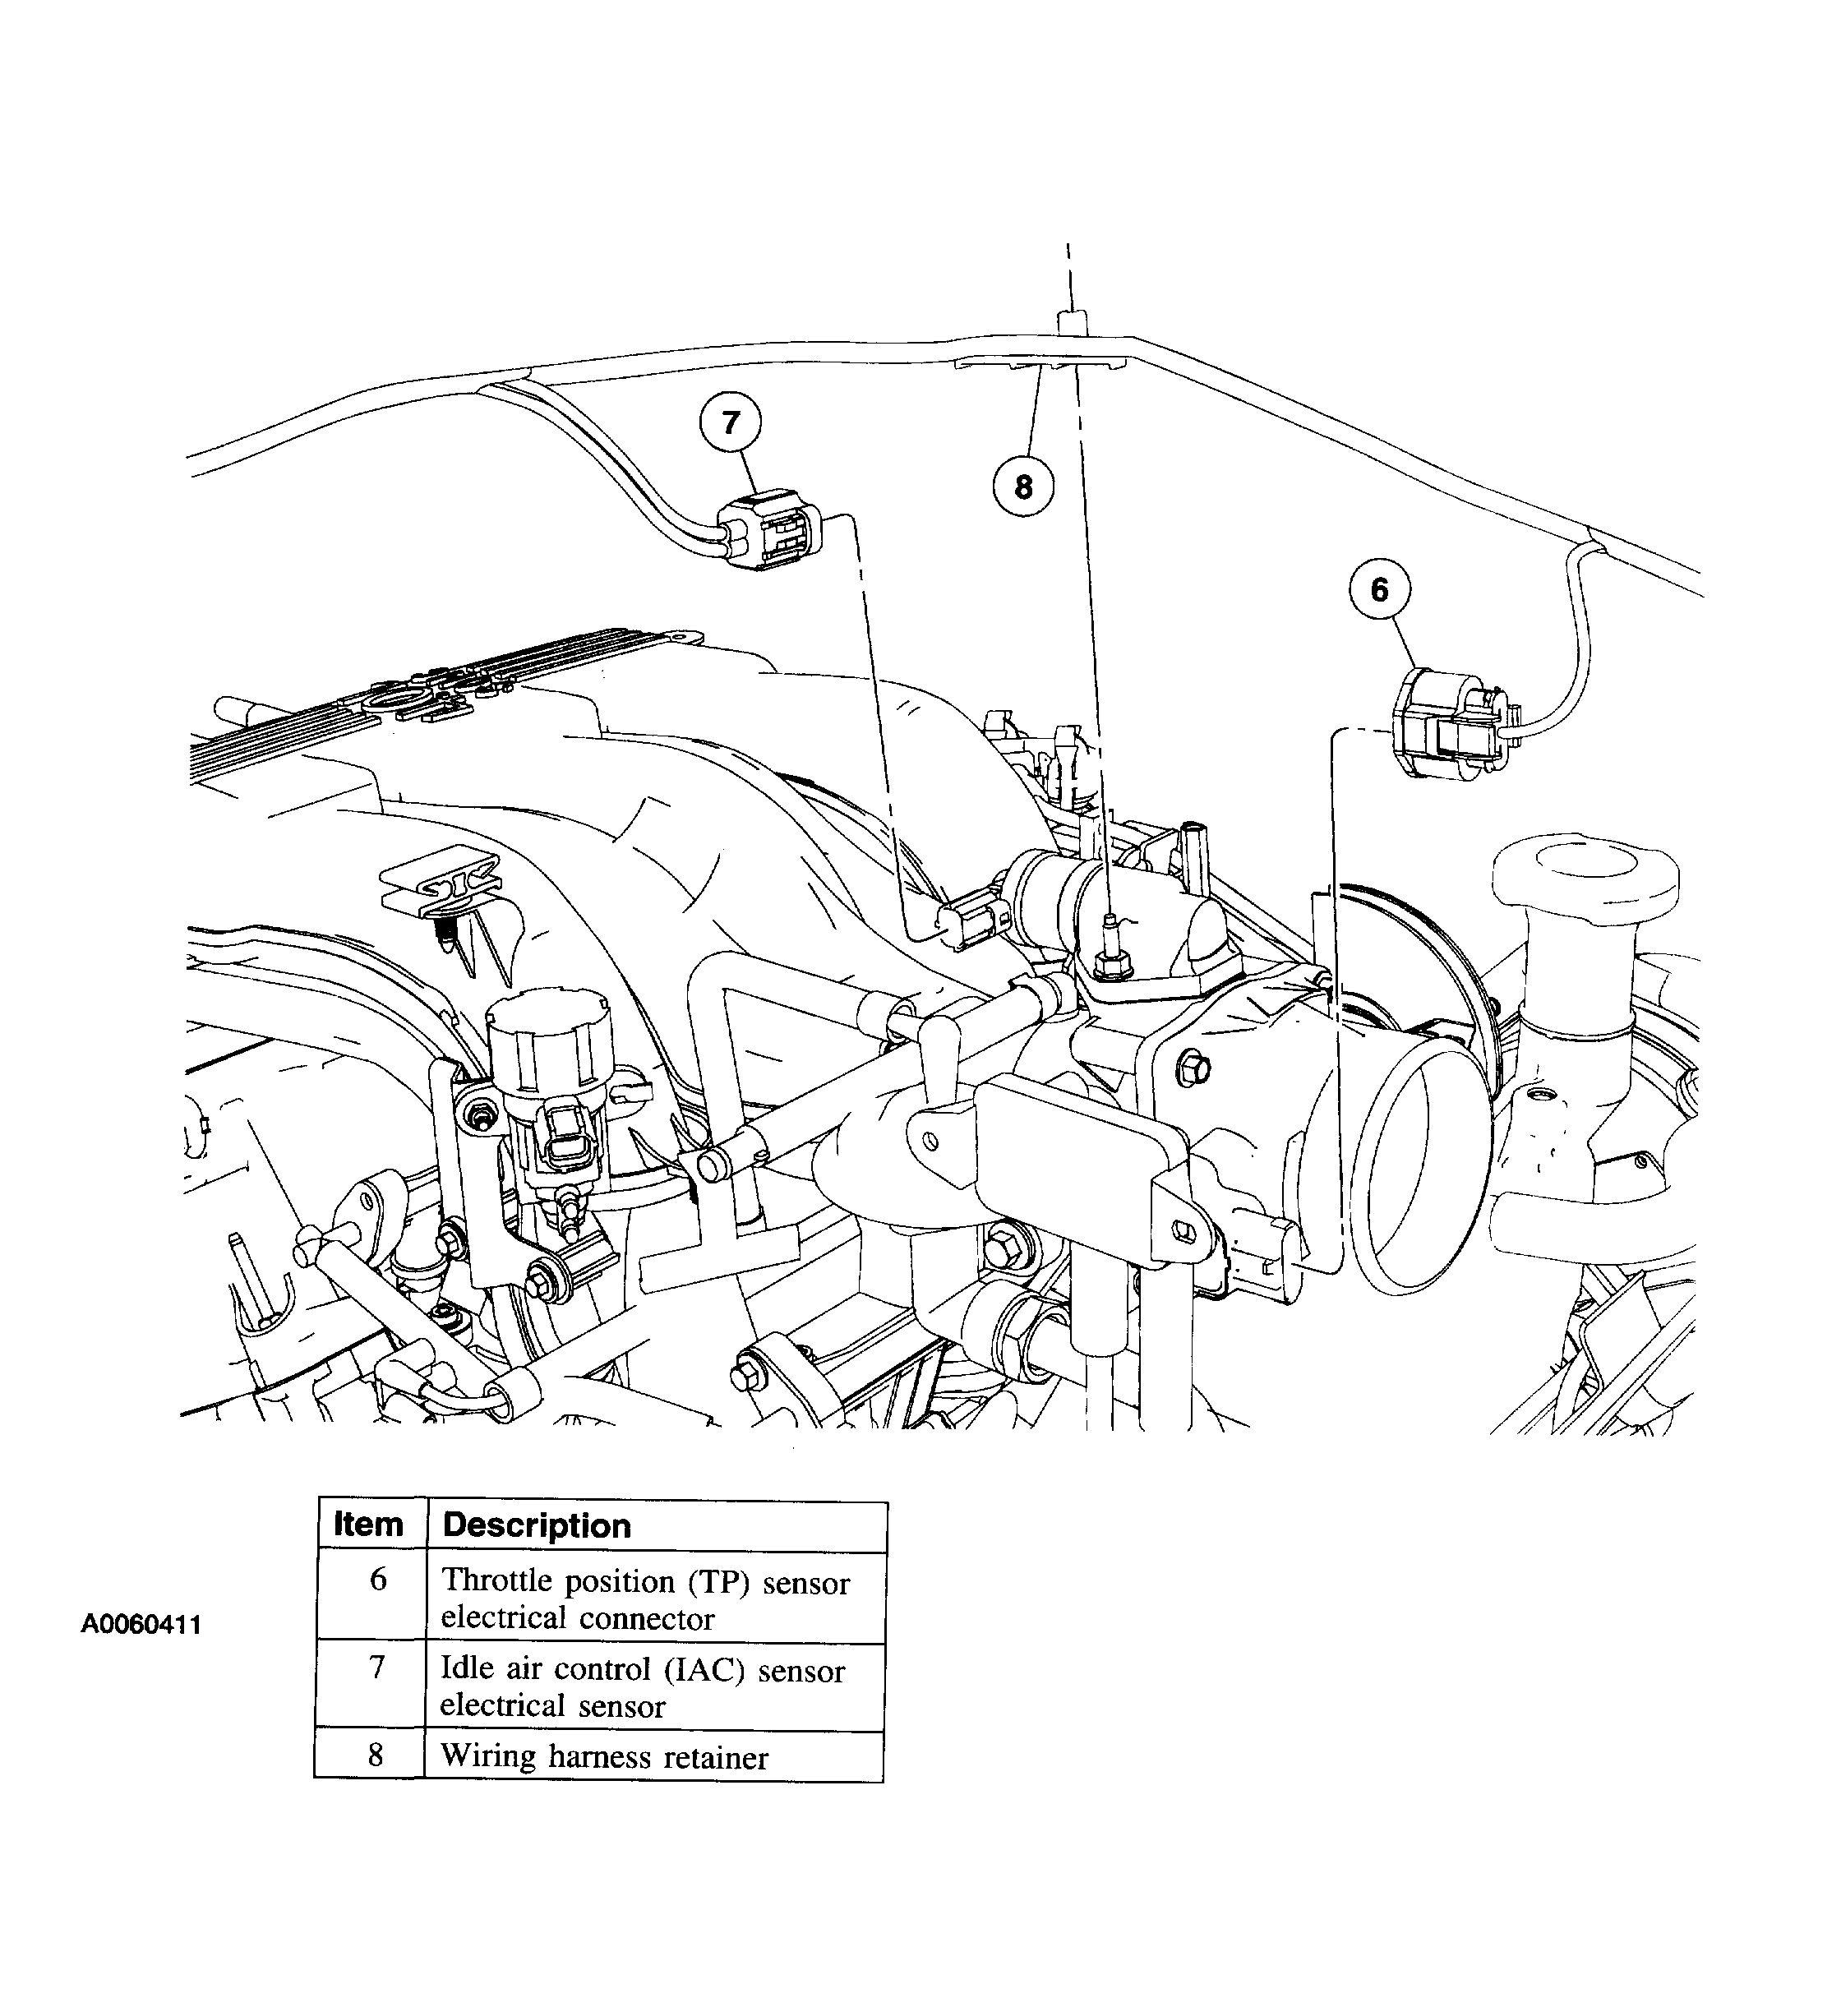
4. Illustration 2 of 4 Remove the components in the order indicated.
pic 3
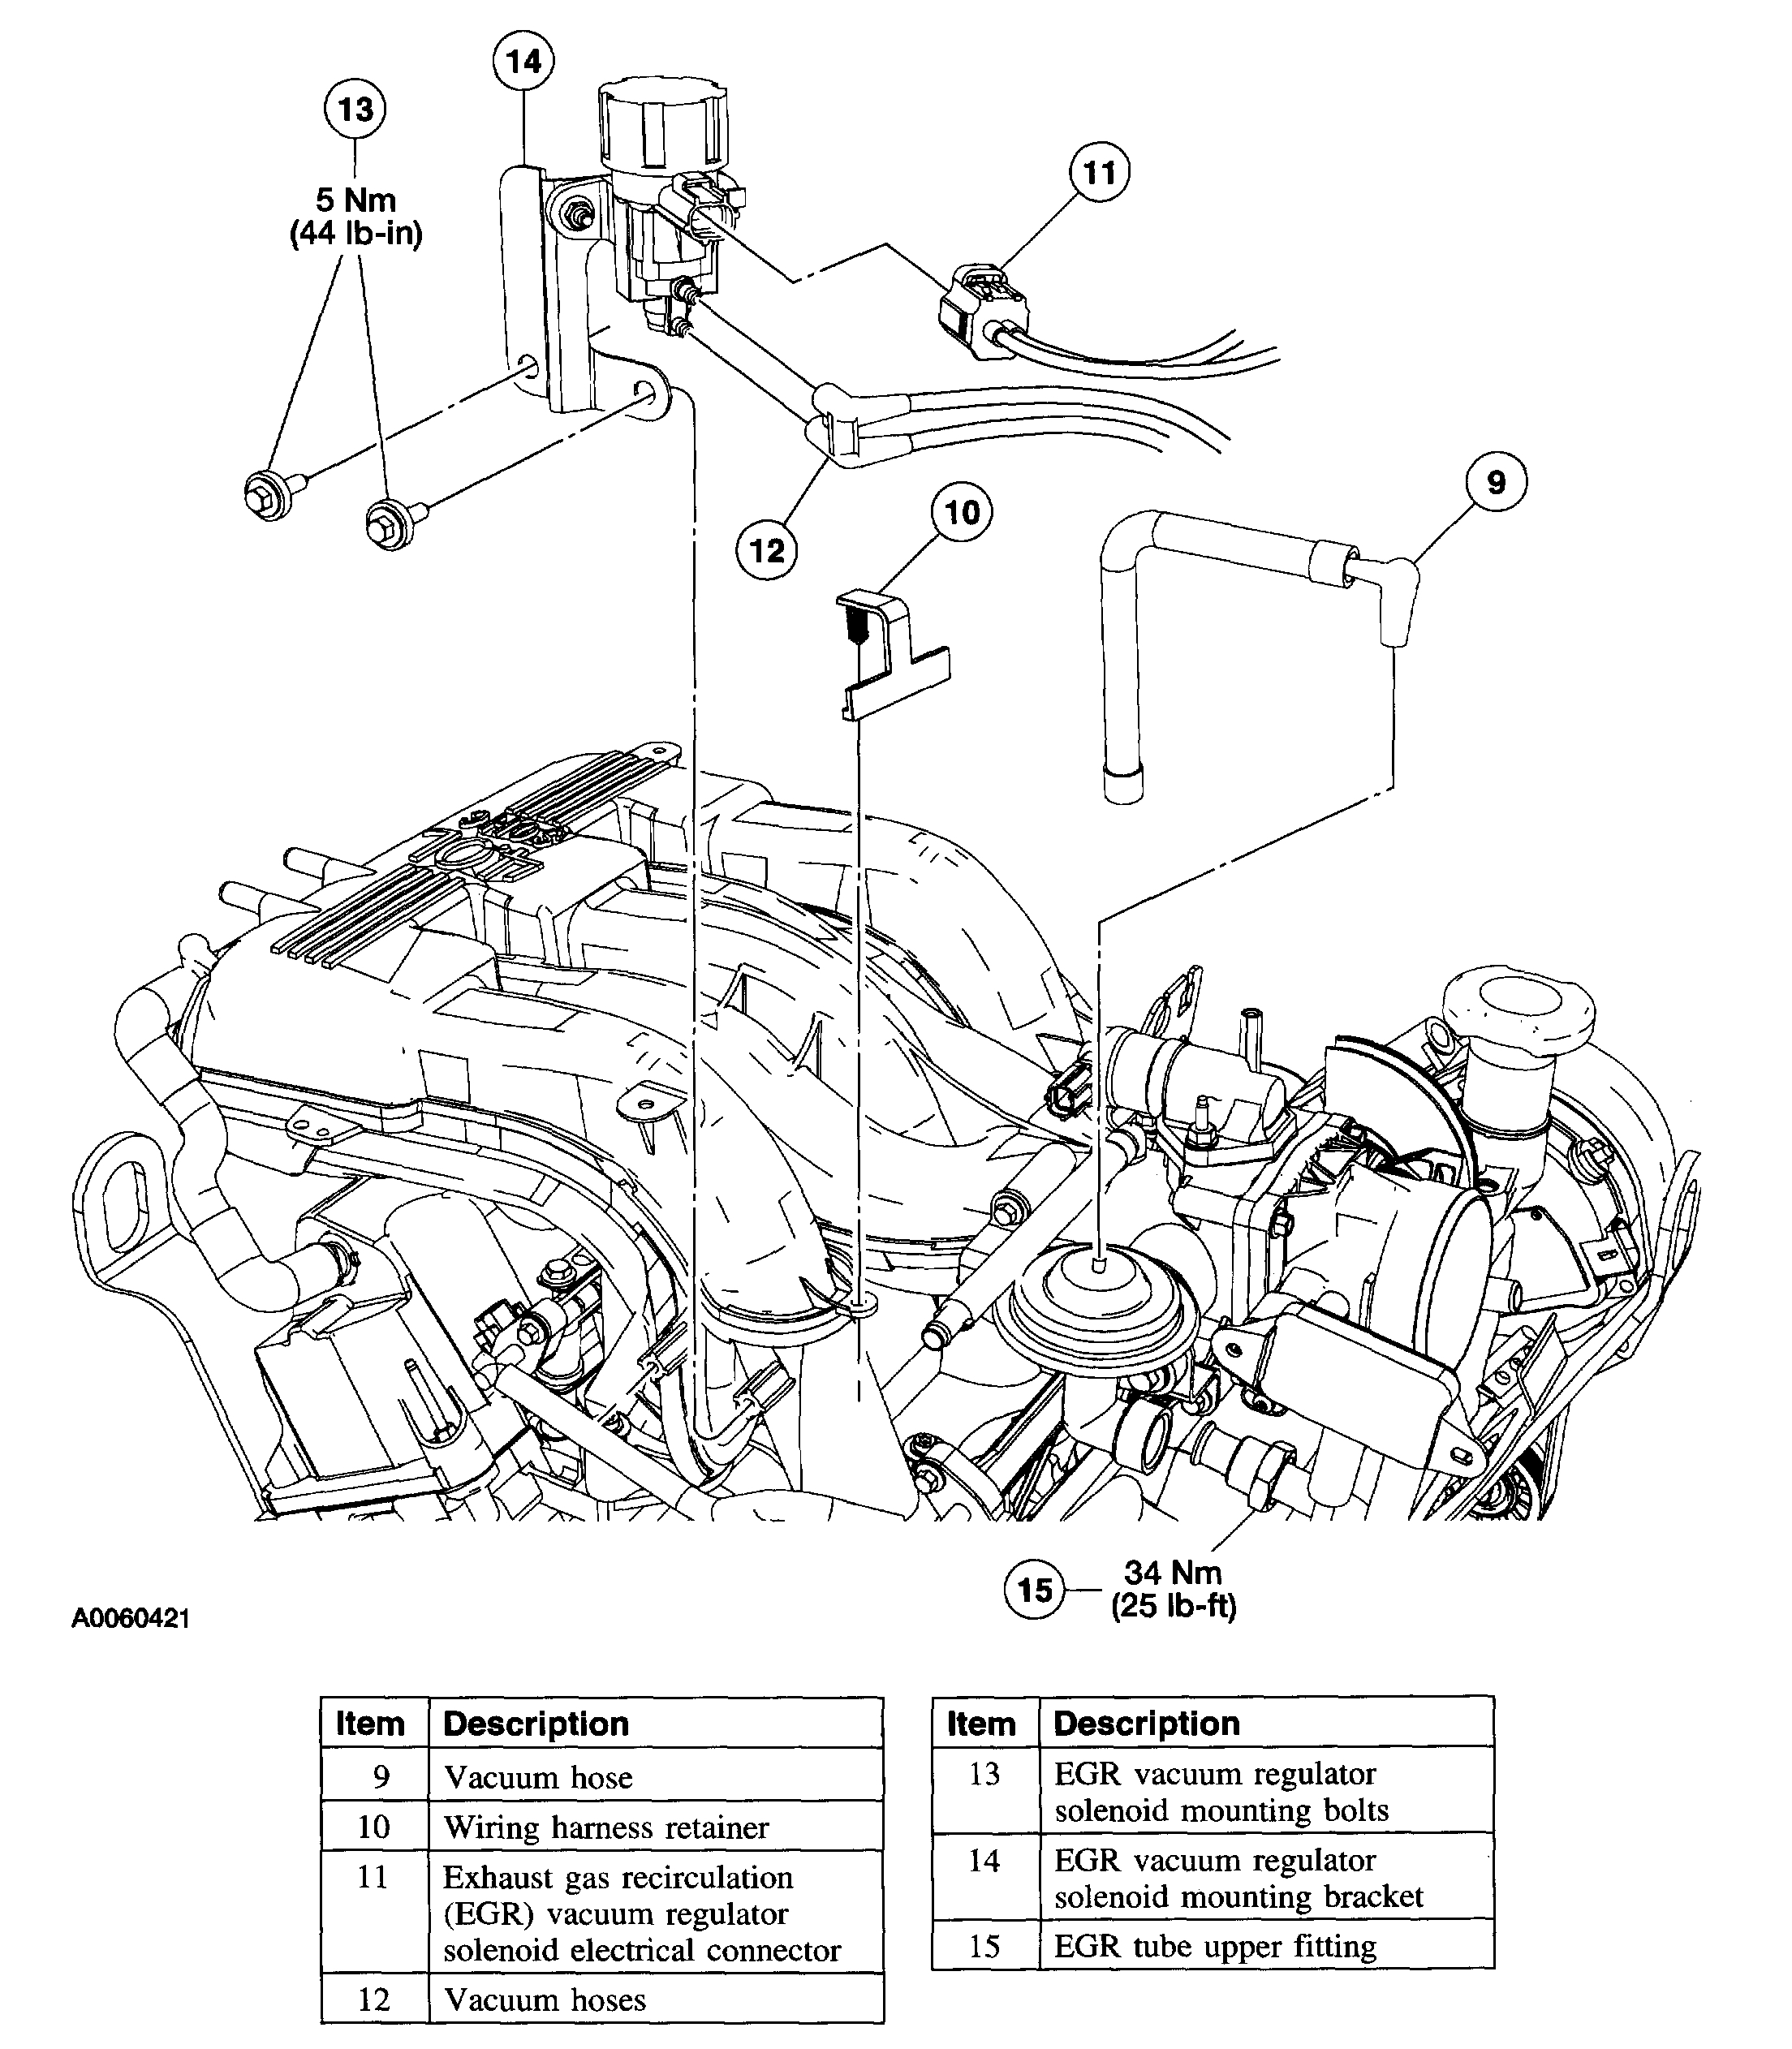
5. Illustration 3 of 4 Remove the components in the order indicated.
pic 4
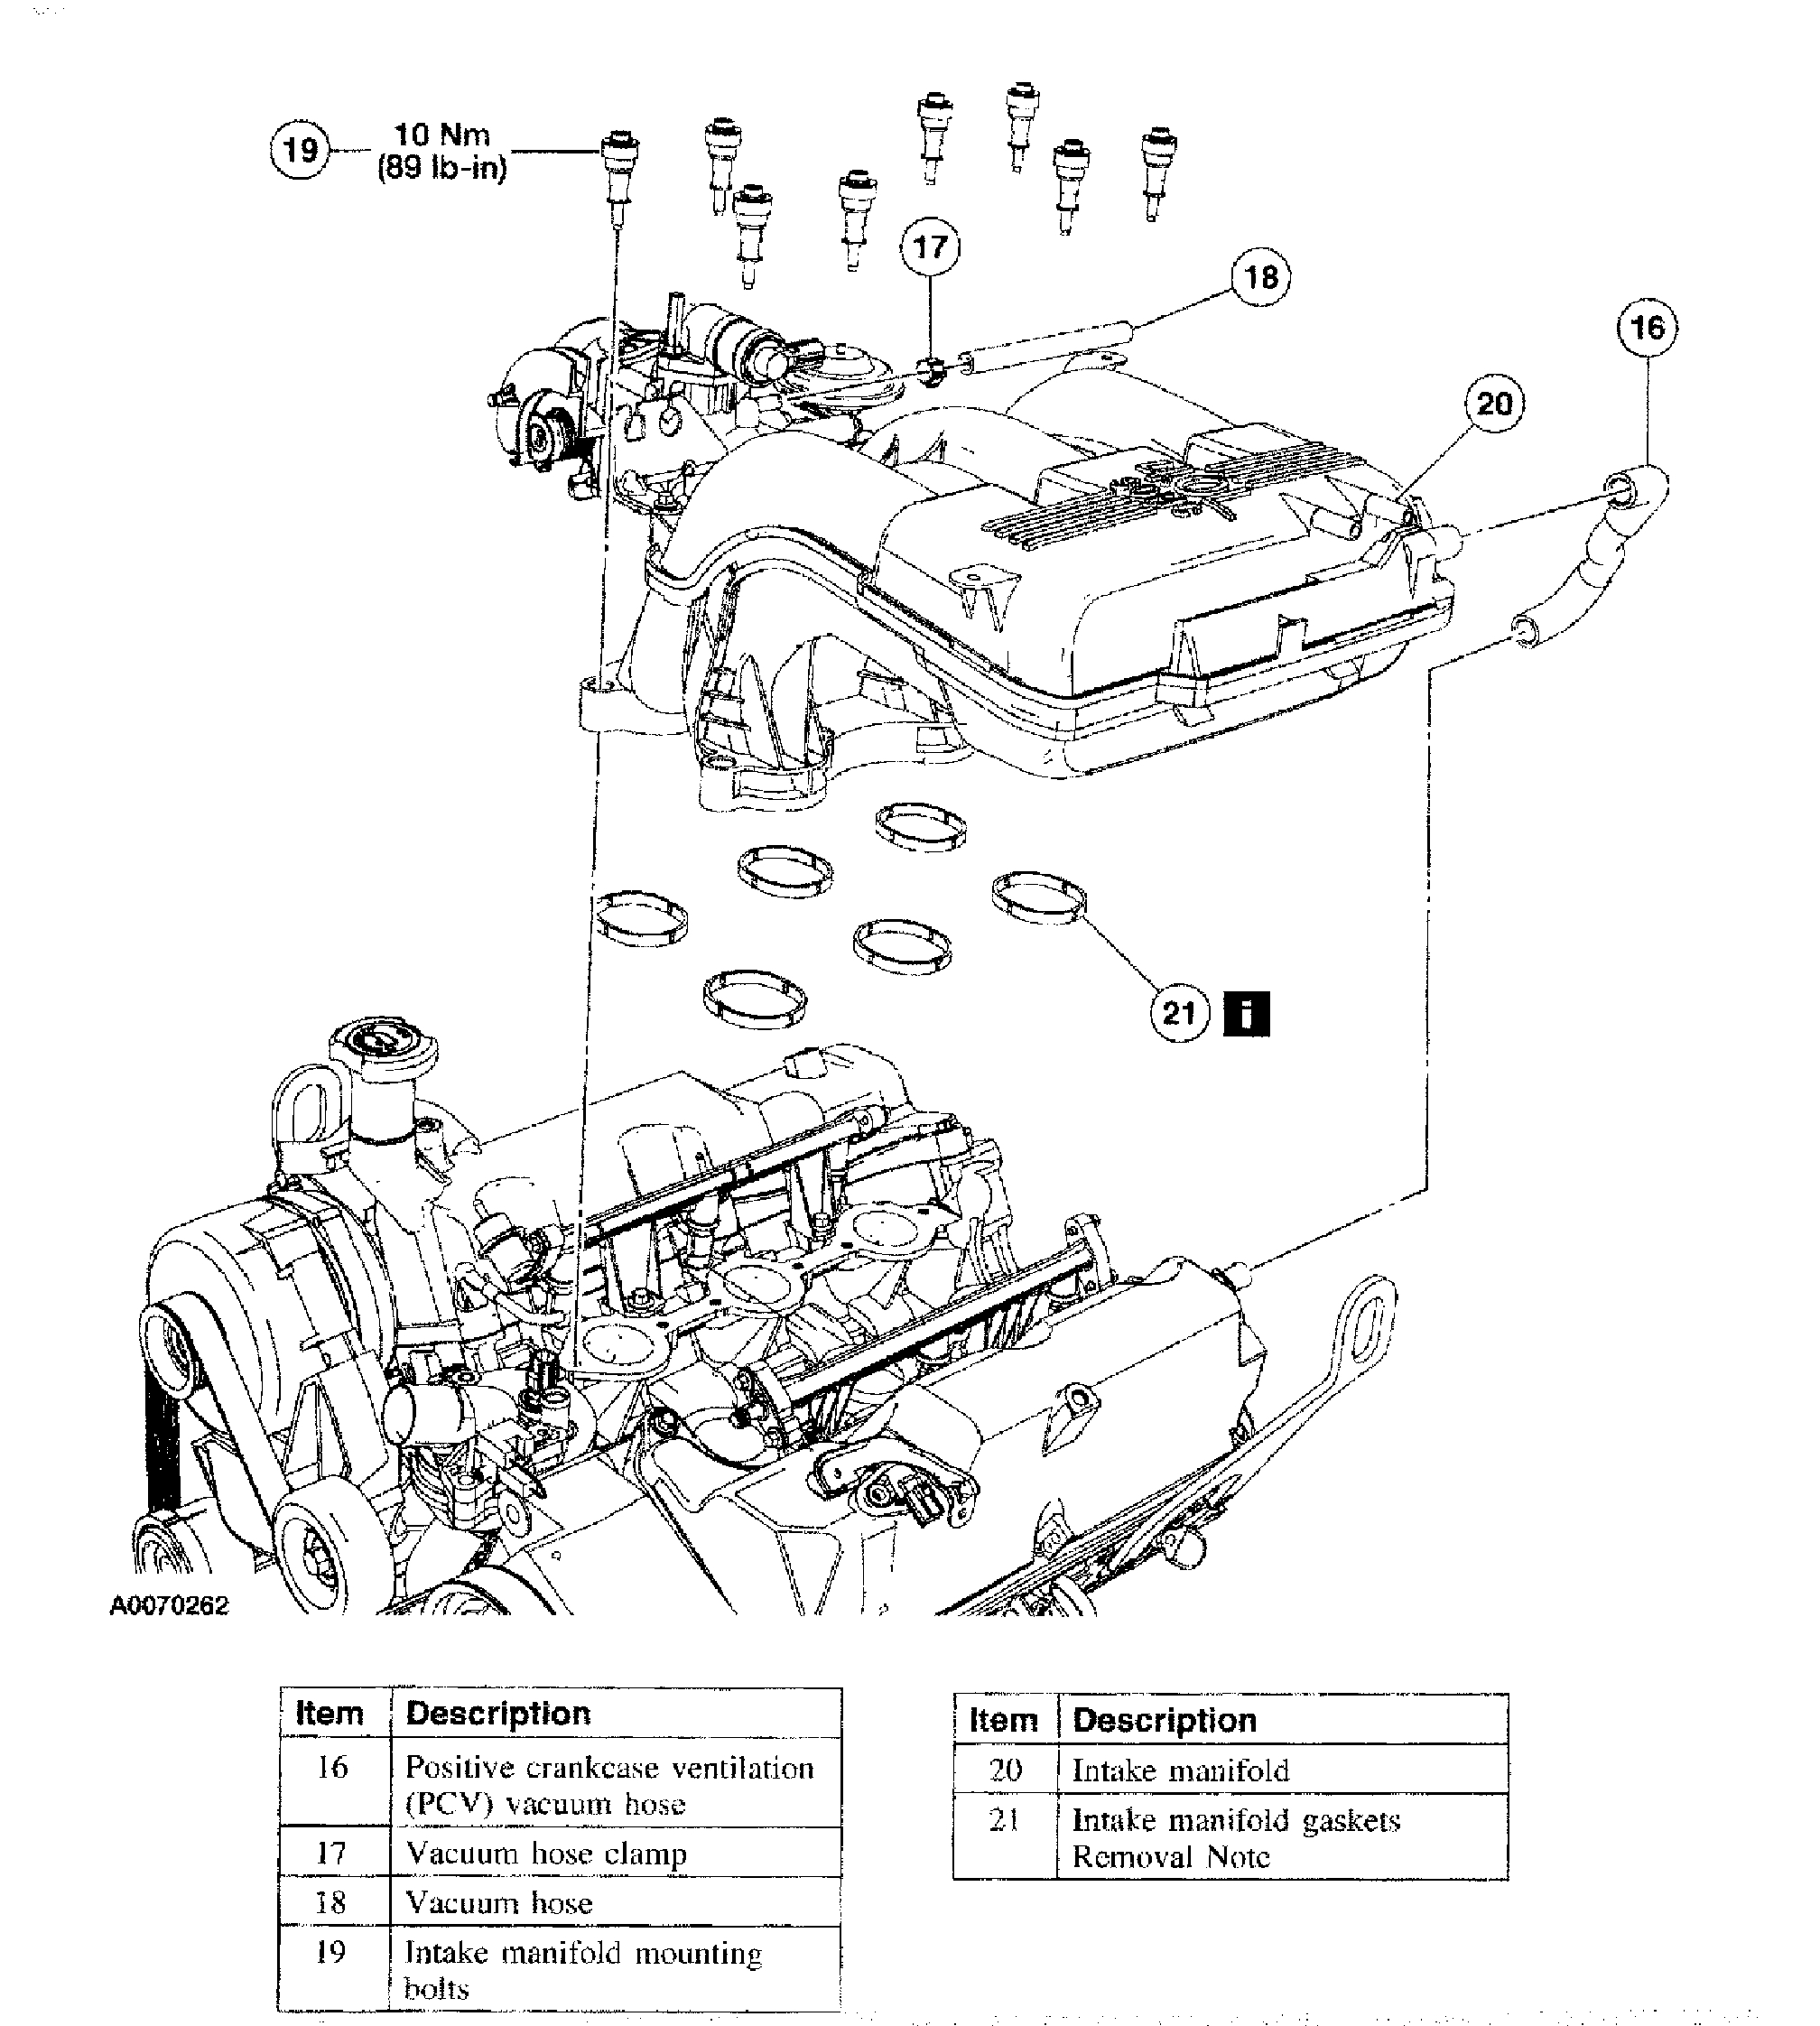
6. Illustration 4 of 4 Remove the components in the order indicated.
7. To install, reverse the removal procedure.
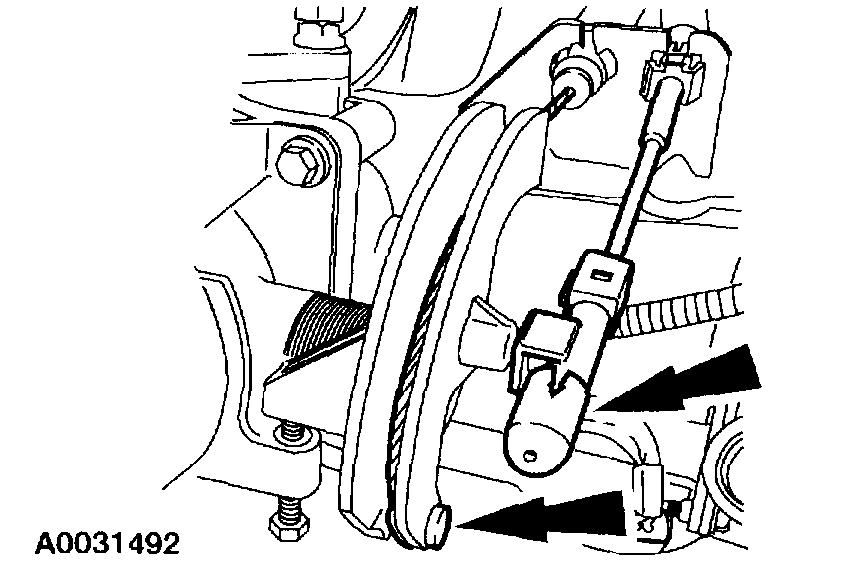
Items 1 and 2: Accelerator Cable and Speed Control Cable Removal Note
pic 5
1. Disconnect the accelerator and the speed control cables from the throttle body.
pic 6
2. Remove the accelerator cable and the speed control cable from the bracket. Position the cables away from the intake manifold.
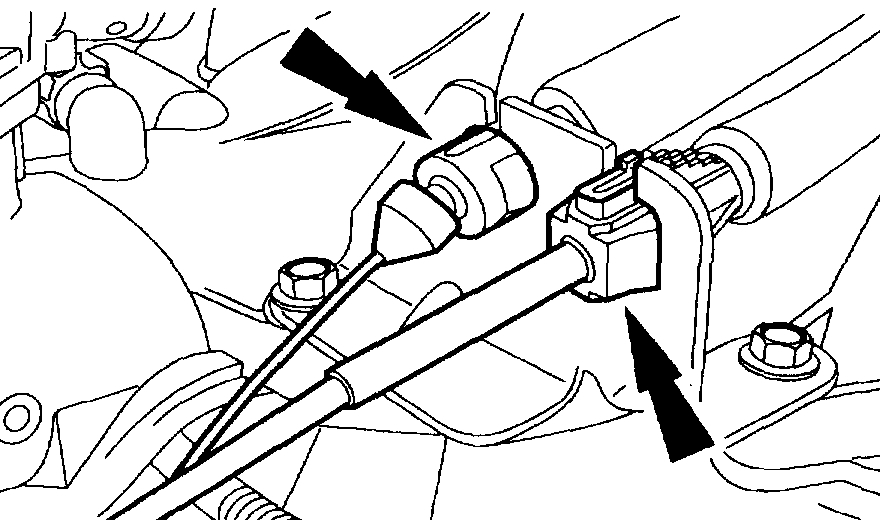
pic 7
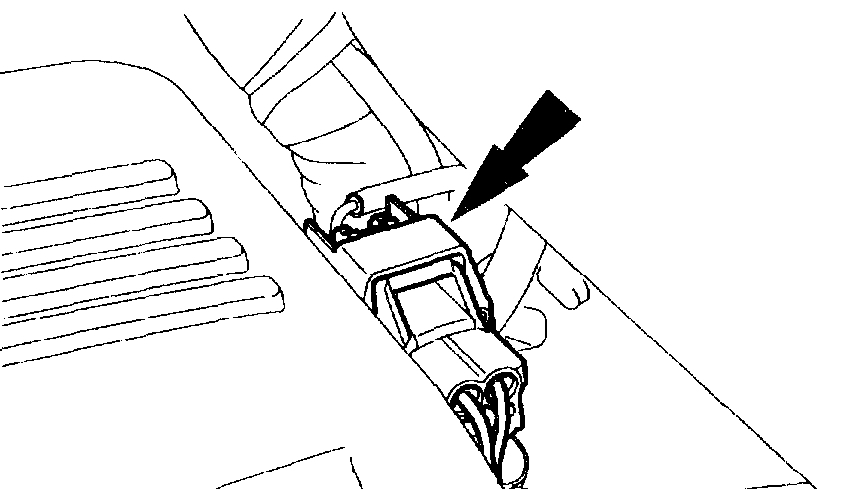
3. Disconnect the accelerator cable and the speed control cable routing clips. Disconnect the vacuum hose.
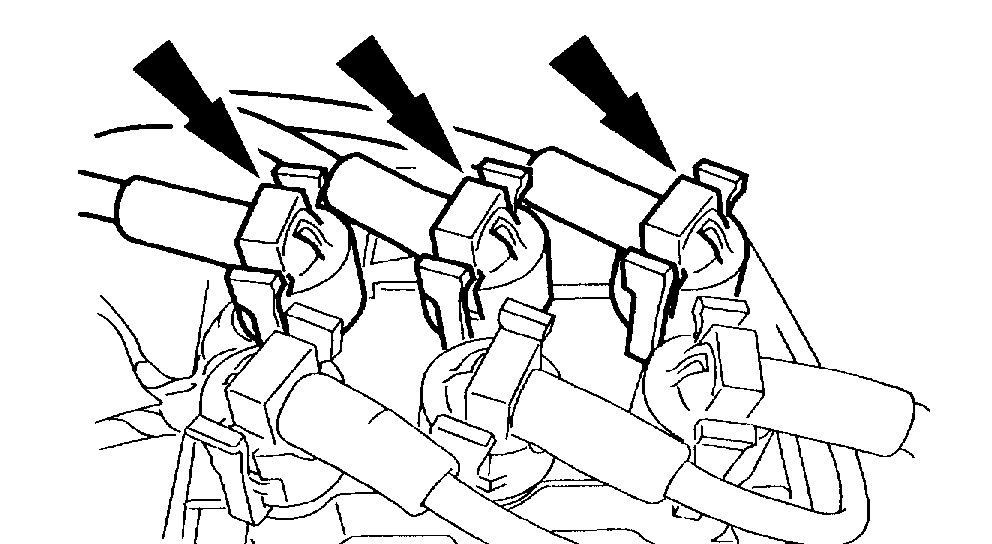
pic 8
4. CAUTION: It is important to twist the spark plug wire boots while pulling upward to avoid possible damage to the spark plug wires.
NOTE: Spark plug wires must be connected to the correct ignition coil terminal. Mark spark plug wire locations before removing them.
Disconnect the spark plug wires.
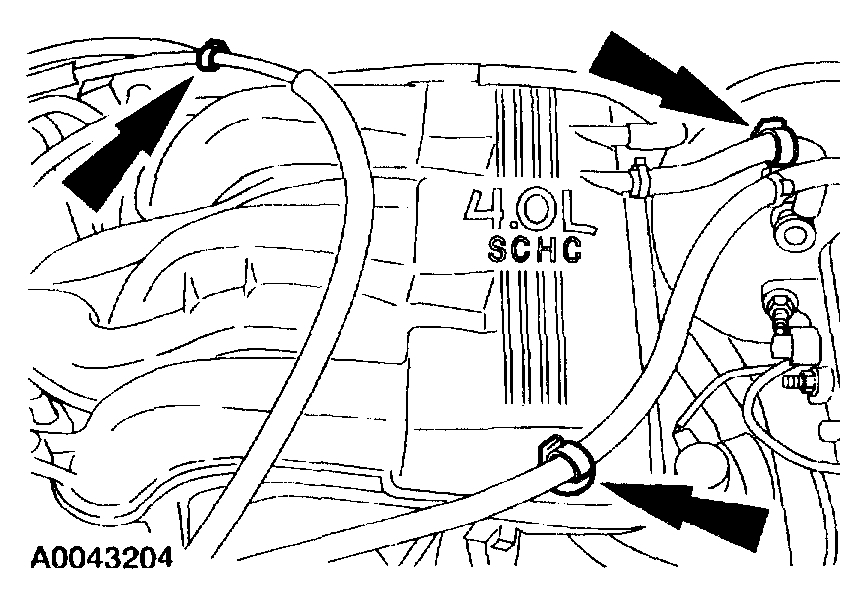
pic 9
5. Disconnect the Knock Sensor (KS) electrical connector retainer.
Item 21: Intake Manifold Gaskets Removal Note
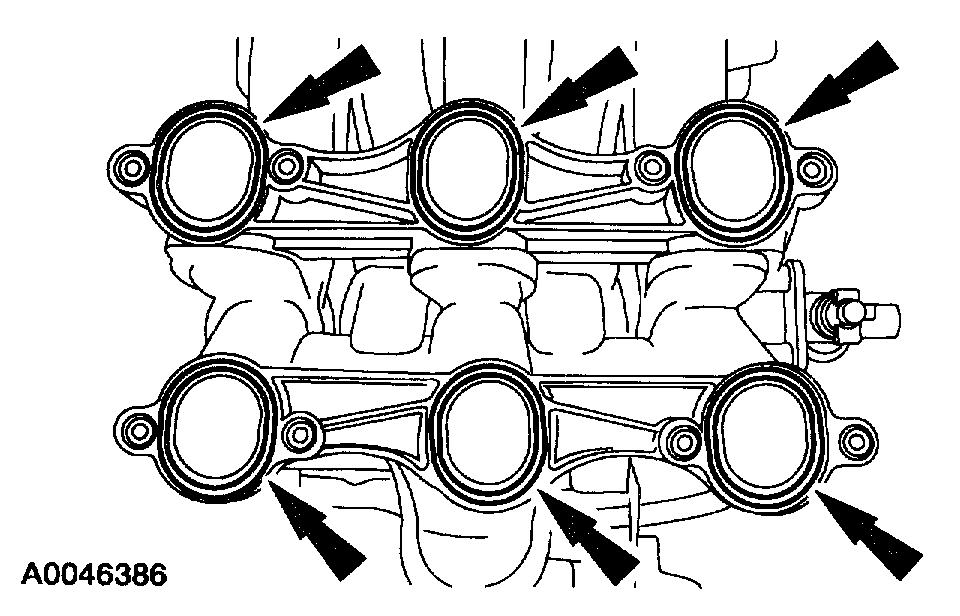
pic 10
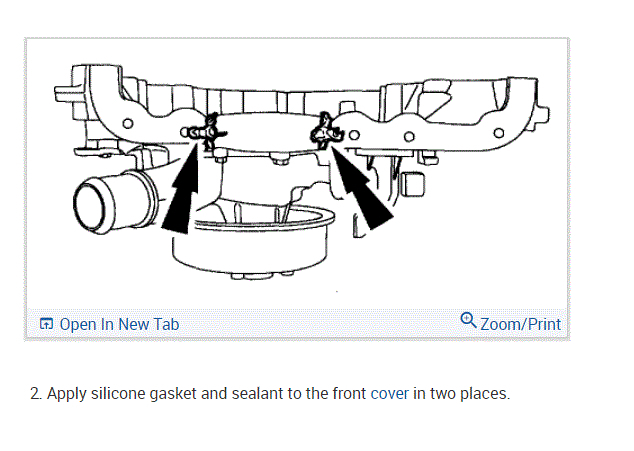
1. CAUTION: Do not use metal scrapers, wire brushes, power abrasive discs or other abrasive means to clean the sealing surfaces. These tools can cause scratches and gouges which can make leak paths.
Clean the sealing surfaces, inspect the gaskets and install new gaskets if necessary.
__________________________________
Valve Cover LH
2003 Ford Truck Explorer 4WD V6-4.0L VIN E
Valve Cover LH
Vehicle Engine, Cooling and Exhaust Engine Cylinder Head Assembly Valve Cover Service and Repair Procedures Valve Cover LH
VALVE COVER LH
Valve Cover LH
Removal and Installation
1. Remove the intake manifold.
pic 11
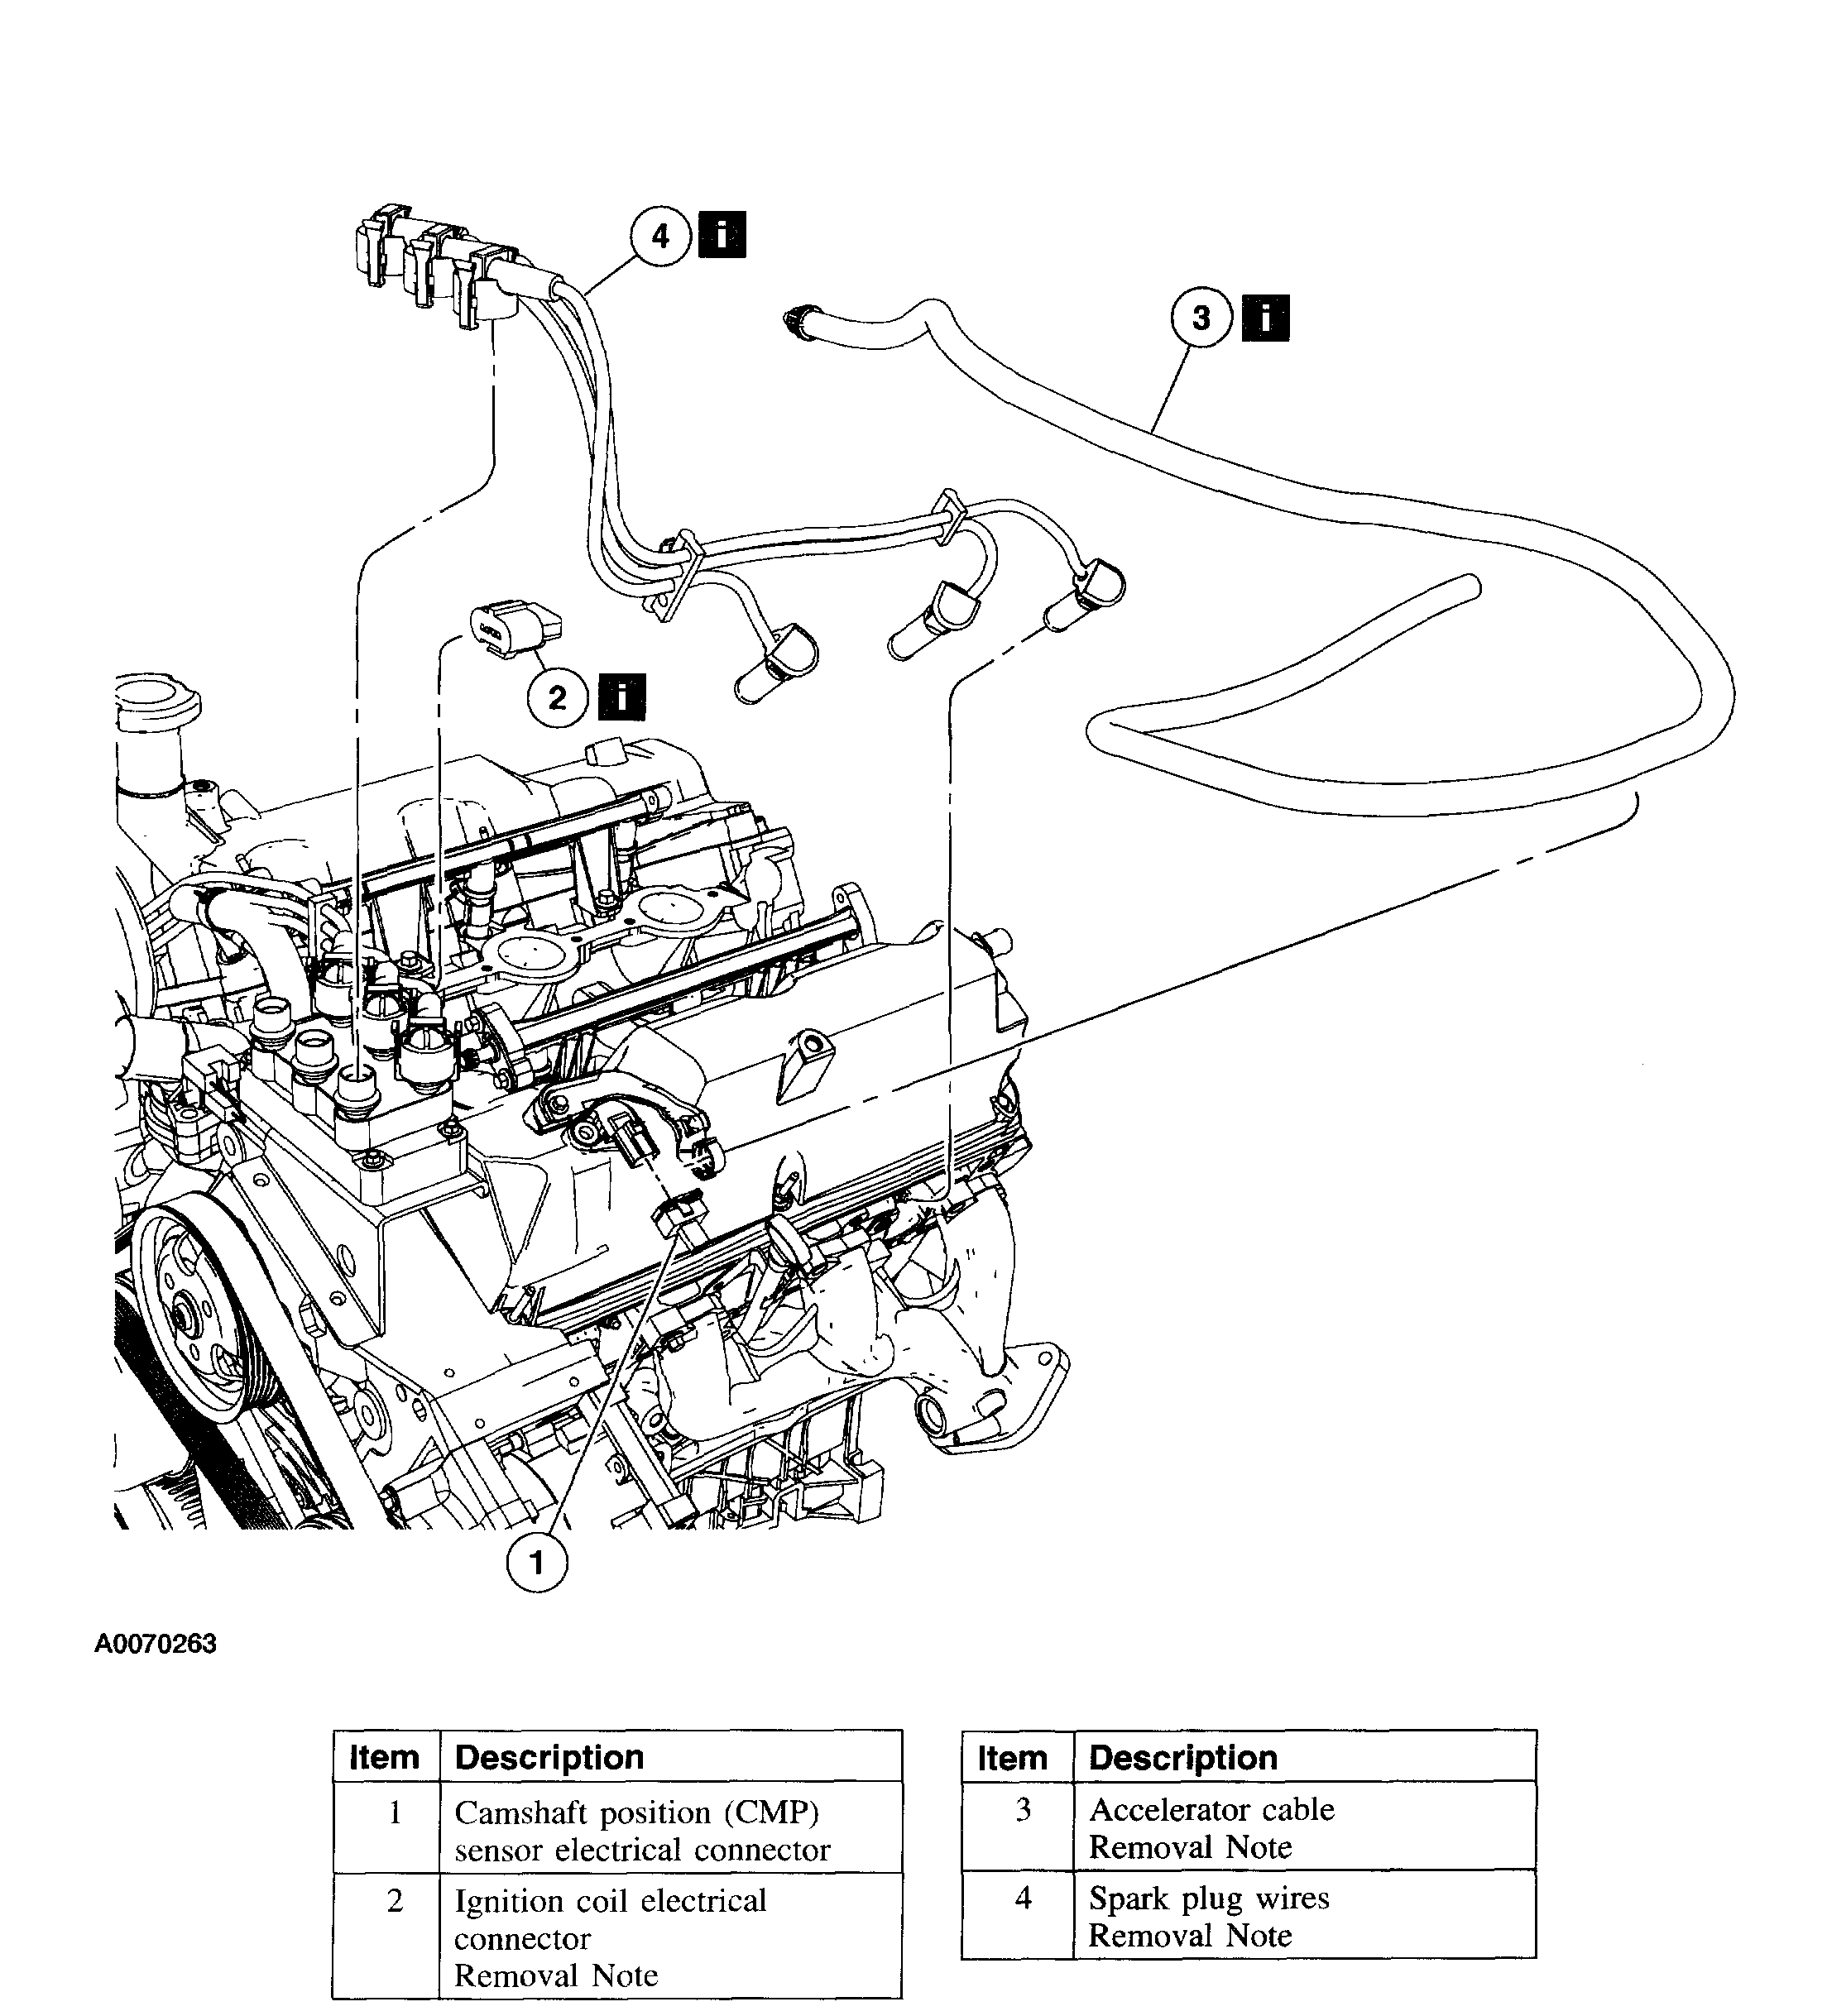
2. Illustration 1 of 2. Remove the components in the order indicated.
pic 12
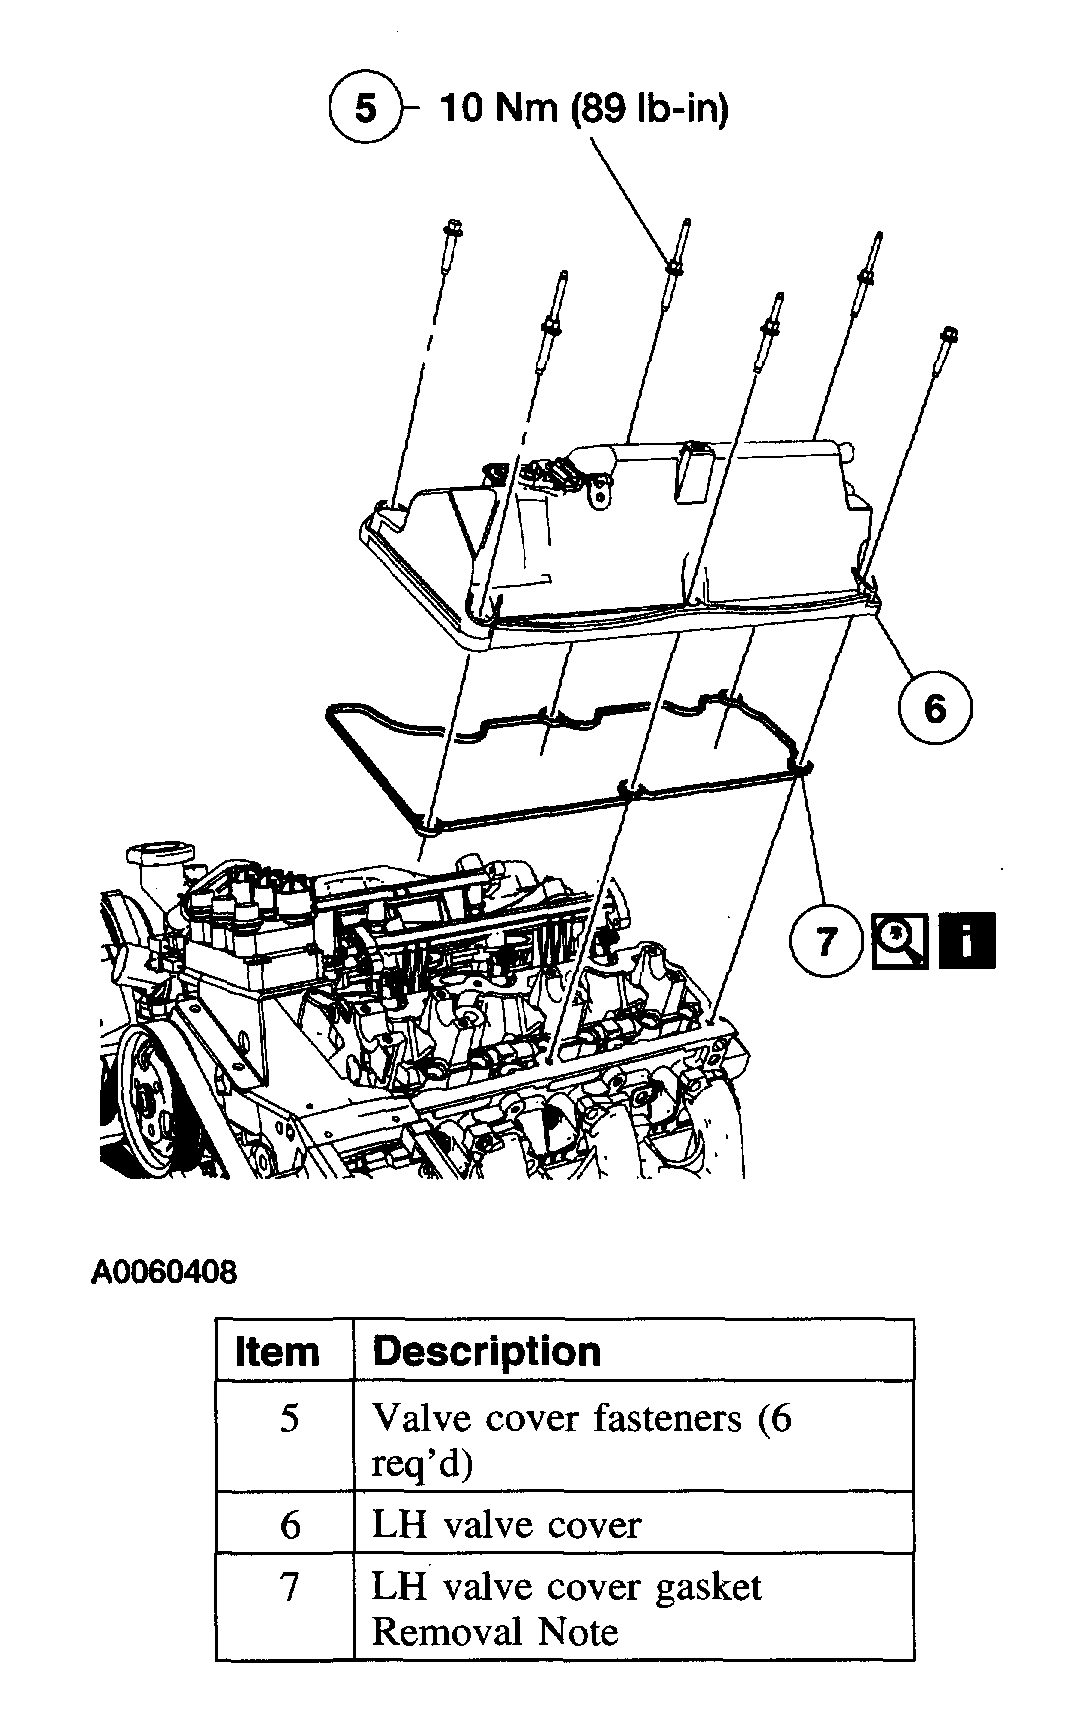
3. Illustration 2 of 2. Remove the components in the order indicated.
4. To install, reverse the removal procedure.
Item 2: Ignition Coil Electrical Connector Removal Note
1. Detach the pin-type retainer on the wiring harness near the ignition coil electrical connector.
pic 13
2. Disconnect the fuel injector electrical connectors and the harness standoff clips.
Item 3: Accelerator Cable Removal Note
pic 14
1. Disconnect the accelerator cable from the routing clip and position it aside.
Item 4: Spark Plug Wires Removal Note
pic 15
1. Disconnect the standoff clips and position the spark plug wires aside.
Item 7: Valve Cover Gasket Removal Note
pic 16
1. CAUTION: Do not use metal scrapers, wire brushes, power abrasive discs or other abrasive means to clean sealing surfaces. These tools cause scratches and gouges which make leak paths.
Clean and inspect the sealing surfaces. Install a new gasket, if necessary.
_________________________________
Valve Cover RH
2003 Ford Truck Explorer 4WD V6-4.0L VIN E
Valve Cover RH
Vehicle Engine, Cooling and Exhaust Engine Cylinder Head Assembly Valve Cover Service and Repair Procedures Valve Cover RH
VALVE COVER RH
Valve Cover RH
Removal and Installation
1. Release the fuel system pressure.
2. Remove the intake manifold.
Part 1 Of 2
pic 17
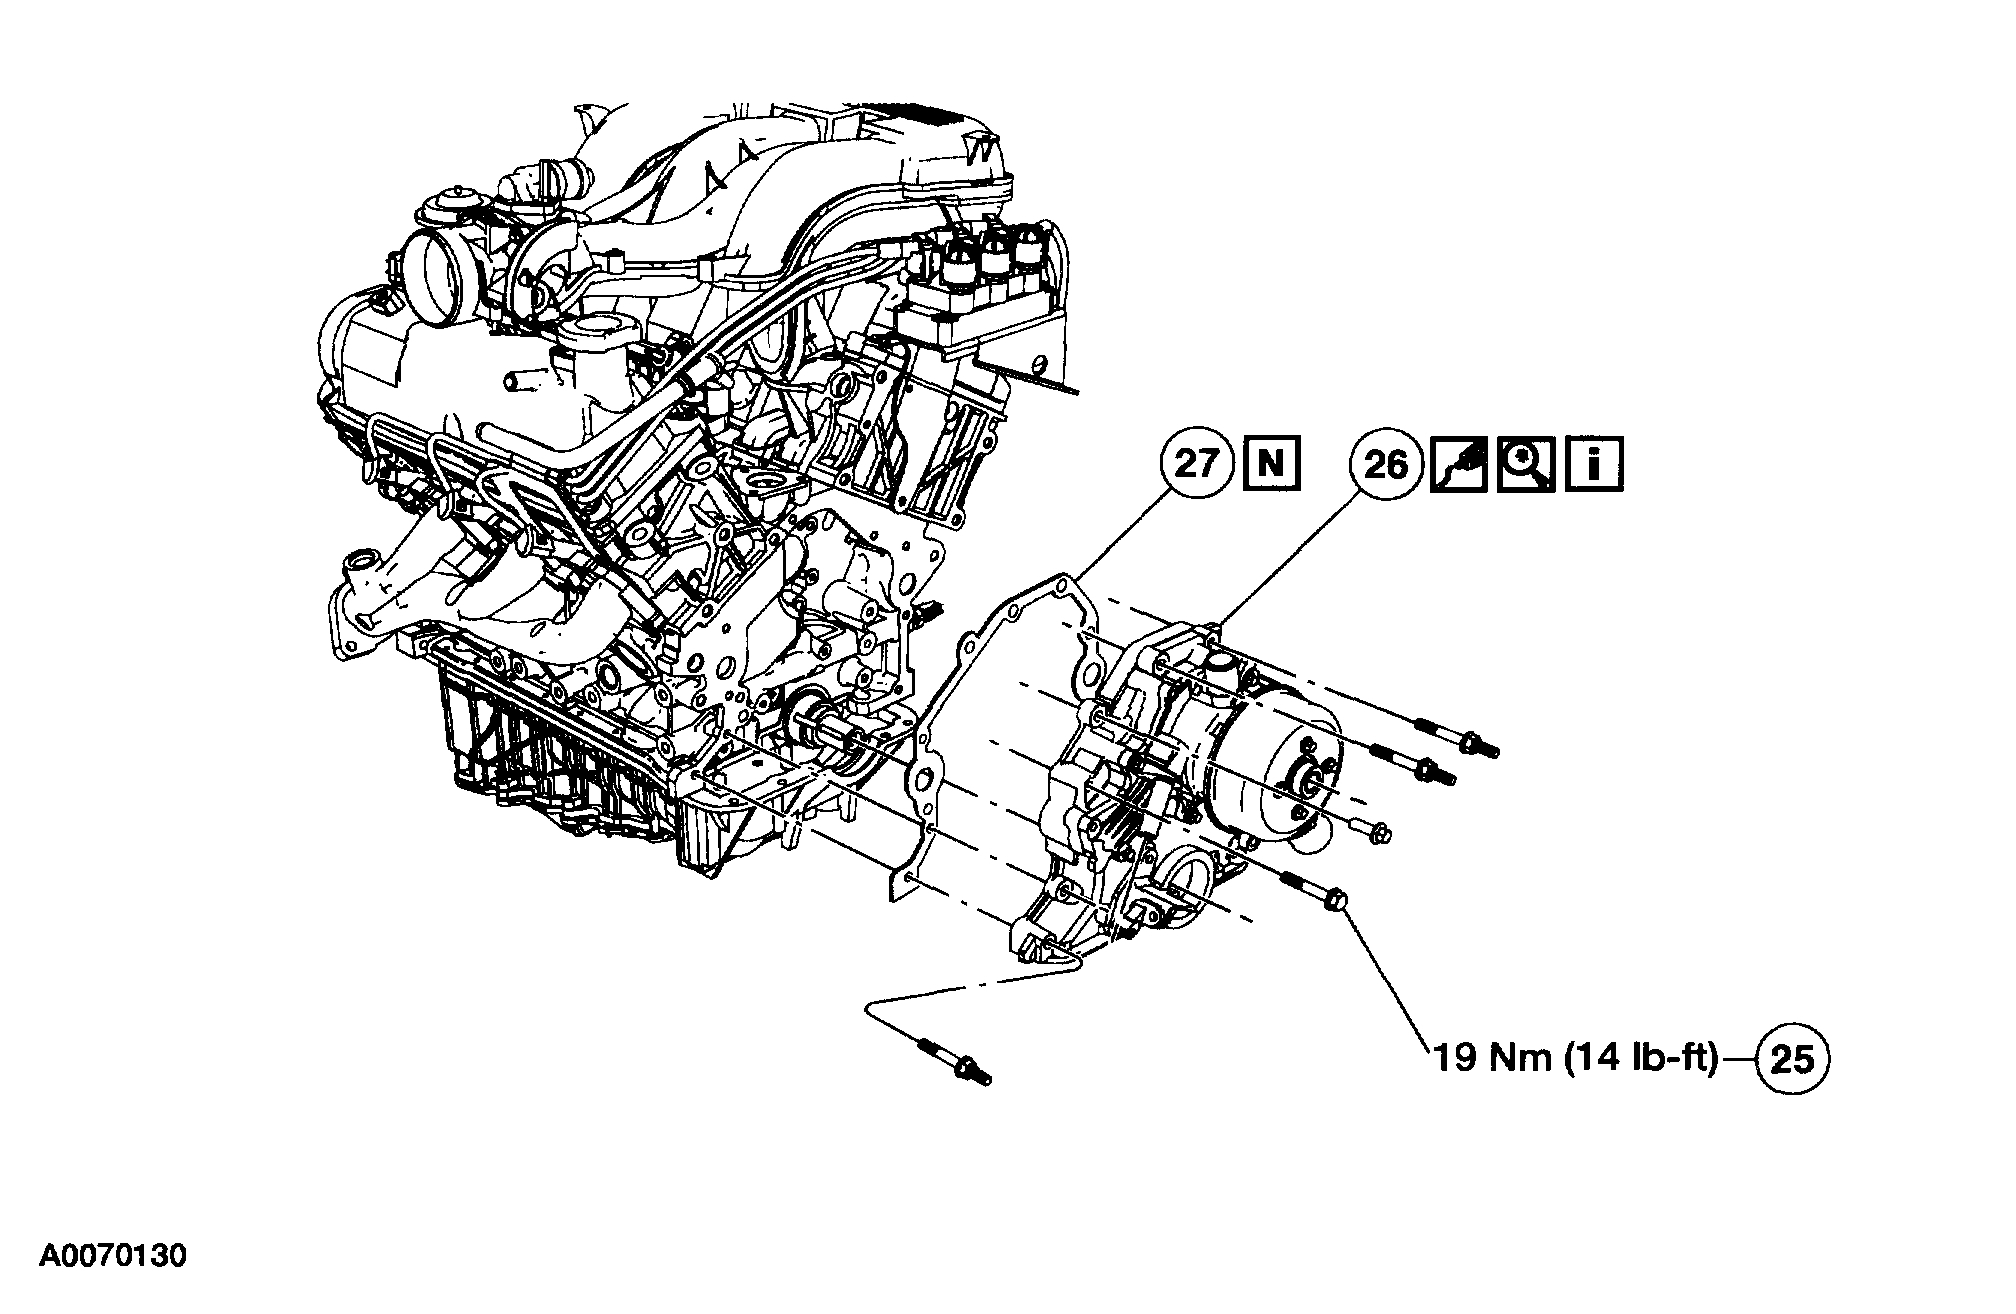
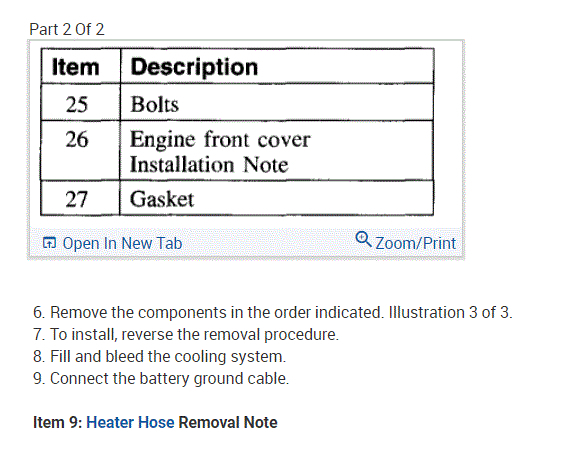
Part 2 Of 2
pic 18
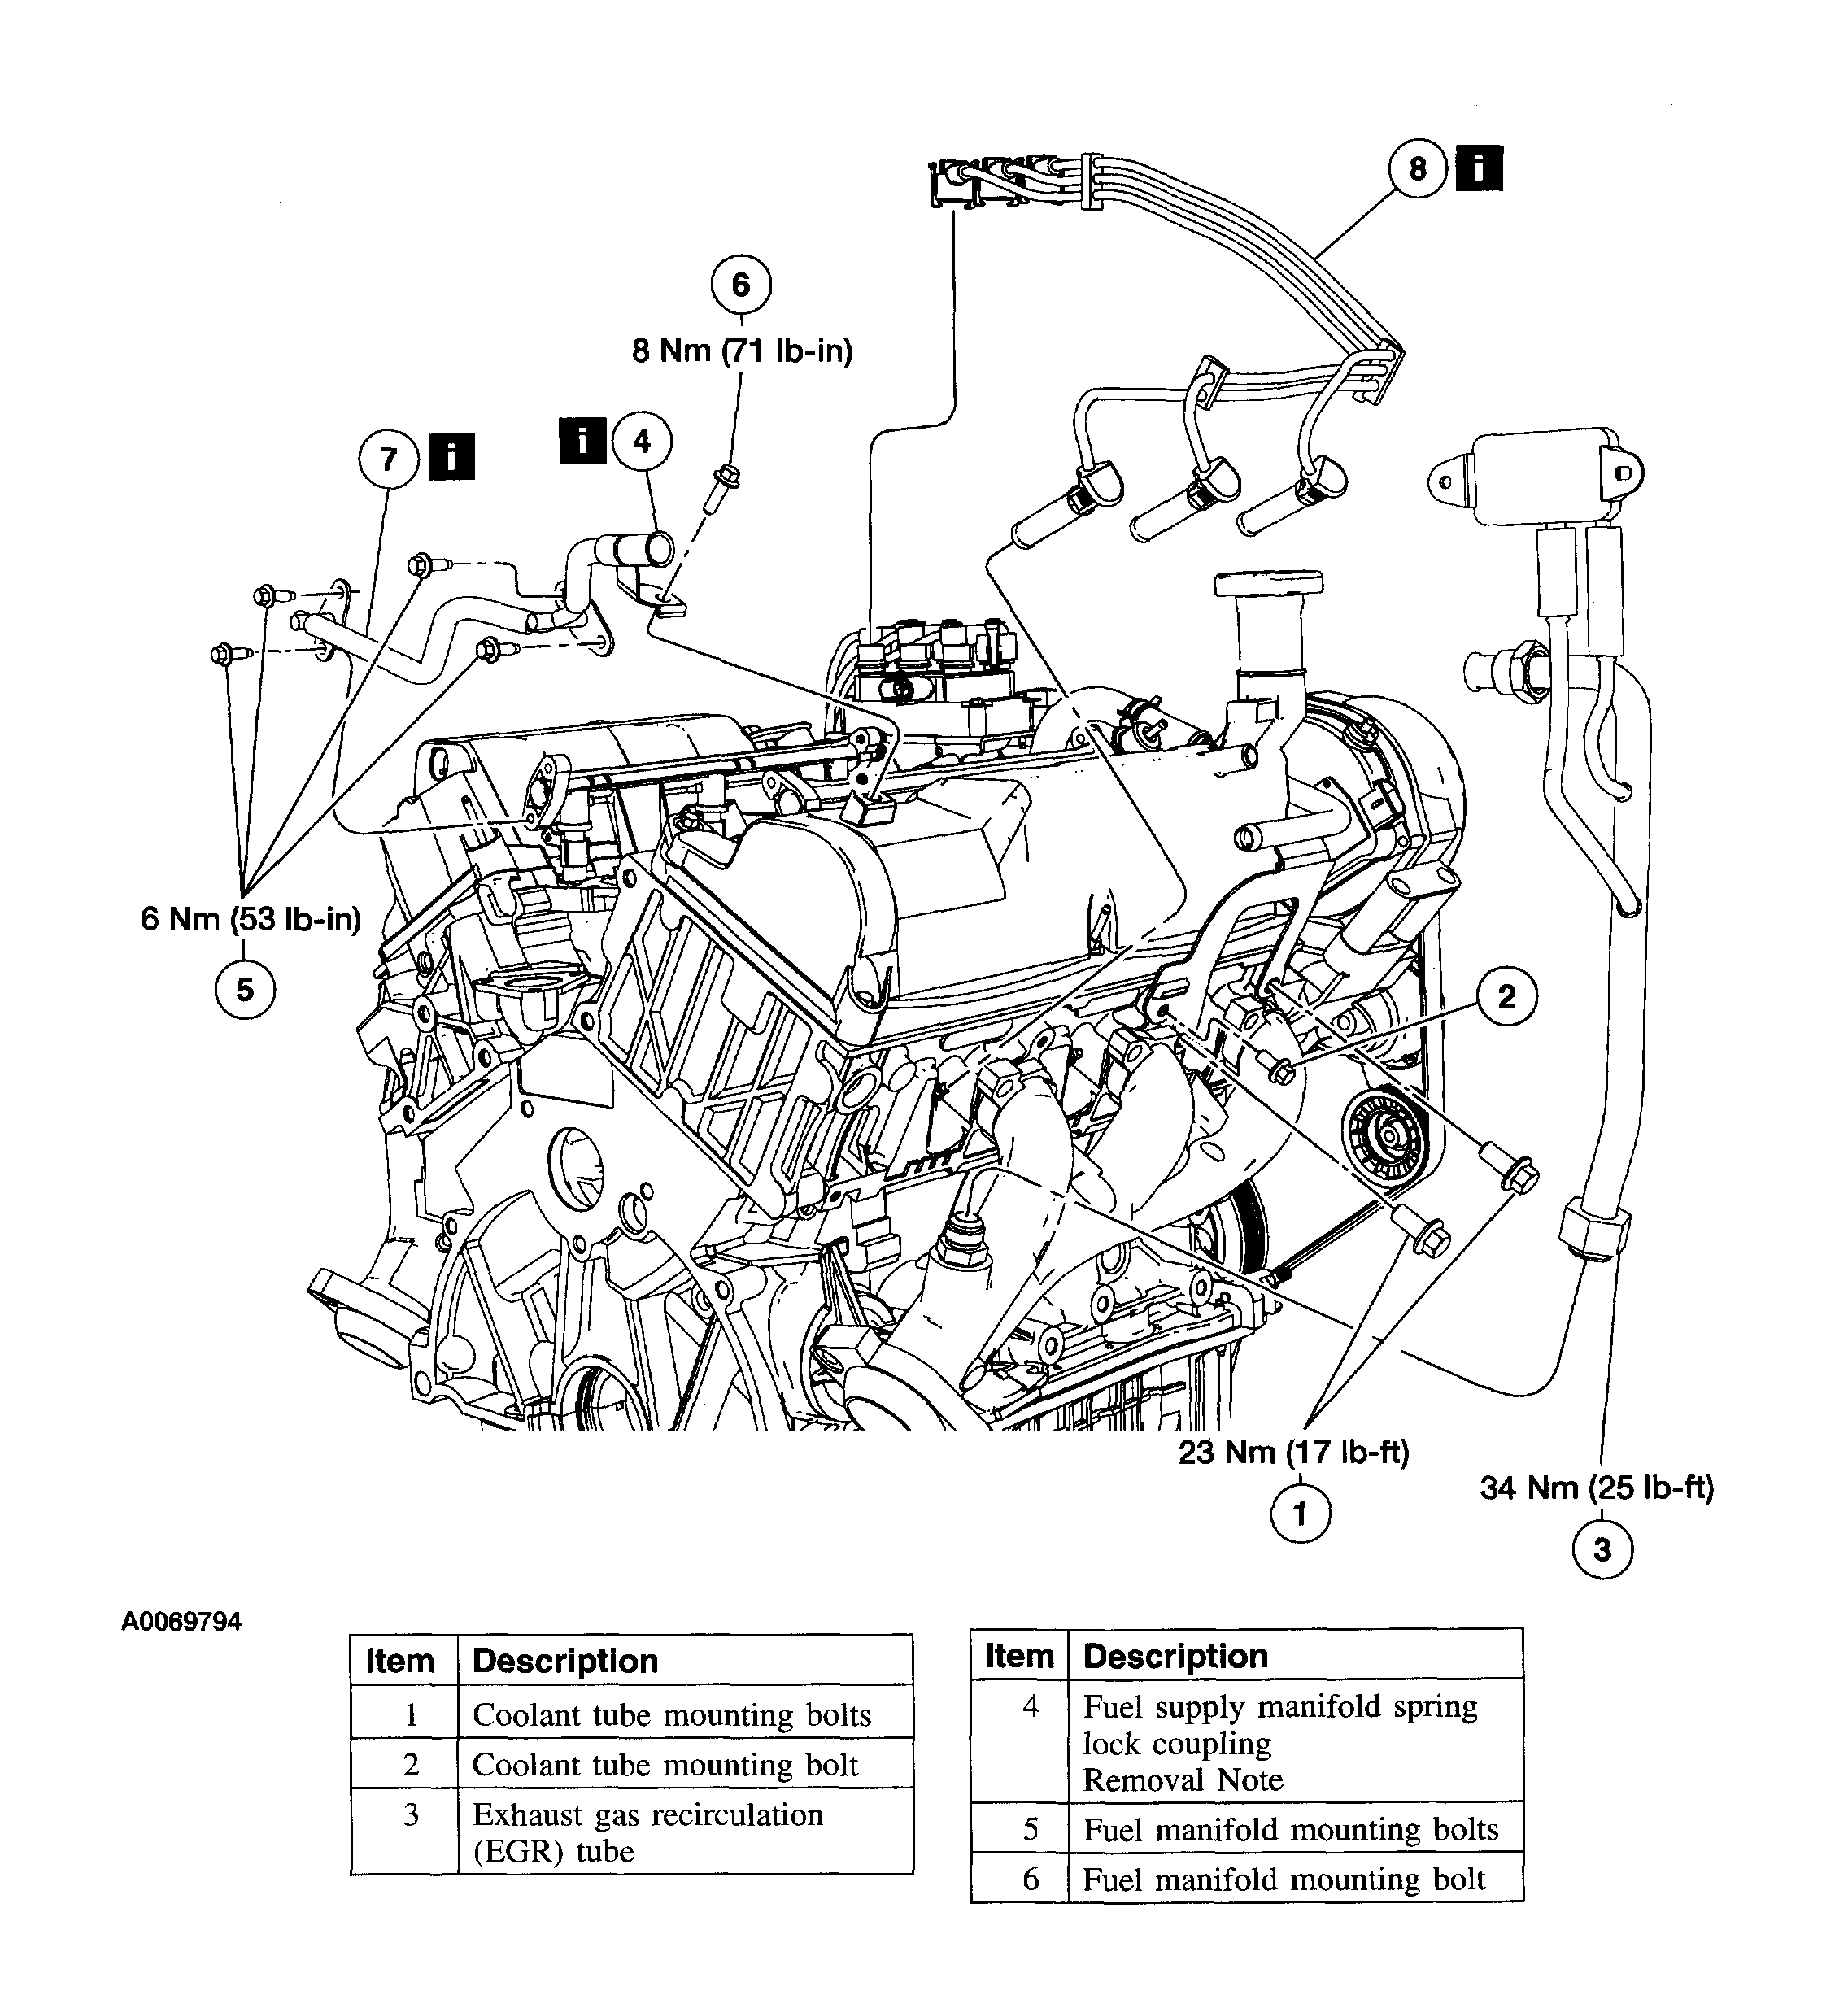
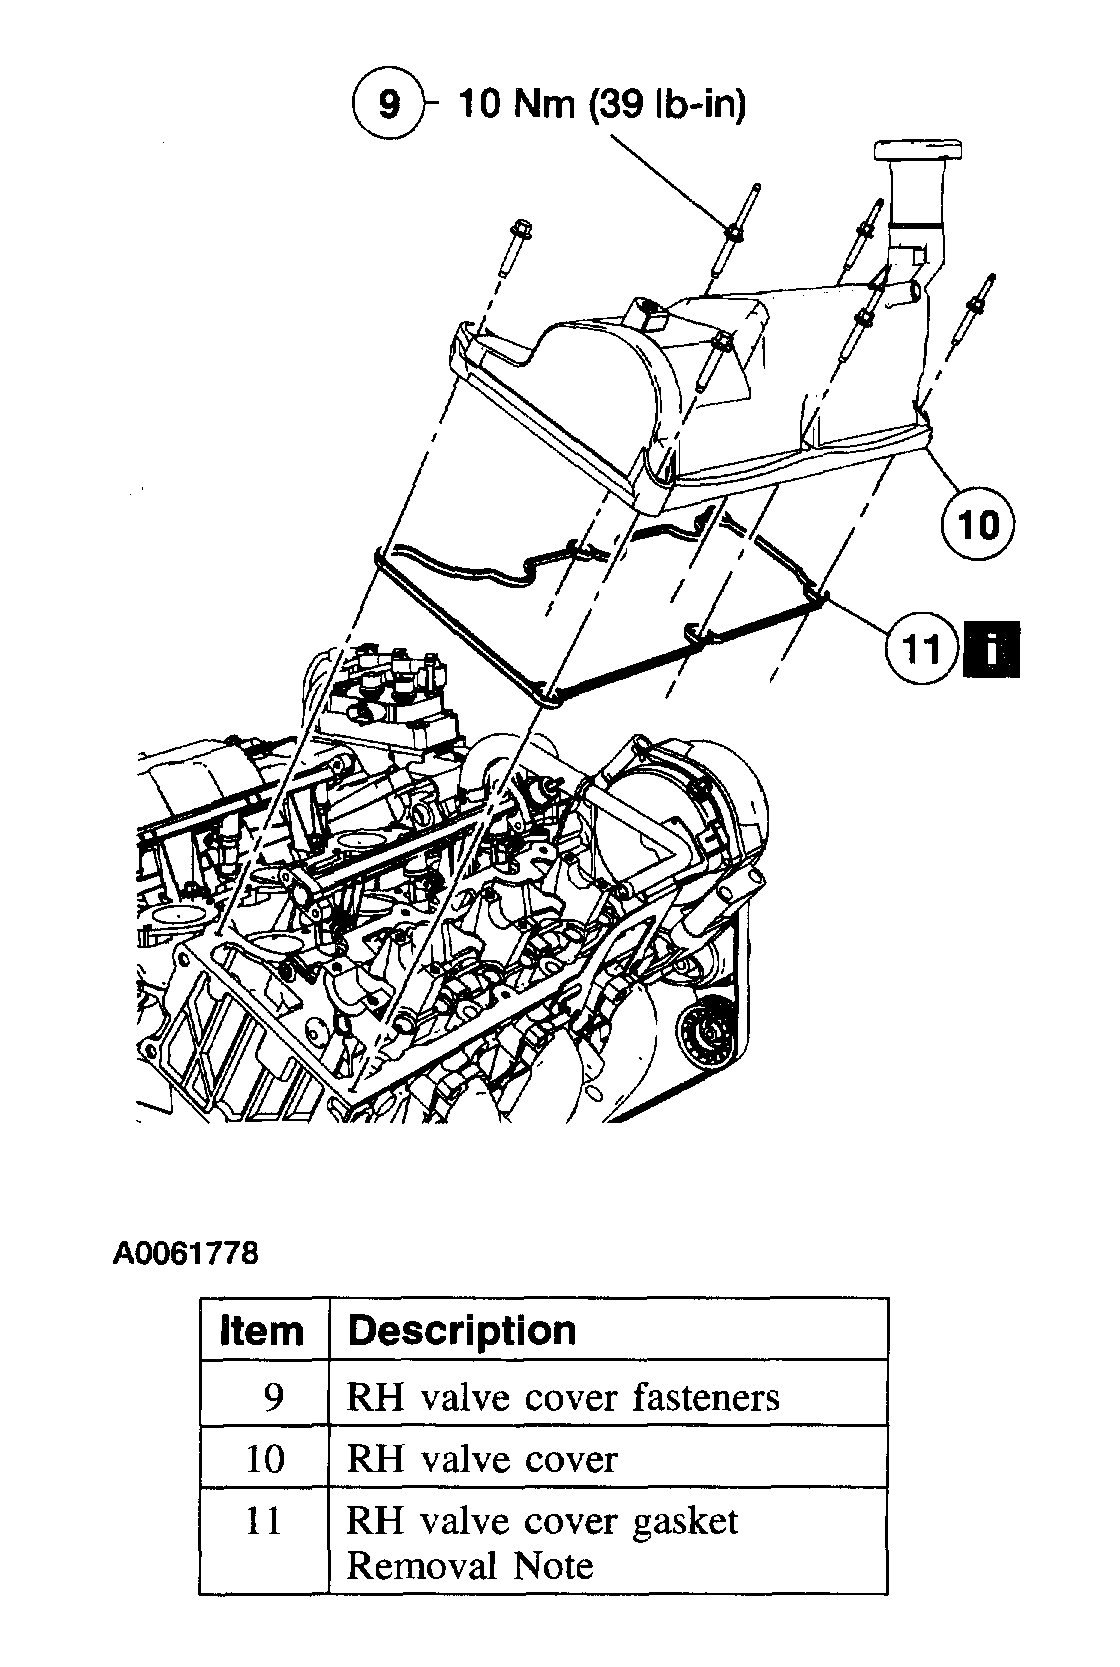
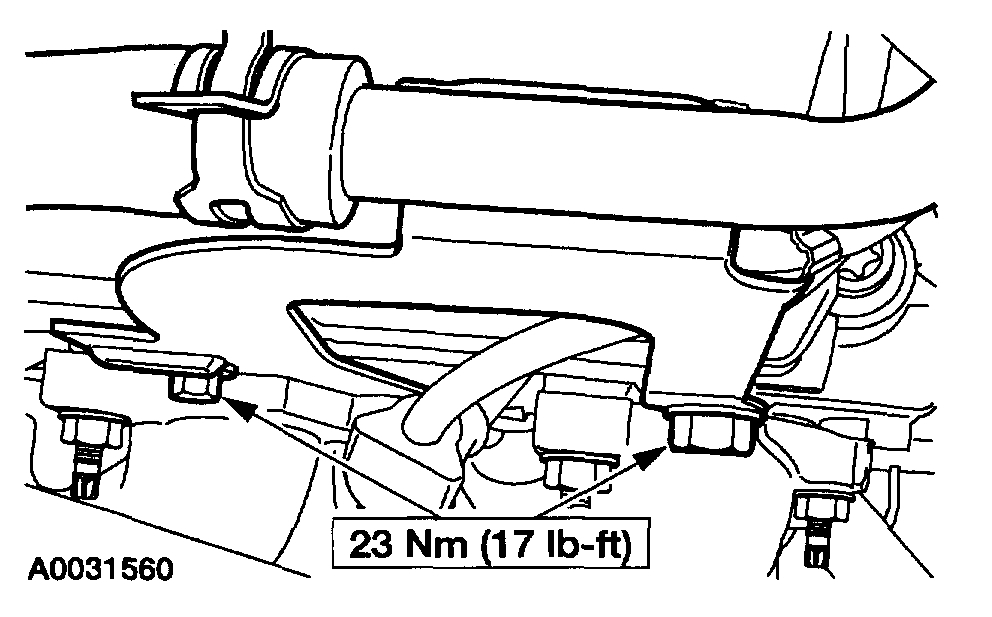
3. Illustration 1 of 2. Remove the components in the order indicated.
pic 19
4. Illustration 2 of 2. Remove the components in the order indicated.
5. To install, reverse the removal procedure.
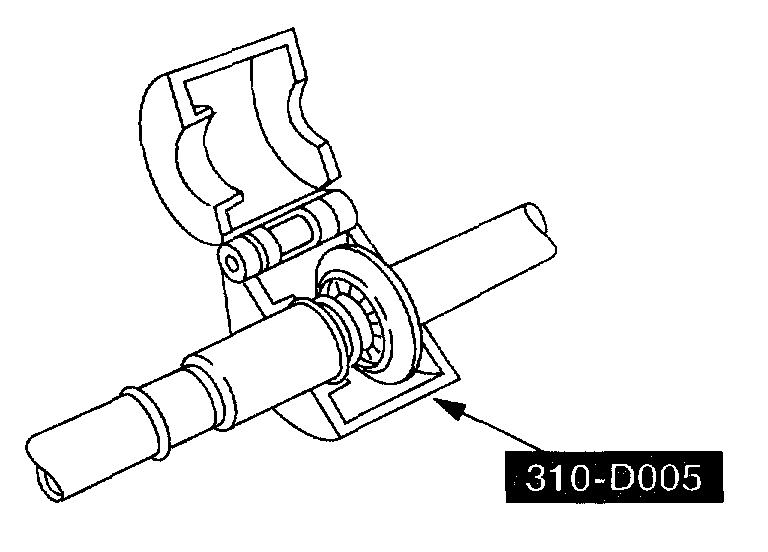
Item 4: Fuel Supply Manifold Spring Lock Coupling Removal Note
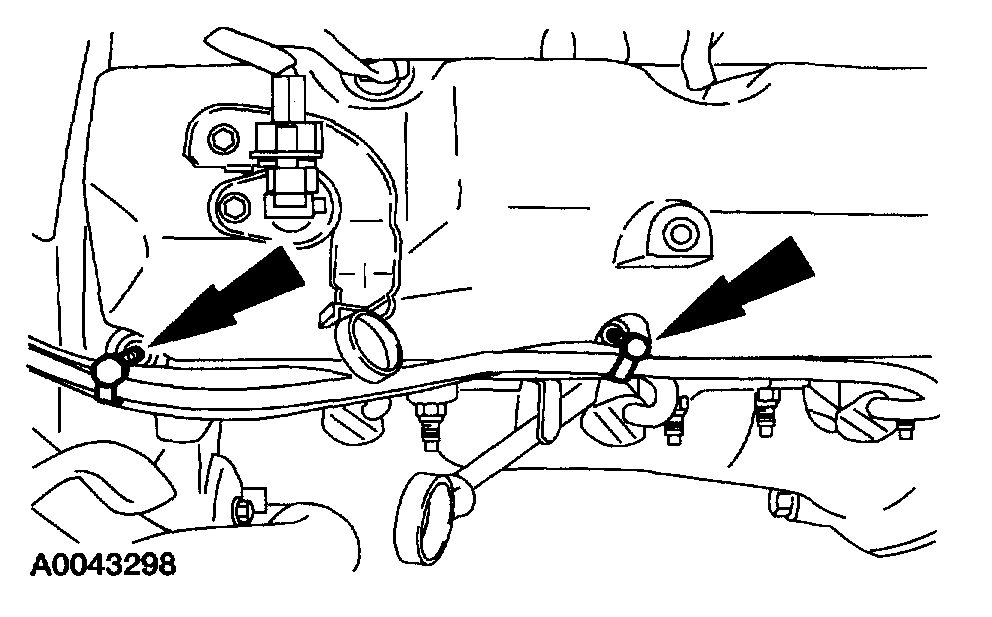
pic 20
1. Disconnect the fuel injector electrical connectors and routing clips.
pic 21
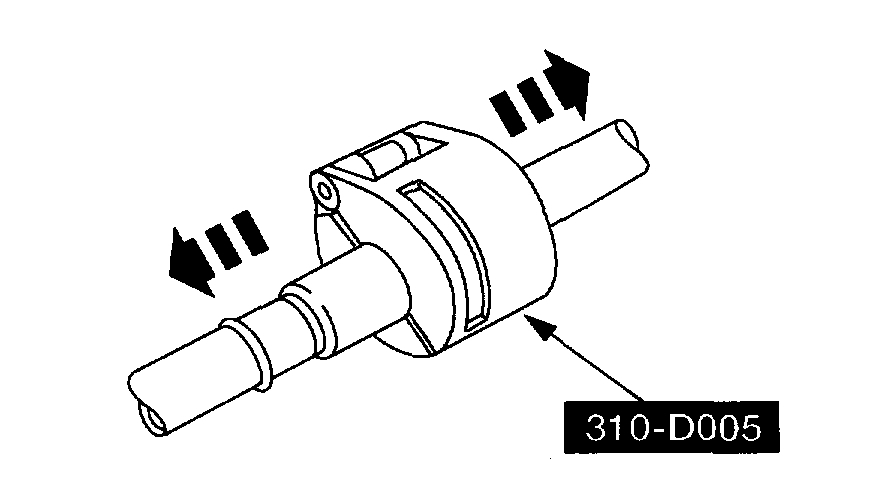
2. Install the special tool.
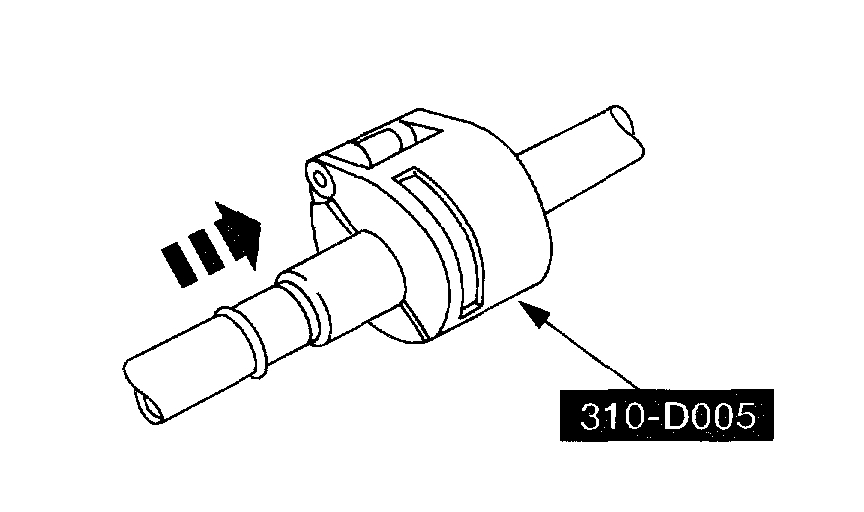
pic 22
3. Press the special tool into the open end of the cage.
pic 23
4. Separate the fuel line fitting.
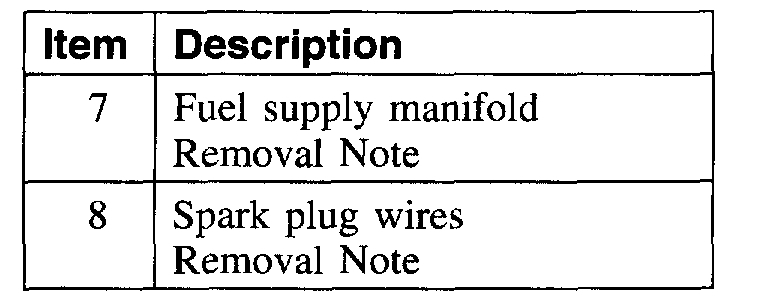
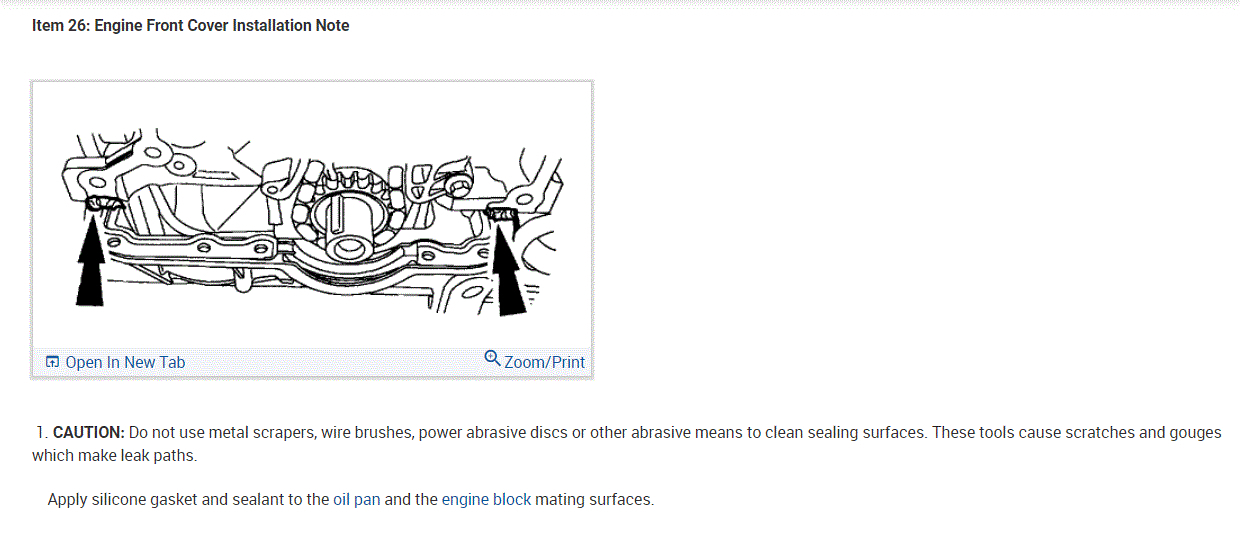
Item 7: Fuel Supply Manifold Removal Note
1. CAUTION: Use O-ring seals that are made of special fuel-resistant material. Use of ordinary O-ring seals can cause the fuel system to leak.
Discard the fuel supply manifold O-ring and install a new O-ring.
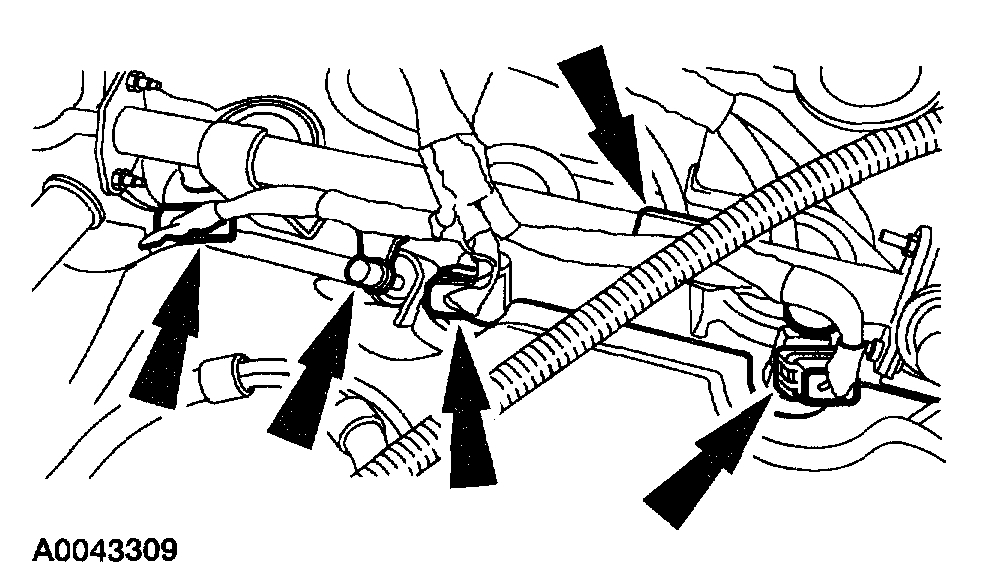
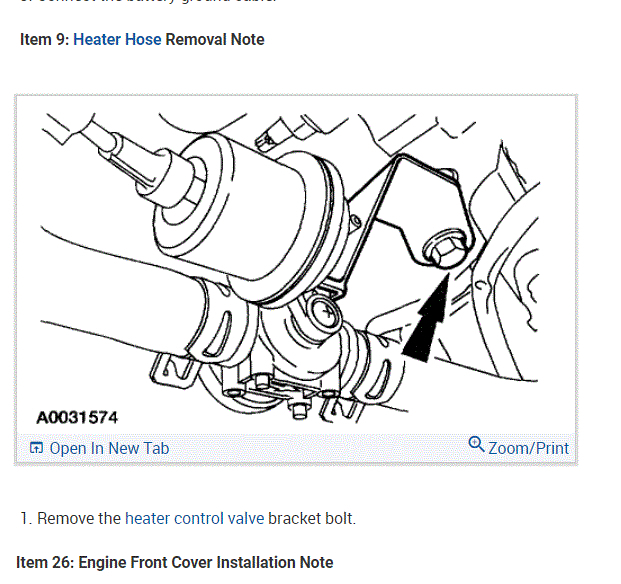
Item 8: Spark Plug Wires Removal Note
pic 24
1. Disconnect the retaining clips and position the spark plug wires aside.
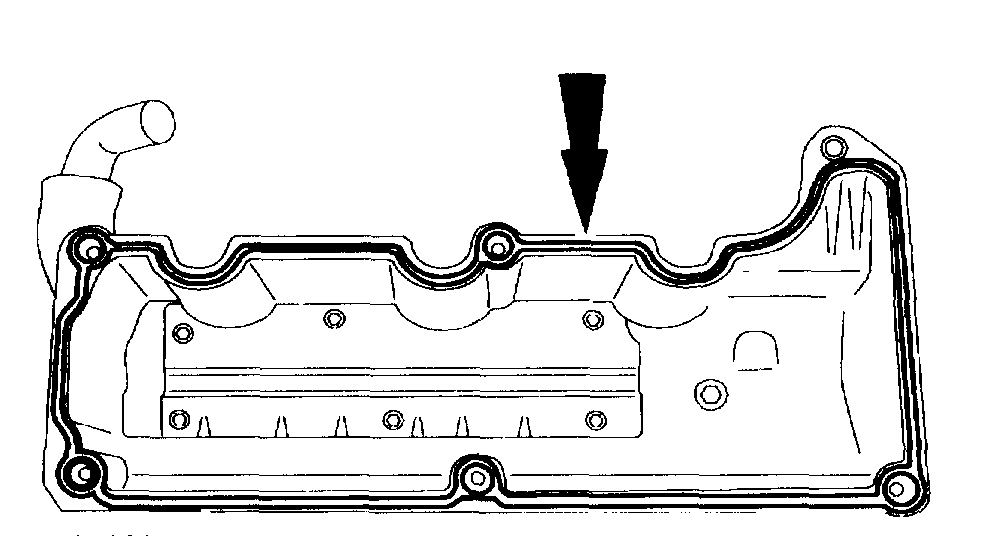
Item 11: RH Valve Cover Gasket Removal Note
pic 25
1. CAUTION: Do not use metal scrapers, wire brushes, power abrasive discs or other abrasive means to clean sealing surfaces. These tools cause scratches and gouges which make leak paths.
Clean and inspect the sealing surfaces. Install a new gasket, if necessary.
__________________________
I hope this helps. Let me know if you have other questions.
Take care and God Bless.
Joe
Images (Click to enlarge)
Mar 11, 2021 at 6:55 PM