You will need to discharge and recharge the air conditioner as well, here is a link for that
https://www.2carpros.com/articles/re-charge-an-air-conditioner-system
Here are the core replacement instructions.
Heater core replacement replacement general guide.
https://www.2carpros.com/articles/replace-heater-core
Tools Required
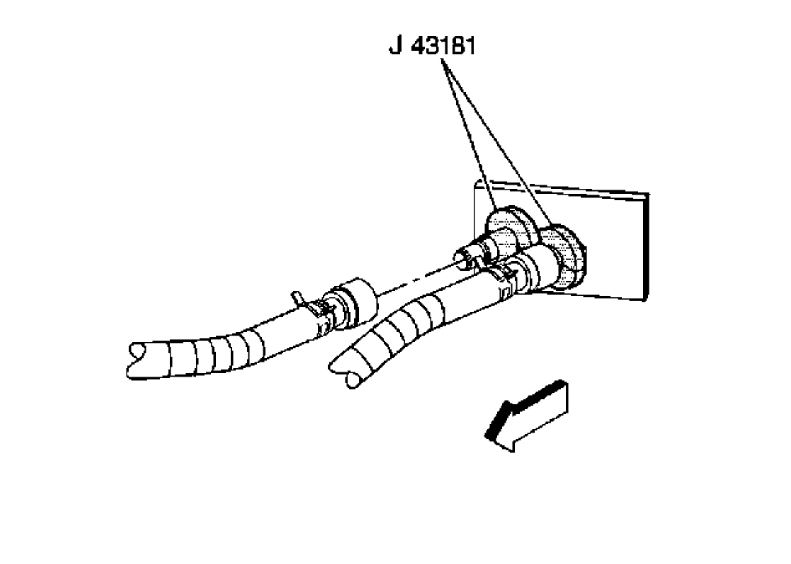
J 43181 Quick Connect Connector Removal Tool
Removal Procedure
Drain the engine coolant. Refer to Draining and Filling Cooling System (w/RPO HP2) or Draining and Filling Cooling System (w/o RPO HP2) in Engine Cooling.
If equipped remove the auxiliary battery. Refer to Battery Replacement - Auxiliary in Engine Electrical.
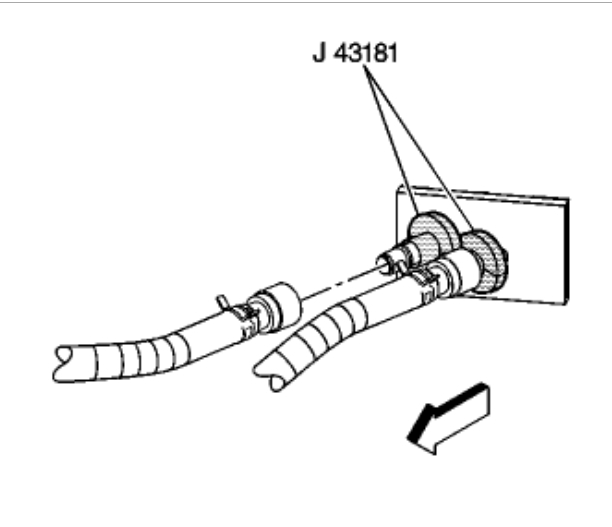
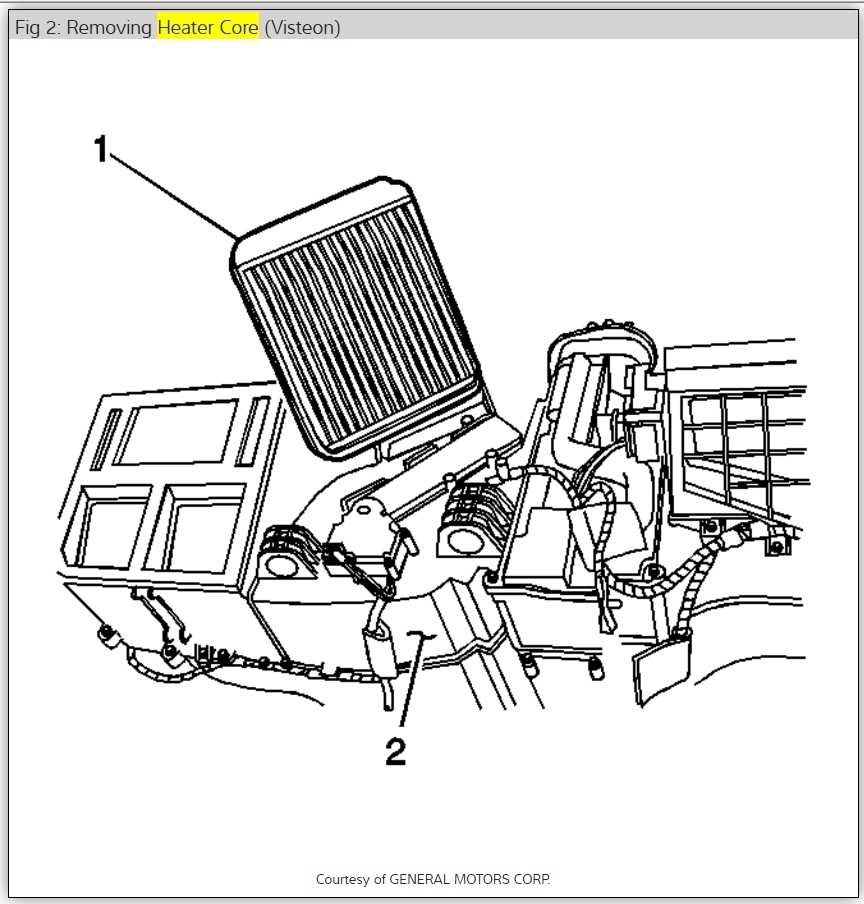
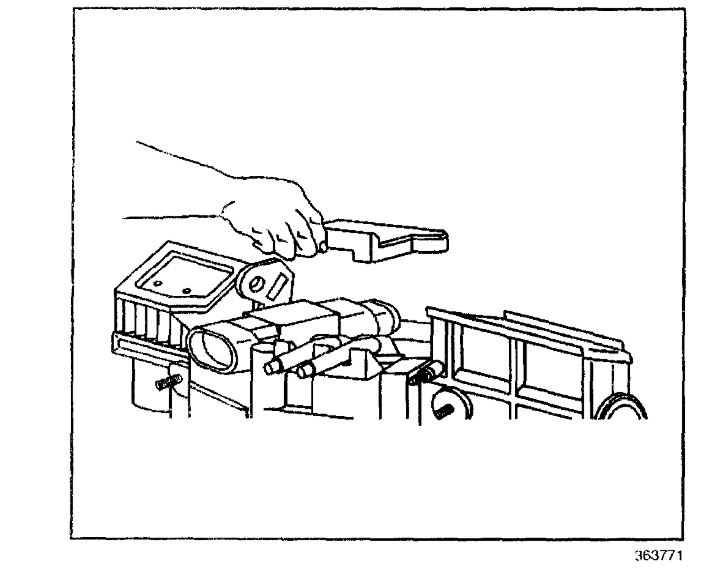
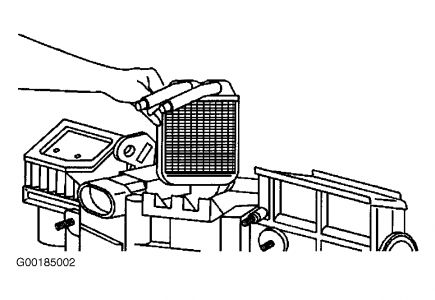
Using the J 43181 disconnect the inlet heater hose from the heater core.
Install the J 43181 to the heater core pipe.
Close the tool around the heater core pipe.
Firmly pull the tool into the quick connect end of the heater hose.
Firmly grasp the heater hose. Pull the heater hose forward in order to disengage the inlet hose from the heater core.
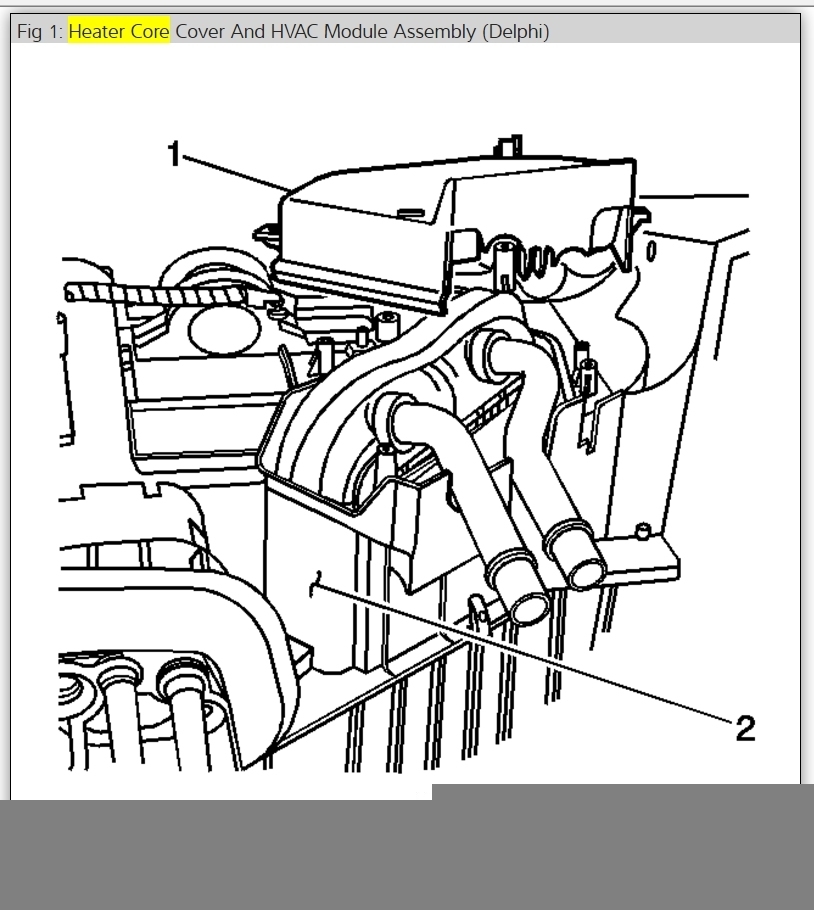
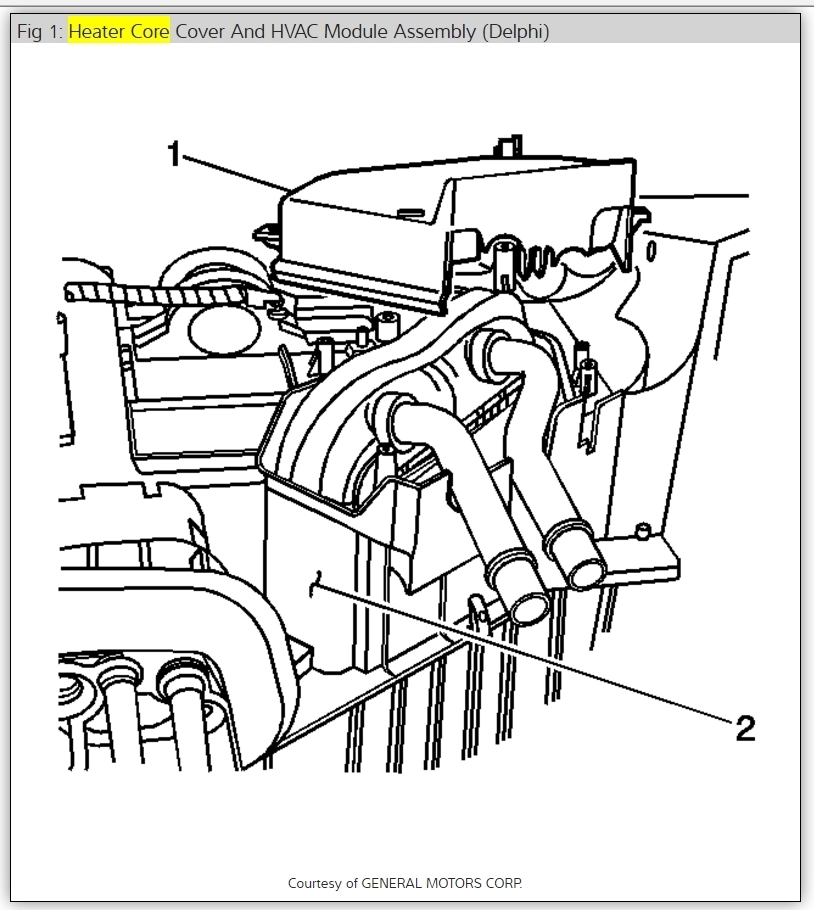
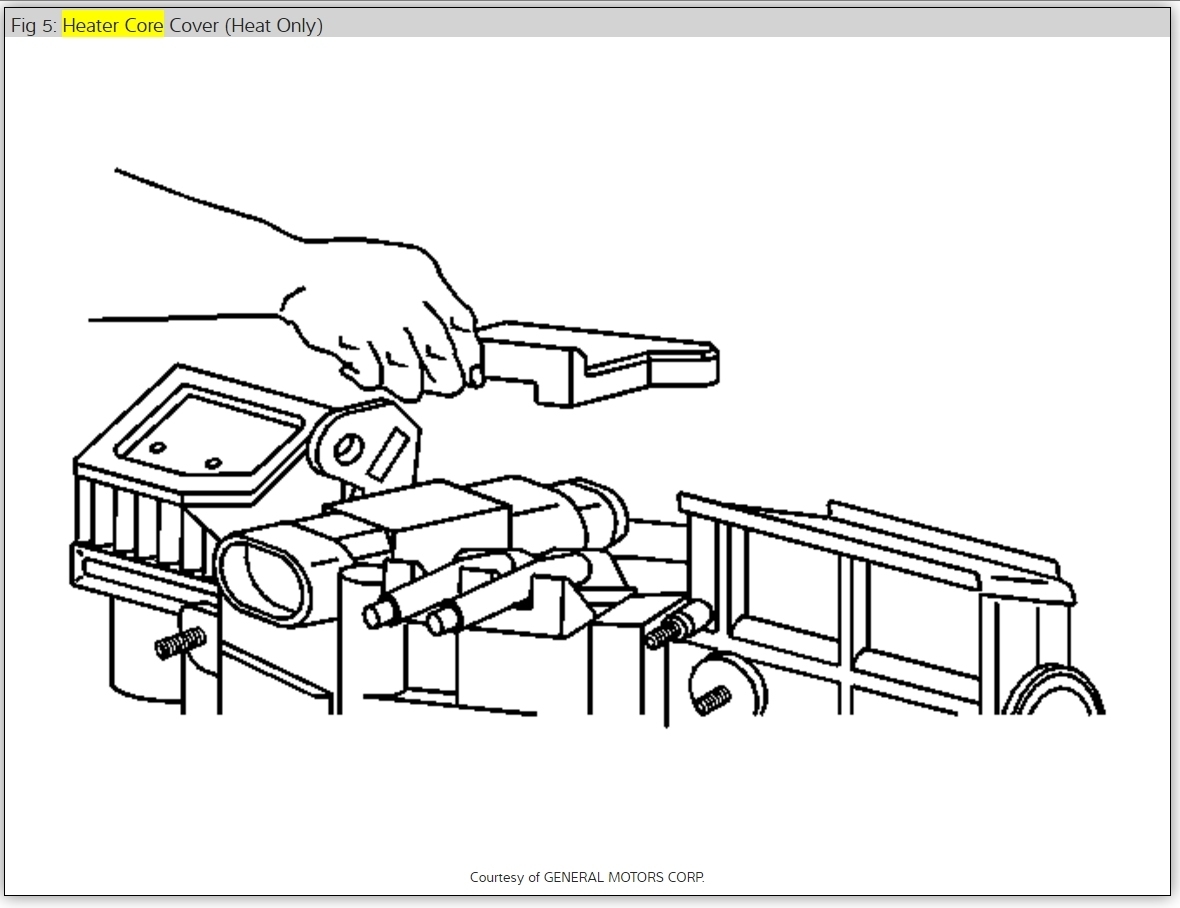
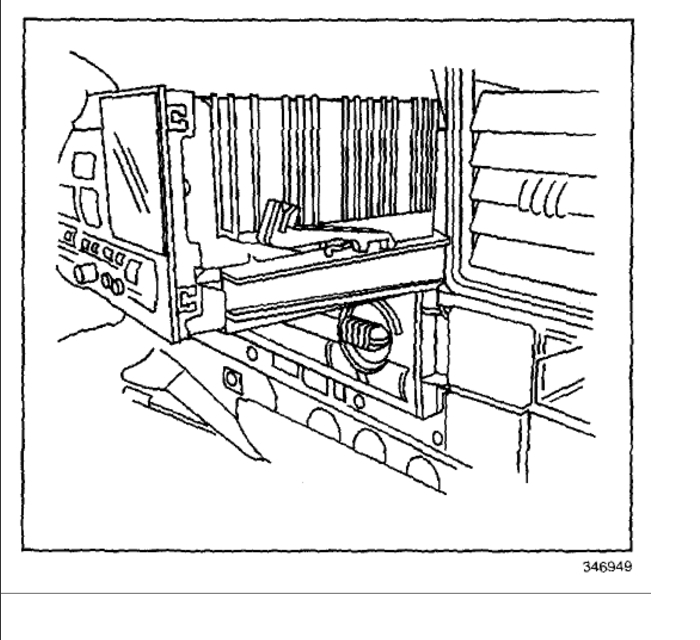
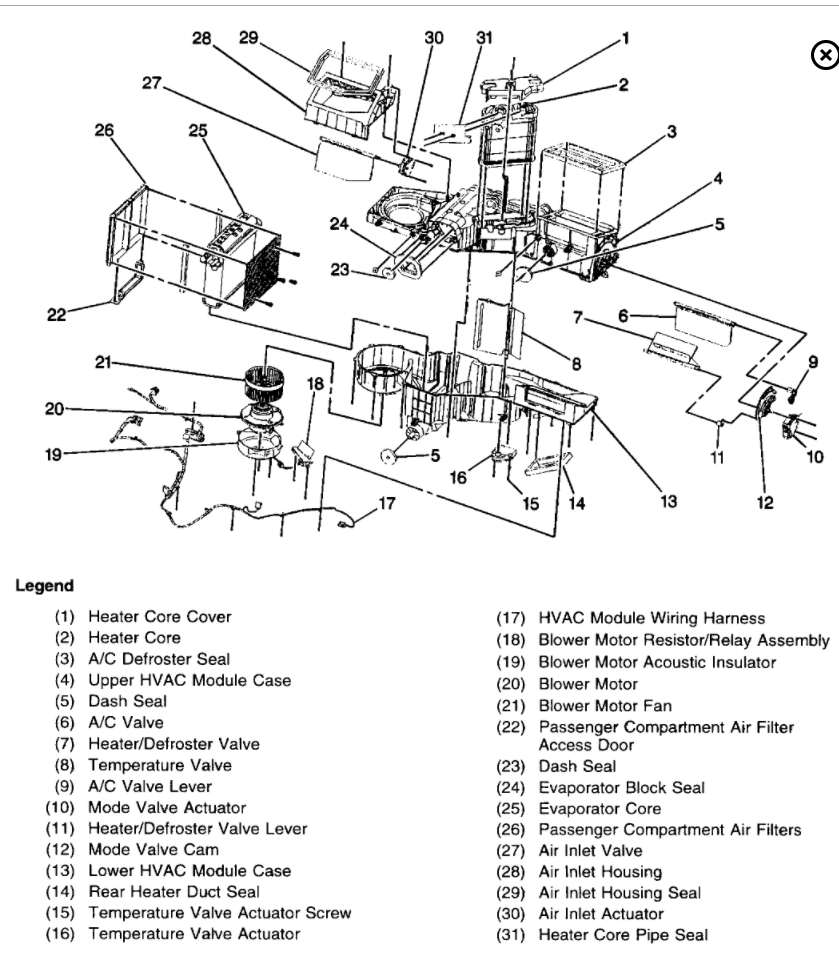
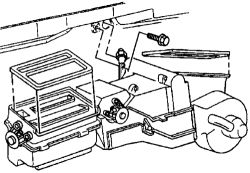
Fig 1: Identifying Heater Hose To Heater Core Fittings
GM362171
Courtesy of GENERAL MOTORS CORP.
View Full-Screen
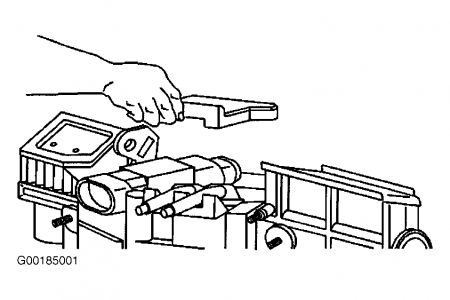
Using the J 43181 disconnect the surge tank outlet hose from the heater core.
Install the J 43181 to the heater core pipe.
Close the tool around the heater core pipe.
Firmly pull the tool into the quick connect end of the heater hose.
Firmly grasp the heater hose. Pull the heater hose forward in order to disengage the surge tank outlet hose from the heater core.
Remove the accumulator. Refer to Accumulator Replacement .
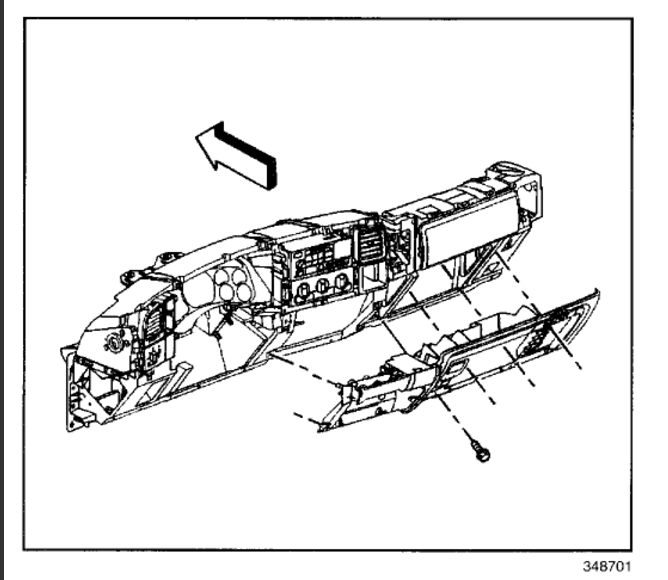
Remove the instrument panel carrier. Refer to Instrument Panel (I/P) Carrier Replacement in Instrument Panel, Gages and Console.
Remove the HVAC module drain hose.
Disconnect the electrical harnesses and the ground connections from the HVAC module.
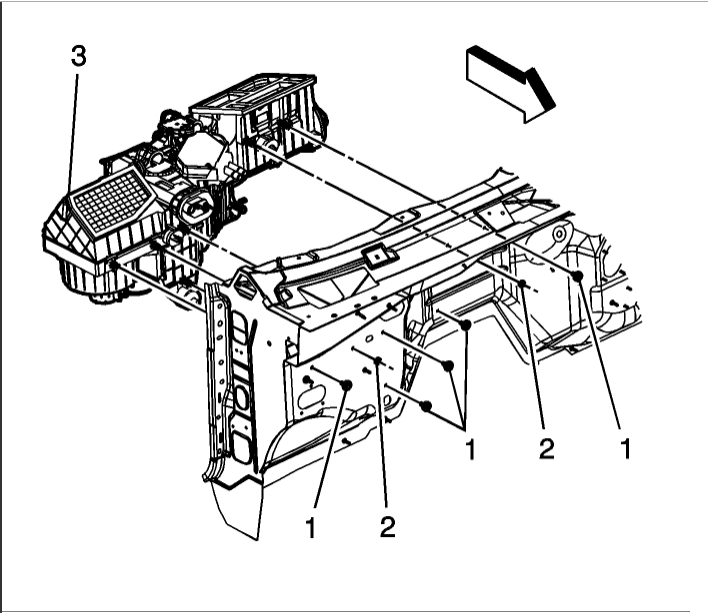
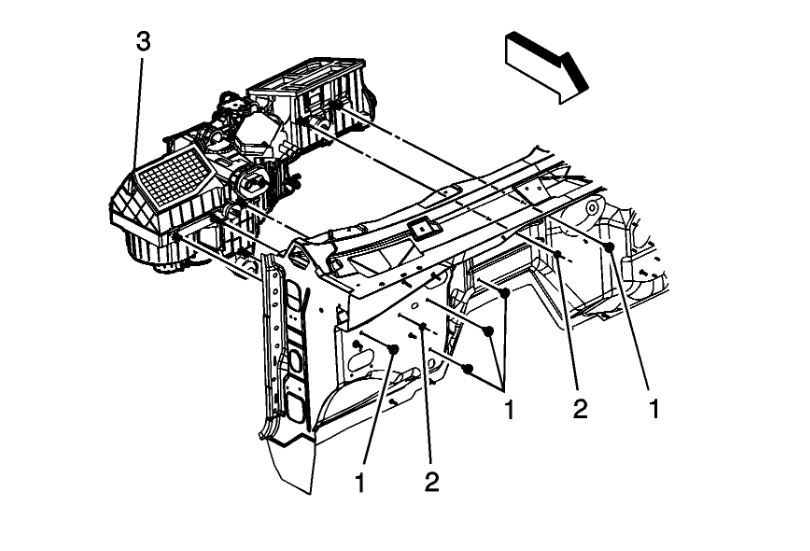
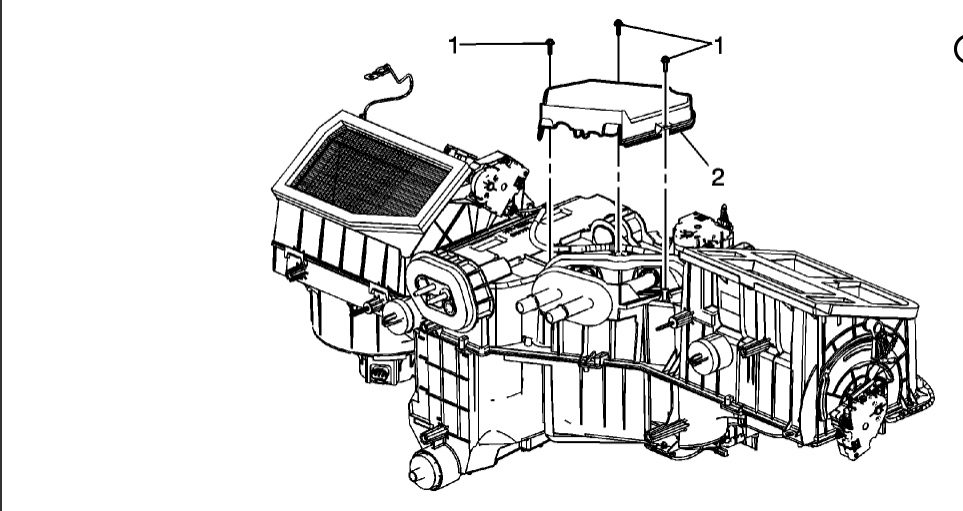
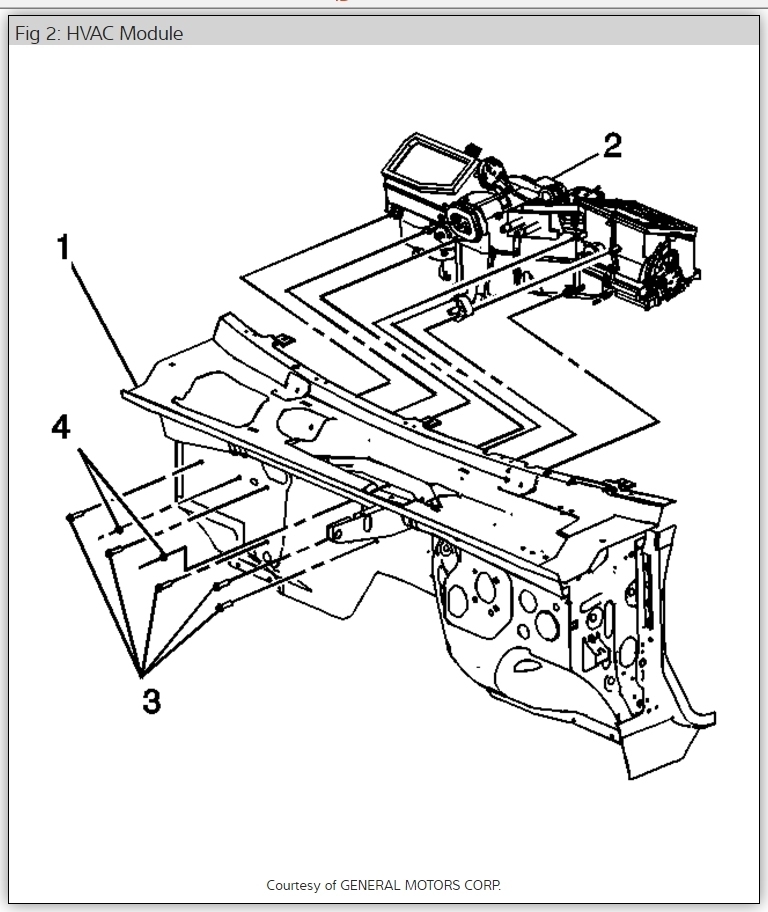
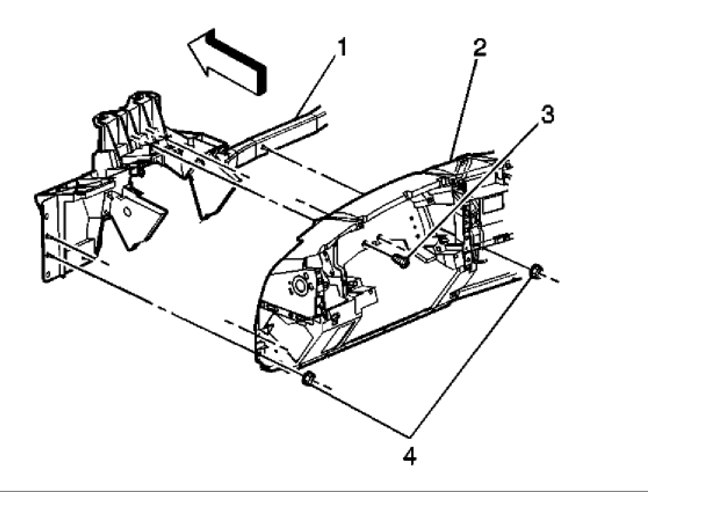
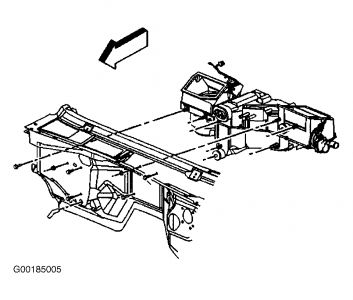
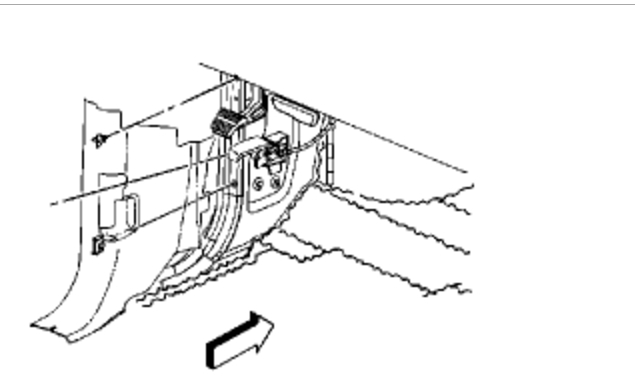
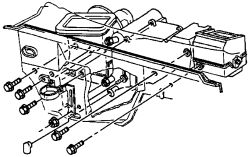
Remove the nuts (4) from the HVAC module (2).
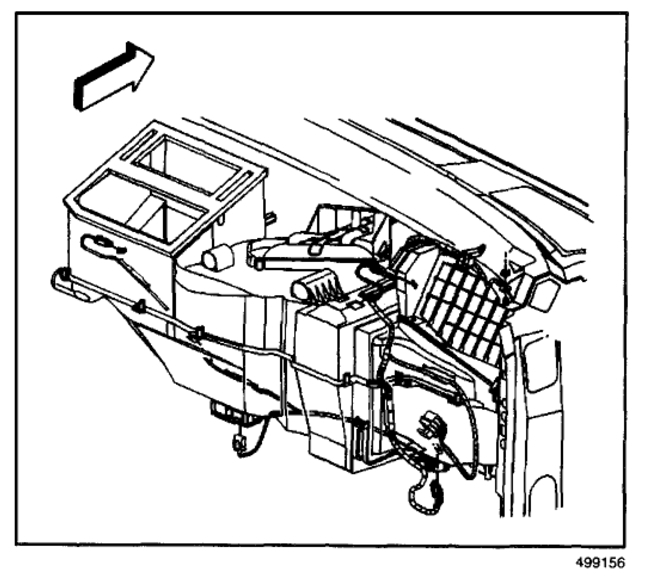
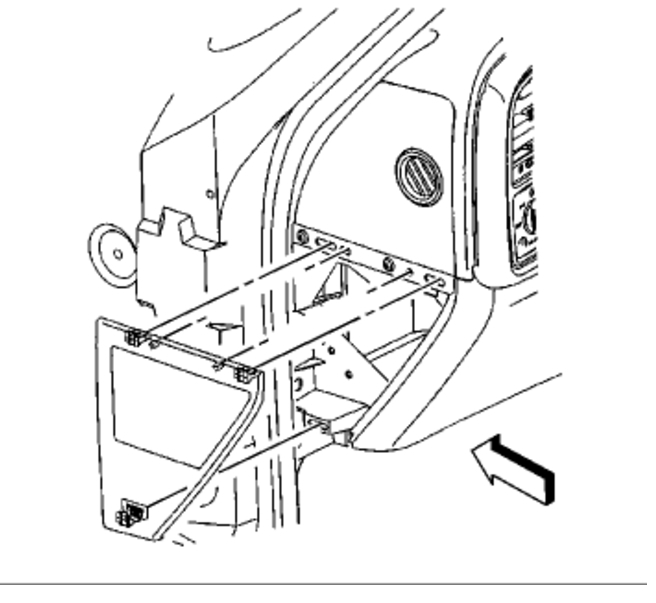
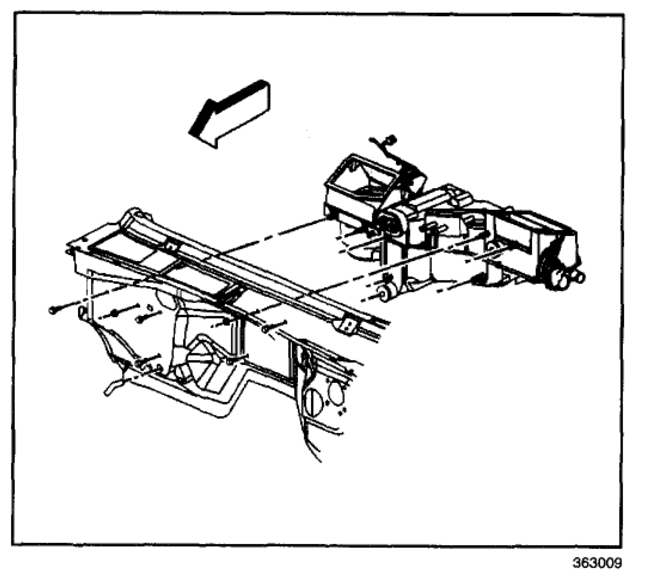
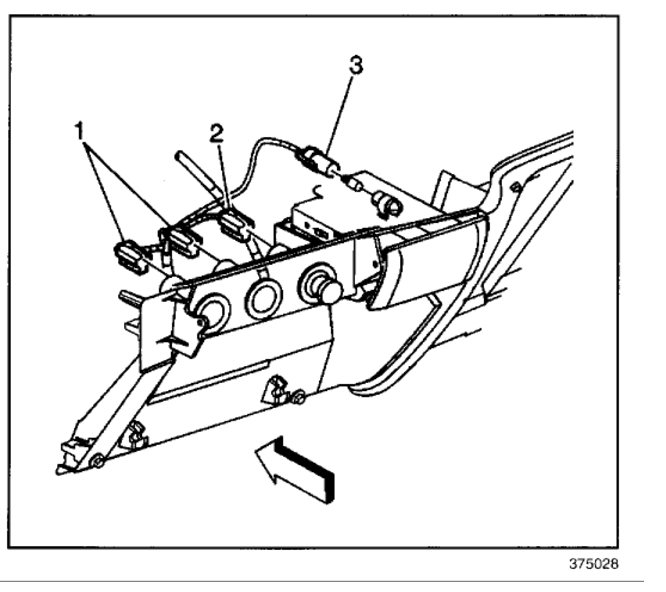
Fig 2: HVAC Module
GM810832
Courtesy of GENERAL MOTORS CORP.
View Full-Screen
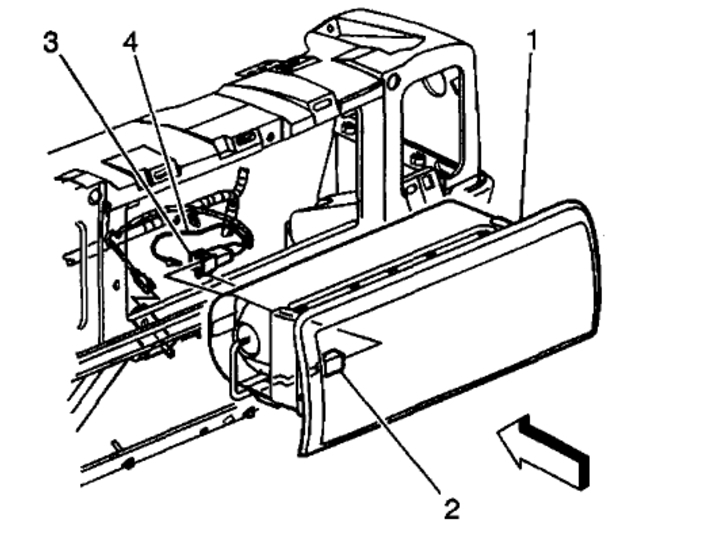
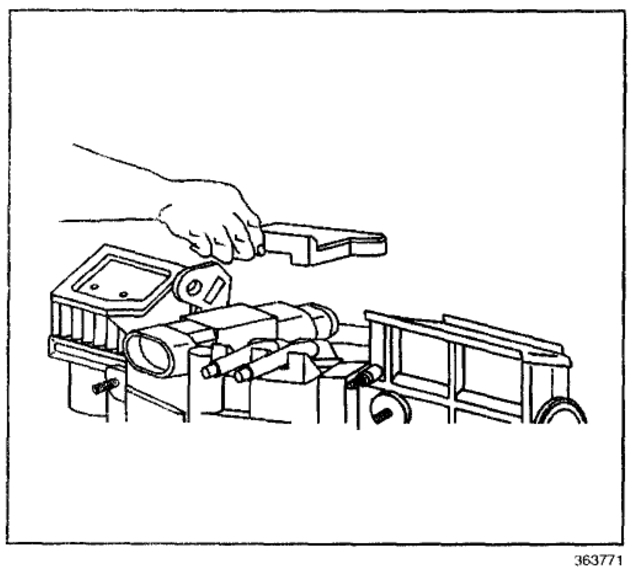
Remove the bolts (3) from the HVAC module (2).
Remove the HVAC module (2) from the vehicle (1).
Installation Procedure
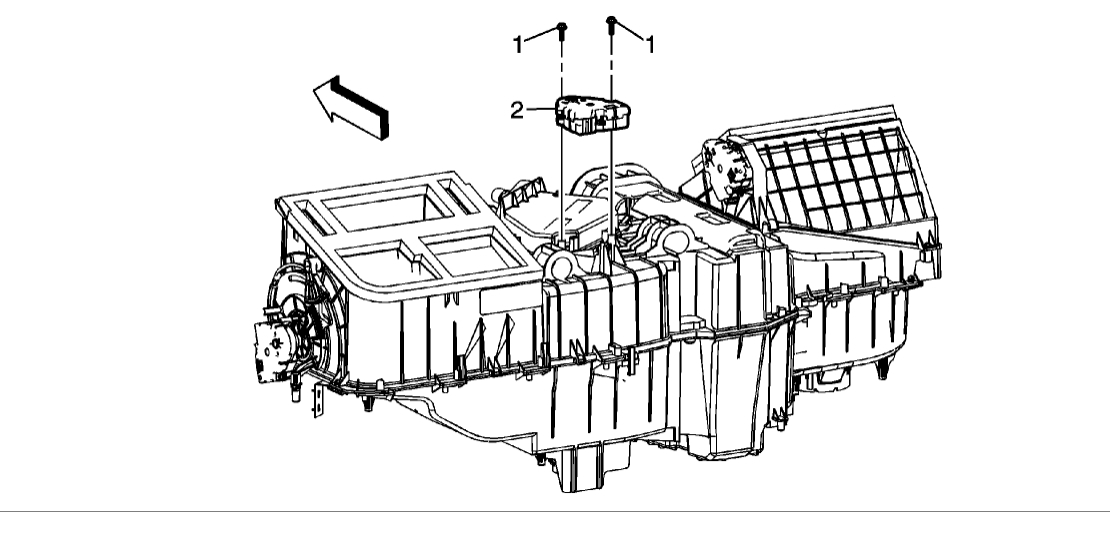
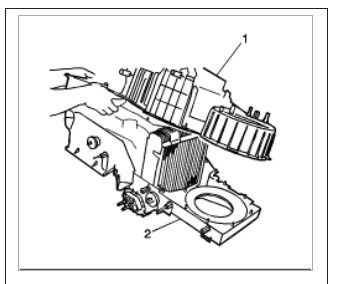
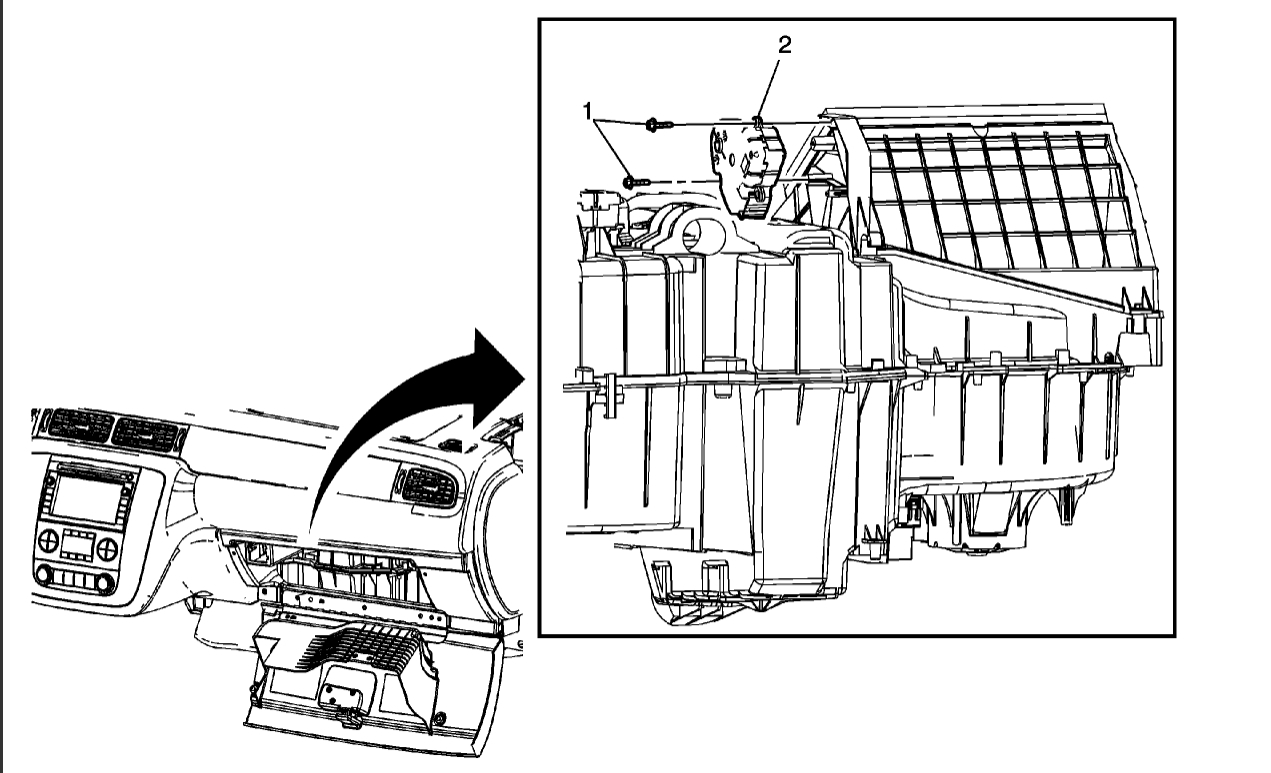
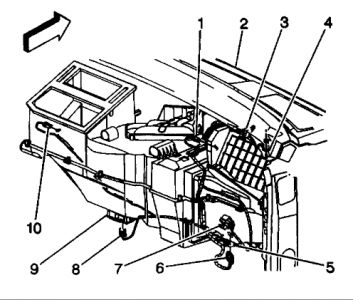
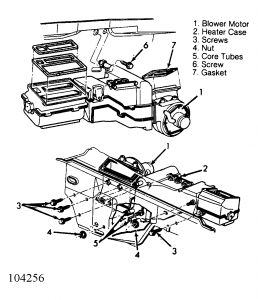
If replacing the HVAC module, transfer the components from the old HVAC module as necessary.
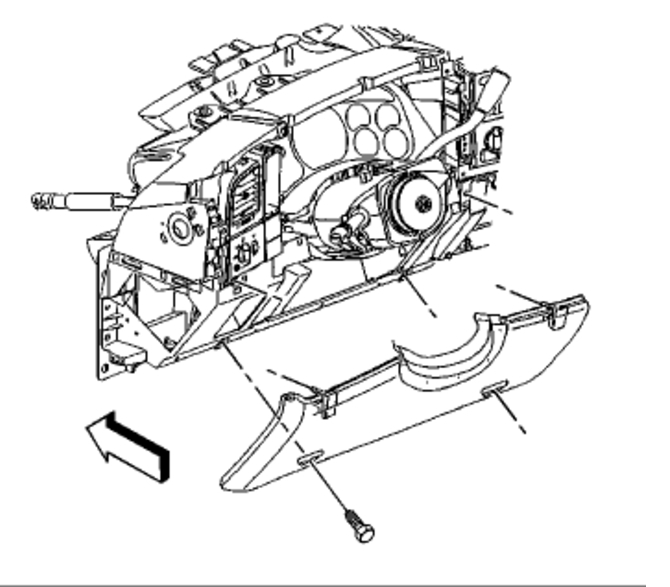
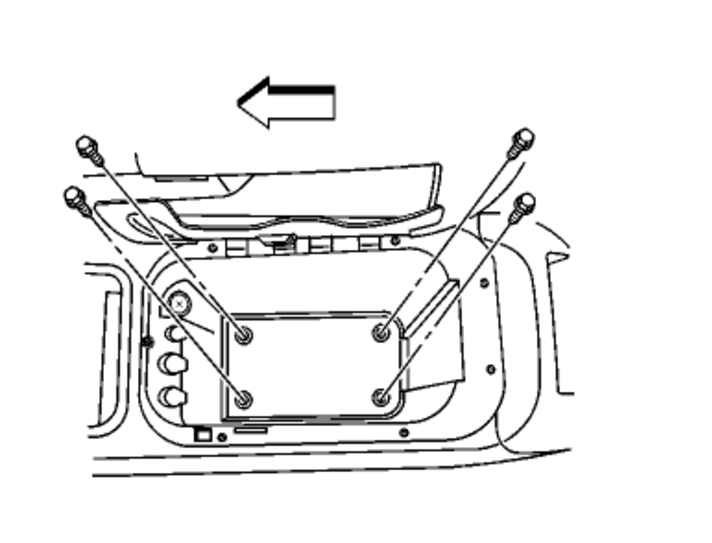
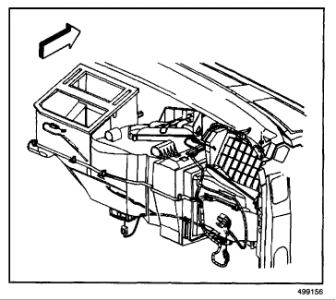
Fig 3: HVAC Module
GM810832
Courtesy of GENERAL MOTORS CORP.
View Full-Screen
Install the HVAC module (2) to the vehicle (1).
NOTE: Refer to Fastener Notice in Cautions and Notices.
Install the nuts (4) to the HVAC module (2).
Tighten: Tighten The Nuts To 9 N.M (80 Lb In).
Install the bolts (4) to the HVAC module (2).
Tighten: Tighten The Bolts To 4 N.M (35 Lb In).
Connect the electrical harnesses and the ground connections.
Install the HVAC module drain hose.
Install the instrument panel carrier. Refer to Instrument Panel (I/P) Carrier Replacement in Instrument Panel, Gages and Console.
Install the accumulator. Refer to Accumulator Replacement .
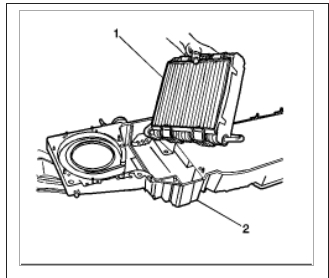
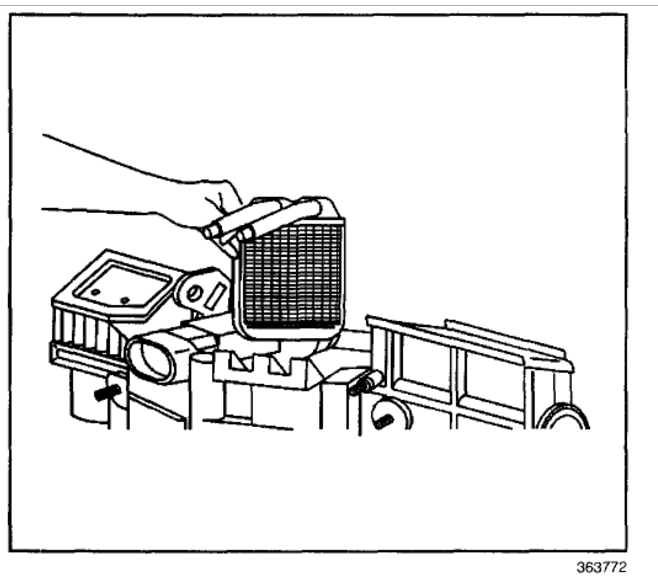
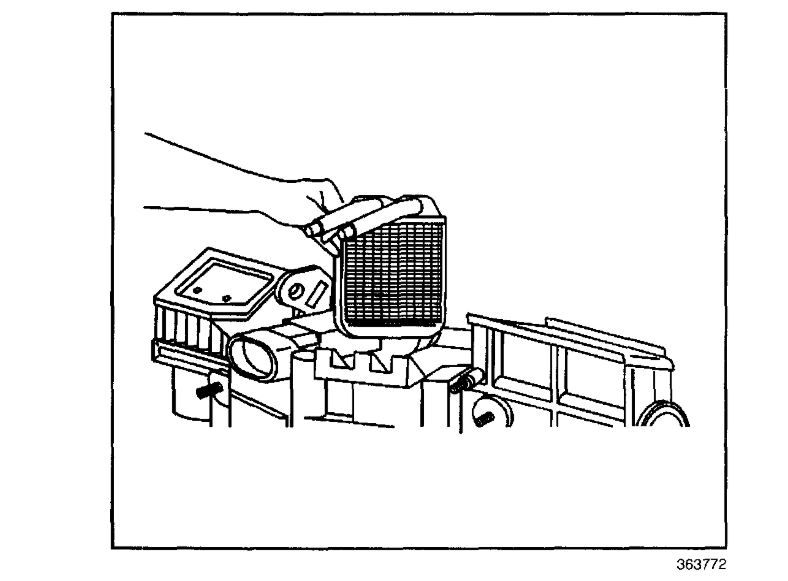
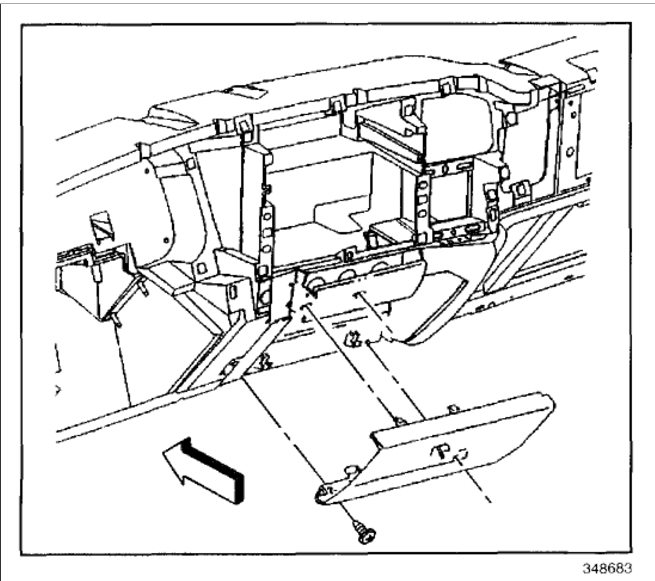
Install the surge tank outlet hose to the heater core.
Firmly Push The Quick Connect Onto The Heater Core Pipe Until You Hear An Audible Click.
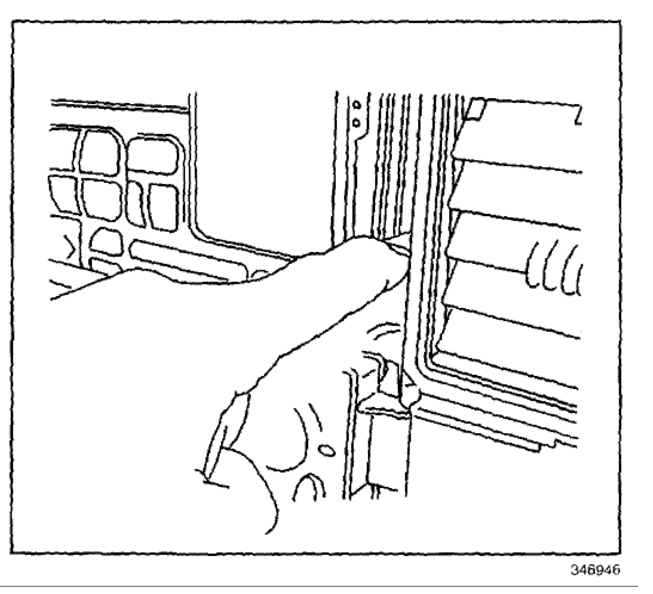
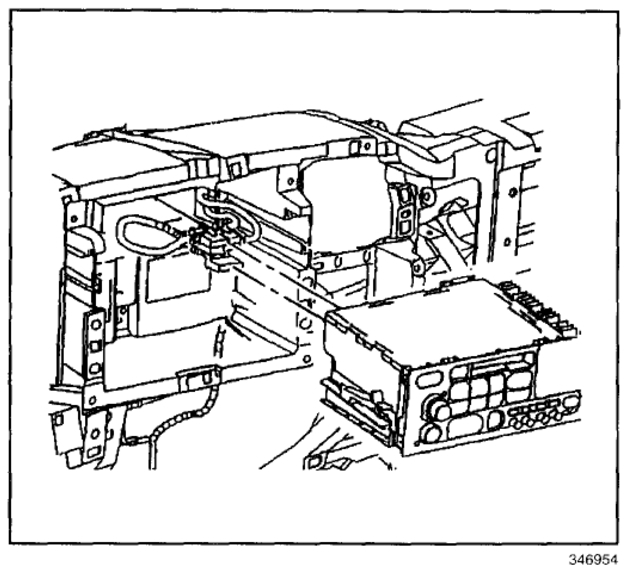
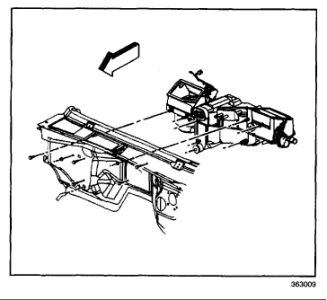
Fig 4: Removing/Installing Heater Hose To Engine
GM363237
Courtesy of GENERAL MOTORS CORP.
View Full-Screen
Install the inlet heater hose to the heater core.
Firmly Push The Quick Connect Onto The Heater Core Pipe Until You Hear An Audible Click.
Fill the cooling system. Refer to Draining and Filling Cooling System (w/RPO HP2) or Draining and Filling Cooling System (w/o RPO HP2) in Engine Cooling.
Check out the diagrams (Below). Please let us know if you need anything else to get the problem fixed.
Cheers, Ken
Images (Click to enlarge)
May 25, 2021 at 11:37 AM
(Merged)