Rear Brake Drum Removal and Installation
Removal
Hoist vehicle and remove wheel.
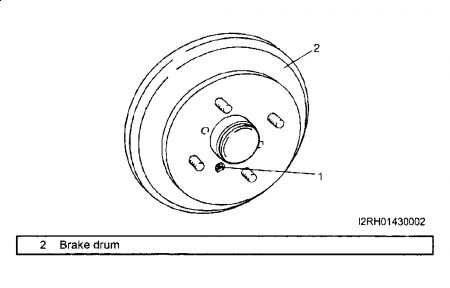
Remove brake drum screw (1).
Fig. 2: Removing Brake Drum Screw
Courtesy of SUZUKI OF AMERICA CORP.
Release parking brake lever.
Remove console box and loosen parking brake cable locking nut(1).
Fig. 3: Loosening Parking Brake Cable Locking Nut
Courtesy of SUZUKI OF AMERICA CORP.
Remove back plate plug (1) attached to the back side of brake back plate so as to increase clearance between brake shoe and brake drum.
Insert a screwdriver into plug hole till its tip contacts shoe hold down spring and push screwdriver in the arrow direction.
With this push, hold down spring is pushed up and releases parking shoe lever from hold down spring, resulting in larger clearance.
Fig. 4: Removing Back Plate Plug
Courtesy of SUZUKI OF AMERICA CORP.
Pull brake drum off by using 8 mm bolts (1) (2 pieces).
Fig. 5: Pulling Brake Drum Off
Courtesy of SUZUKI OF AMERICA CORP.
Installation
Before installing brake drum, to maximize brake shoe-to-drum clearance, put screwdriver between rod (1) and ratchet (2) and push down ratchet as shown in figure.
Fig. 6: Maximizing Brake Shoe-To-Drum Clearance
Courtesy of SUZUKI OF AMERICA CORP.
NOTE:The figure show ratchet position where brake shoe-to-drum clearance is maximum.
Fig. 7: Identifying Ratchet Position
Courtesy of SUZUKI OF AMERICA CORP.
Put brake shoe hold down spring (2) back to its original position as shown. (Put shoe hold down spring in place by moving shoe lever (3) so that shoe lever comes to the side of shoe hold down spring.)
Fig. 8: Putting Brake Shoe Hold Down Spring
Courtesy of SUZUKI OF AMERICA CORP.
Install brake drum after making sure that inside of brake drum and brake shoes are free from dirt and oil.
Tighten brake drum screws (1) to specified torque.
Tightening torque
Brake drum screw (a): 8 N.m (0.8 kg-m, 6.0 lb-ft)
Fig. 9: Tightening Brake Drum Screws
Courtesy of SUZUKI OF AMERICA CORP.
Upon completion of all jobs, depress brake pedal with about 300 N (30 kg, 66 lbs) load three to five times so as to obtain proper drum-to-shoe clearance. Adjust parking brake cable.
Install console box.
Install wheel and tighten wheel nuts to specified torque.
Tightening torque
Wheel nut (a): 85 N.m (8.5 kg-m, 61.5 lb-ft)
Fig. 10: Tightening Wheel Nuts
Courtesy of SUZUKI OF AMERICA CORP.
Check to ensure that brake drum is free from dragging and proper braking is obtained. Then remove vehicle from hoist and perform brake test (foot brake and parking brake).
Nov 8, 2009 at 7:22 PM
