Thanks for visiting 2CarPros.
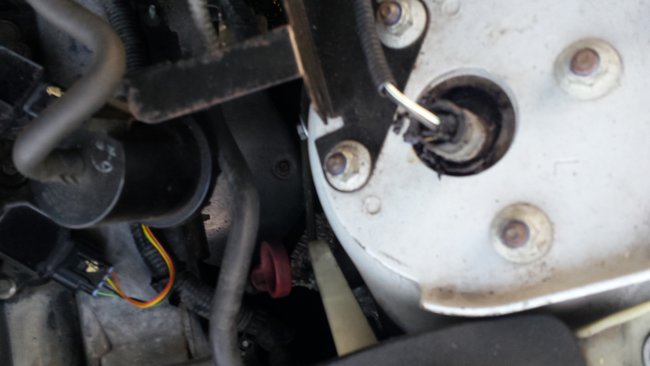
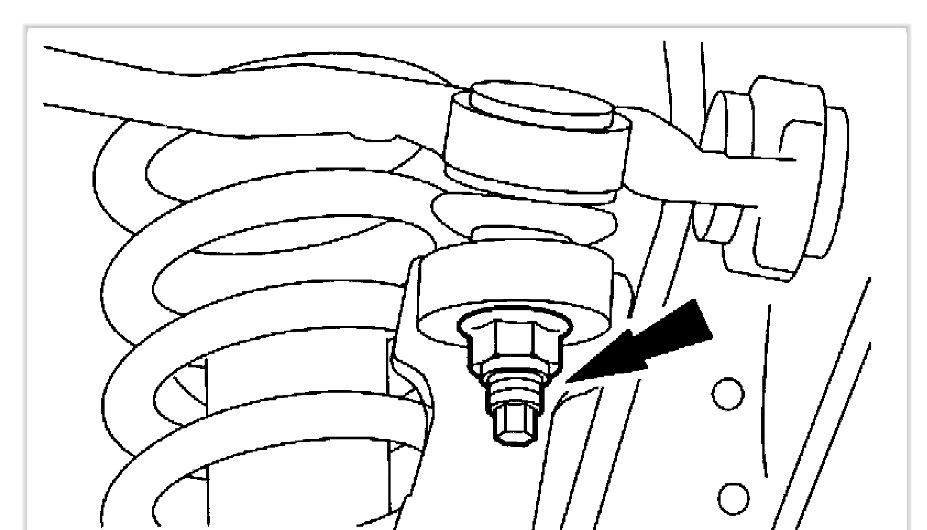
What you have looking at your picture is a failed strut mount and possibly damaged shock. The shock should rest against the bottom of the strut mount and there should be threads and a nut in the middle. It should look like the diagram at the link below.
https://www.jaguarclassicparts.com/uk/part/XR856158
I would suggest replacing them both as a pair, right and left.
Other than mechanical failure as seen here, the way to test a shock absorbors function is to press down on one corner of the vehicle nearest the shock you wish to test, press down on the body of the car and release. If it rebounds more than once the shock has failed. Changing the shock will require a spring compressor. You will compress the spring, remove the center nut of the shock mount , the mount then slide the spring assembly off. Most parts stores rent spring ocmpressors or a shop can do this for you. Replacement steps and pictures are below.
Removal
1. Remove the wheel and tire.
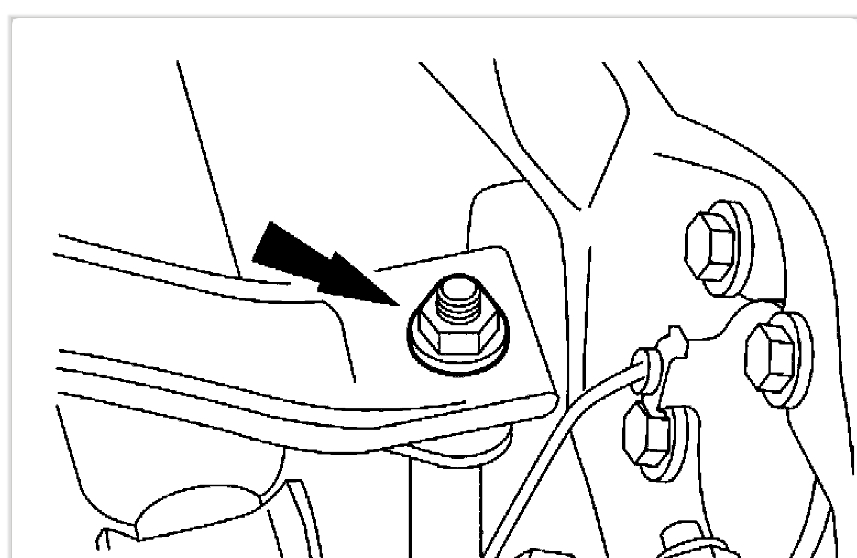
2. Remove the stabilizer bar link retaining nut.
3. Remove the stabilizer bar link.
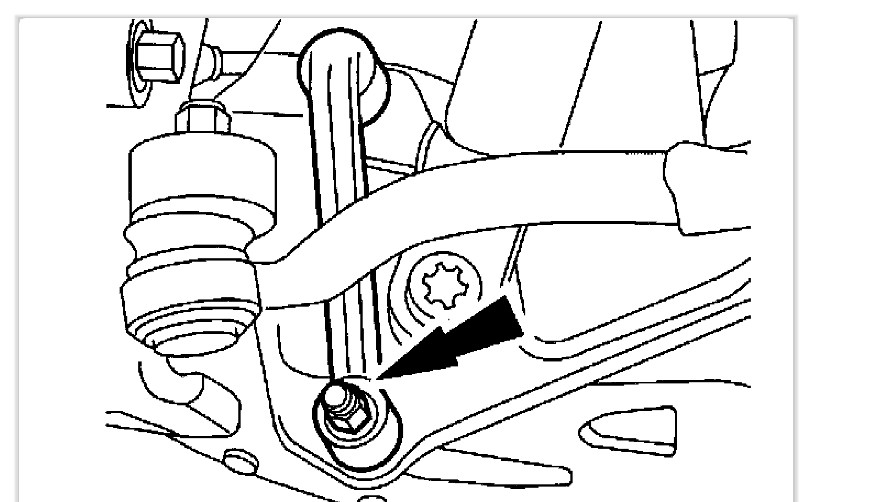
4. Detach the shock absorber.
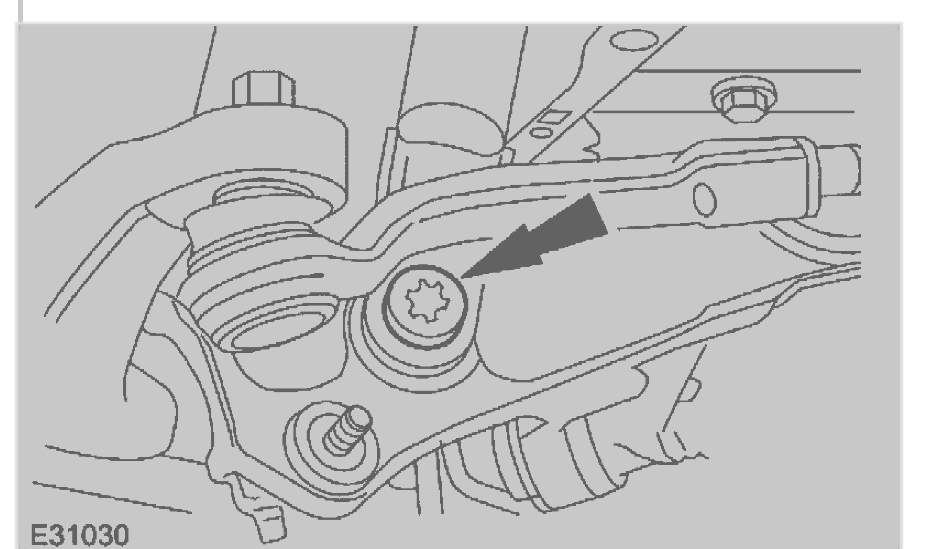
5. CAUTION: Make sure the wheel knuckle is supported. Failure to follow these instructions may result in damage to the vehicle.
Detach the upper arm.
6. Lower the vehicle.
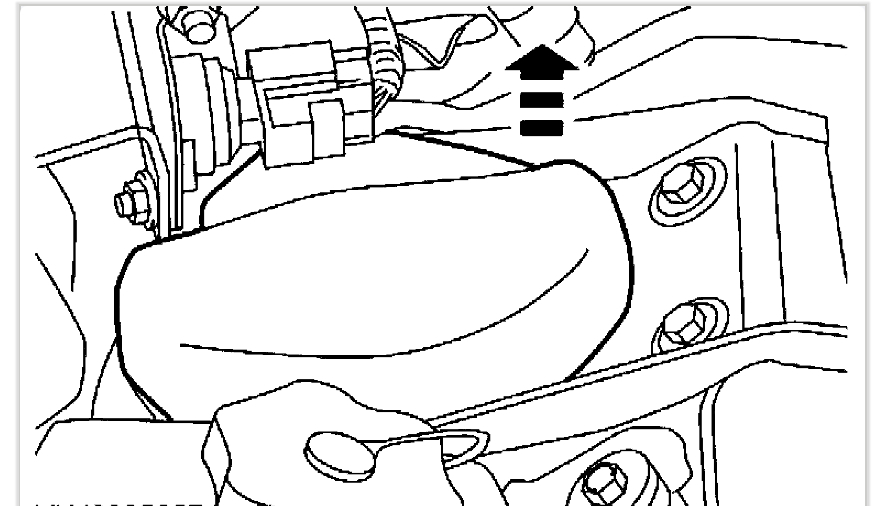
7. Remove the shock absorber and spring assembly mounting cover plate.
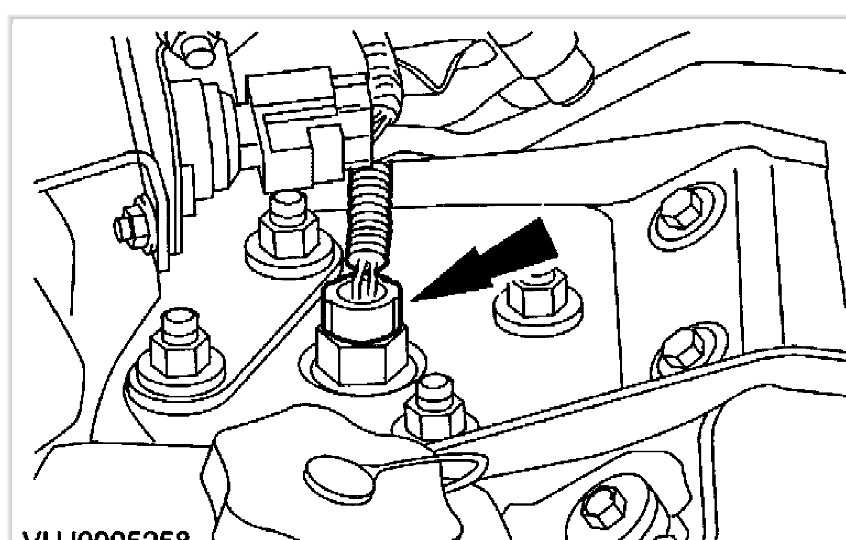
8. Disconnect the electrical connector.
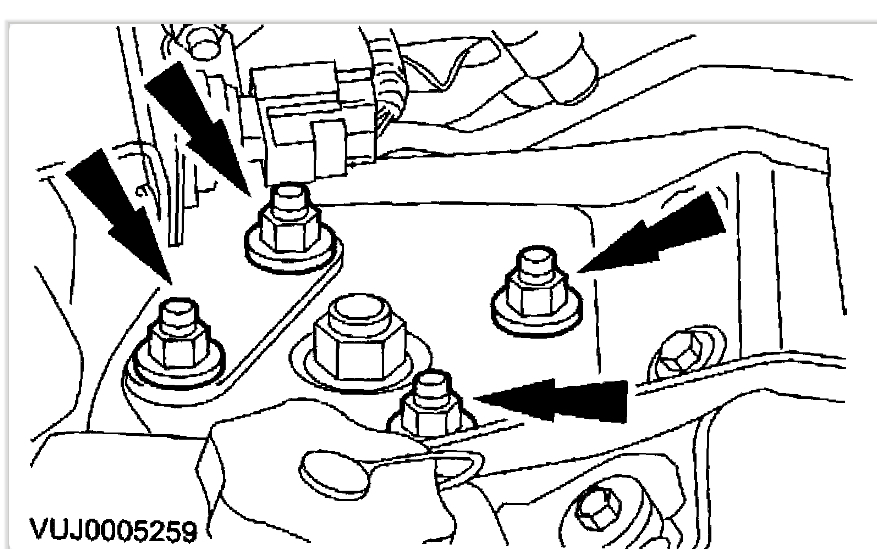
9. Remove the shock absorber and spring assembly.
Installation
1. Install the shock absorber and spring assembly.
1. Tighten to 27 Nm.
2. Connect the electrical connector.
3. Install the shock absorber and spring assembly mounting cover plate.
4. CAUTION: Make sure the wheel knuckle is supported. Failure to follow these instructions may result in damage to the vehicle.
Attach the upper arm.
1. Tighten to 90 Nm.
5. Attach the shock absorber.
^ Tighten to 175 Nm.
6. Install the stabilizer bar link.
7. Attach the stabilizer bar link.
^ Tighten to 47 Nm.
8. Install the wheel and tire assembly.
Images (Click to enlarge)
Feb 22, 2019 at 11:26 PM