I was able to get this from the internet for you. THis is an involved process, and I recommend getting a good repair manual. They offer them on line at this site.
Here is what I found for you:
When draining the coolant, keep in mind that cats and dogs are attracted by the ethylene glycol antifreeze, and are quite likely to drink any that is left in an uncovered container or in puddles on the ground. This will prove fatal in sufficient quantity. Always drain the coolant into a sealable container. Coolant should be reused unless it is contaminated or several years old.
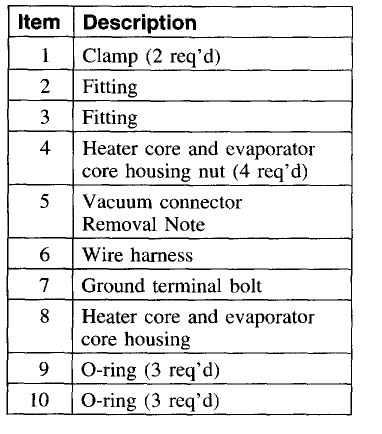
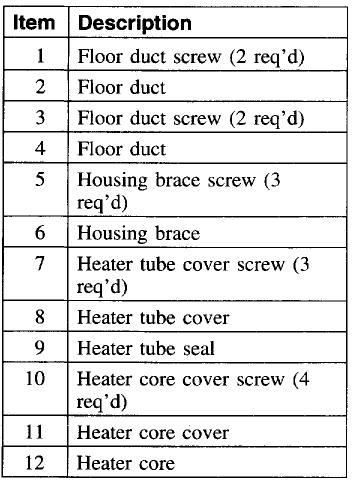
Fig. Fig. 2: From inside the engine compartment, disconnect the heater hoses from the core fittings ...
Disconnect the heater hoses from the heater core tubes and plug hoses.
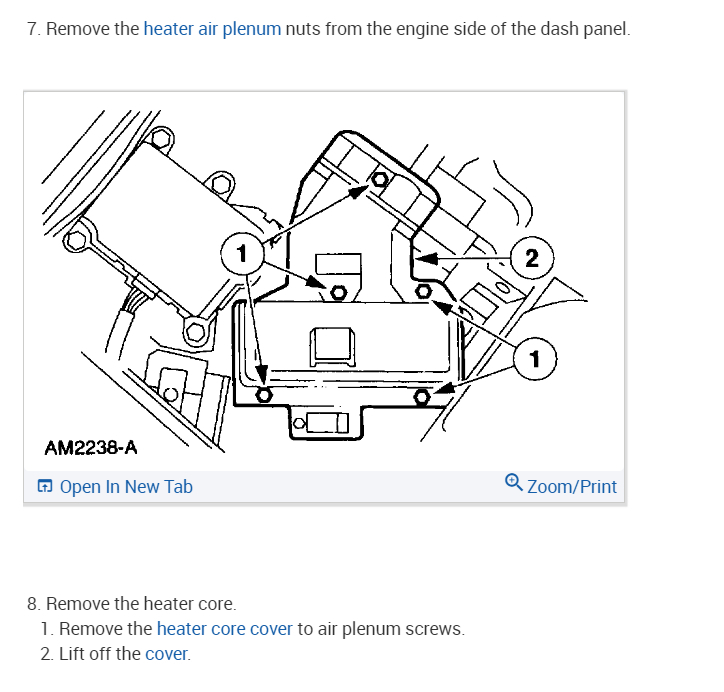
In the passenger compartment, remove the four screws attaching the heater core access cover to the plenum assembly and remove the access cover.
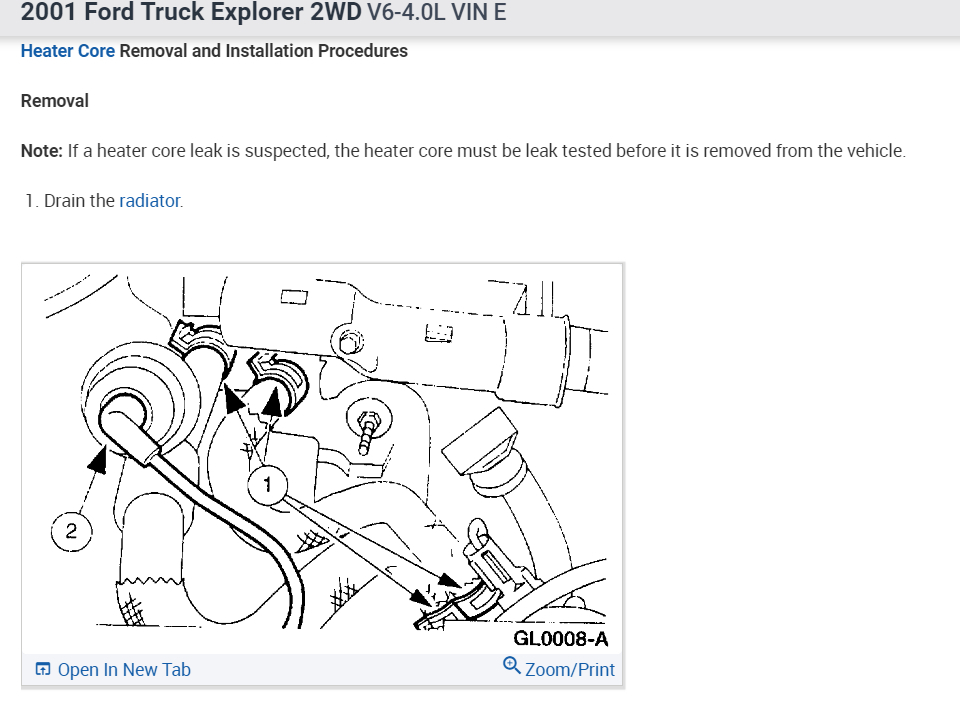
Fig. Fig. 3: ... then, in the passenger compartment, remove the under dash cover retaining screws ...
Fig. Fig. 4: ... and allow the cover to drop down. If necessary, you can remove the cover if it is in your way
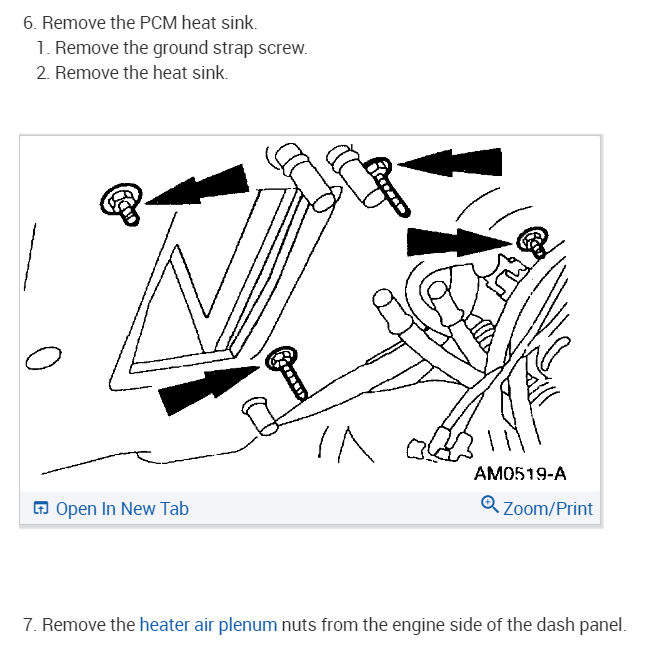
Fig. Fig. 5: Remove the heater core access panel attaching screws ...
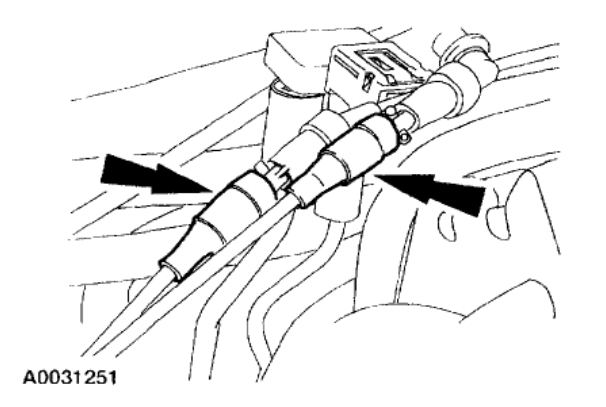
Fig. Fig. 6: ... then remove the cover by pulling downward and straight back to disengage the drain tube (arrow)
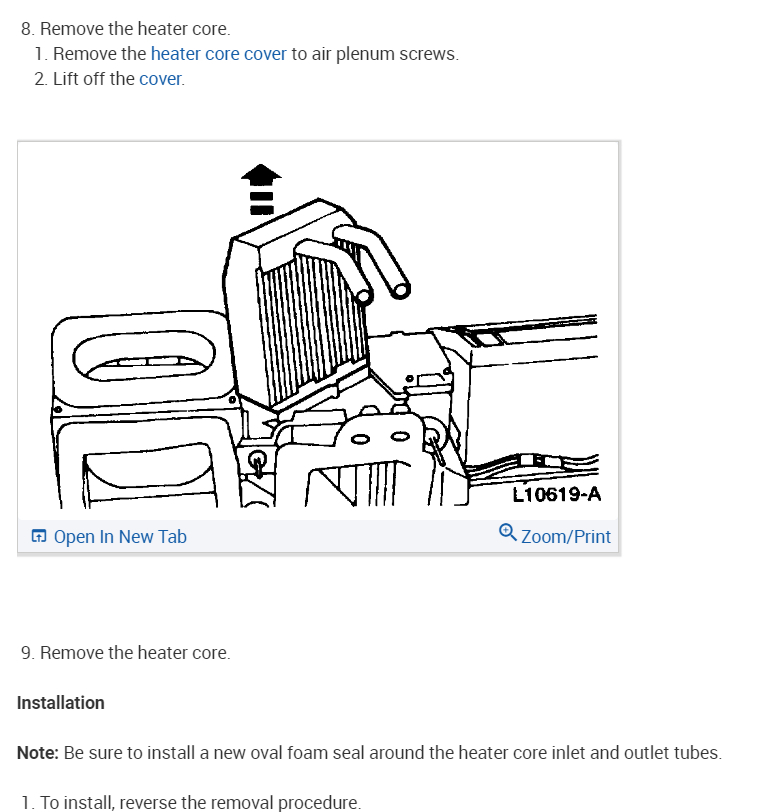
Pull the heater core rearward and down, removing it from the plenum assembly.
Fig. Fig. 7: Pull the heater core rearward and down to remove it from the plenum assembly
To install:
Position the heater core and seal in the plenum assembly.
Install the heater core access cover to the plenum assembly and secure with four screws.
Install the heater hoses to the heater core tubes at the dash panel in the engine compartment. Do not over-tighten hose clamps.
Check the coolant level and add coolant as required. Connect the negative battery cable.
Start the engine and check the system for coolant leaks.
1991-99 Models
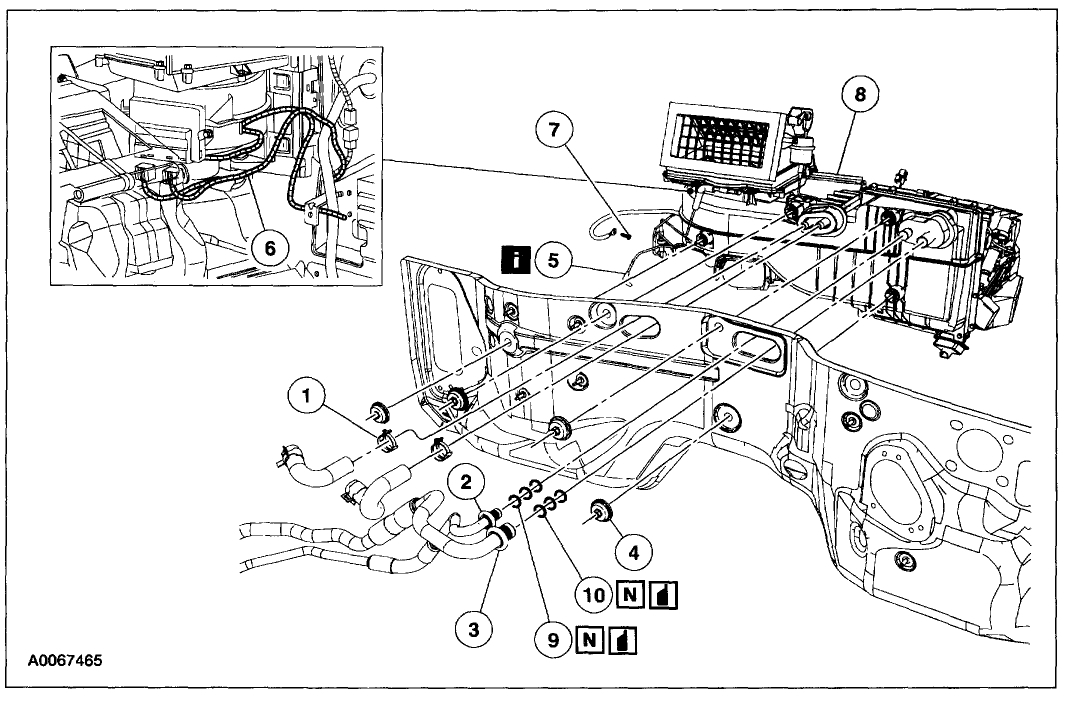
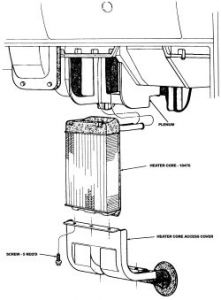
See Figure 8
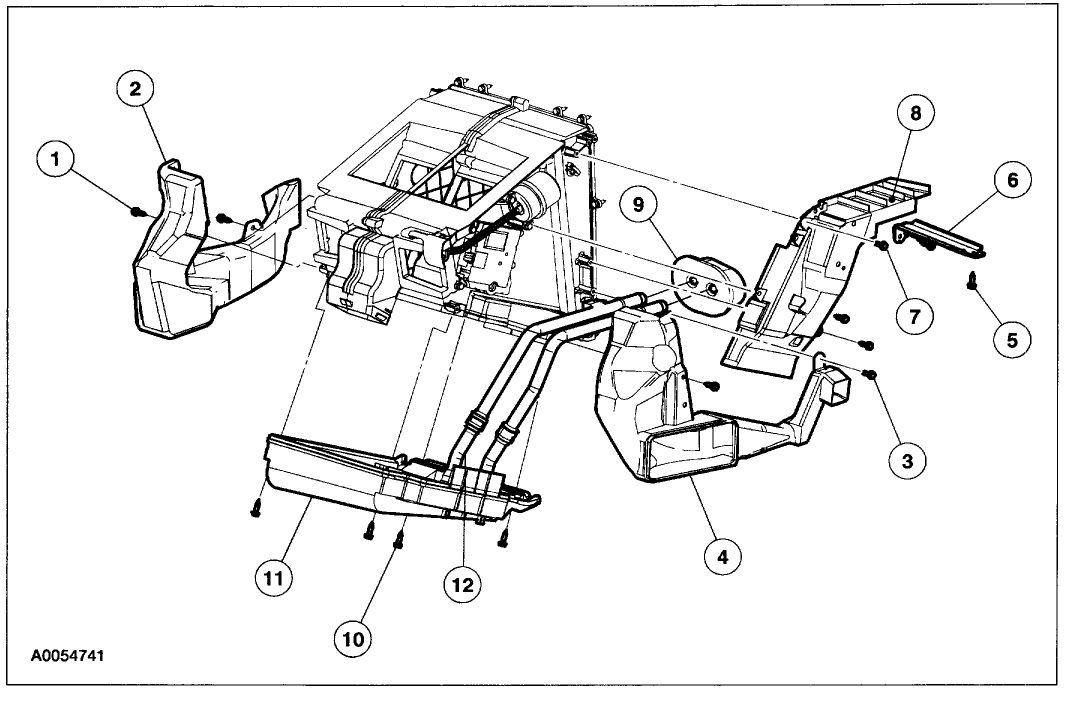
Fig. Fig. 8: Exploded view of the blower motor housing and the heater air plenum assemblies
Disconnect the negative battery cable. Allow the engine to cool down. Drain the cooling system to a level below the heater core fittings on the firewall.
CAUTION
When draining the coolant, keep in mind that cats and dogs are attracted by the ethylene glycol antifreeze, and are quite likely to drink any that is left in an uncovered container or in puddles on the ground. This will prove fatal in sufficient quantity. Always drain the coolant into a sealable container. Coolant should be reused unless it is contaminated or several years old.
Disconnect the heater hoses from the heater core tubes and plug hoses.
Remove the five nuts that secure the blower motor housing to the firewall.
Pull the housing away from the firewall. Disconnect any wire harness plugs which inhibit the housing.
Remove the remaining nuts which secure the heater air plenum (inside the passenger compartment) to the firewall.
In the passenger compartment, remove the instrument panel. Refer to .
Pull the heater air plenum rearward from the firewall and remove it from the vehicle.
Remove the heater core from the heater air plenum.
Inspect all air seals on the components and firewall and replace any that are damaged.
To install:
Install the heater core into the air plenum chamber.
Position the heater air plenum against the firewall from the passenger compartment.
Under the hood, install the plenum retaining nuts.
Install the blower motor housing to the firewall and install the attaching nuts.
Connect the heater hoses to the heater core tubes at the dash panel in the engine compartment. Do not over-tighten the hose clamps.
Install the instrument panel.
Check the coolant level and add coolant as required. Connect the negative battery cable.
Start the engine and check the system for coolant leaks.
Let me know if this helps.
Joe
Nov 13, 2023 at 10:56 AM
(Merged)