Good morning,
I attached the procedure for the left and right mounts for you.
https://www.2carpros.com/articles/how-a-motor-mount-works
https://www.2carpros.com/articles/replace-motor-mounts
The left mount is the most common mount that fails. It also lets the motor sit a little lower than it should be.
There are 2 struts that support the engine as well. One at the top and one at the bottom. The vibration is not coming from these struts. The mounts are the key for the vibration.
https://www.2carpros.com/articles/vibration-noise
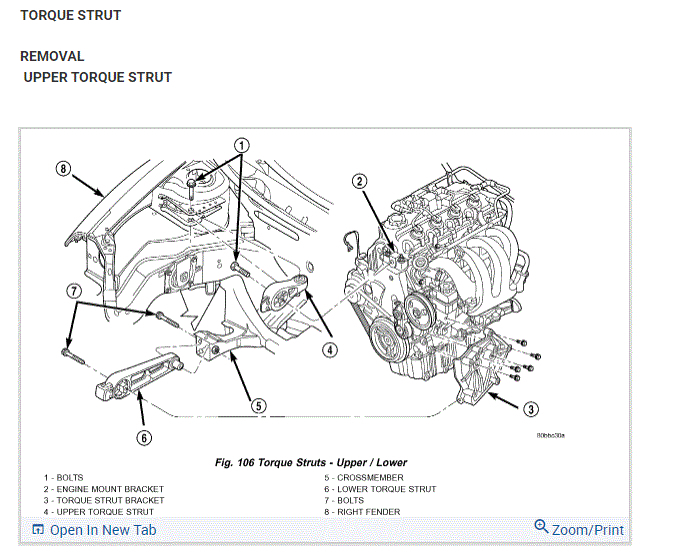
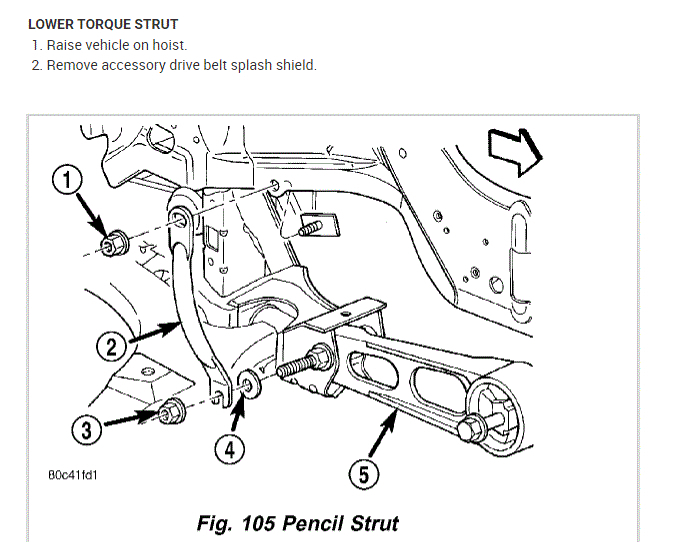
I also posted pictures of the upper and lower strut mounts as well.
Roy
RIGHT MOUNT
REMOVAL
1. Remove the accessory drive belts.
2. Remove the crankshaft vibration damper.
3. Remove upper and lower engine torque struts.
4. Support engine with a suitable jack.
imageOpen In New TabZoom/Print
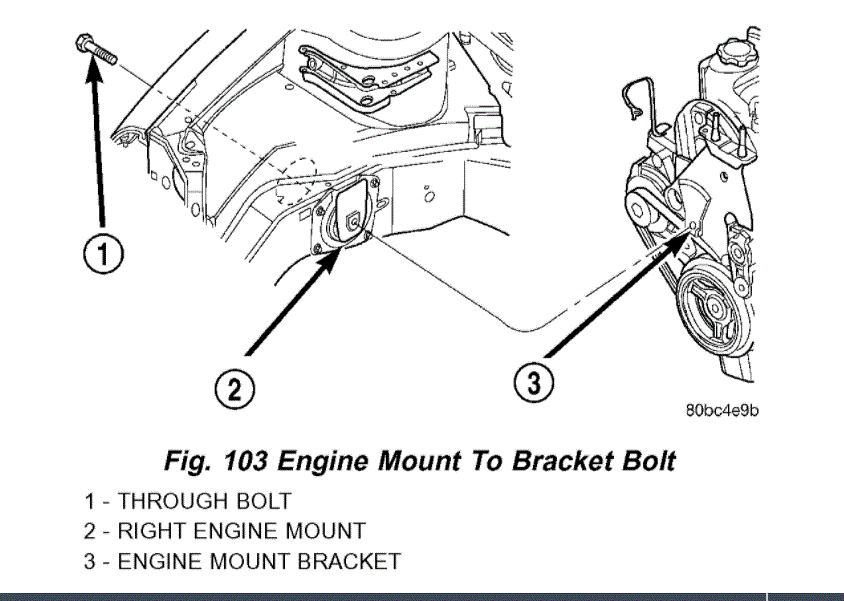
5. Remove bolt access cover and bolt attaching the right engine mount to mount bracket (Fig. 103).
6. Remove engine mount bracket.
NOTE: The right engine mount attaching holes are slightly oversize to compensate for manufacturing tolerances. The mount has been set at the manufacturing plant for proper powertrain alignment. Therefore, it is necessary to mark the position of the mount before the attaching bolts are loosened.
7. Using a permanent ink marker or equivalent, mark the position of engine mount to the body frame rail.
imageOpen In New TabZoom/Print
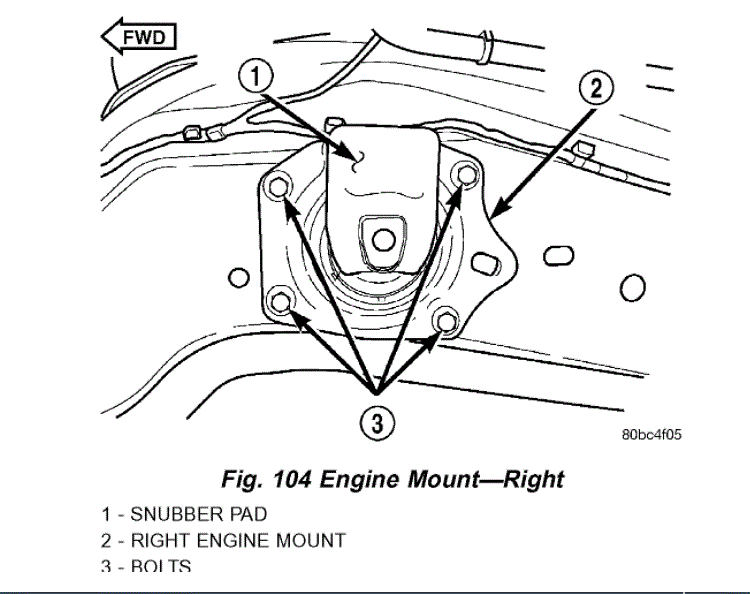
8. Remove bolts attaching mount to body (Fig. 104).
9. Remove mount between engine and body frame rail. Mount removal may require engine position to be raised or lowered to allow mount removal clearance.
Right mount
LEFT MOUNT
REMOVAL
1. Raise vehicle approximately 30.5 cm (12 inch) on hoist
imageOpen In New TabZoom/Print
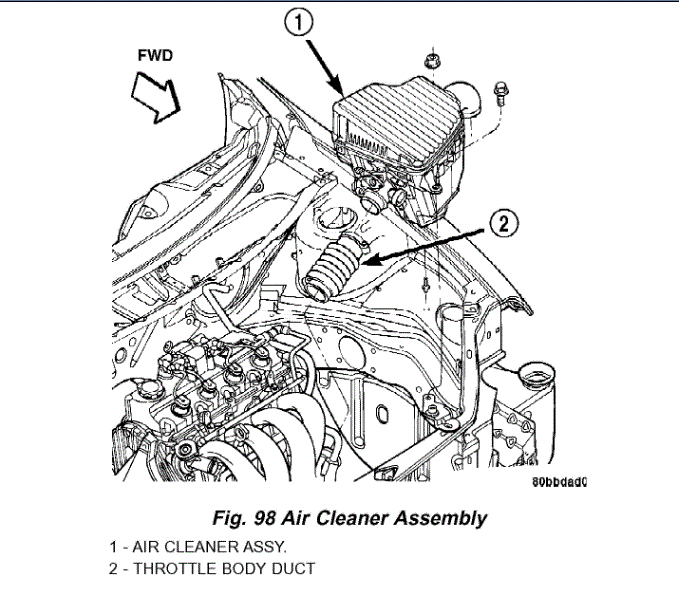
2. Remove air cleaner assembly (Fig. 98).
3. Remove battery and tray.
4. Support transaxle with a suitable jack.
5. Remove left front wheel.
6. Remove left splash shield.
7. Remove through bolt access plug at left side outer frame rail.
imageOpen In New TabZoom/Print
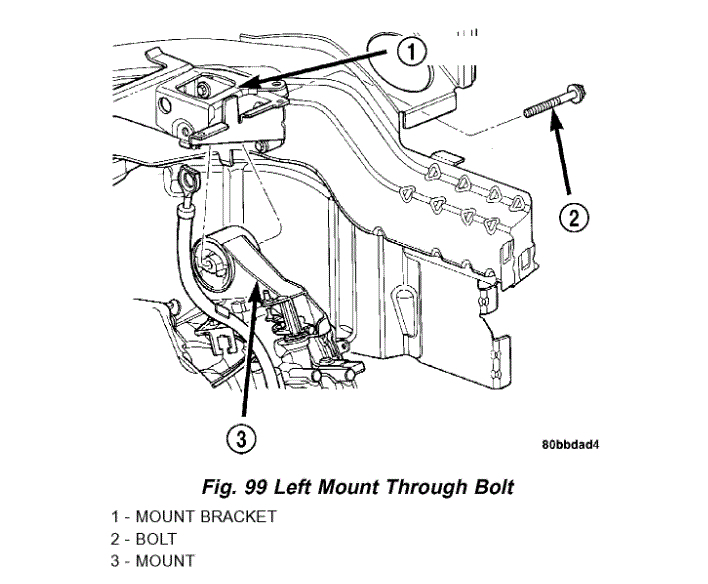
8. Remove mount through bolt (Fig. 99).
9. Disconnect transaxle shift cable from left mount and transaxle linkage.
imageOpen In New TabZoom/Print
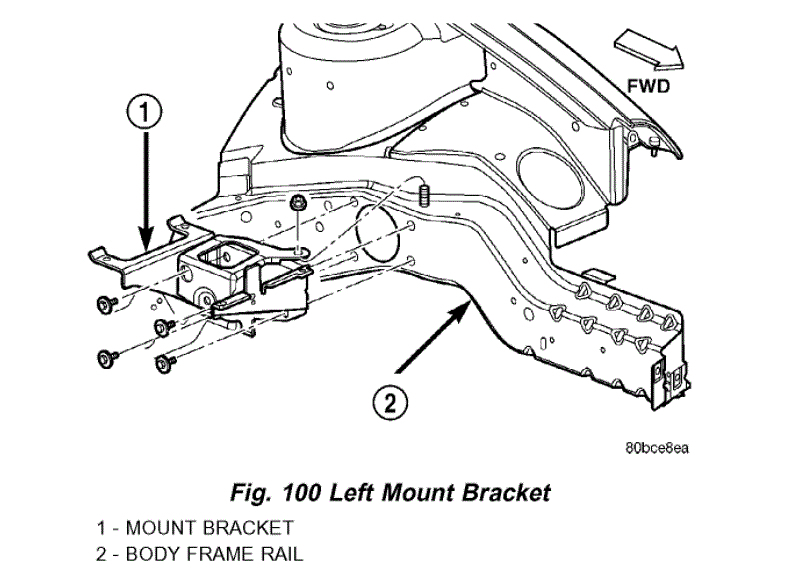
10. Remove left mount bracket to body frame rail fasteners (Fig. 100).
imageOpen In New TabZoom/Print
imageOpen In New TabZoom/Print
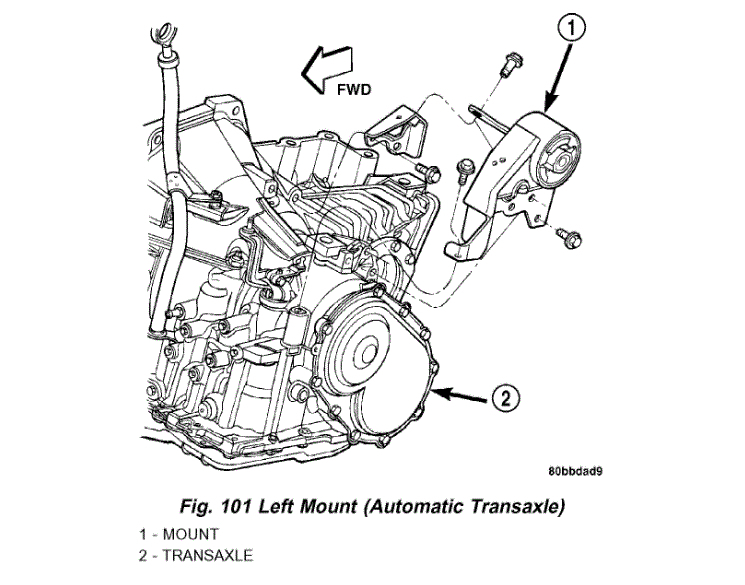
11. Remove mount attaching bolts (Fig. 101) or (Fig. 102).
12. Remove mount.
Images (Click to enlarge)
Oct 12, 2020 at 6:32 AM