Good Luck and Merry Christmas
Removal and Installation of Blower Motor :
A. "Behr" Air Conditioner Unit :
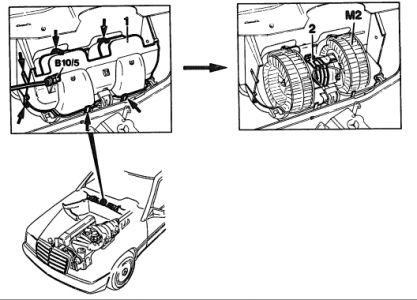
Remove windshield wiper system. See Wiper Motor Service and Repair.
Pull out outside air temperature sensor (B10/5).
Remove cover (1); for this purpose unclip 8 clamps (arrows).
Unclip mounting strap (2).
Pull off flat plug on blower motor and remove blower motor (M2).
Reinstall in opposite order. Assure that the blower motor catches properly in the mount.
B. "Siemens/Thermal" Air Conditioner Unit :
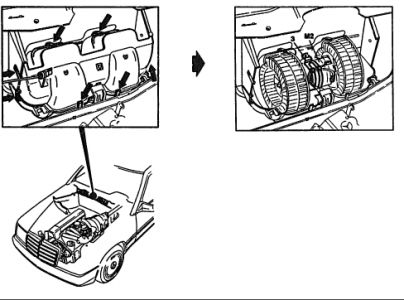
Remove wiper system. See Wiper Motor Service and Repair.
Remove outside air temperature sensor.
Remove cover by unclipping 8 clips (arrows).
Unclip retaining strap (3).
Detach flat plug on blower motor and remove blower motor (M2).
Install in reverse sequence. Ensure that the blower motor engages correctly in the mounting. If the blower motor has had to be replaced, observe note.
NOTE : The "Siemens/thermal" air conditioner unit has been installed since 01/88. As only the Behr blower motor is available for all air conditioner units in the replacement parts market, the motor bracket also has to be exchanged when replacing the blower motor on the Siemens/thermal air conditioner unit boxes.
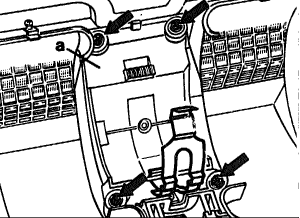
The Siemens/thermal air conditioner unit can be recognized by the bracket on the blower motor, which is secured with 4 screws (arrows) (this is 3 screws in the case of "Behr").
If the electrical cables are soldered to the blower motor, snip off immediately after the connections and solder a push-on bush to the red cable and a flat-pin terminal to the brown cable.
Scope of Work :
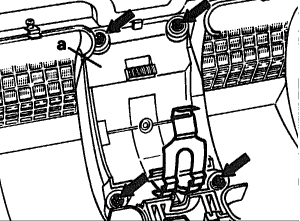
Remove bracket (item a) by unscrewing 4 screws (arrows).
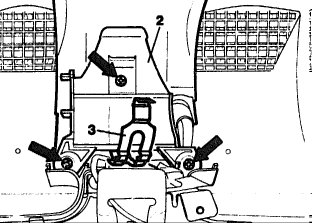
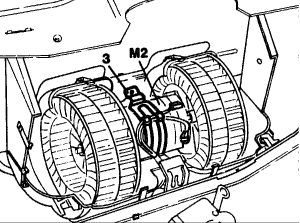
Install new retaining strap and new bracket (items 2 and 3) with the existing 3 screws (arrows).
Install in reverse sequence.
Dec 19, 2009 at 2:39 AM