Preliminary work :
Door liner removed. See: Body and Frame\Doors, Hood and Trunk\Front Door Panel\Service and Repair\Removal and Replacement
Conversion Calculator
1995 Mercedes Benz S 420 (140.043) V8-4.2L (119.971)
Vehicle Level Body and Frame Doors, Hood and Trunk Front Door Panel Service and Repair Removal and Replacement Sedan
Sedan
Removal and installation of door liner on driver's door
Special tools
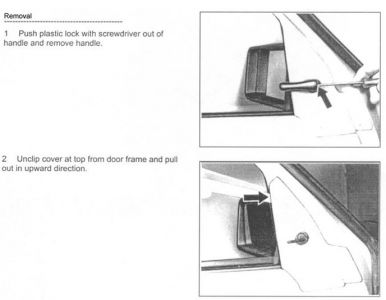
Removal, Installation
Press off cover toward inside with wedge 115 589 03 59 00 and remove upward.
Remove filler piece below cover.
Remove entry light.
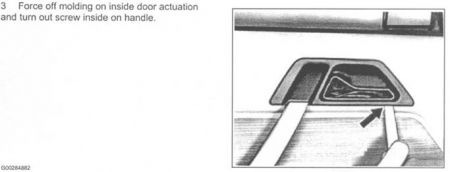
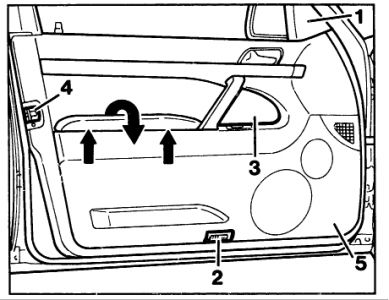
Unhook wooden cover at rear using special tool 140 589 16 63 00 by inserting blade of special tool between wooden cover and upholstery on door panelling, then pull special tool all the way up (arrows). At the same time the two rotating bars are turned back (refer to item 6, arrows).
Tip wooden cover toward inside at top and bottom using special tool.
Wooden cover-rear
Remove wooden cover toward front.
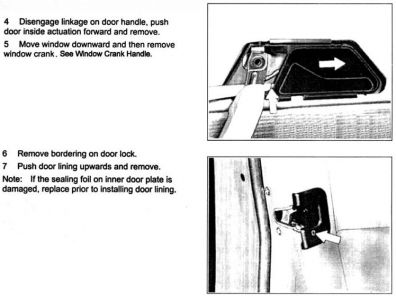
Unscrew the screws in area of door handle (arrows).
Open cover above door pocket.
Remove plugs (arrows) using awl. Puncture plugs at outer edge only and pull out.
Screw out the screws in area of door pocket (arrows), screw off door cover plate (4) and remove.
Press door liner off of interior door panel at bottom, front and rear using plastic wedge 110 589 03 59 00 (10 clips); insert plastic wedge directly at clip.
Beginning at front top, remove door liner from channel whilst simultaneously pulling door liner away from interior door panel at bottom.
Preliminary work :
Door liner removed. See: Body and Frame\Doors, Hood and Trunk\Front Door Panel\Service and Repair\Removal and Replacement
Exterior mirror removed.
Exterior molding with sealing bar on belt line removed.
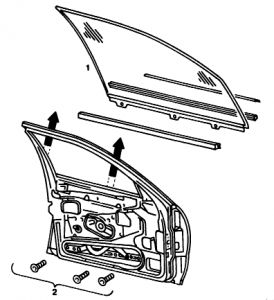
Crank window (1)
open until screws (2) on window lift bar are accessible through installation opening at bottom.
Screws (2) on window lift bar
screw out (3 each), use Torx wrench attachment T30.
Crank window (1)
remove upward out of door shaft while tipping window toward front.
Crank window (1)
insert into door shaft from outside while tipping window toward front, guide into window guide channels at front and rear and insert into mounting hooks on window lift bar.
Screw (2)
on window lift bar, screw in and tighten hand-tight.
Sealing channels and molding on door shaft
install.
Crank window (1)
close.
Crank window adjustment
check, readjust if required.
Screw (2)
tighten.
Exterior mirror
install.
Form piece
glue onto interior door panel.
Door liner
install.
Exterior mirror removed.
Exterior molding with sealing bar on belt line removed.
Crank window (1)
open until screws (2) on window lift bar are accessible through installation opening at bottom.
Screws (2) on window lift bar
screw out (3 each), use Torx wrench attachment T30.
Crank window (1)
remove upward out of door shaft while tipping window toward front.
Crank window (1)
insert into door shaft from outside while tipping window toward front, guide into window guide channels at front and rear and insert into mounting hooks on window lift bar.
Screw (2)
on window lift bar, screw in and tighten hand-tight.
Sealing channels and molding on door shaft
install.
Crank window (1)
close.
Crank window adjustment
check, readjust if required.
Screw (2)
tighten.
Exterior mirror
install.
Form piece
glue onto interior door panel.
Door liner
install.
Oct 12, 2010 at 9:03 PM