Hi,
Does it seem as if the squeal is coming from the serpentine belt? Also, did the check engine light stay on when it was running?
If the light came on, have the computer scanned. Here is a video showing how it is done:
https://youtu.be/YV3TRZwer8k
I realize most people don't own one, but often times a parts store will lend or rent one to you. If the light stays on, this needs done.
Next, the knocking has me a bit concerned. By any chance, was the AC or defroster on when this happened? I'm questioning if the AC compressor has locked up or nearly did and that is causing a squeal because the belt is slipping and the knocking is the compressor itself.
If possible, remove the serpentine belt and start the engine to see if the noises are gone. Also, if you can record the sound it's making and upload it for me to hear, it may help me diagnose possible issues.
Here are the directions specific to your vehicle for belt removal and replacement. Also, check to make sure the belt hasn't started breaking and the noise is a ripped portion of the belt hitting things under the hood. The attached pics correlate with the directions.
____________________________________
2006 Chrysler Pacifica V6-3.5L VIN 4
Procedures
Vehicle Engine, Cooling and Exhaust Engine Drive Belts, Mounts, Brackets and Accessories Drive Belt Service and Repair Procedures
PROCEDURES
ACCESSORY DRIVE BELT
REMOVAL
1) Raise vehicle on hoist.
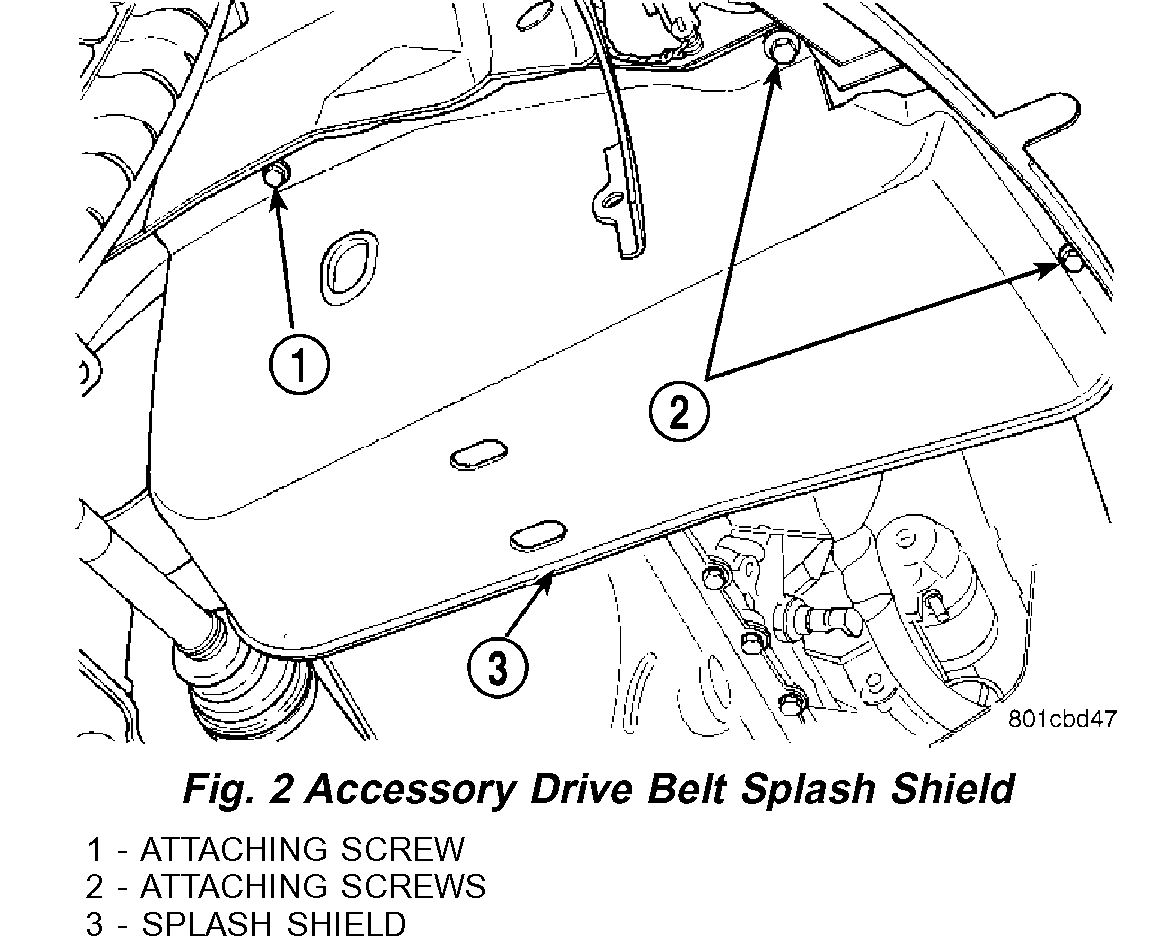
Fig. 2 Accessory Drive Belt Splash Shield
pic 1
2) Remove the drive belt shield (Fig. 2).
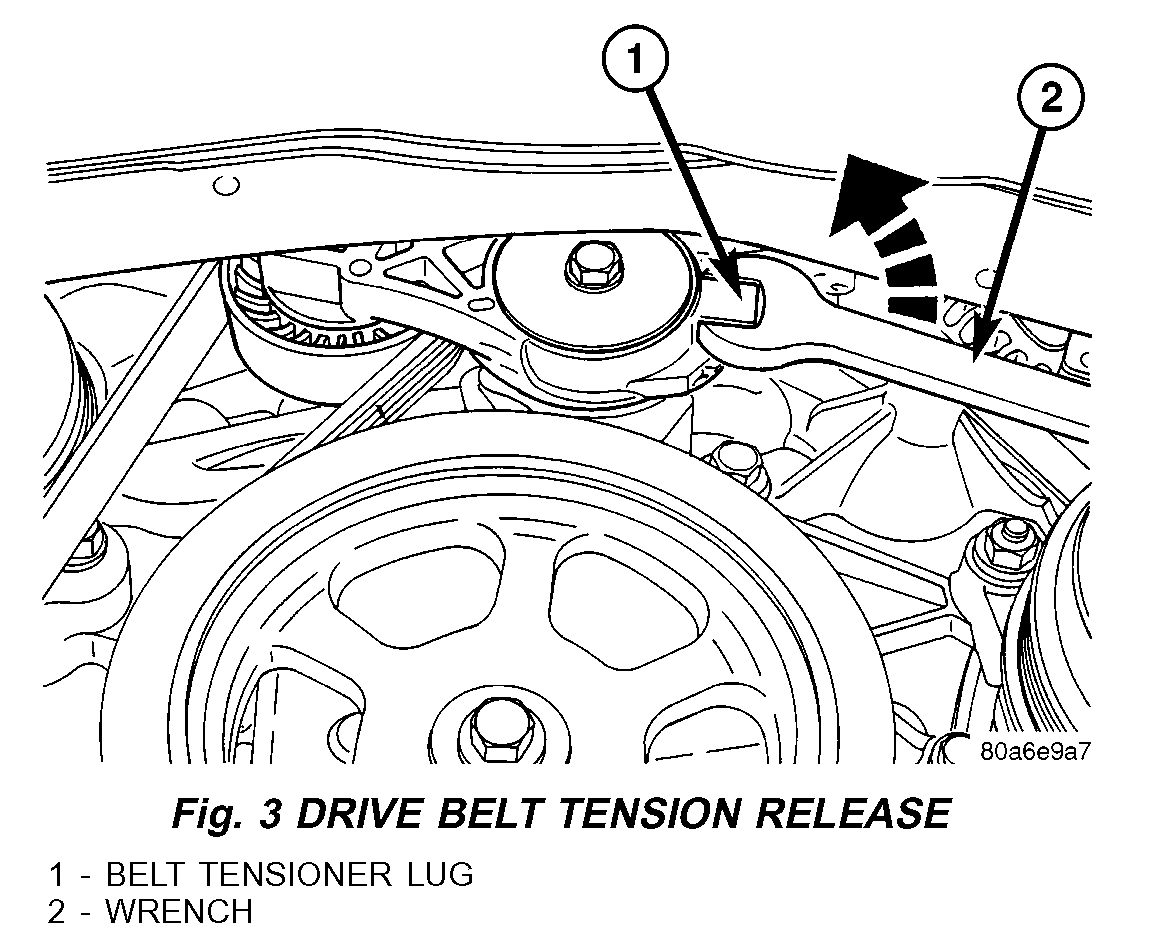
WARNING: DO NOT ALLOW DRIVE BELT TENSIONER TO SNAP BACK, AS DAMAGE TO TENSIONER AND/OR PERSONAL INJURY COULD RESULT.
Fig. 3 DRIVE BELT TENSION RELEASE
pic 2
3) Position a wrench on the belt tensioner lug (Fig. 3).
4) Release belt tension by rotating the tensioner counterclockwise (Fig. 3).
5) Remove the drive belt.
6) Carefully return tensioner to its relaxed position.
CLEANING
Clean all foreign debris from belt pulley grooves. The belt pulleys must be free of oil, grease, and coolants before installing the drive belt.
INSPECTION
Belt replacement under any or all of the following conditions is required:
- Excessive wear
- Frayed cords
- Severe glazing
Fig. 4 Drive Belt Inspection
Pic 3
Poly-V Belt system may develop minor cracks across the ribbed side (due to reverse bending). These minor cracks are considered normal and acceptable. Parallel cracks are not (Fig. 4).
NOTE: Do not use any type of belt dressing or restorer on Poly-V Belts.
INSTALLATION
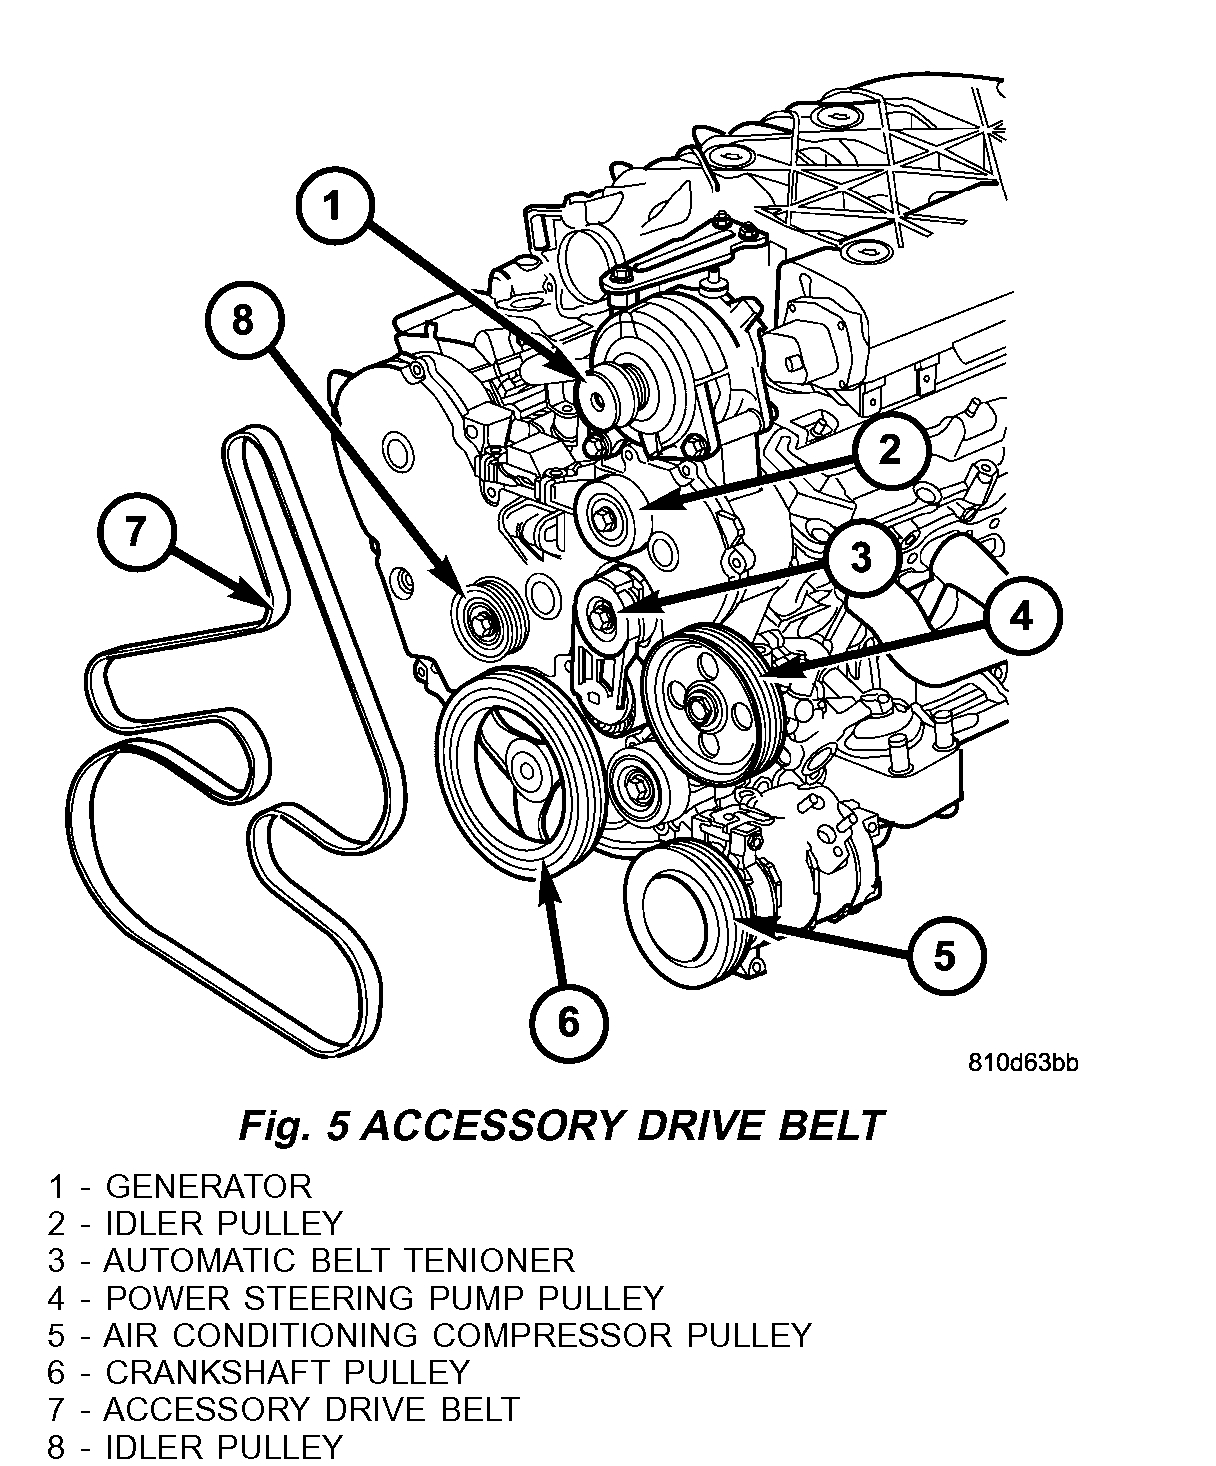
Fig. 5 ACCESSORY DRIVE BELT
pic 4
1) Route and position the drive belt onto all pulleys, except for the crankshaft (Fig. 5).
2) Rotate belt tensioner counterclockwise until belt can be installed onto the crankshaft pulley (Fig. 3). Slowly release belt tensioner.
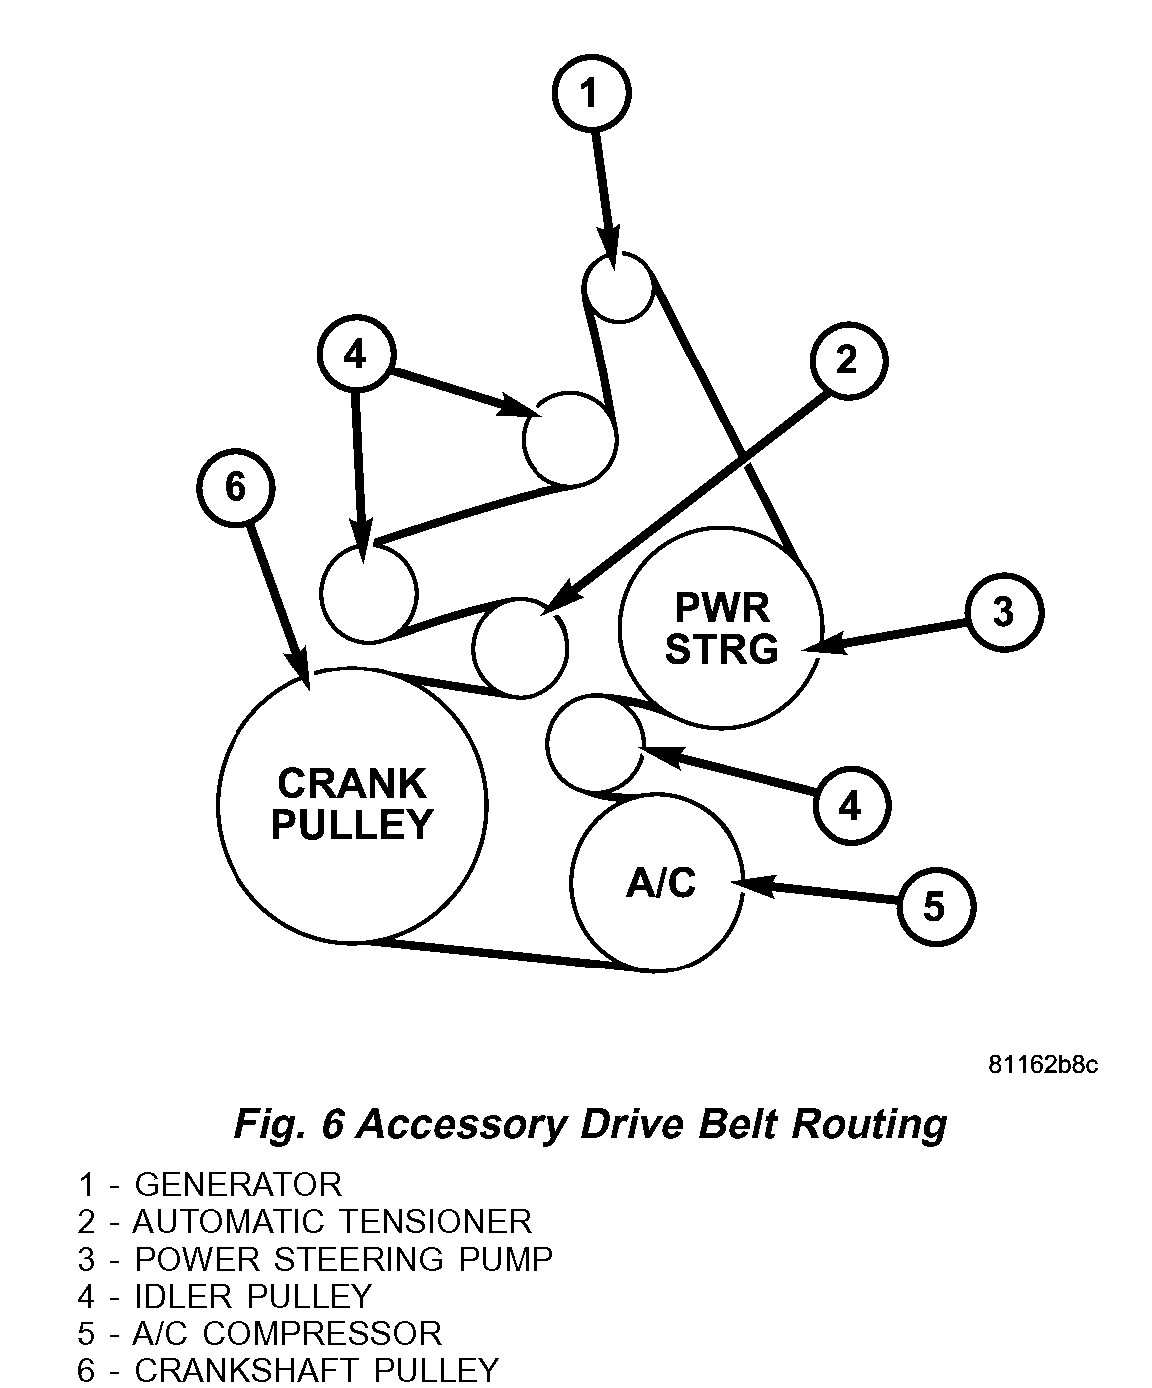
Fig. 6 Accessory Drive Belt Routing
pic 5
3) Verify belt is properly routed and engaged on all pulleys (Fig. 6).
4) Install drive belt shield and lower vehicle.
________________________________________
Let me know.
Joe
Images (Click to enlarge)
Feb 3, 2020 at 8:07 PM