Hi,
I am going to provide the directions for the removal and replacement of the timing chains on this vehicle. The alignment of the components is included in the directions. Also, the attached pictures correlate with the directions.
____________________________________________
2004 Lincoln Truck Navigator 4WD V8-5.4L DOHC VIN R
Procedures
Vehicle Engine, Cooling and Exhaust Engine Timing Components Service and Repair Procedures
PROCEDURES
Timing Drive Components
pic 1
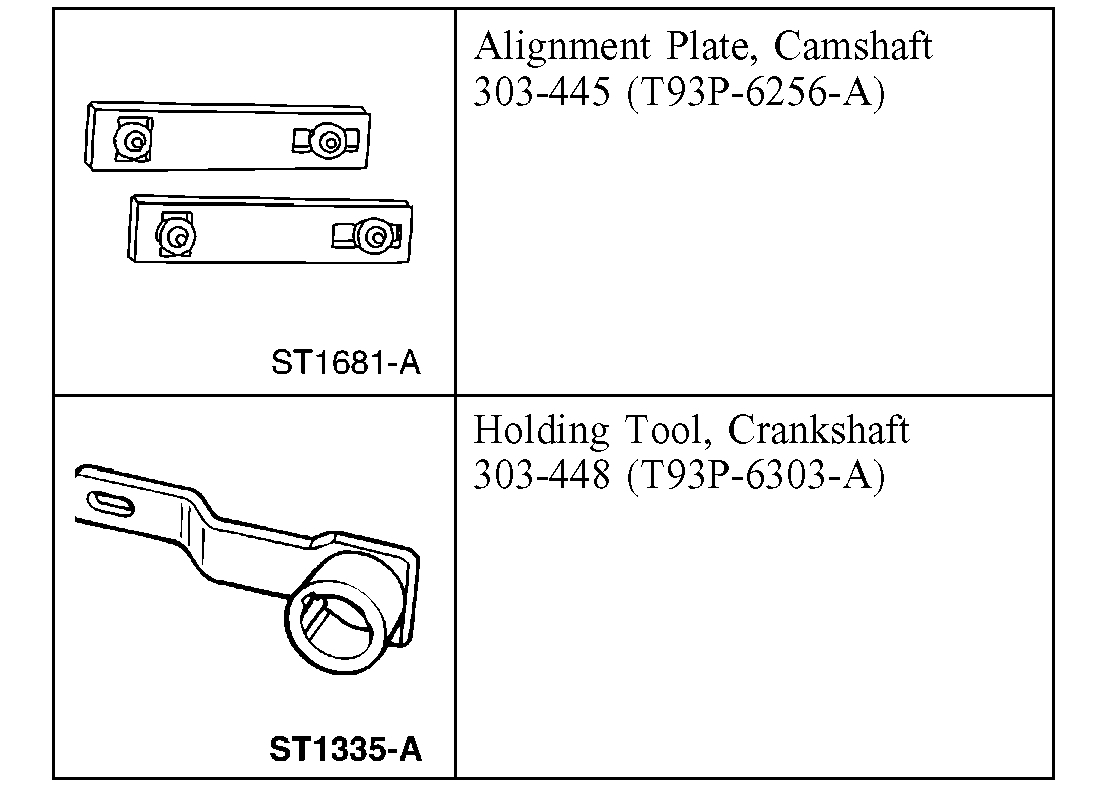
Special Tool(s)
Removal
CAUTION: Since the engine is not free-wheeling, if the crankshaft or the camshafts are moved in any manner during removal and installation, the crankshaft and the camshafts must be re-synchronized.
1. Remove the engine front cover.
pic 2
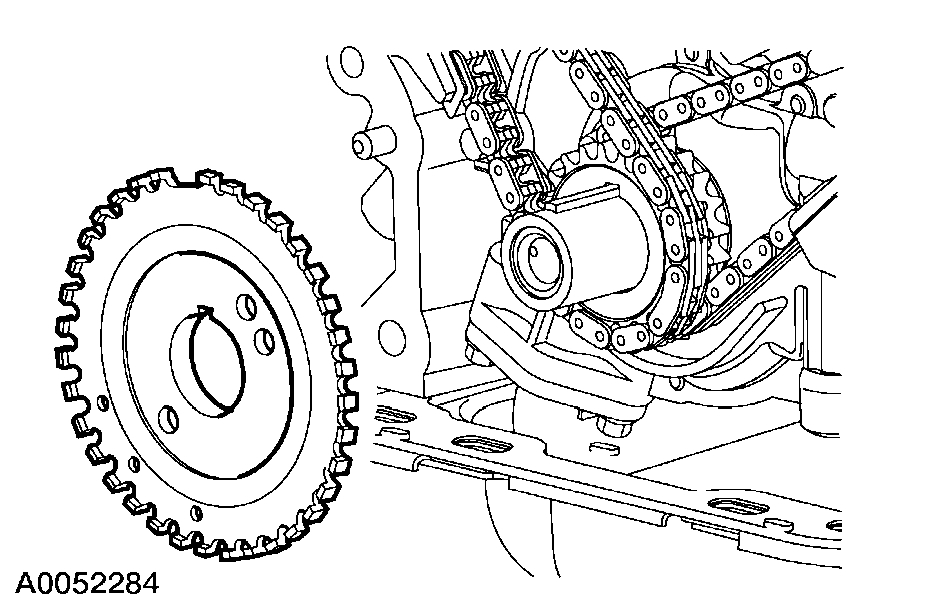
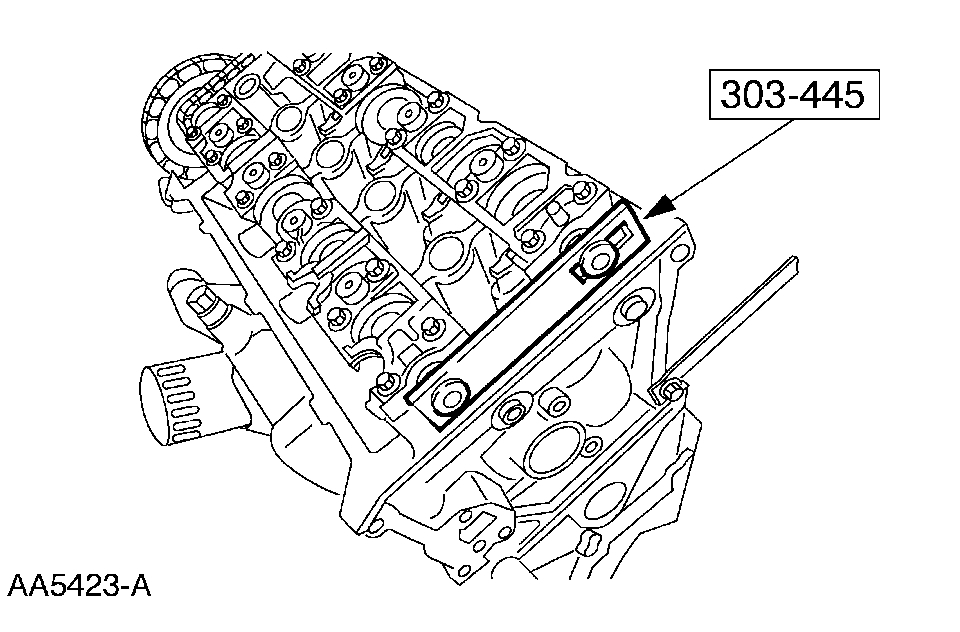
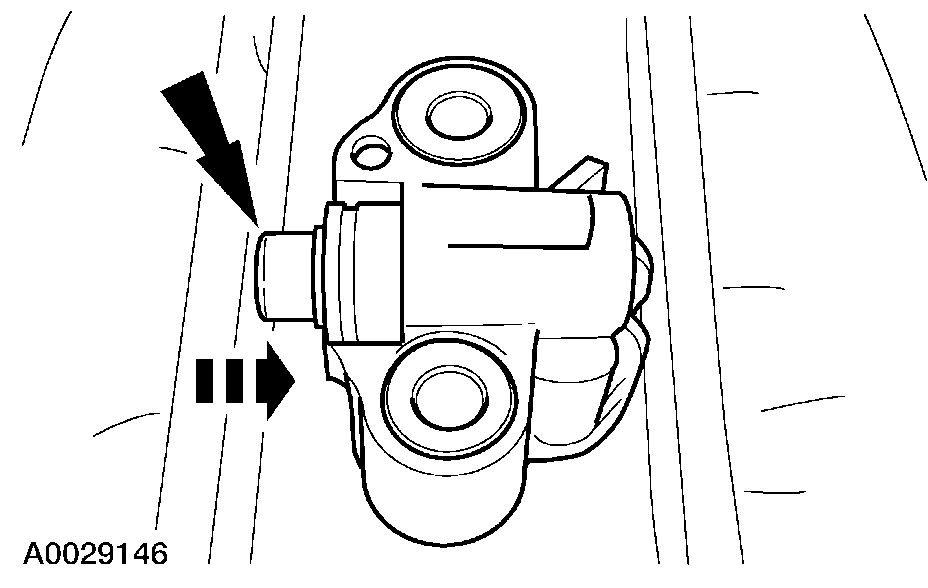
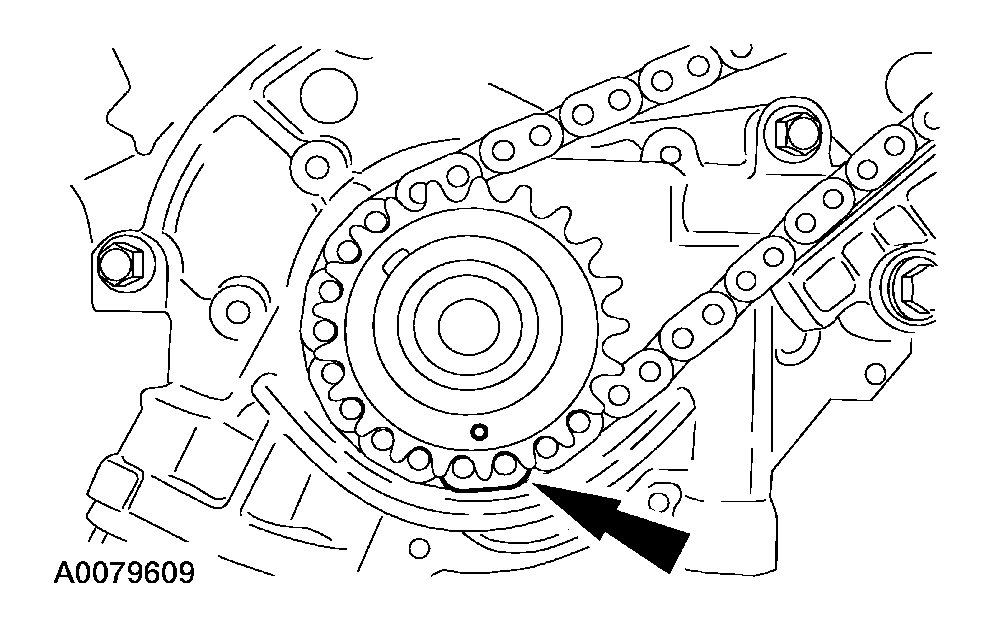
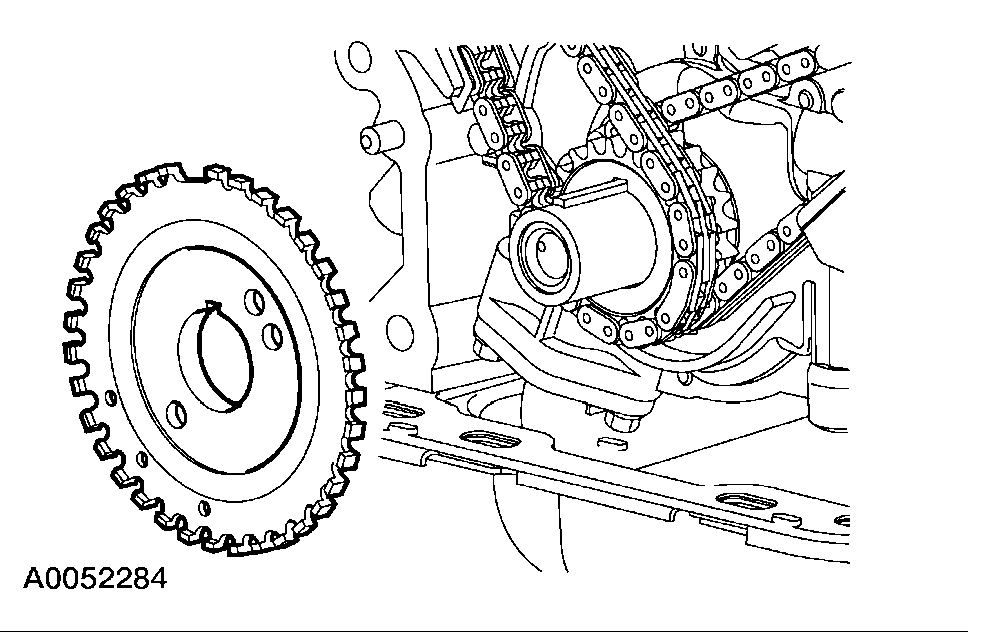
2. Remove the crankshaft sensor ring from the crankshaft.
pic 3
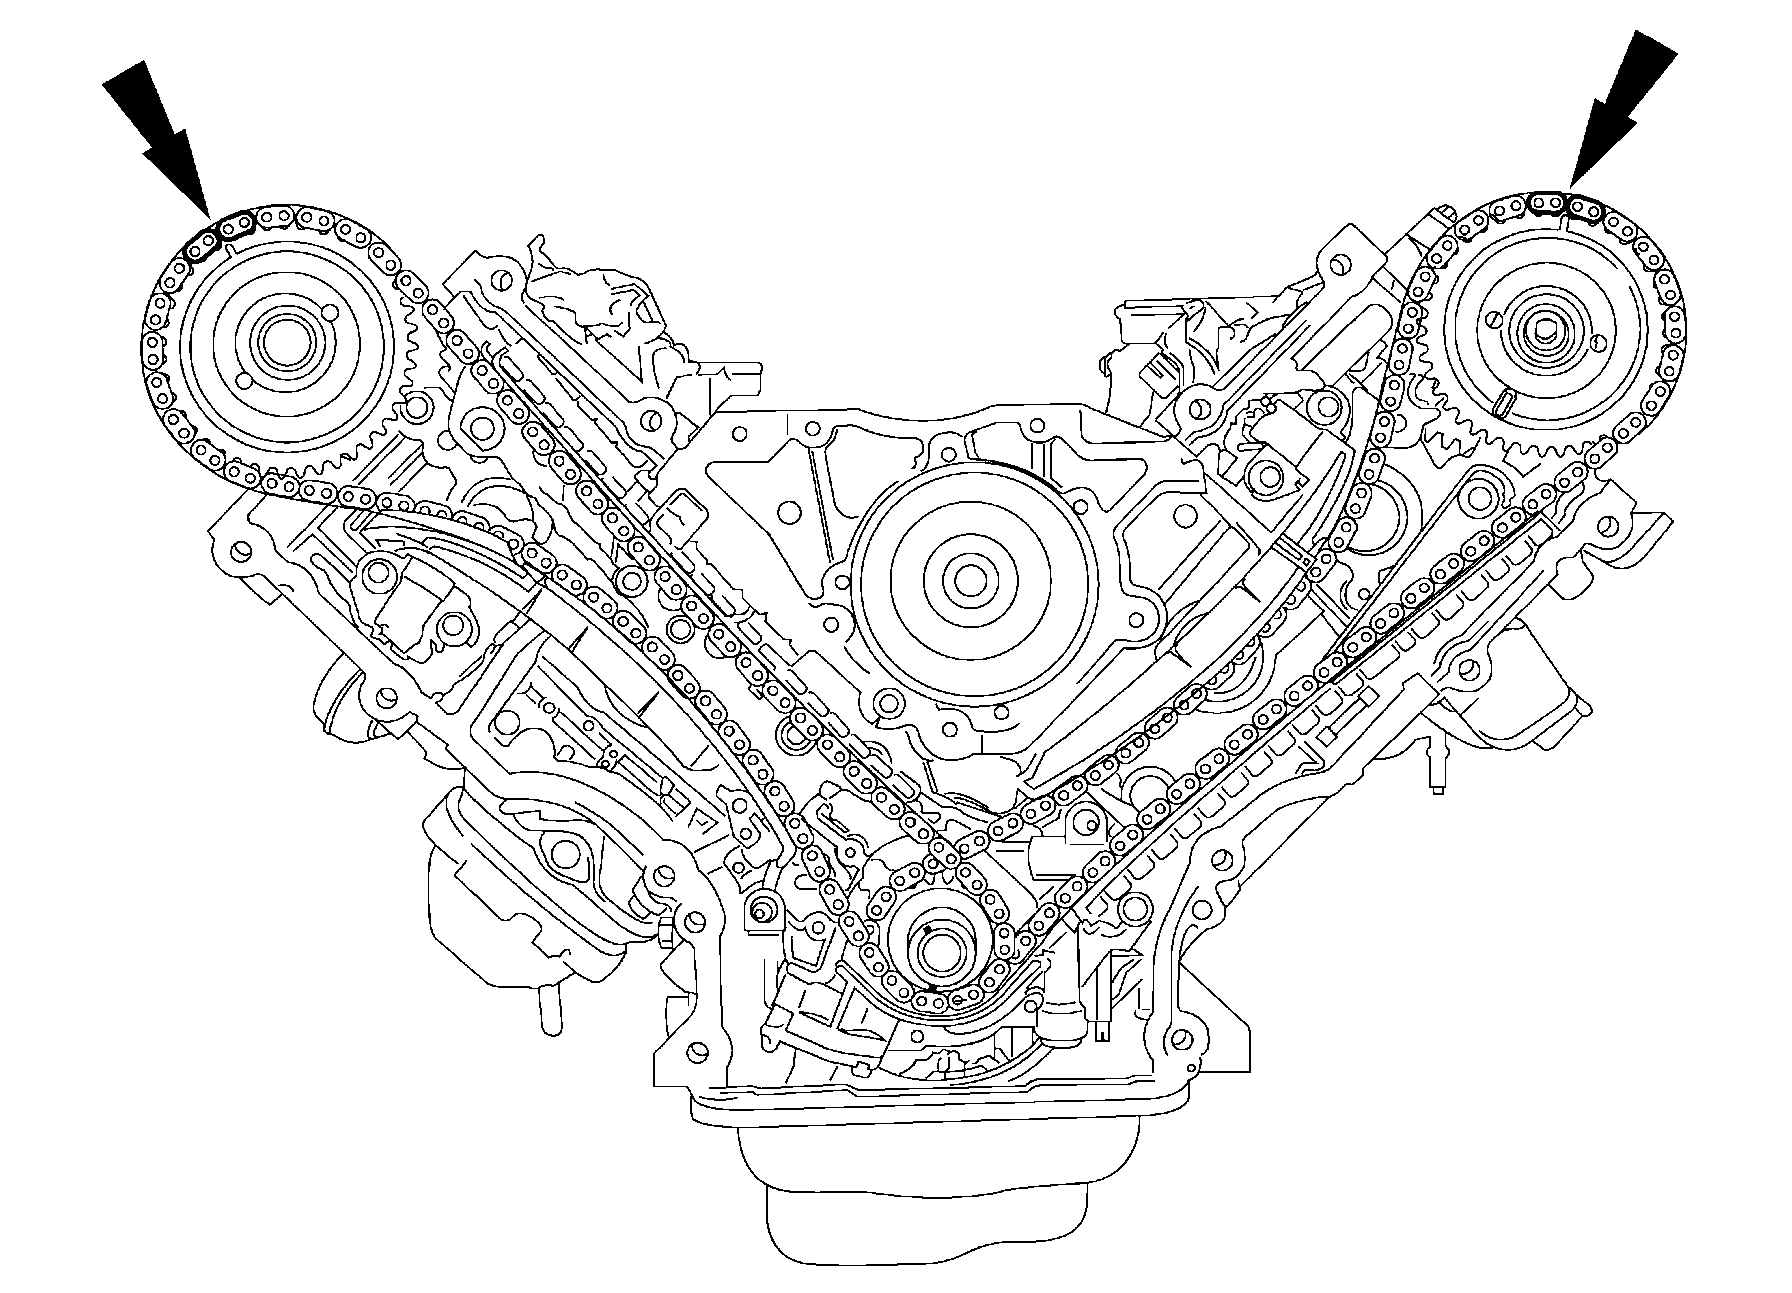
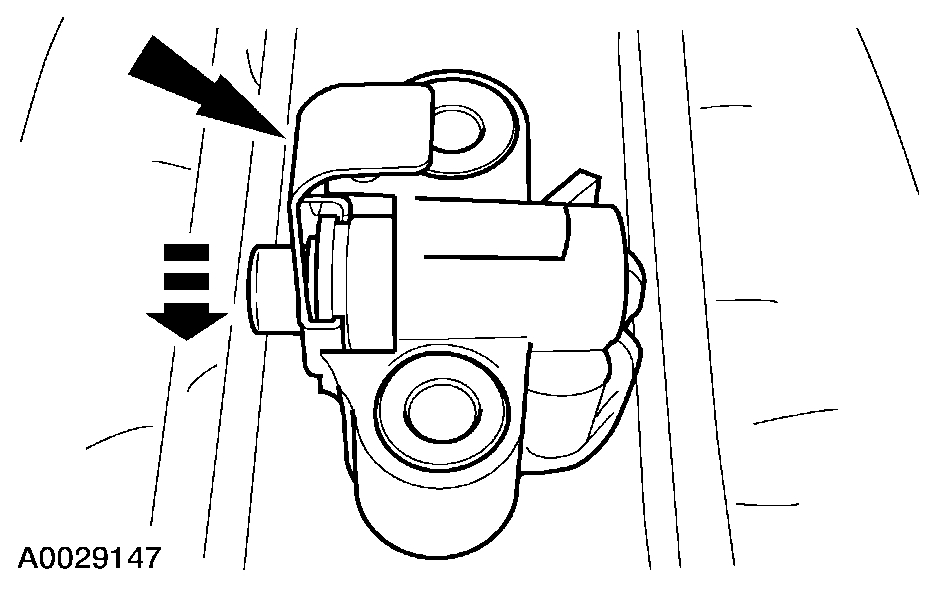
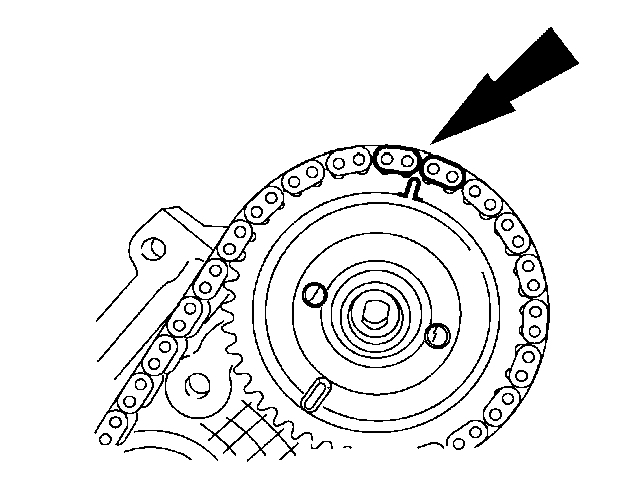
3. Rotate the crankshaft until the timing mark on the RH camshaft sprocket is approximately at the 11 o'clock position, and the timing mark on the LH camshaft sprocket is approximately at the 12 o'clock position.
pic 4
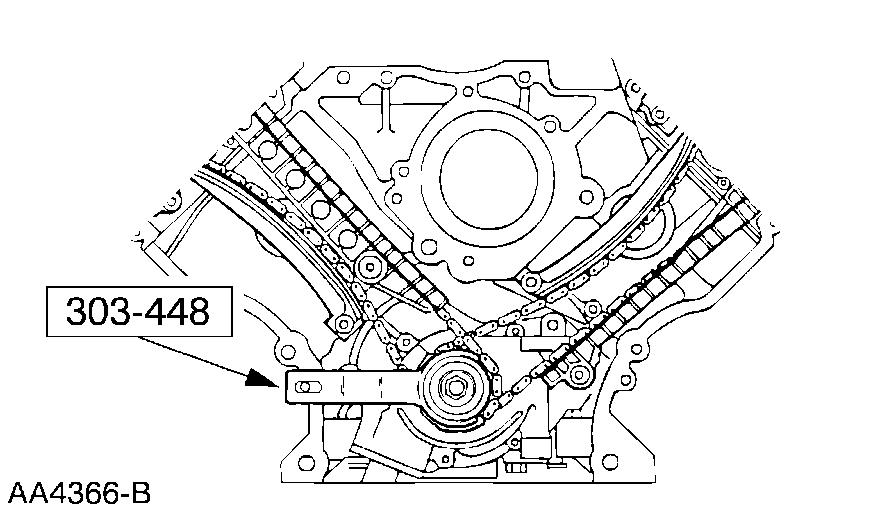
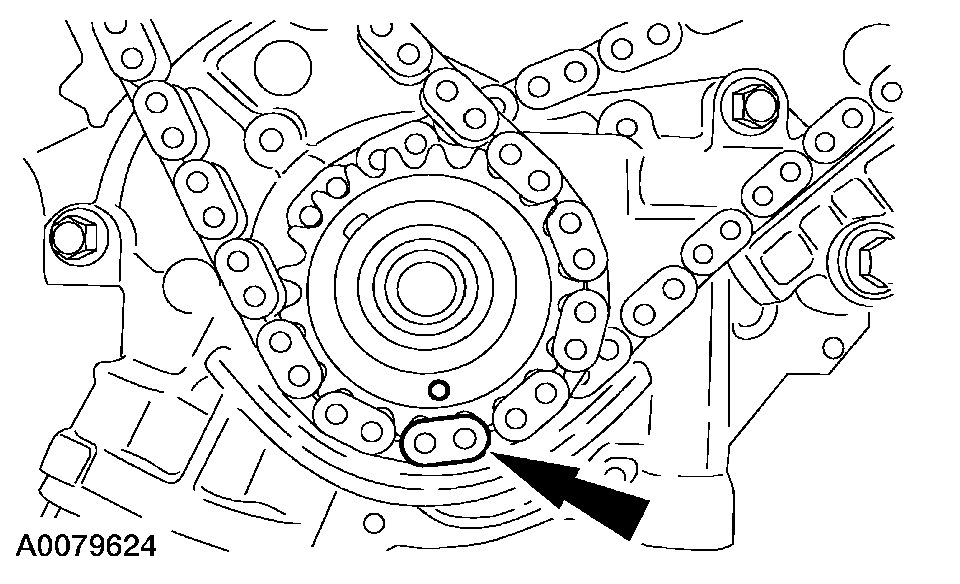
4. CAUTION: Unless otherwise instructed, at no time when the timing chains are removed and the cylinder heads are installed is the crankshaft or the camshaft to be rotated. Severe piston and valve damage will occur.
Using the special tool, position the crankshaft as shown.
pic 5
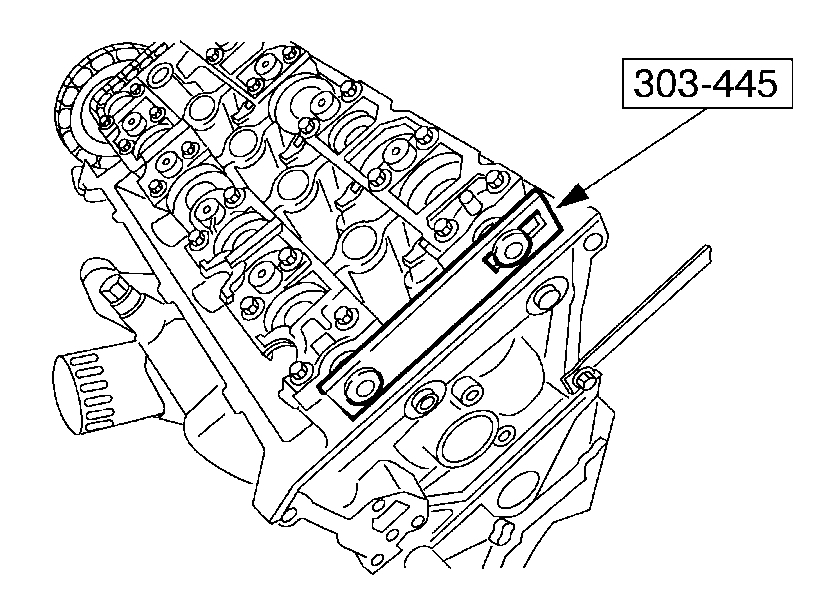
5. Install the special tool.
pic 6
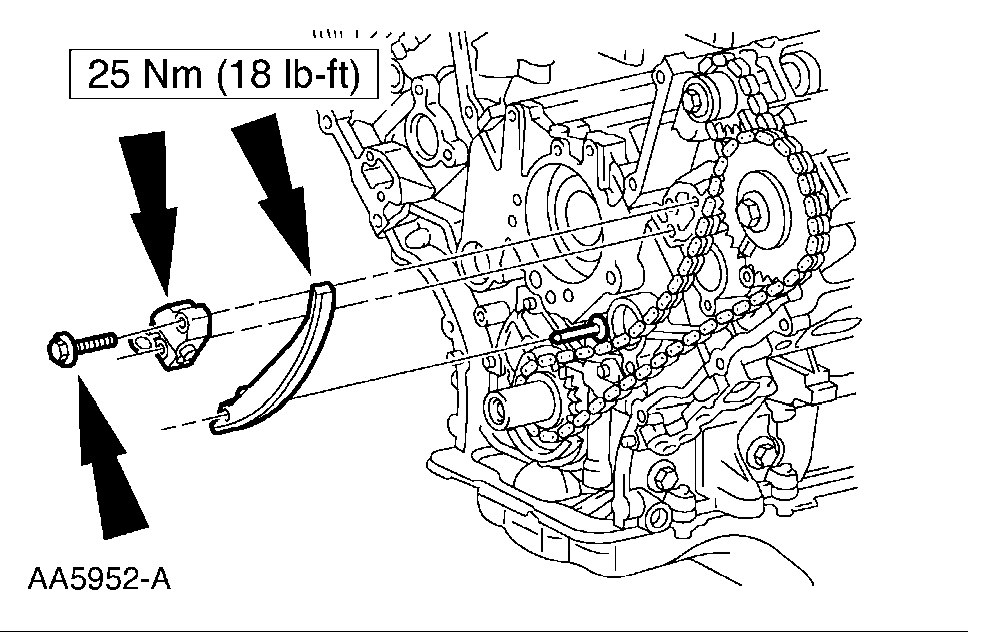
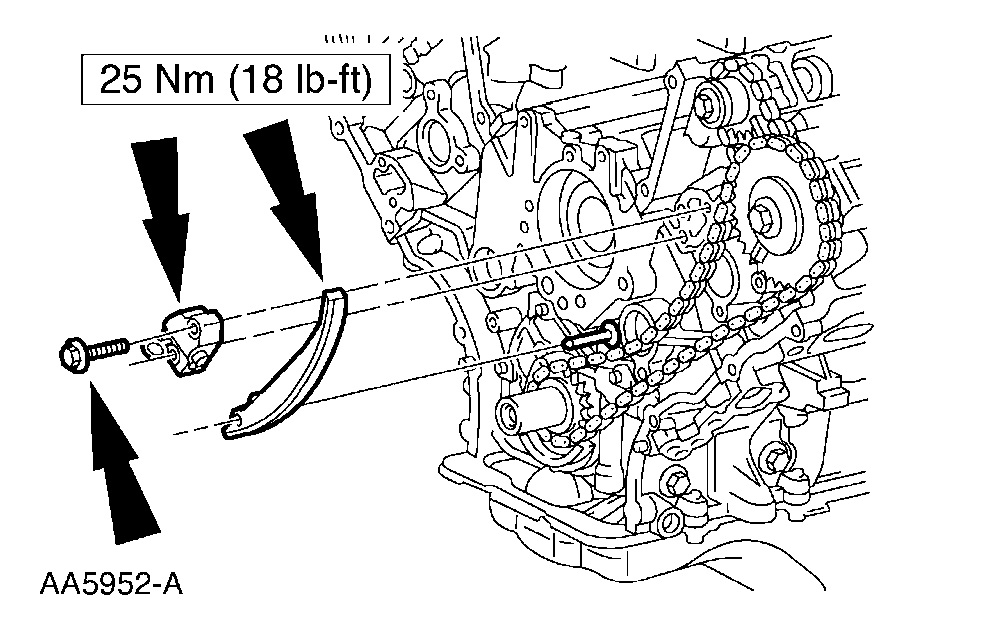
6. NOTE: LH shown; RH similar.
Remove the two bolts, the timing chain tensioner and tensioner arm.
pic 7
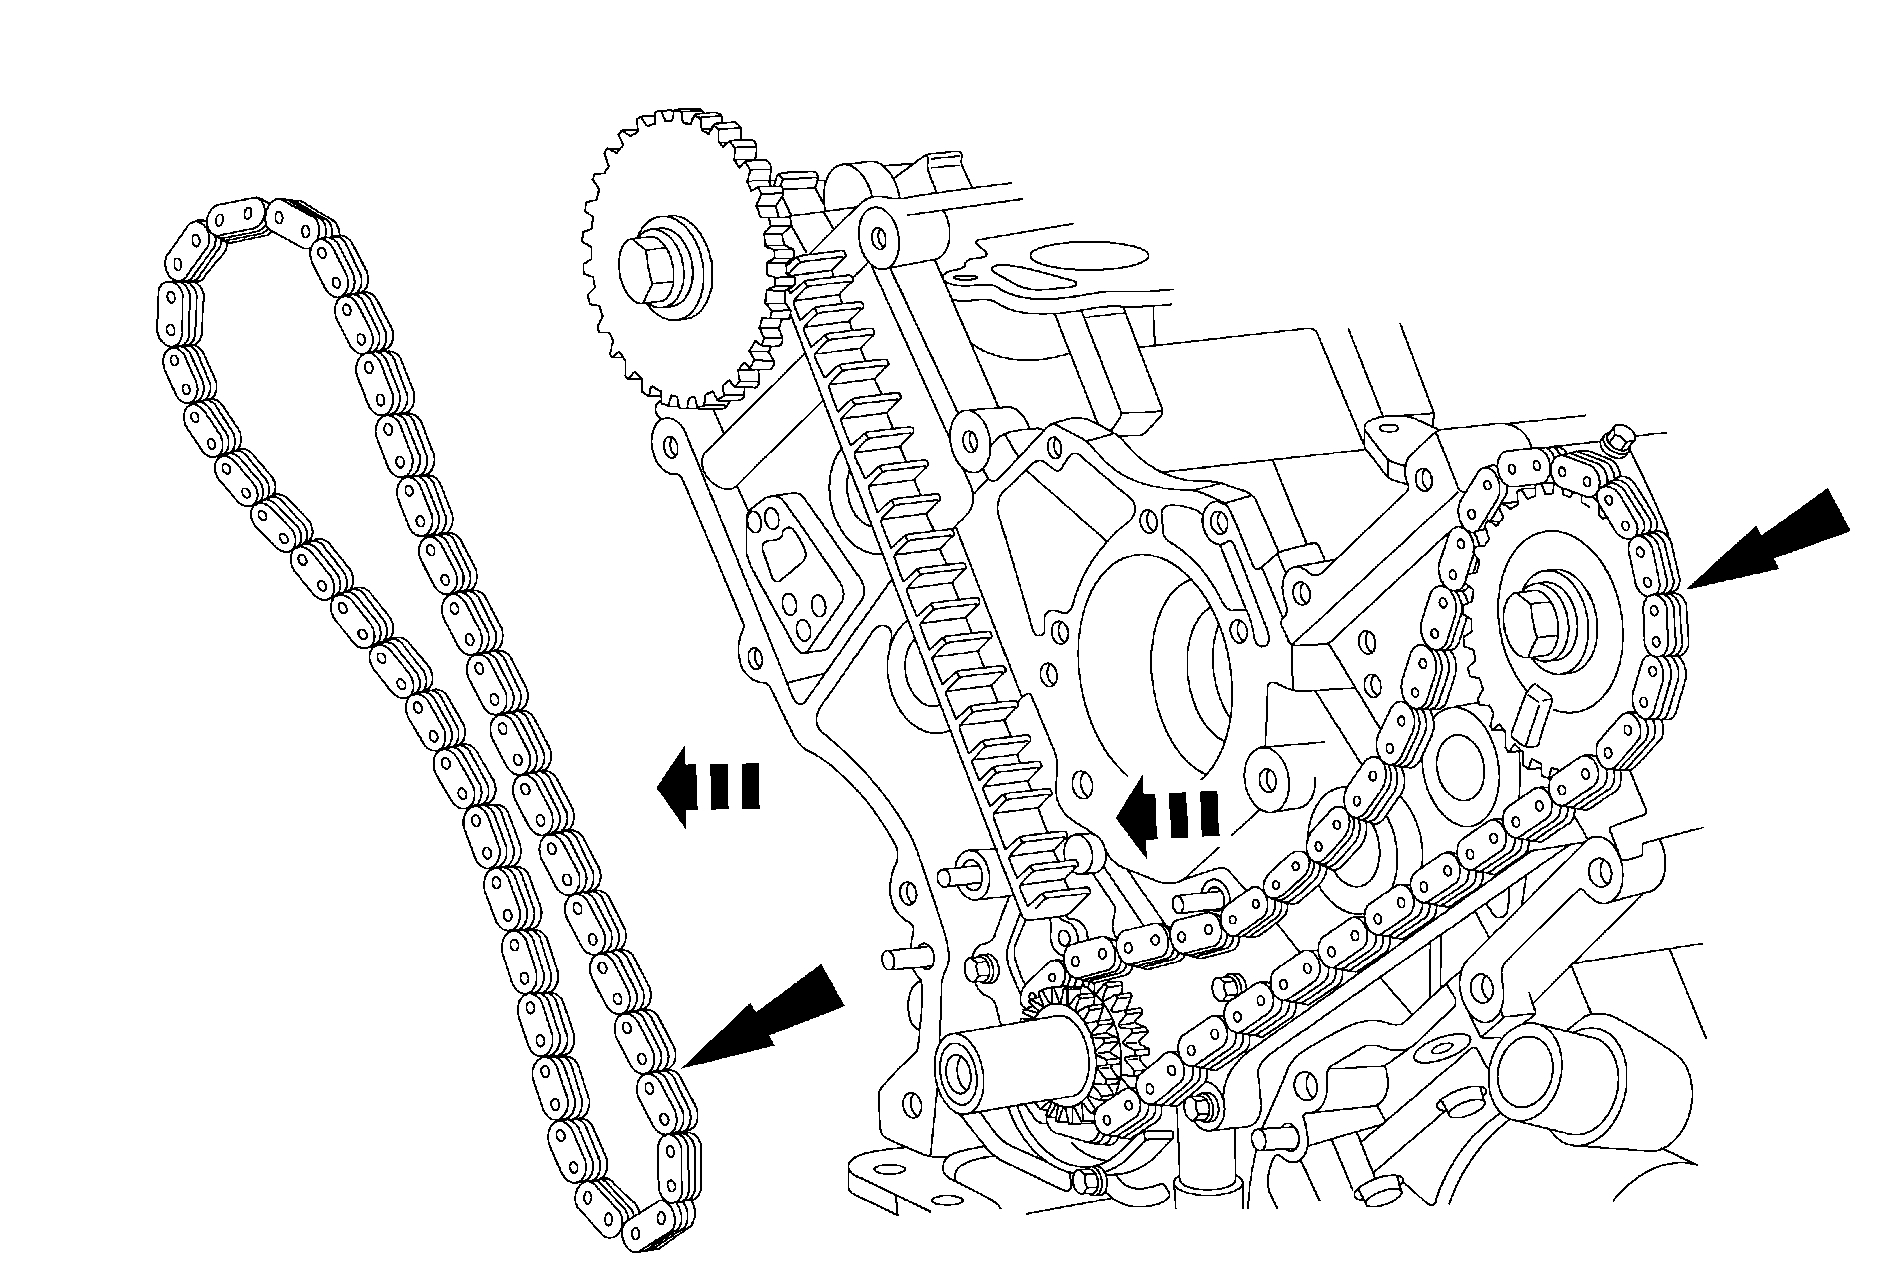
7. CAUTION: Unless otherwise instructed, at no time when the timing chains are removed and the cylinder heads are installed is the crankshaft or the camshaft to be rotated. Severe piston and valve damage will occur.
CAUTION: Do not remove the special tool from the camshafts.
Remove the LH and RH timing chains and the crankshaft sprockets.
^ Remove the special tool from the crankshaft.
^ Remove the timing chains from the camshaft sprockets.
^ Remove the right and left timing chains and the crankshaft sprocket from the crankshaft.
pic 8
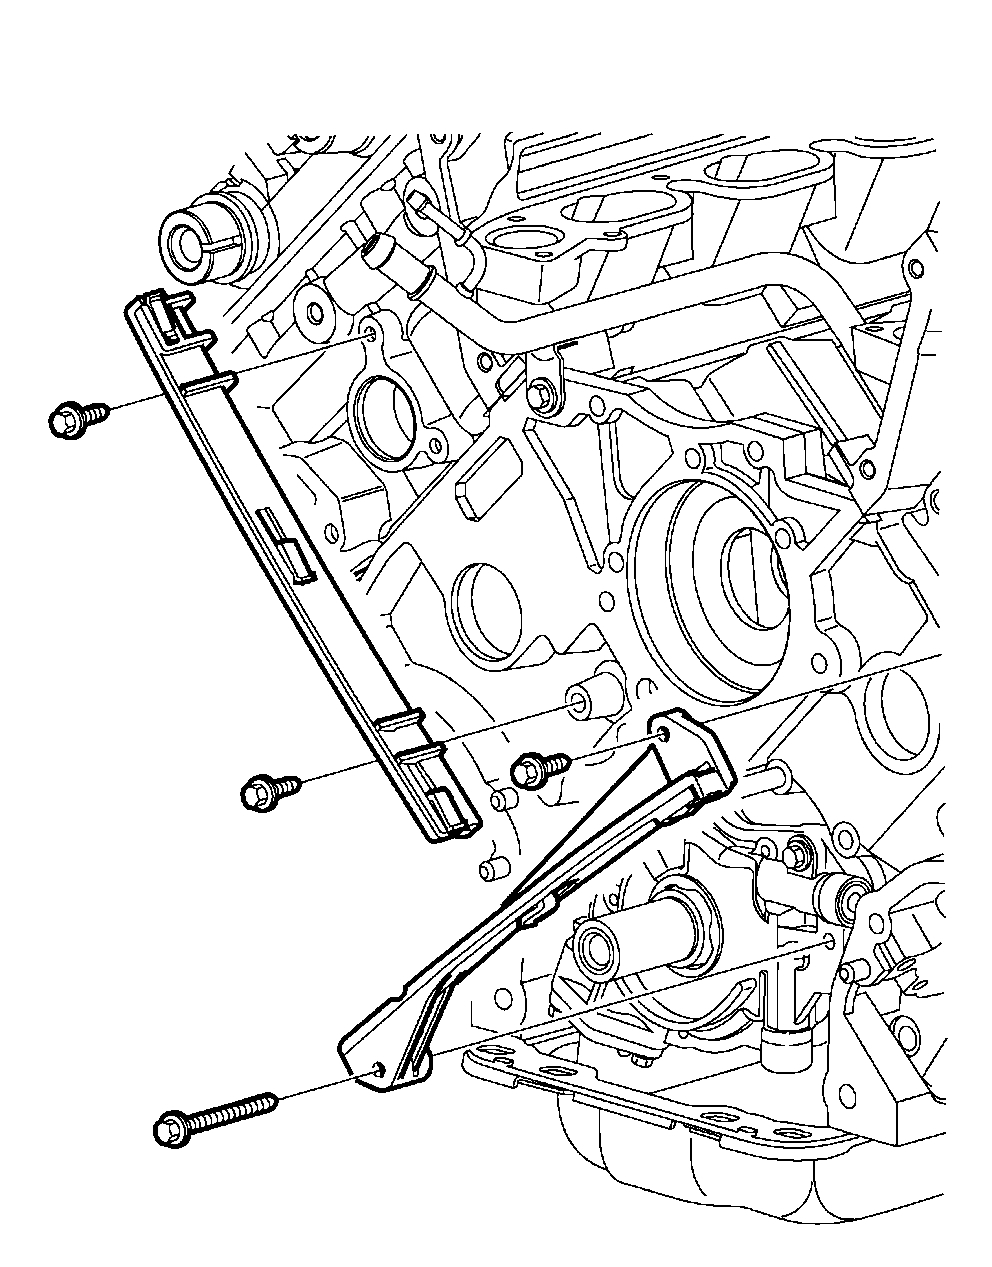
8. CAUTION: The bolts are different lengths and must be returned to their original location.
NOTE: LH shown; RH similar.
Remove the bolts and the timing chain guides.
Installation
pic 9
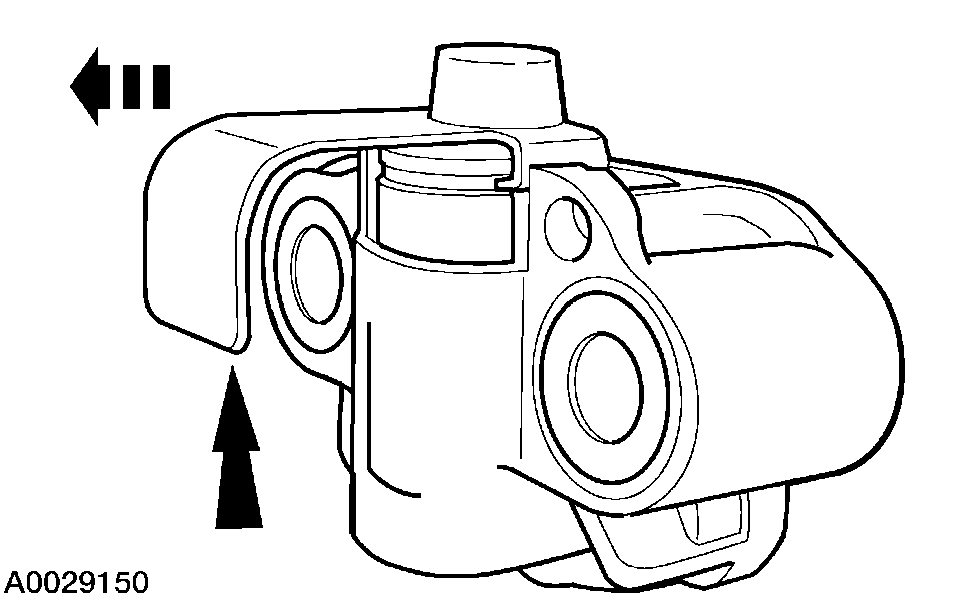
1. CAUTION: Timing chain procedures must be followed exactly or damage to the pistons or valves will result.
Compress the tensioner plunger, using the edge of a soft jawed vise.
pic 10
2. Install the tensioner retaining clip.
^ Remove the tensioner from the vise.
pic 11
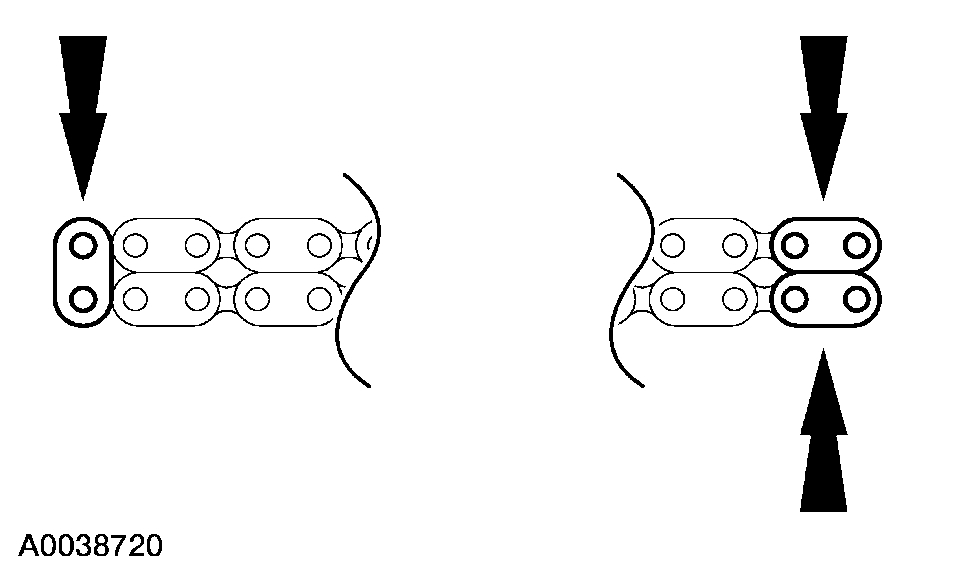
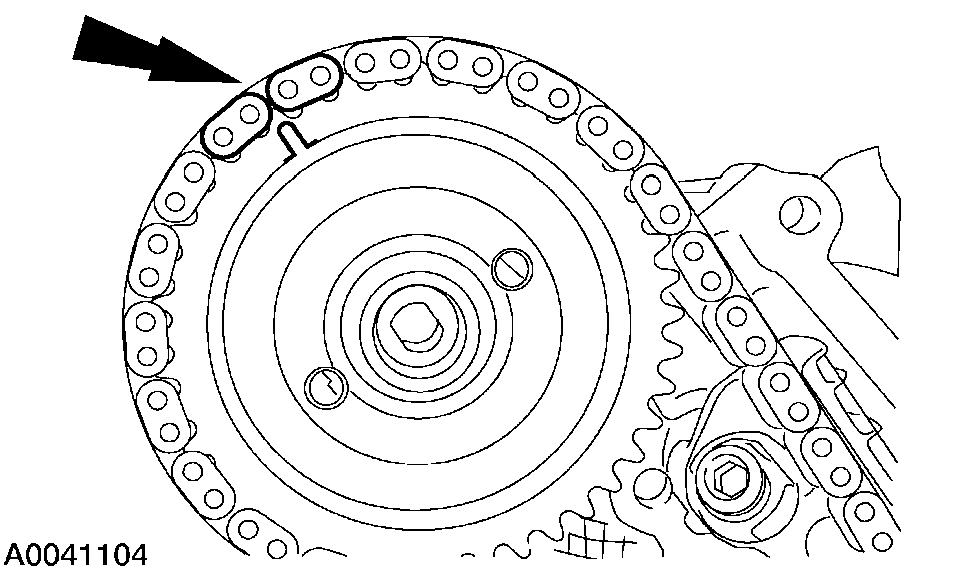
3. NOTE: There are 61 links in the timing chain.
If the copper links are not visible, mark two links on one end and one link on the other end, and use as timing marks.
pic 12
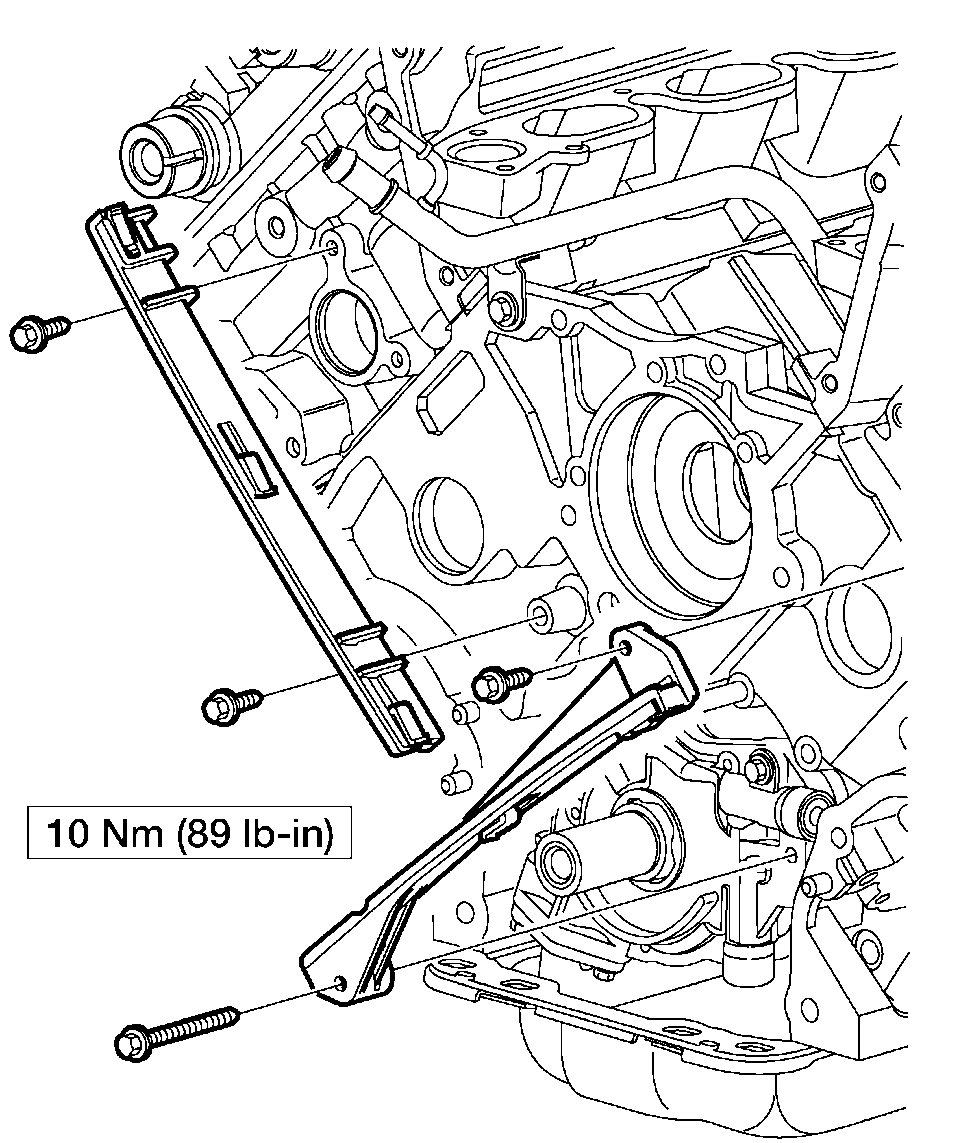
4. Install the timing chain guides.
pic 13
5. Remove the special tool.
pic 14
6. Position the crankshaft sprocket with the long hub facing outward.
pic 15
7. Install the LH timing chain onto the crankshaft sprocket, aligning the one copper (marked) link on the timing chain with the slot on the crankshaft sprocket.
pic 16
8. Position the LH timing chain on the camshaft sprocket with the two copper (marked) chain links and the camshaft sprocket timing mark aligned.
pic 17
9. Position the RH (outer) timing chain on the crankshaft sprocket, aligning the copper (marked) link with the timing mark on the sprocket.
pic 18
10. Position the RH timing chain on the camshaft sprocket. Make sure the two copper (marked) links align with the camshaft sprocket timing mark.
pic 19
11. NOTE: LH shown; RH similar.
Position the tensioner arms and tensioners, and install the bolts.
pic 20
12. Remove the tensioner retaining clip.
pic 21
13. As a post-check, verify correct alignment of all timing marks.
14. Remove the special tool.
pic 22
15. Position the crankshaft sensor ring on the crankshaft.
16. Install the engine front cover.
___________________________
I hope this helps. Let me know if you have other questions.
Take care and God Bless,
Joe
Images (Click to enlarge)
Feb 4, 2021 at 6:53 PM