Hi,
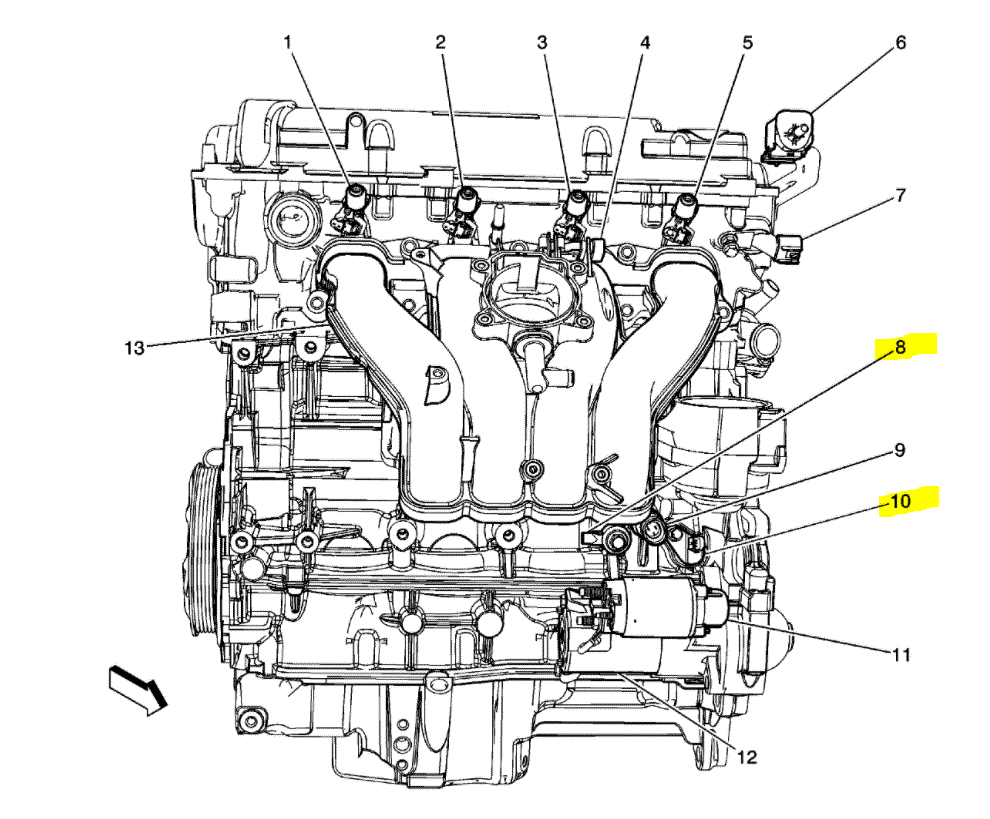
if you look at pic 1, number 8 is the knock sensor and number 10 is the crankshaft position sensor.
__________________________
Here are directions for replacing the crankshaft position sensor. The attached pics correlate with the directions.
__________________________
2009 Saturn Aura L4-2.4L
Crankshaft Position Sensor Replacement
Vehicle Powertrain Management Sensors and Switches - Powertrain Management Sensors and Switches - Computers and Control Systems Crankshaft Position Sensor Service and Repair Removal and Replacement Crankshaft Position Sensor Replacement
CRANKSHAFT POSITION SENSOR REPLACEMENT
Crankshaft Position Sensor Replacement
pic 2
1. Remove the starter. Refer to Starter Motor Replacement (LAT) (See: Starter Motor > Removal and Replacement)Starter Motor Replacement (LY7) (See: Starter Motor > Removal and Replacement)Starter Motor Replacement (LE5) (See: Starter Motor > Removal and Replacement).
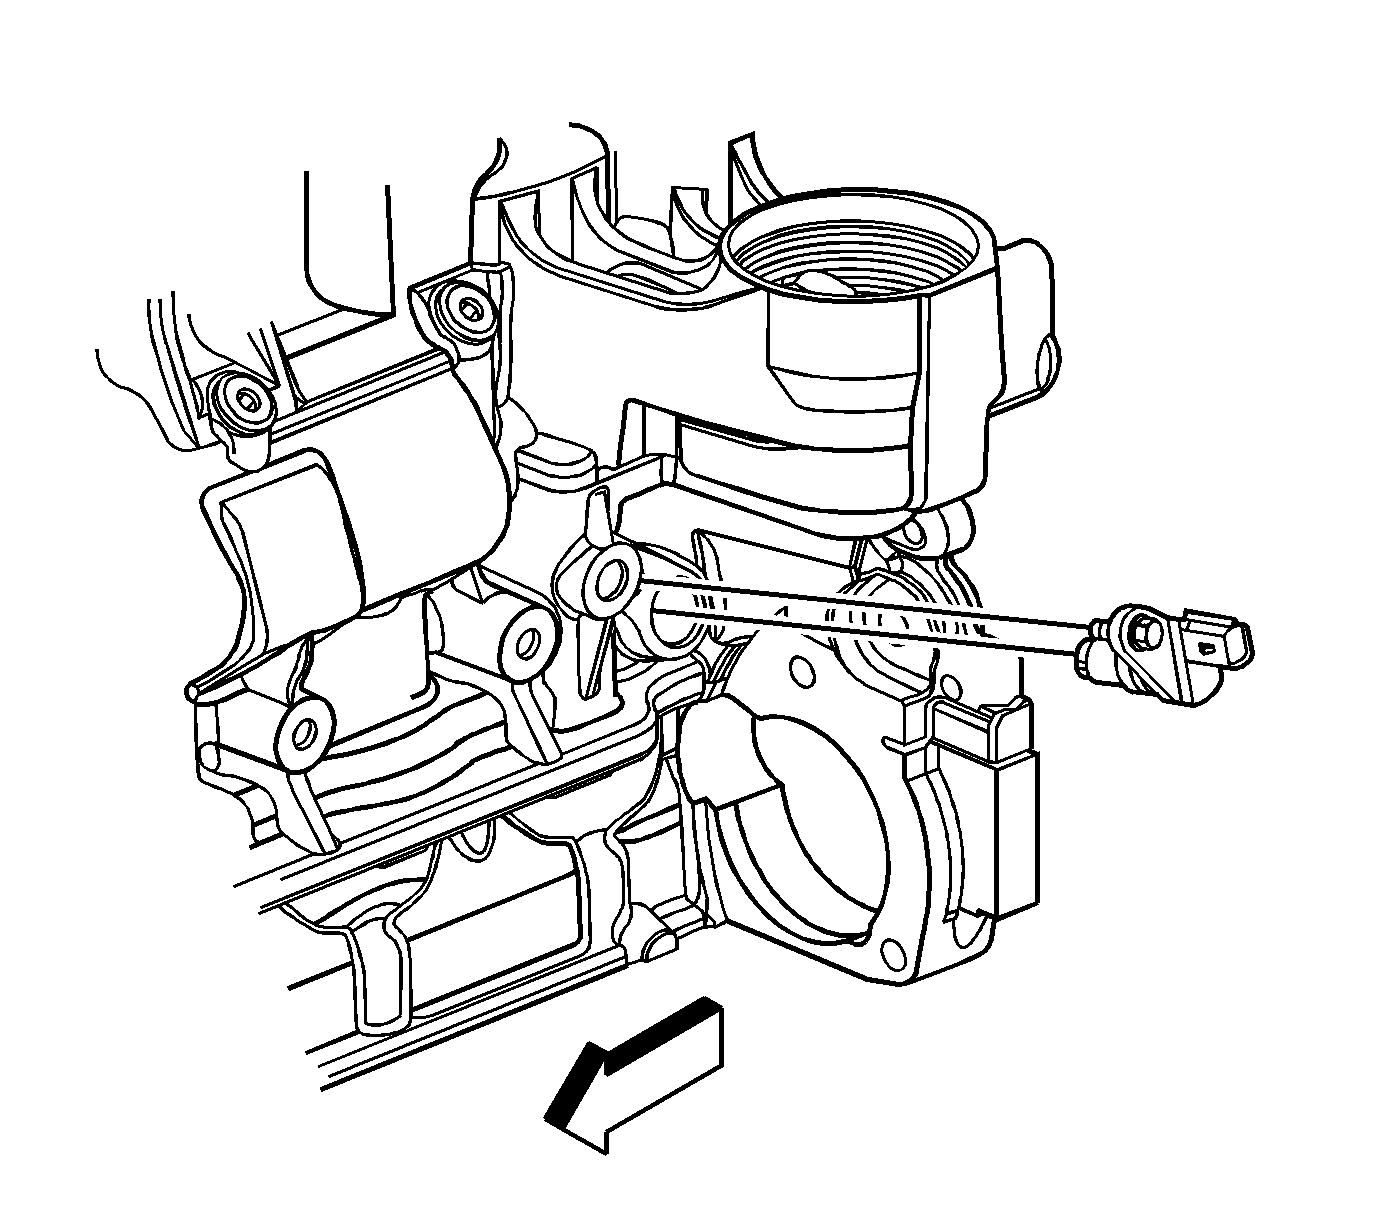
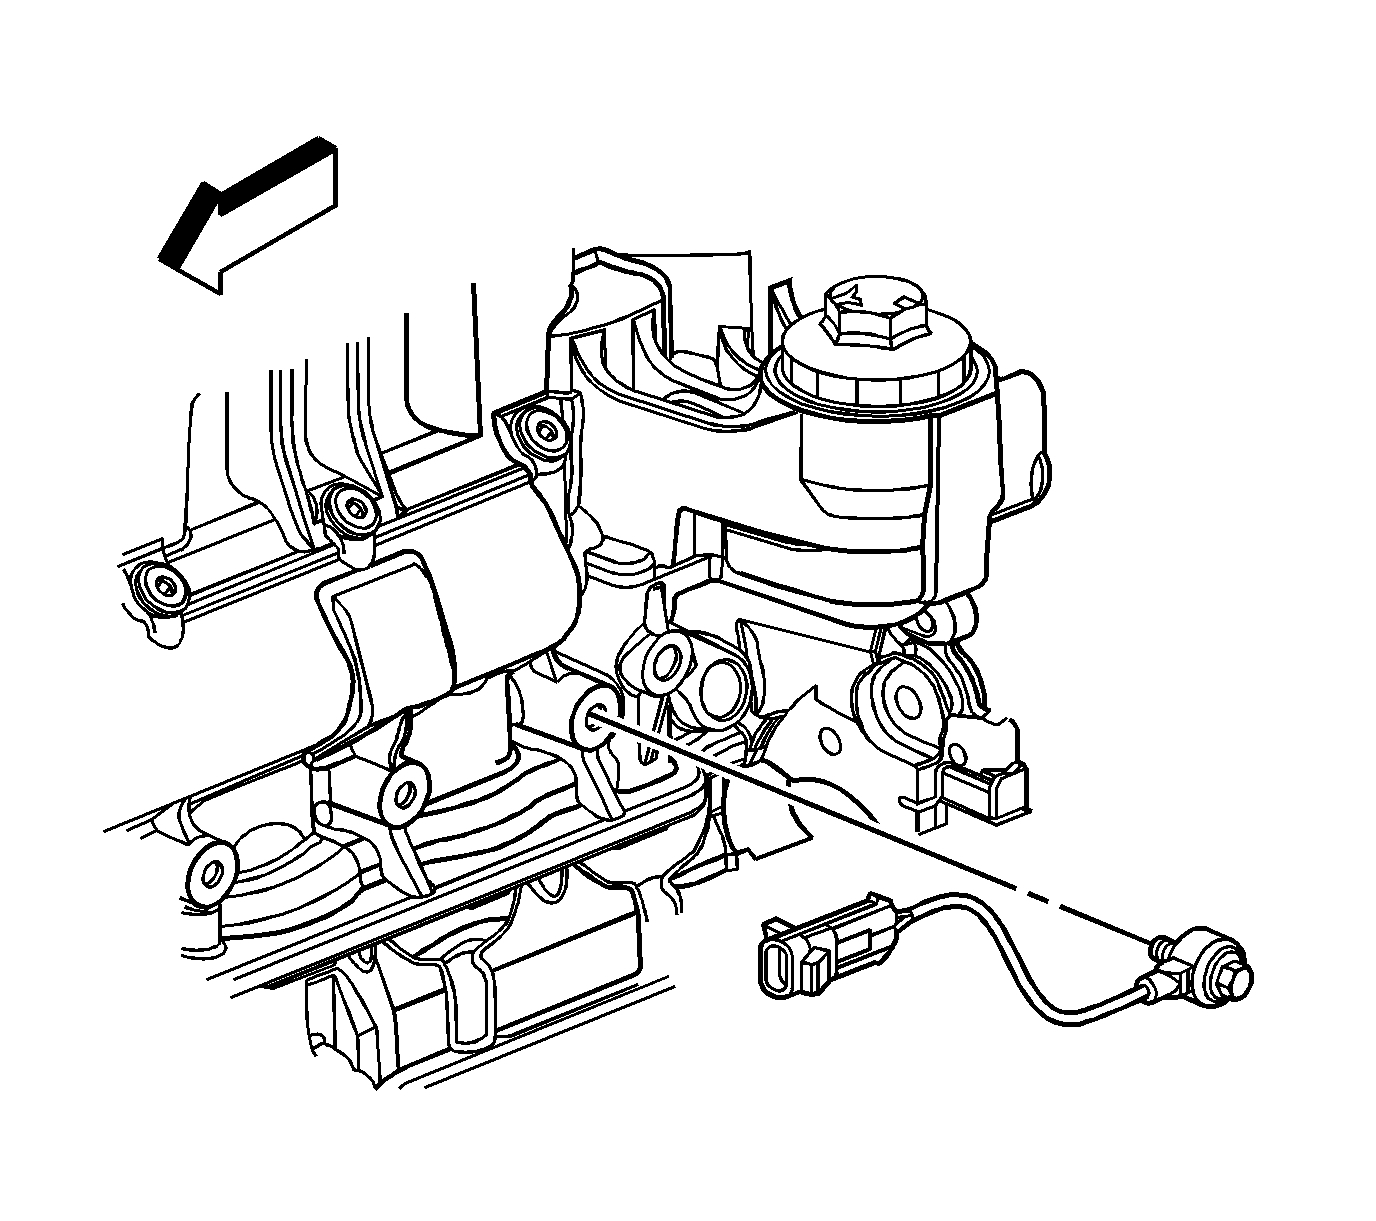
2. Disconnect the engine wiring harness electrical connector (1) from the crankshaft position (CKP) sensor.
pic 3
3. Remove the CKP sensor bolt.
4. Remove the CKP sensor.
Installation Procedure
pic 4
1. Lubricate the CKP sensor O-ring seal with clean engine oil.
2. Install the CKP sensor.
Caution: Refer to Fastener Caution (See: Vehicle > Vehicle Damage Warnings > Fastener Caution).
3. Install the CKP sensor bolt and tighten to 10 Nm (89 lb in).
pic 5
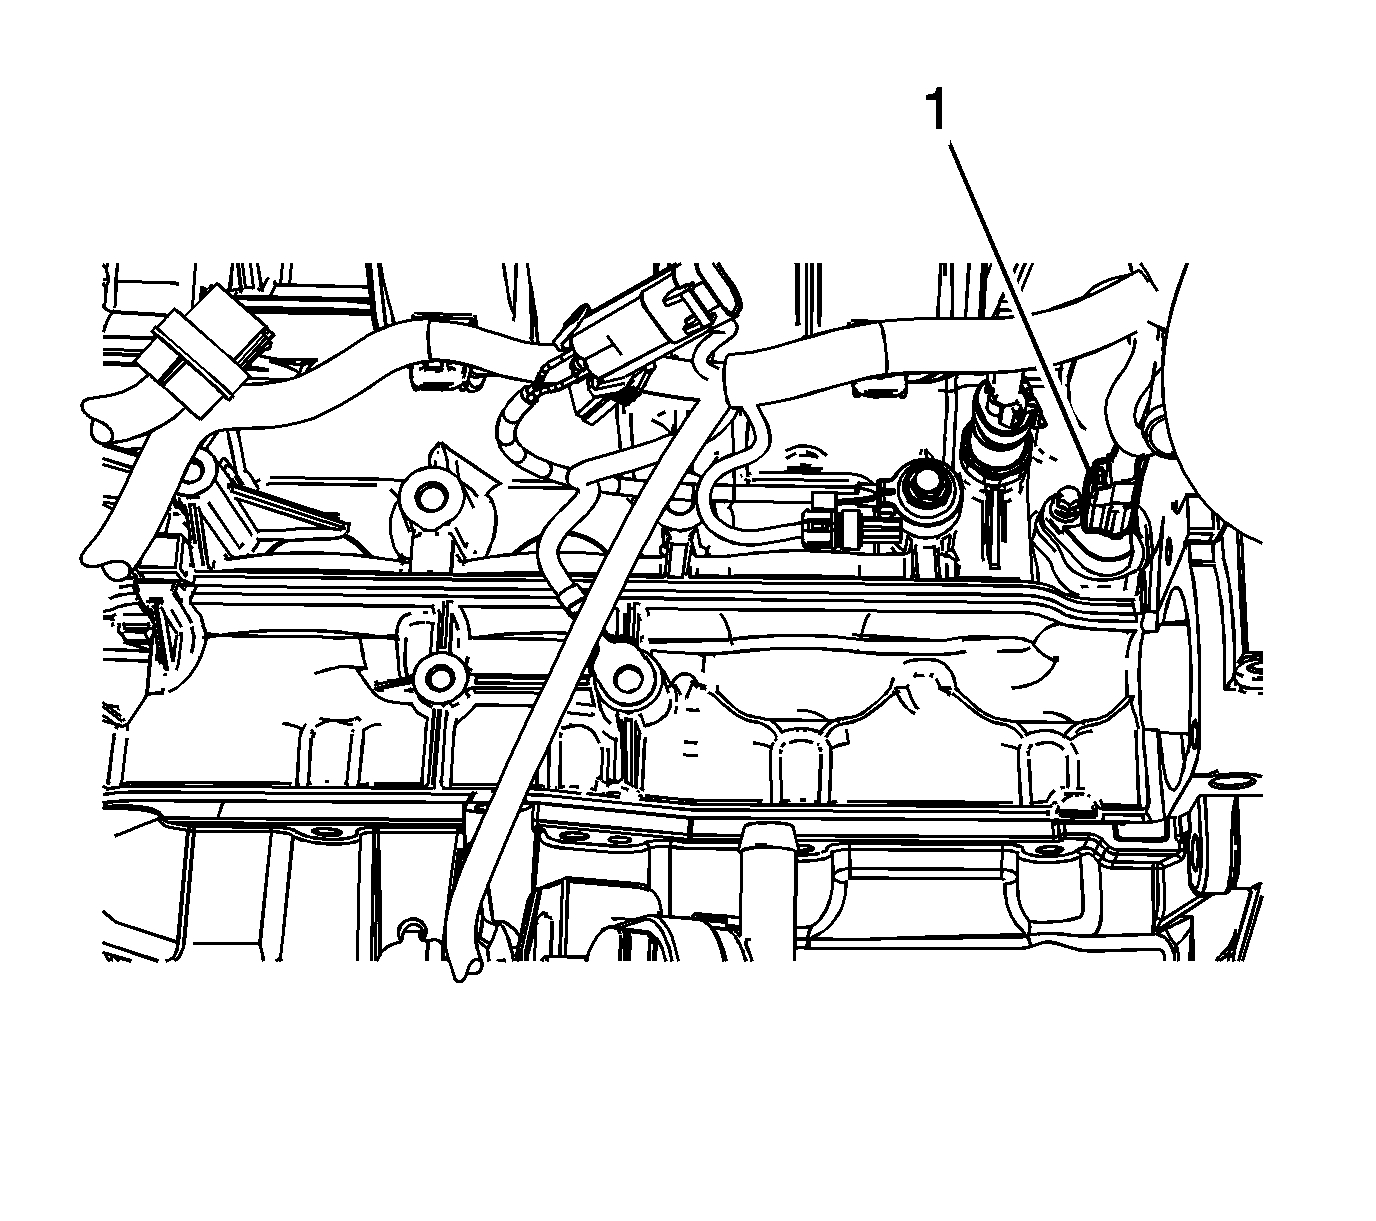
4. Connect the engine wiring harness electrical connector (1) to the CKP sensor.
5. Install the starter. Refer to Starter Motor Replacement (LAT) (See: Starter Motor > Removal and Replacement)Starter Motor Replacement (LY7) (See: Starter Motor > Removal and Replacement)Starter Motor Replacement (LE5) (See: Starter Motor > Removal and Replacement).
6. Perform the crankshaft position system variation learn procedure. Refer to Crankshaft Position System Variation Learn (See: Crankshaft Position Sensor > Removal and Replacement).
___________________________
Here are the directions for the knock sensor replacement.
___________________________
2009 Saturn Aura L4-2.4L
Knock Sensor Replacement
Vehicle Powertrain Management Sensors and Switches - Powertrain Management Sensors and Switches - Computers and Control Systems Knock Sensor Service and Repair Removal and Replacement Knock Sensor Replacement
KNOCK SENSOR REPLACEMENT
Knock Sensor Replacement
Removal Procedure
pic 6
1. Disconnect the negative battery cable. Refer to Battery Negative Cable Disconnection and Connection (LAT) (See: Battery Cable > Removal and Replacement)Battery Negative Cable Disconnection and Connection (LZ4, LY7, and LE5) (See: Battery Cable > Removal and Replacement).
2. Raise and support the vehicle. Refer to Lifting and Jacking the Vehicle (See: Vehicle Lifting > Procedures > Lifting and Jacking the Vehicle).
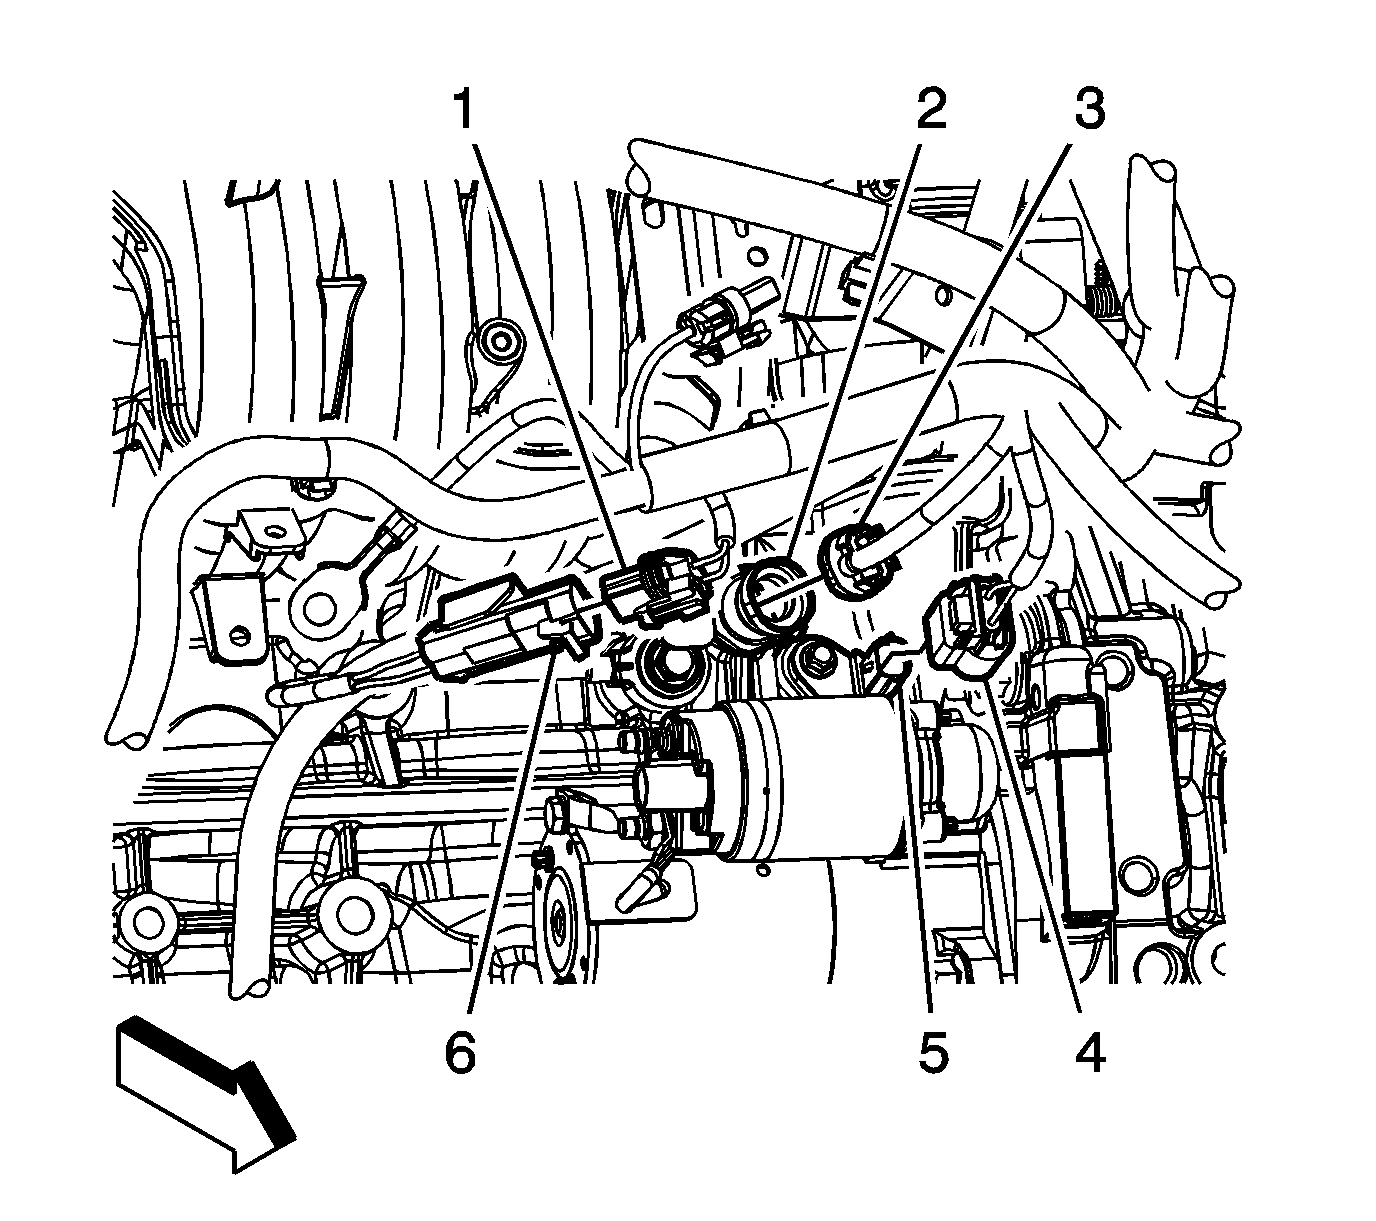
3. Disconnect the engine wiring harness electrical connector (1) from the knock sensor pigtail electrical connector (6).
4. Remove the knock sensor electrical connector pigtail (6) clip from the oil level indicator tube bracket.
pic 7
5. Remove the knock sensor bolt.
6. Remove the knock sensor.
Installation Procedure
Note: Rotate the pigtail 90 degrees from vertical before securing the fastener.
pic 8
1. Install the knock sensor.
Caution: Refer to Fastener Caution (See: Vehicle > Vehicle Damage Warnings > Fastener Caution).
2. Install the knock sensor bolt and tighten to 25 Nm (18 lb ft).
pic 9
3. Install the knock sensor electrical connector pigtail (6) clip to the oil level indicator tube bracket.
4. Connect the engine wiring harness electrical connector (1) to the knock sensor pigtail electrical connector (6).
5. Lower the vehicle.
6. Connect the negative battery cable. Refer to Battery Negative Cable Disconnection and Connection (LAT) (See: Battery Cable > Removal and Replacement)Battery Negative Cable Disconnection and Connection (LZ4, LY7, and LE5) (See: Battery Cable > Removal and Replacement).
_________________________
Let me know if this helps or if you have other questions.
Take care,
Joe
Images (Click to enlarge)
Nov 19, 2020 at 5:31 PM