Hey feller!
Back when that answer was made, we had a little more "do as you wish" lee-way. The "album" was made at Walmart photos (now expired), the cool thing was you could arrange your photos and tell a story below them. If you wanted someone to see the "album(s)" you simply added their email address to the Walmart album. Presto! They had it!
I had many many albums but they are a thing of the past.
I still have the pics and can "wing it" in the forum!
The original mechanical system will "saw" itself into.
Then it fails!
Either the vertical clutch rod will saw through the bell crank "hole" or the hole will saw through the rod. The same goes for the clutch pedal hole (up on the top end of the pedal)
Along with this failure, the bell crank "ends" (nylon pivots) wear out and the "smoothness" of the pedal being depressed fails or gets hard to push.
Here's where I'll attempt to explain the deal! Center to center holes are measured and marked as to keep these points in the same spots after the modification is implemented (keeping the lengths or throws the same as before)
Ask if I don't make it clear!
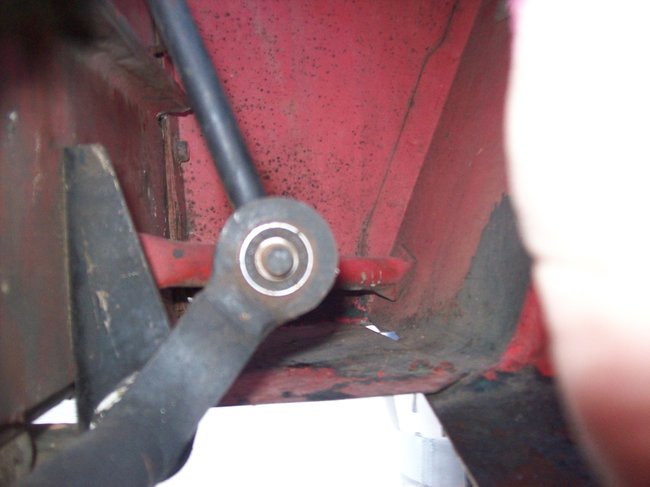
Pic 1 and 2) 2 "doughnuts" are cut out using 1/4" flat steel. I used a drill press and 2 hole saws. I used the pilot bit and cut both holes maybe 7/8 through. I then took off the pilot and cut the smaller hole all the way out. Then did the same for the outer hole saw (oiling all the way to cool it was a must!)
I measured the old hole's center off of the bell crank's body and centered my 1st doughnut on that hole. I then marked the "old flat steel" on the bell crank. Then I sawed off the old hole and welded my doughnut onto the "old flat" of the bell crank.
End result- Big hole in the same exact spot as the the smaller original.
Insert roller bearing, the clutch rod, a big washer on either side. Top it off with a cotter pin. Pic 1) bearing in place, Pic 2) washers in place.
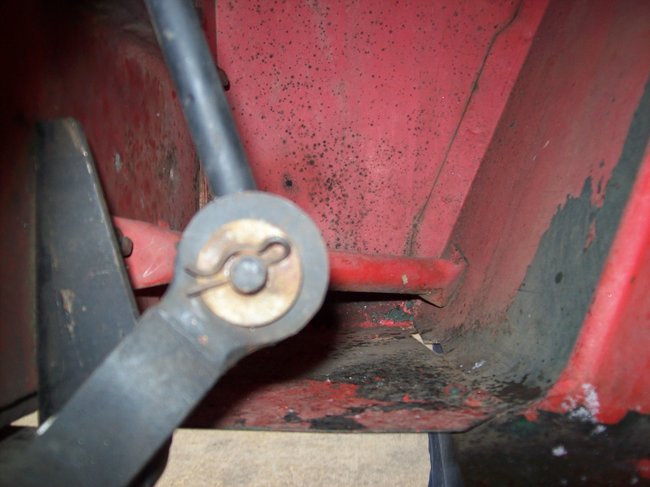
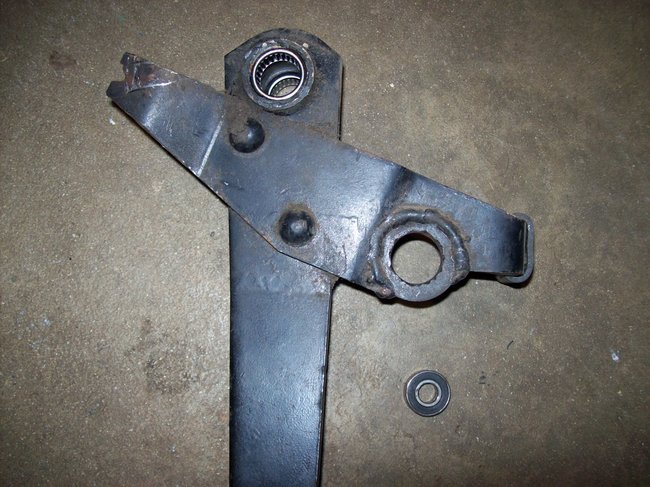
Pic 2 and 3 and 4) Remove clutch pedal (fun!). With a slightly larger hole saw than the doughnut chuck it up and vise down the pedal tight in the vise. I think I did not use a pilot bit and slowly lowered the hole saw into the pedal's hole insuring it stayed centered. (pic 4 is "in place")
When finished, I installed doughnut number 2, insuring it was "square" or "perpendicular" in the new (over the old) hole before I welded it in place.
End result- Big hole centered perfectly where the old one was.
Install bearing, Clutch rod then a washer on either side and a cotter pin.
I'm going to let this portion soak in!
I'm going to look for the part numbers and descriptions of the bearings and the dimensions of them so you can select the hole saw sizes. The sizes were snug when all was done (no floppy holes). This did take some thinking and testing (hole sawing) before I started actually chopping on stuff.
My modification is still in place after being installed in 2010, It works just as smooth as "Day 1", It has no wear!
Respond if we are okay thus far!
We will continue with the rest of the mod!
The Medic
Images (Click to enlarge)
Feb 10, 2020 at 6:55 PM