Hello .. thanks for the doantion .. much appreciated
You can buy a generic brake tool from most autoparts stores
REAR DISC BRAKE PADS
WARNING:Brake dust, if inhaled can damage your health. Always remove brake dust using a vacuum brush. Do not use a compressed air line to disperse brake dust into the atmosphere.
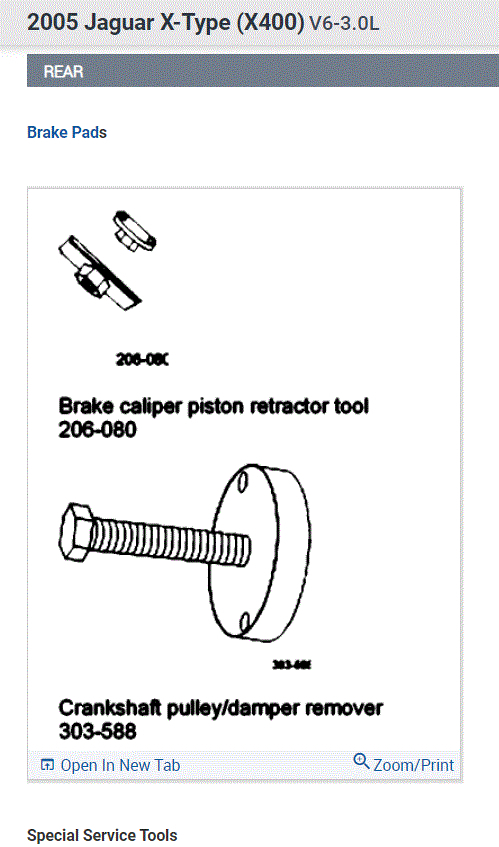
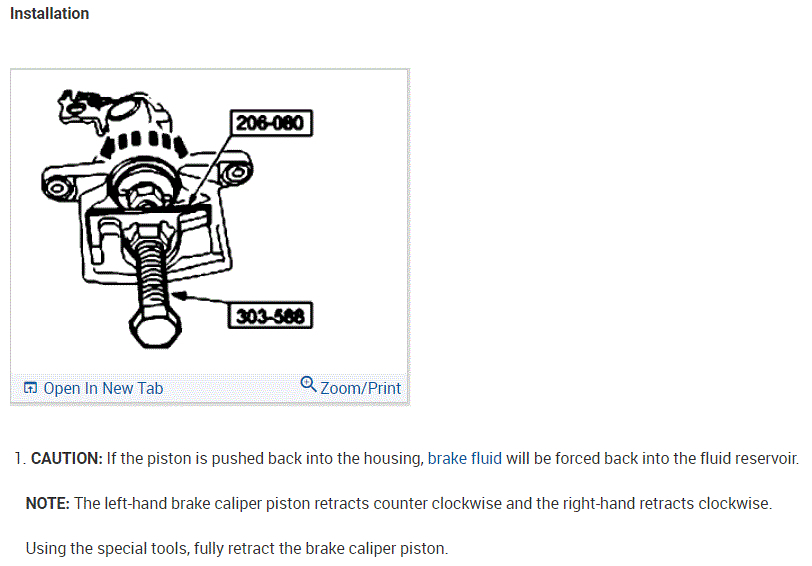
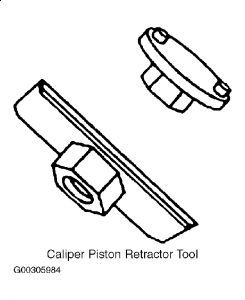
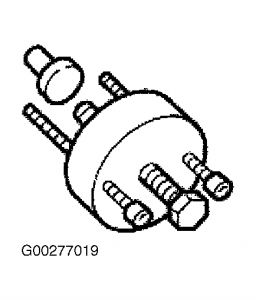
NOTE:Special tools required: Brake Caliper Piston Retractor Tool (206-080) and Crankshaft Pulley/Damper Remover (303-588). See Fig. 68 and Fig. 69 .
NOTE:Brake pads must always be replaced in axle sets.
Removal
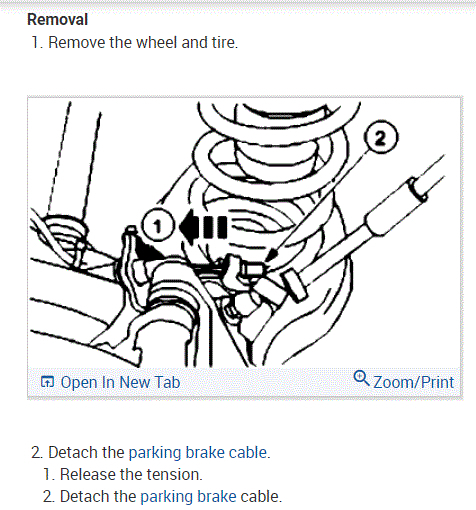
Open engine compartment hood and fit paint protection covers to fenders. Raise and support vehicle. Remove rear wheels.
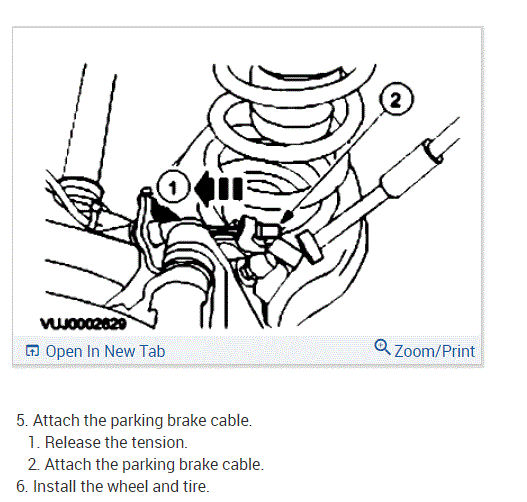
Release the tension on the parking brake cable by moving the parking brake caliper lever away from the cable end. Remove cable from parking brake cable lever. See Fig. 32 .
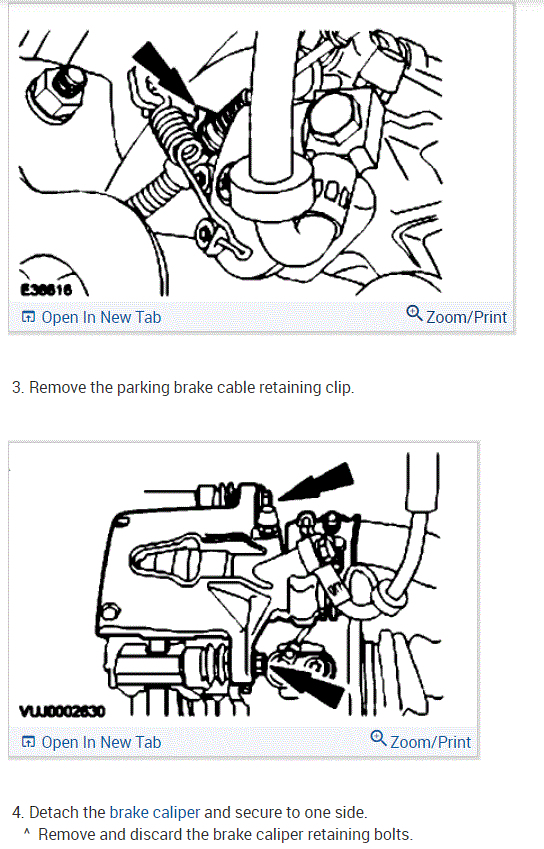
Remove the parking brake cable from the rear brake caliper.
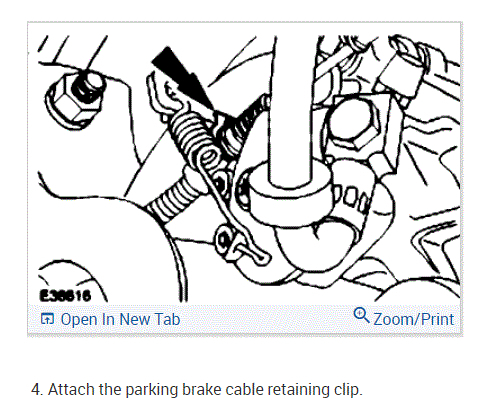
On vehicles with manually adjusted parking brakes, remove the retaining clip. See Fig. 33 .
On vehicles with self-adjusting parking brakes, release the tabs on the parking brake cable housing. See Fig. 38 .
Remove and discard the rear brake caliper retaining bolts. See Fig. 62 . Remove the rear brake caliper and secure to one side.
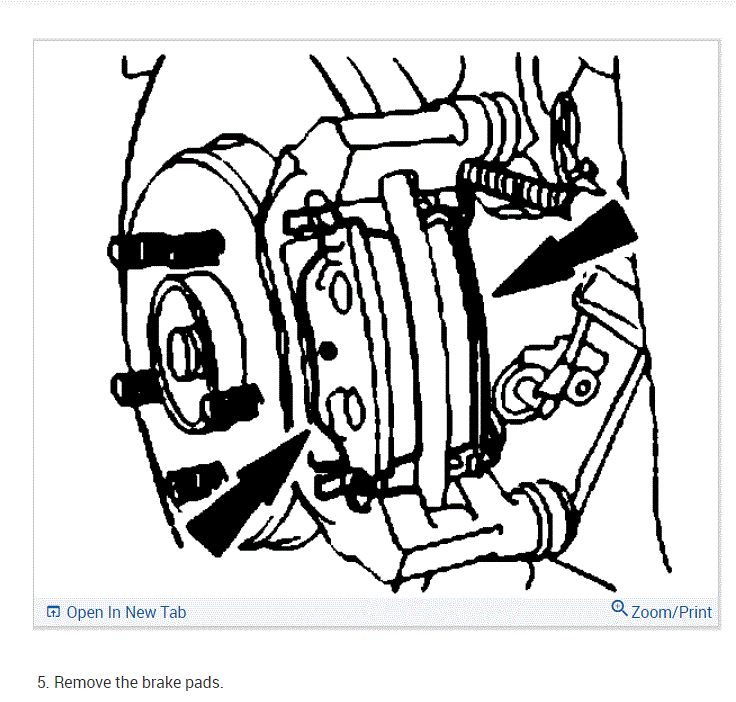
Remove the rear brake pads. See Fig. 63 .
Clean and inspect caliper and all associated parts.
Installation
CAUTION:Retracting the caliper piston may cause the fluid reservoir to overflow. Remove brake fluid spillage immediately from paint work with clean water.
NOTE:The left rear brake caliper piston retracts counterclockwise and the right rear caliper piston retracts clockwise.
Using the Brake Caliper Piston Retractor Tool (206-080) and Crankshaft Pulley/Damper Remover (303-588), fully retract the rear brake caliper piston into the caliper housing. See Fig. 64 .
Install the rear brake pads. See Fig. 63 .
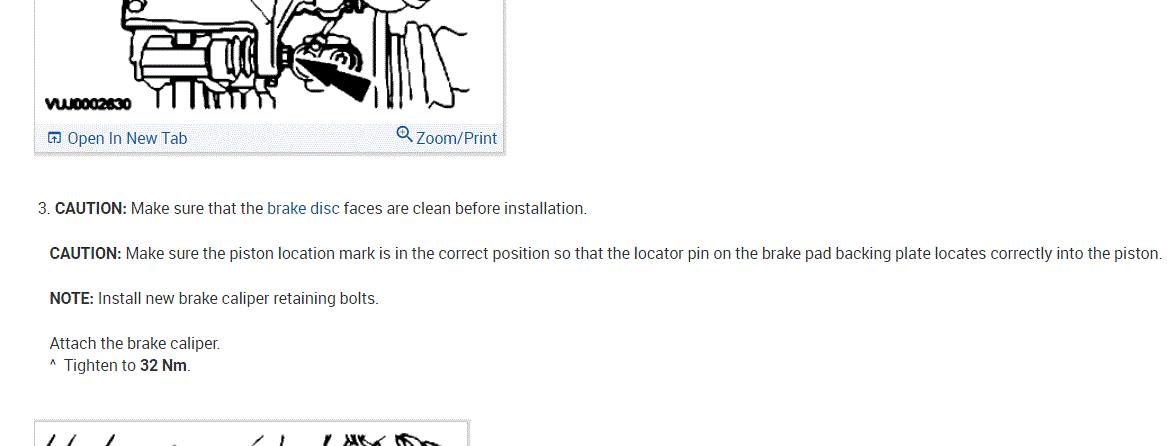
NOTE:Make sure the piston location mark is in the correct position so that the locator pin on the brake pad backing plate locates correctly into the piston.
Using NEW caliper retaining bolts, install the rear brake caliper. See Fig. 62 . Tighten rear caliper retaining bolts to specification. See TORQUE SPECIFICATIONS
Install the parking brake cable to rear brake caliper.
On vehicles with manually adjusted parking brakes, install parking brake cable retaining clip.
On vehicles with self-adjusting parking brakes, ensure that retaining tabs secure the parking brake cable housing.
Release the tension on the parking brake cable by moving the parking brake caliper lever away from the cable end. Install cable to parking brake cable lever.
Install rear wheels. Install lug nuts and tighten to specification. See TORQUE SPECIFICATIONS . Lower vehicle.
Ensure that brake fluid level is at the MAX mark on reservoir.
Start the engine and repeatedly press the brake pedal until brake pressure is evident. Top off brake fluid as necessary, bringing fluid level to the MAX mark. If necessary, check parking brake adjustment. See PARKING BRAKE under ADJUSTMENTS.
Remove paint work protection covers, and close engine compartment hood.
Fig. 62: Removing & Installing Rear Brake Caliper
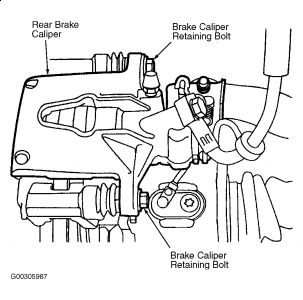
Fig. 63: Removing & Installing Rear Brake Pads

Fig. 64: Retracting Rear Brake Caliper Piston

Hope this helps

May 23, 2021 at 12:59 PM
(Merged)