Welcome to 2carPros.
Often times, the key itself will wear out and it becomes more difficult to actually release the tumbler. See if a different key makes a difference. Also, try spraying a small amount of key cylinder lubricant in it to see if that helps.
If none of this helps, you will most likely need to replace the key and tumbler. Here are the directions for that. The attached pictures correlate with the directions. Also, please note that these directions are for both the switch (electronic) and ignition switch lock cylinder. When you read through the directions, it indicates the steps you need to take for just the lock.
______________________________
PROCEDURES
The ignition key must be in key lock cylinder for cylinder removal.
REMOVAL
If removing key lock cylinder only, refer to first 6 steps. If removing ignition switch only, refer to steps 1 and 2 and proceed to steps 7 through 13.
1. Disconnect negative cable from battery.
2. Place transmission shifter in PARK position.
3. Place tilt steering wheel in full up position.
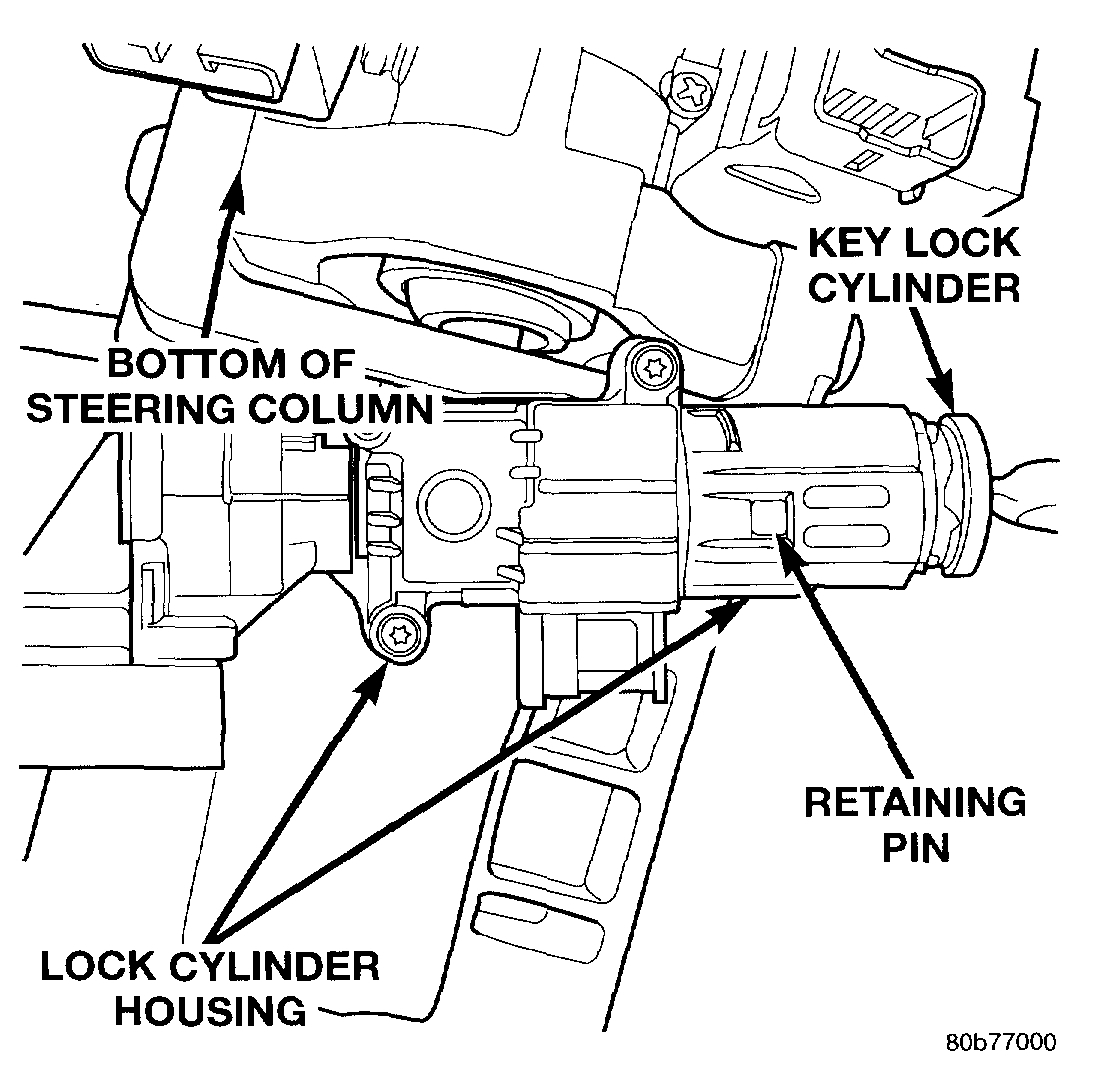
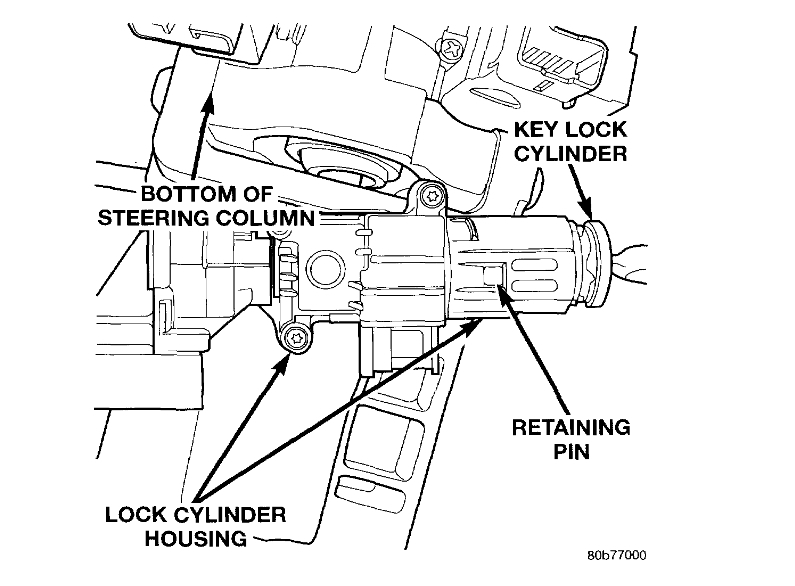
Retaining Pin
pic 1
4. A retaining pin is located at bottom of key lock cylinder housing.
5. Rotate key to RUN position.
6. Press in on retaining pin while pulling key cylinder from housing. After removal, note position of alignment tang at end of cylinder. When installing lock cylinder, key must be rotated back to RUN position.
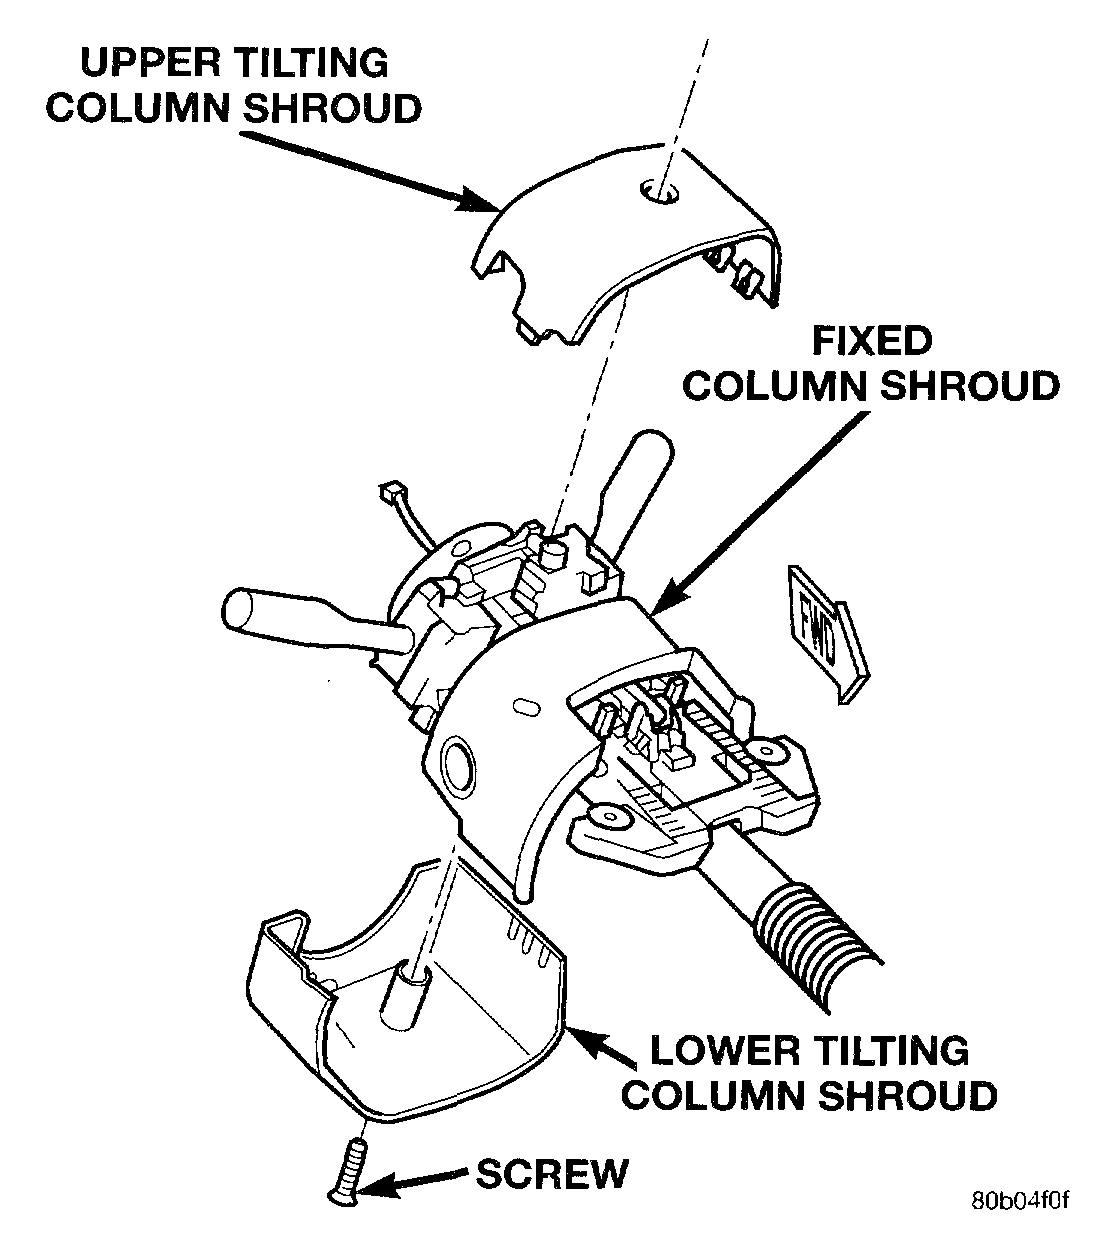
7. Remove steering column lower opening cover.
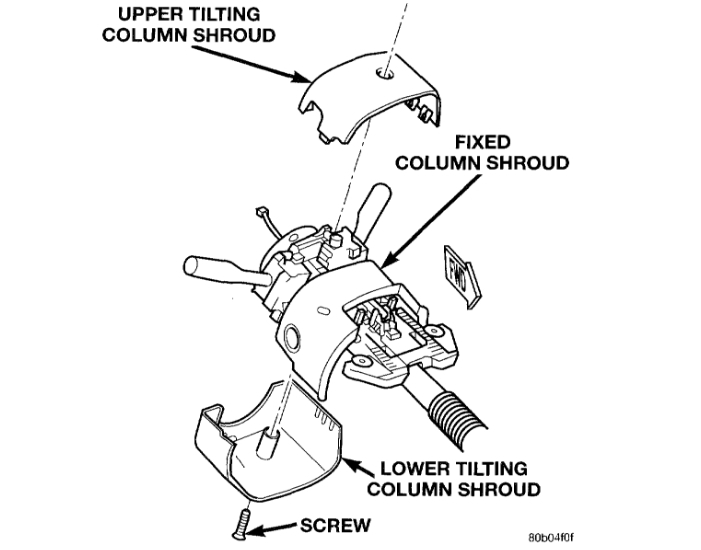
Shroud Removal/Installation
pic 2
8. Remove upper and lower covers (shrouds) from steering column:
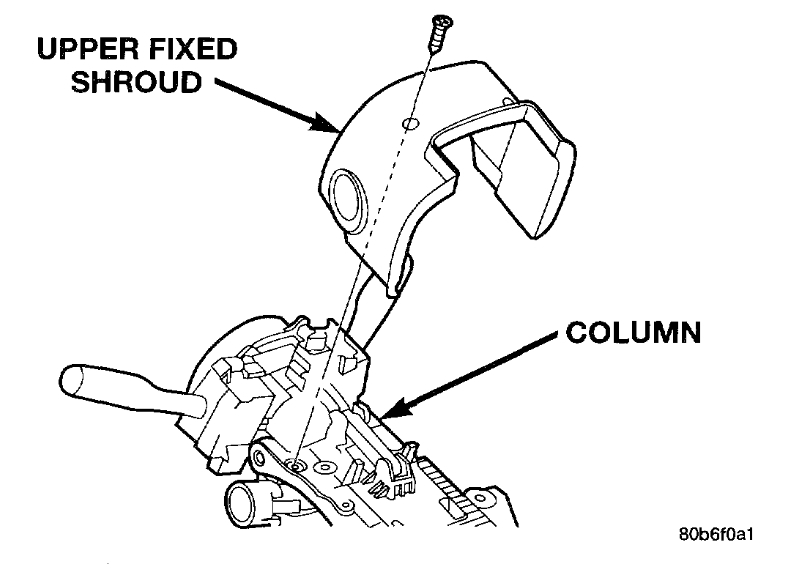
Fixed Column Shroud Removal/Installation
pic 3
9. Remove upper fixed column shroud (2 screws).
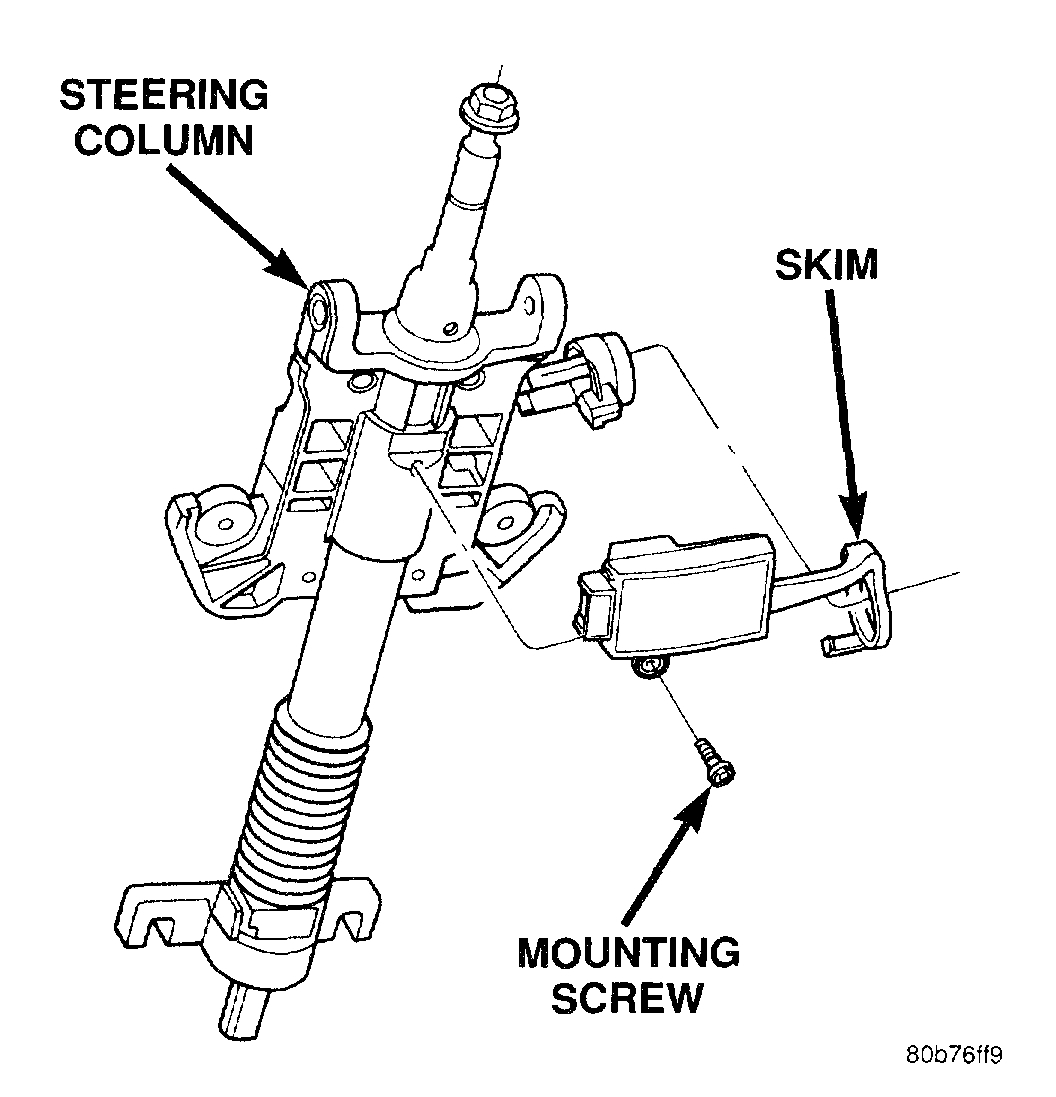
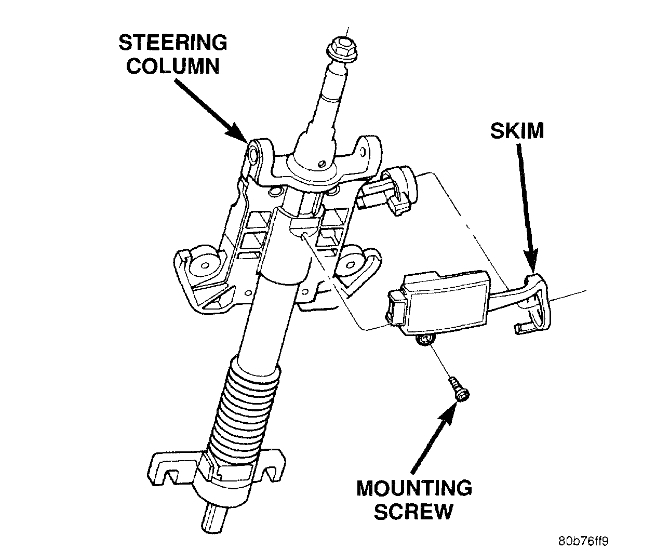
Smart Key Immobilizer Module And Mounting Screw
pic 4
10. Remove SKIM (Smart Key Immobilizer Module) (1 screw).
11. Disconnect electrical connectors at switch.
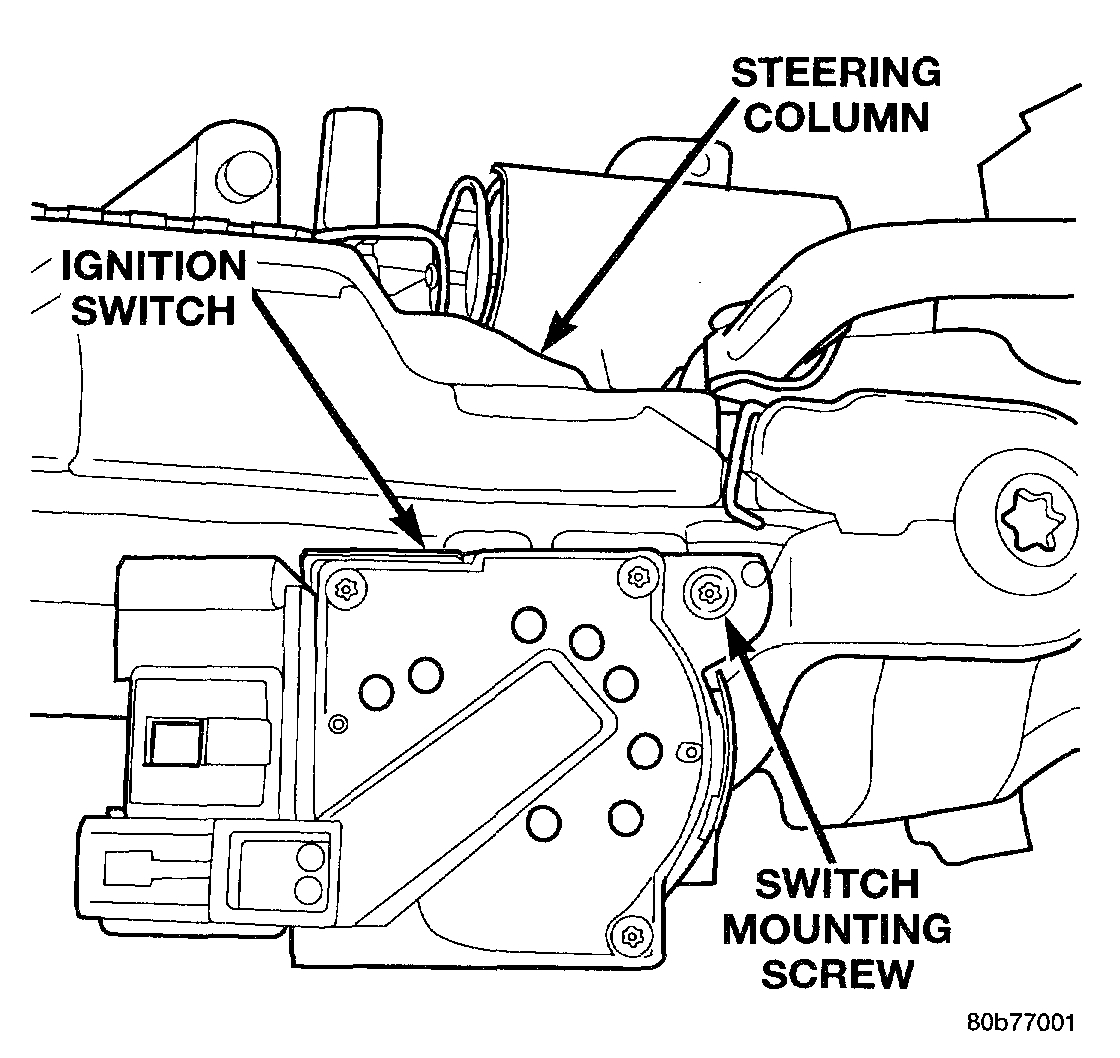
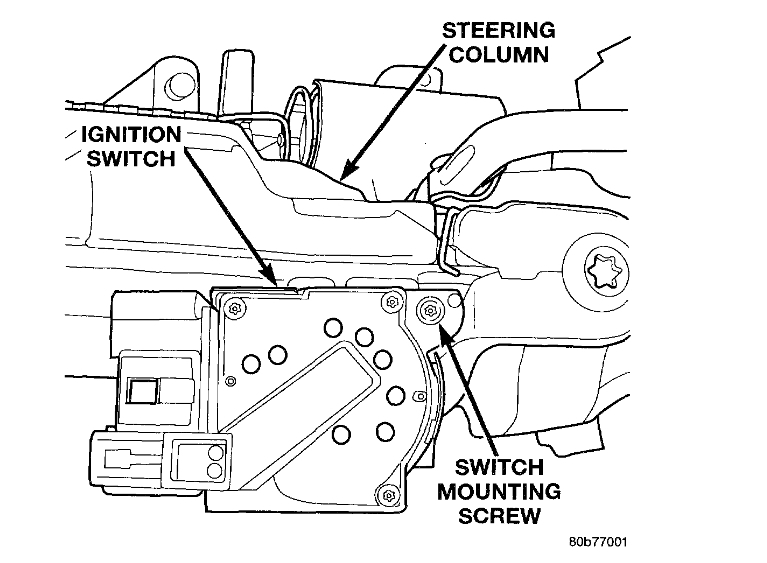
Ignition Switch Mounting Screw
pic 5
12. Remove ignition switch mounting screw. Use tamper proof torx bit (Snap-On TTXR10E or equivalent) to remove screw.
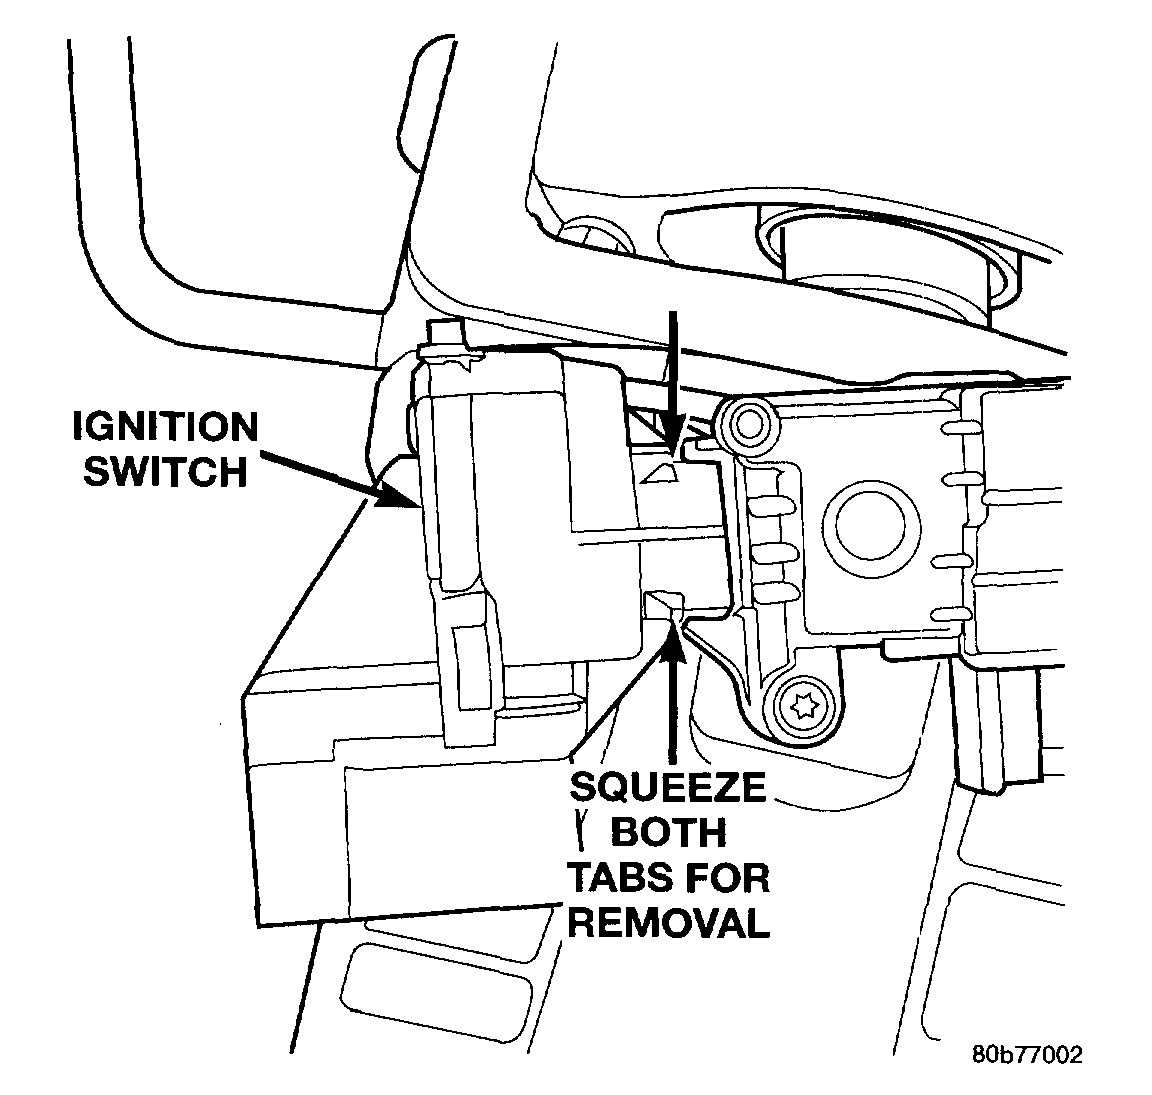
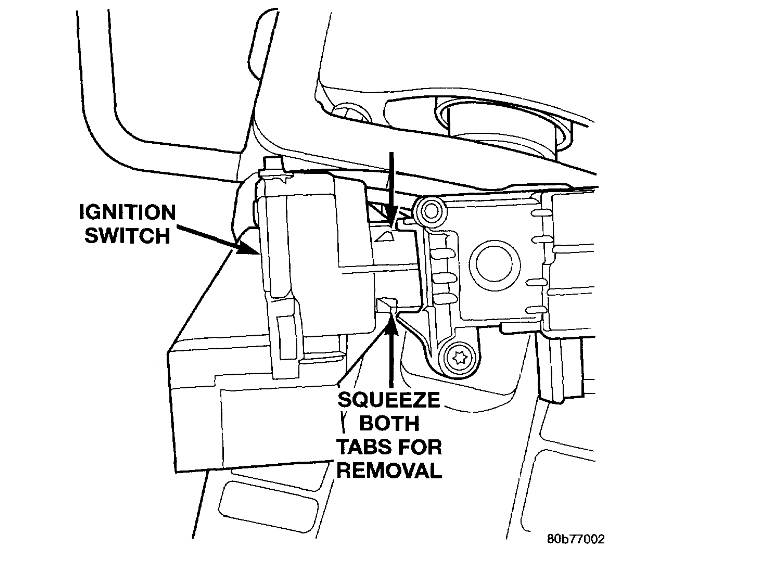
Ignition Switch Lock Tabs
pic 6
13. Using needle-nose pliers, squeeze both switch lock tabs and gently pull switch away from column. Do not rotate key lock cylinder when ignition switch is being removed or has been removed from steering column.
INSTALLATION
If installing key lock cylinder only, refer to steps 1 through 4 then proceed to steps 10 through 14. If installing ignition switch only, refer to steps 5 through 14.
1. Be sure transmission shifter is still in PARK position.
2. Rotate key in lock cylinder to RUN position.
3. Install key cylinder into housing by aligning retaining pin into retaining pin slot. Push key cylinder into housing until retaining pin engages. After pin engages, rotate key to OFF or LOCK position.
4. Check for proper retention of key cylinder by attempting to pull cylinder from housing.
5. Place ignition switch into opening on steering column housing. If switch will not fit into housing, do not force it. Remove switch from housing and rotate key cylinder (slightly) for alignment. Push switch into column housing until 2 lock tabs have engaged.
6. Install ignition switch mounting screw. Tighten screw to 3 Nm (30 in. lbs.) torque.
7. Connect electrical connectors to ignition switch. Make sure that switch locking tabs are fully seated in wiring connectors.
8. Install SKIM (Smart Key Immobilizer Module) (1 screw). Tighten screw to 3 Nm (30 in. lbs.) torque.
9. Install steering column covers (shrouds).
10. Connect negative cable to battery.
11. Shifter should lock in PARK position when key is in LOCK position. Shifter should unlock when key rotated to ON position.
12. With engine running, shifter should not be unable to be moved from PARK position until brake pedal has been depressed.
13. Check for proper operation of ignition switch in ACCESSORY, LOCK, OFF, ON, RUN, and START positions.
14. Steering wheel should lock when key is in LOCK position. Rotate steering wheel to verify. Steering wheel should unlock when key is rotated to ON position.
_______________________________
Let me know if this helps or if you have other questions.
Take care,
Joe
Images (Click to enlarge)
Sep 2, 2020 at 12:15 PM
(Merged)