REMOVAL:
Disconnect the negative battery cable.
If equipped with a 3.1L engine, remove the air cleaner and duct assembly.
If equipped with a 3.8L engine, remove the fuel injector sight shield by performing the following procedures:
Clean the area around the oil filler cap/tube assembly location.
Rotate the oil filler cap/tube assembly counterclockwise from the valve cover.
Lift the fuel injector sight shield up at the front and slide it from the rear engine bracket.
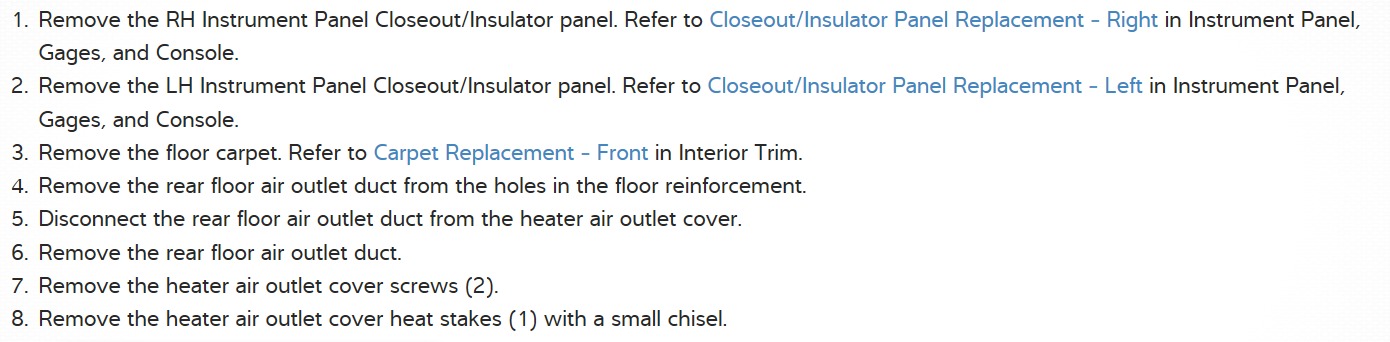
Reinstall the oil filler cap/tube assembly in the valve cover.
CAUTION
Before draining the cooling system, allow the engine to cool to relieve the systems internal pressure and to avoid scalding coolant.
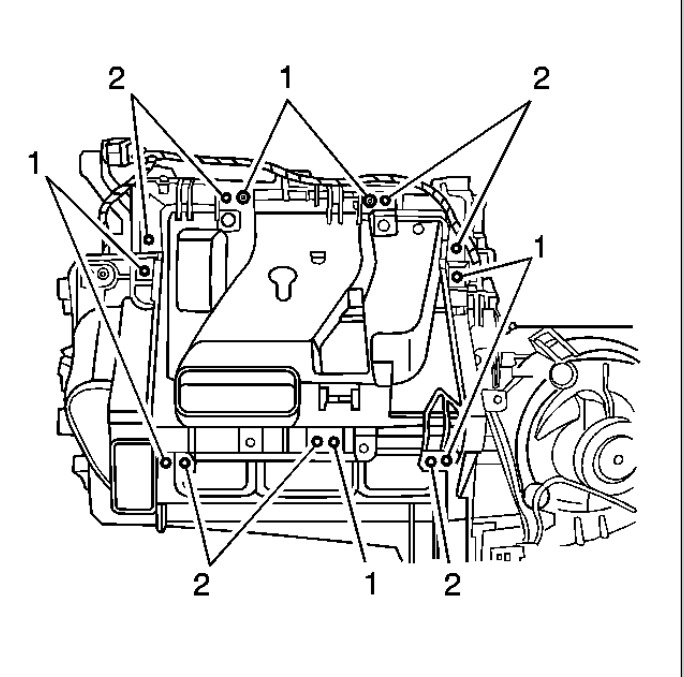
Drain the cooling system by performing the following procedure:
Raise and safely support the front of the vehicle.
Remove and clean the coolant recovery tank.
Place a 2 gallon pan under the radiator to catch the coolant.
At the bottom of the radiator, open the drain valve and drain the coolant to a level lower than the heater core.
Remove the radiator cap and open the air bleed screw (2-3 turns) located on top of the thermostat housing.
After sufficient coolant has been drained from the system, close the drain valve.
CAUTION
Engine coolant is a hazardous waste; it should be stored for reuse or submitted for recycling. NEVER dispose of it by dumping it into the environment.
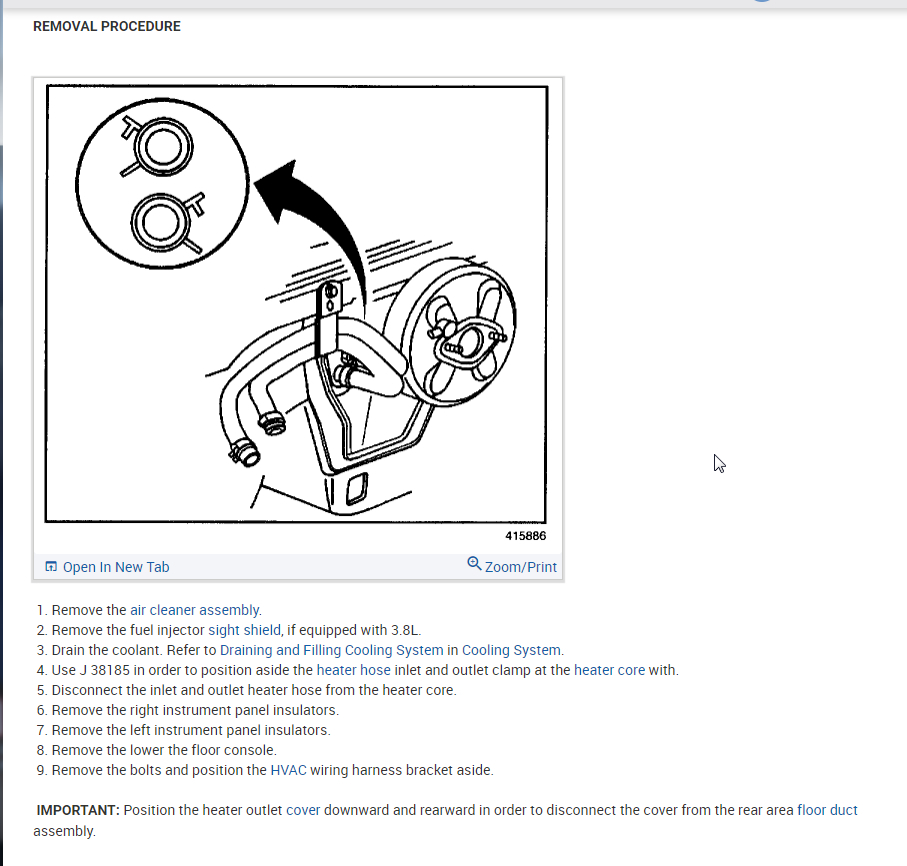
Disconnect and plug the heater hoses at the heater core.
If equipped, remove the lower center console by removing or disconnecting the following:
Cigarette lighter
Automatic transaxle shift handle
Upper console trim plate from the front floor console by unsnapping it
Electrical connectors from the upper console trim plate and remove the trim plate
CD storage compartment from the front floor console by unsnapping it
Raise the front floor console armrest and remove the compartment mat
Console-to-chassis bolts and screws
Electrical connectors from the console and remove the console from the vehicle
Remove the lower instrument panel lower compartment by removing or disconnecting the following:
Lower right instrument panel insulator
Compartment-to-panel bolts and screws, from under the instrument panel compartment
Instrument panel compartment door screws and the door
Instrument panel compartment screws and plastic clips; then slide the compartment from the instrument panel
Electrical connector from the compartment
Ashtray and bracket, if necessary
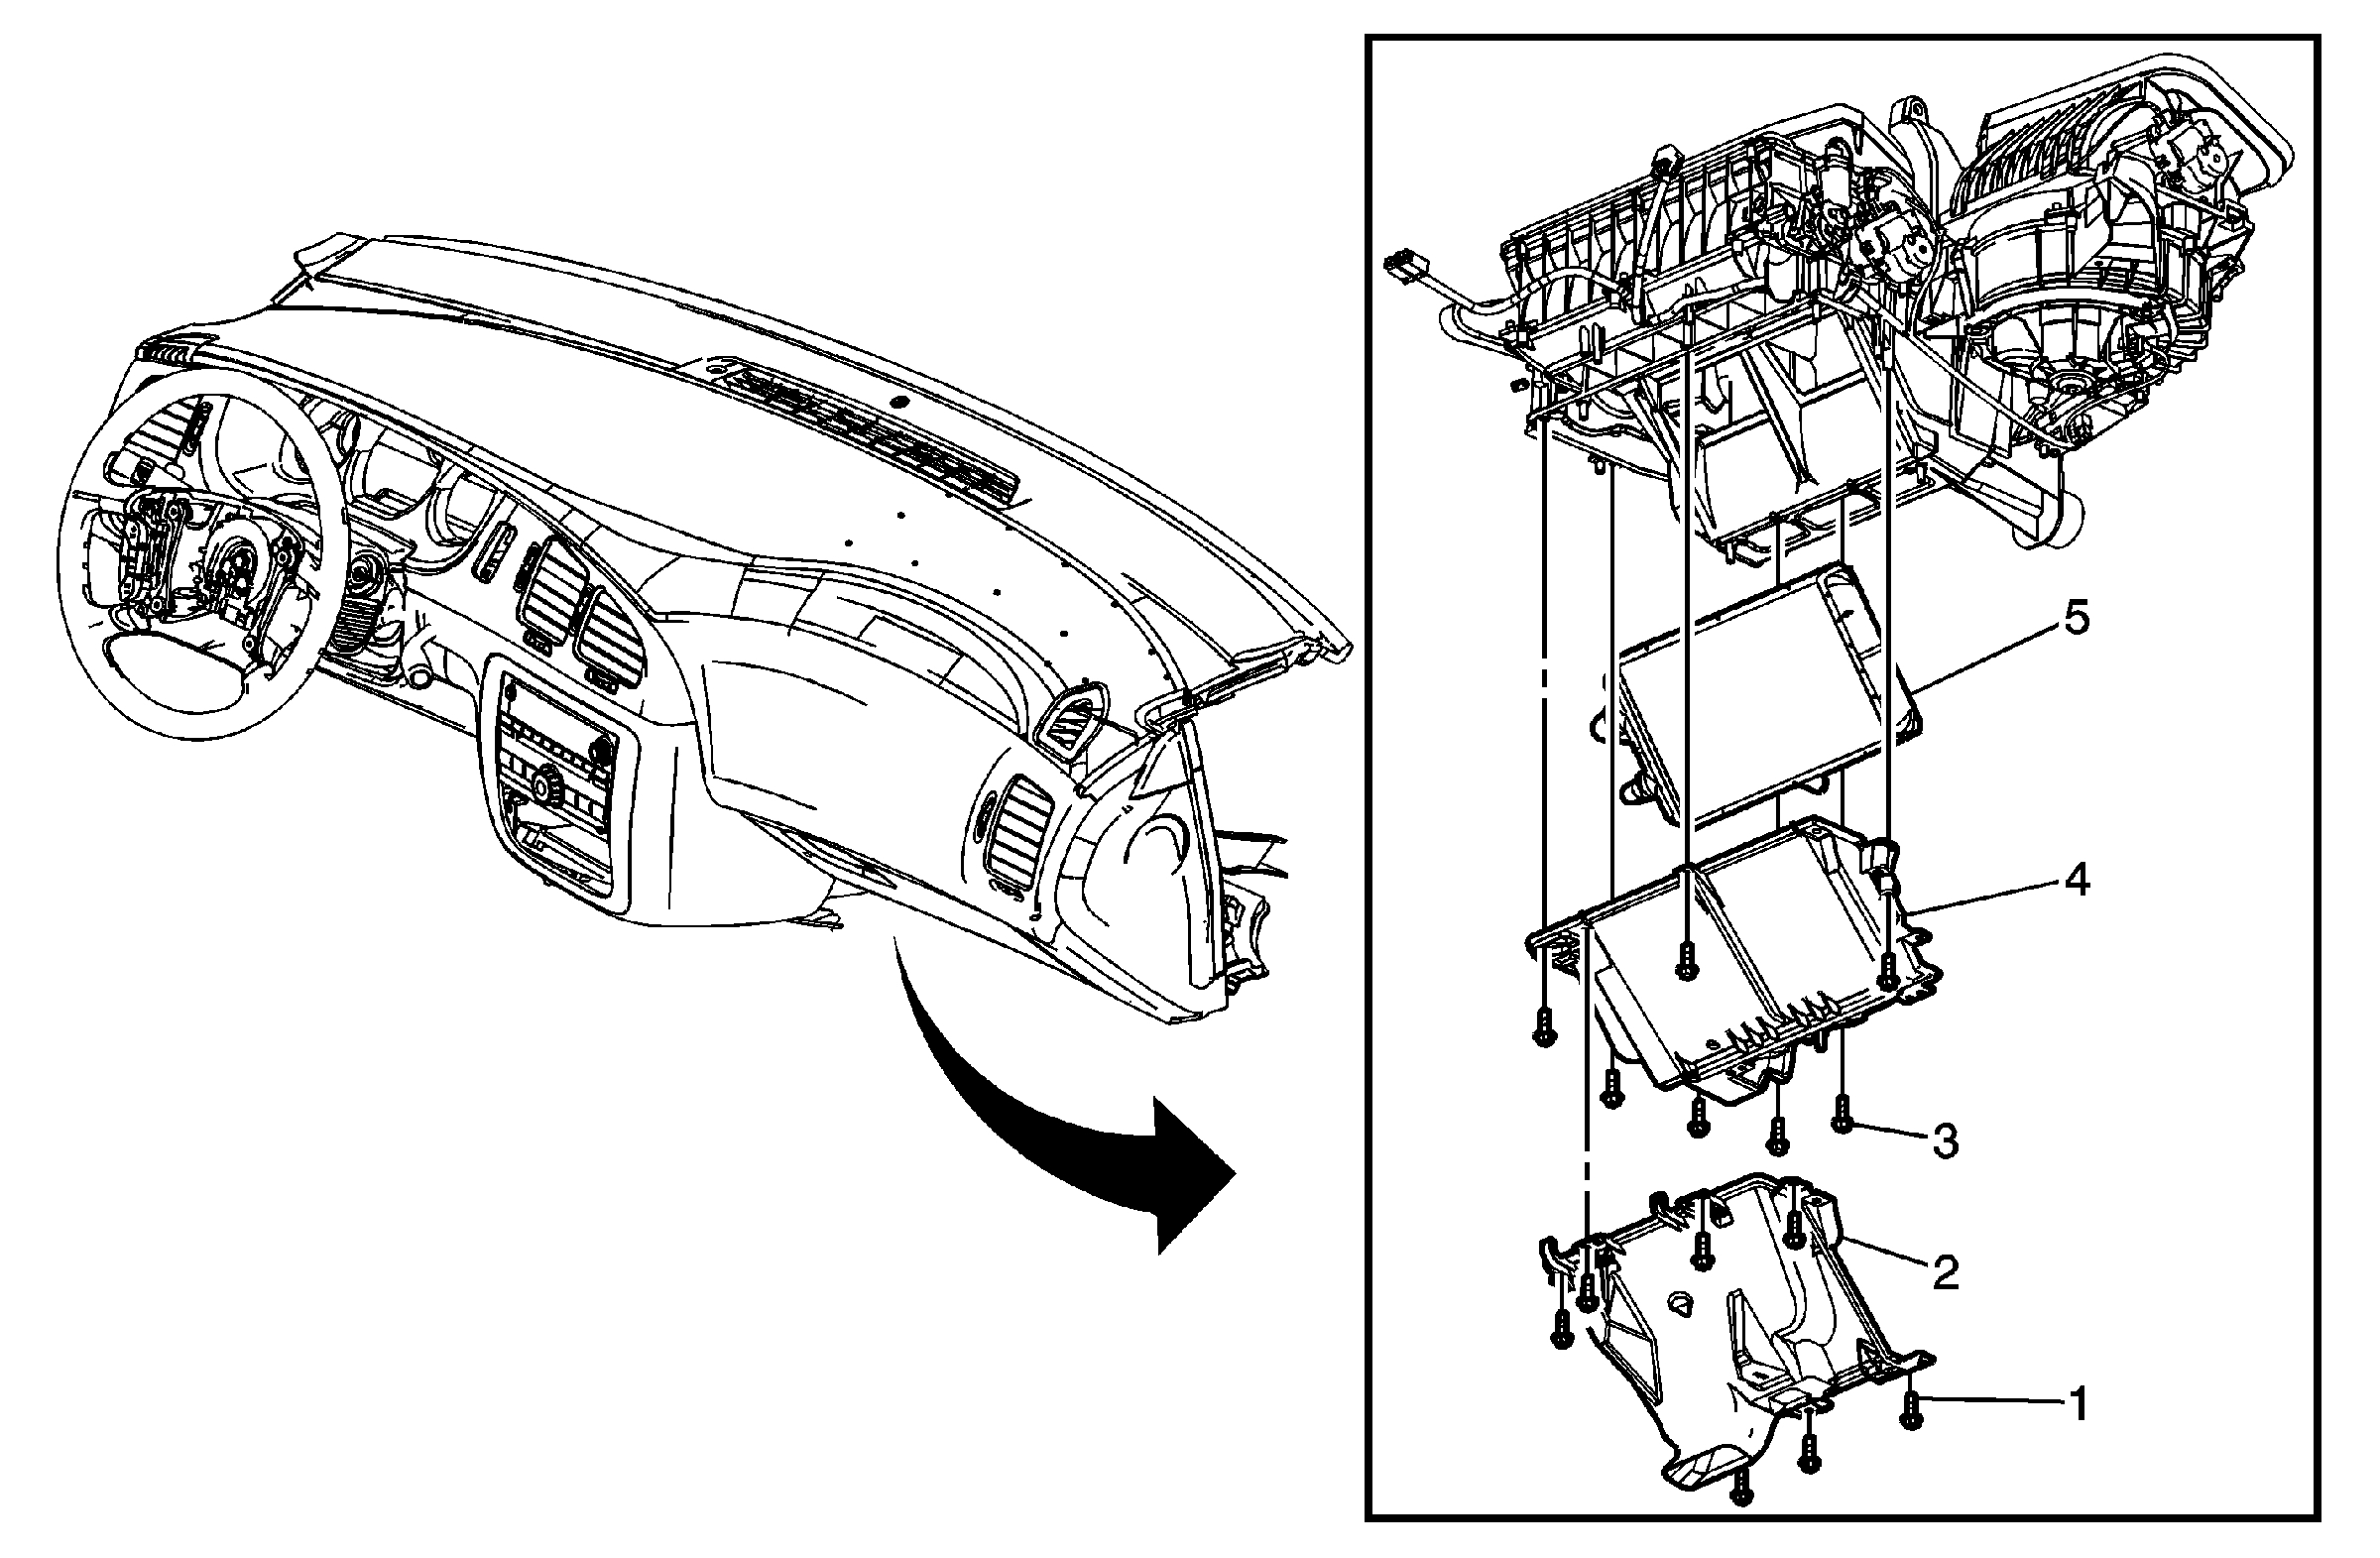
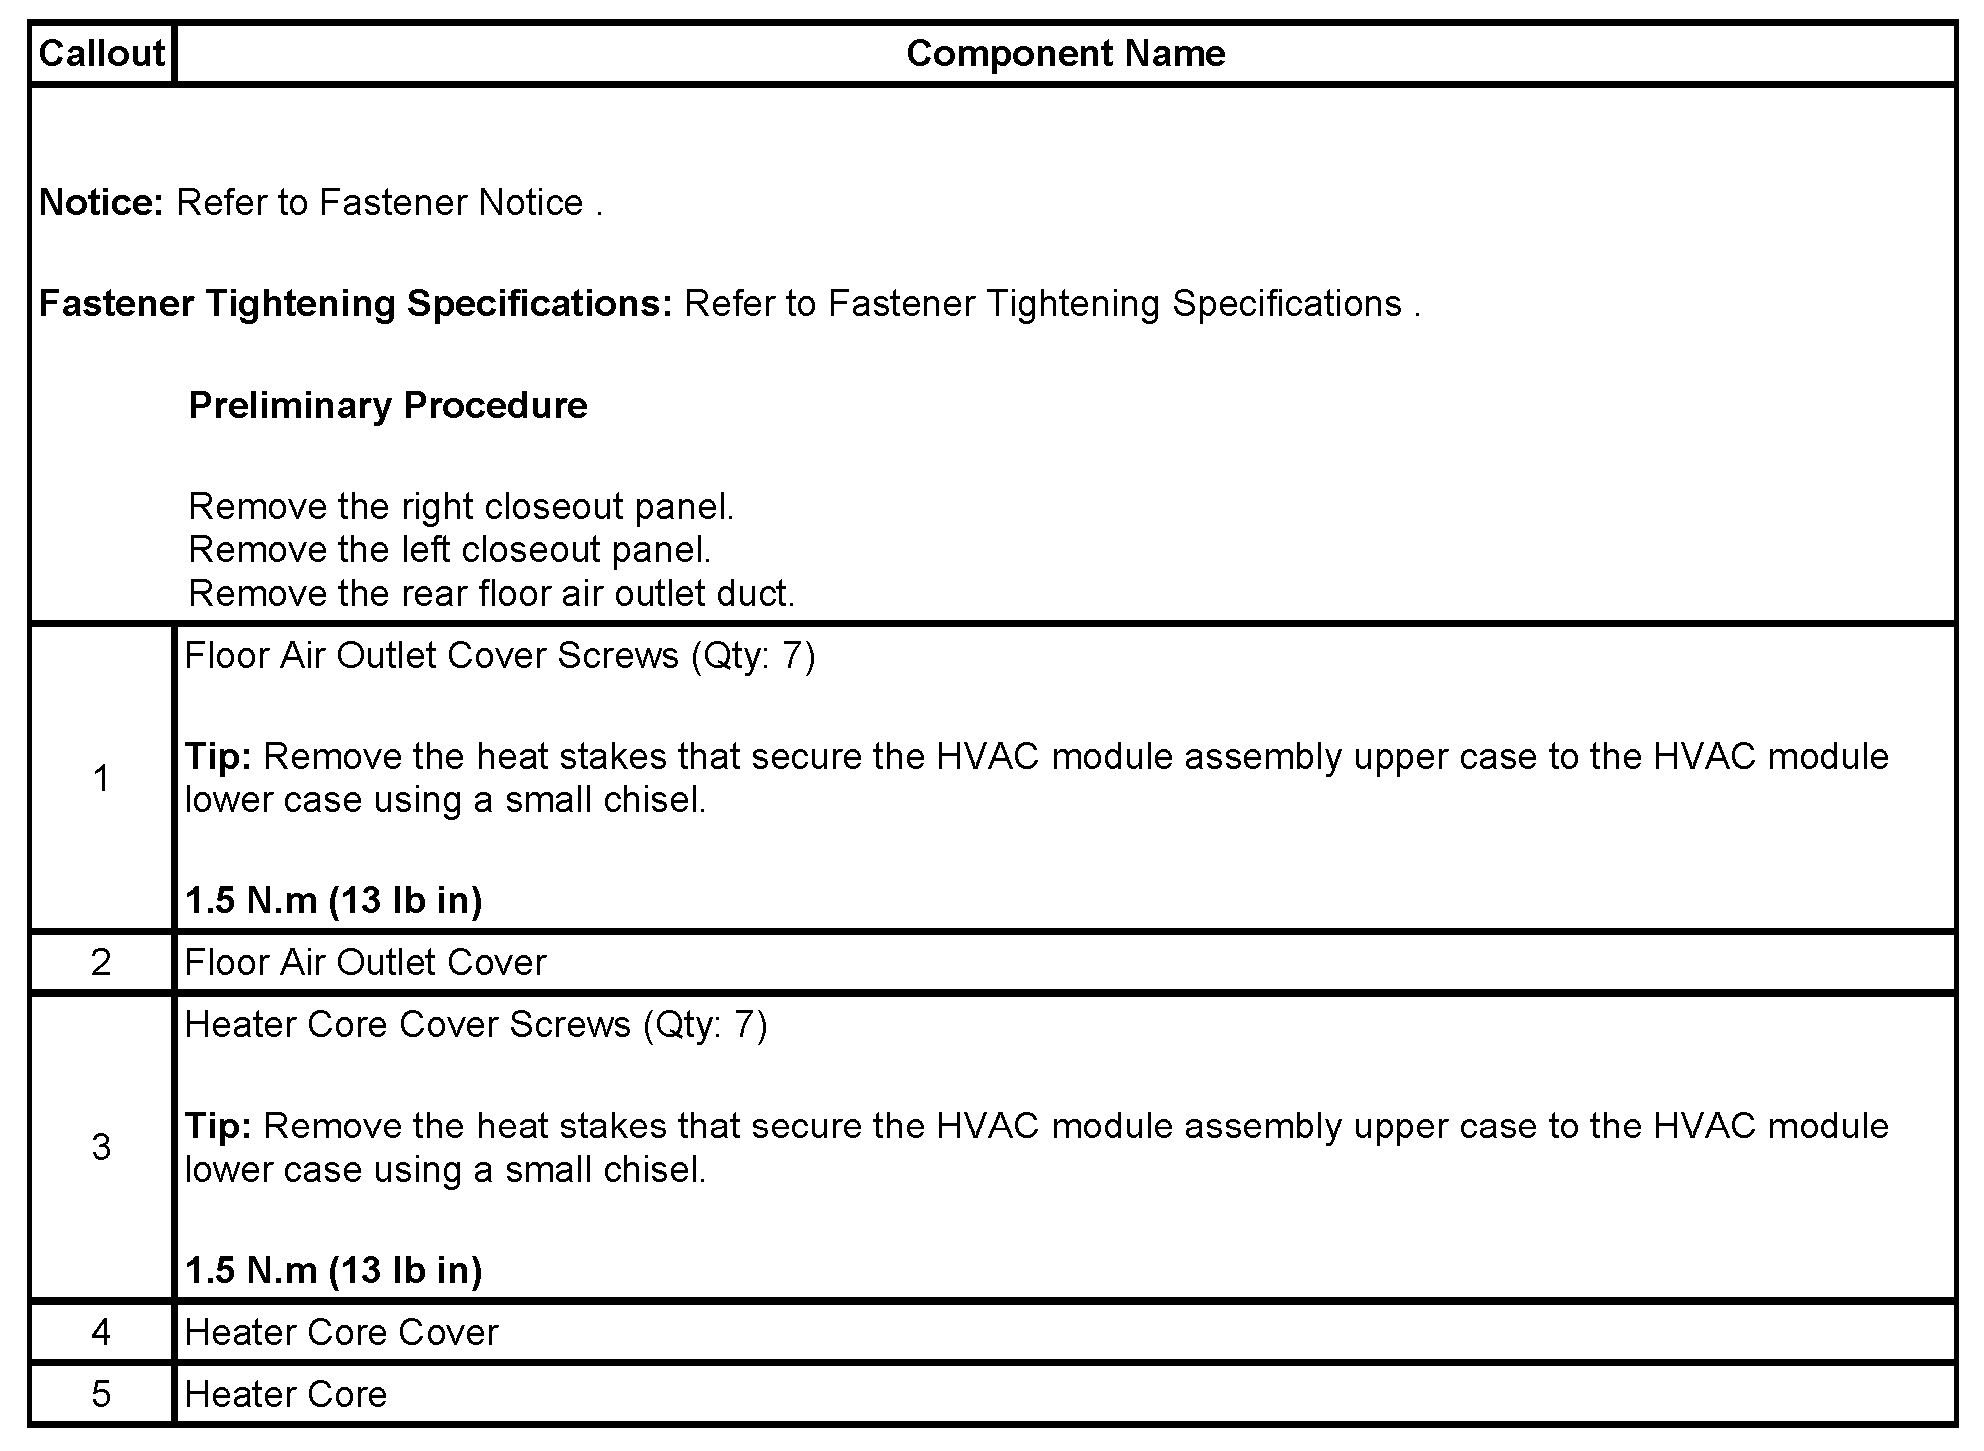
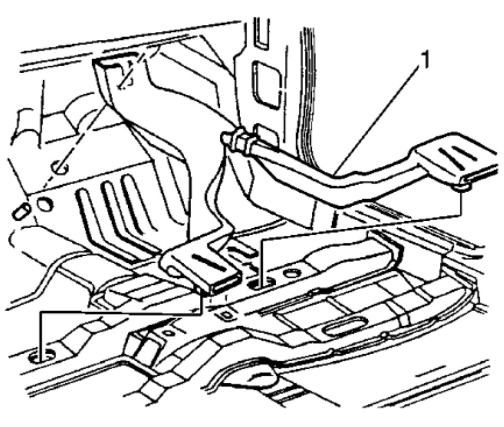
Lower heater duct
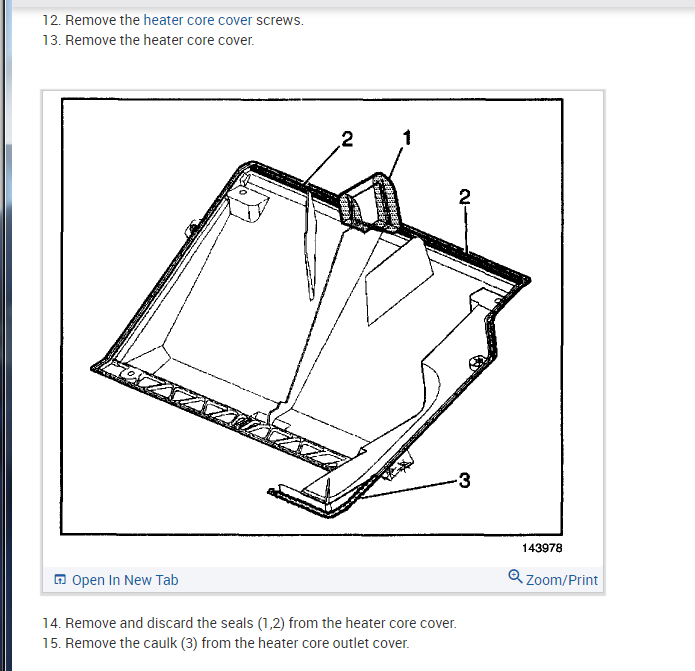
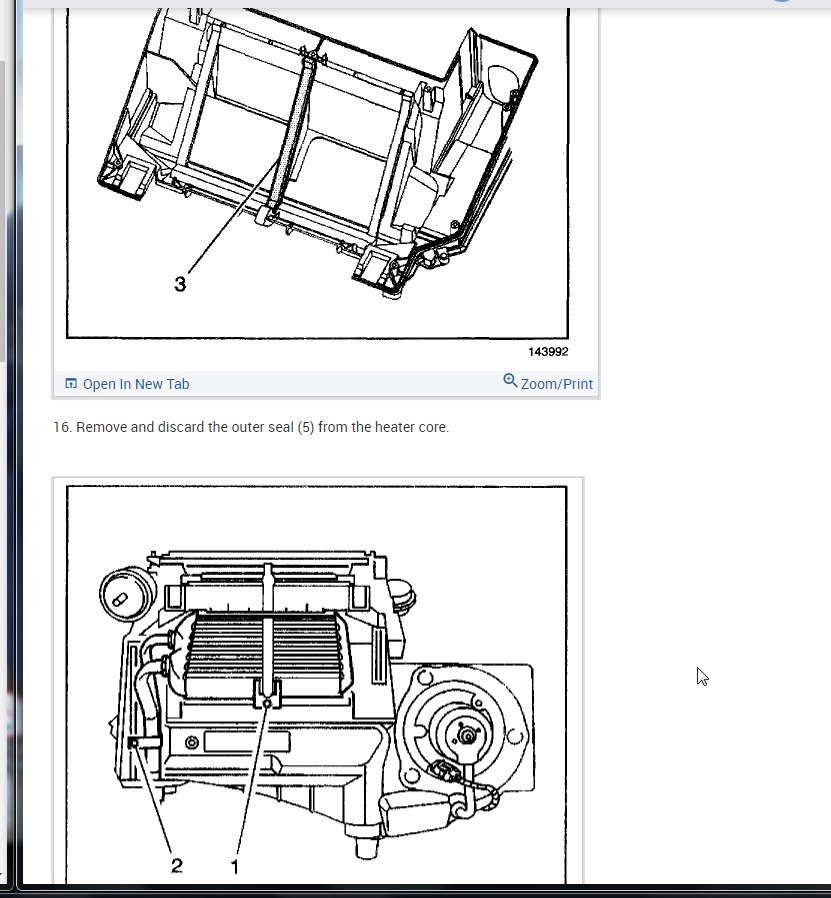
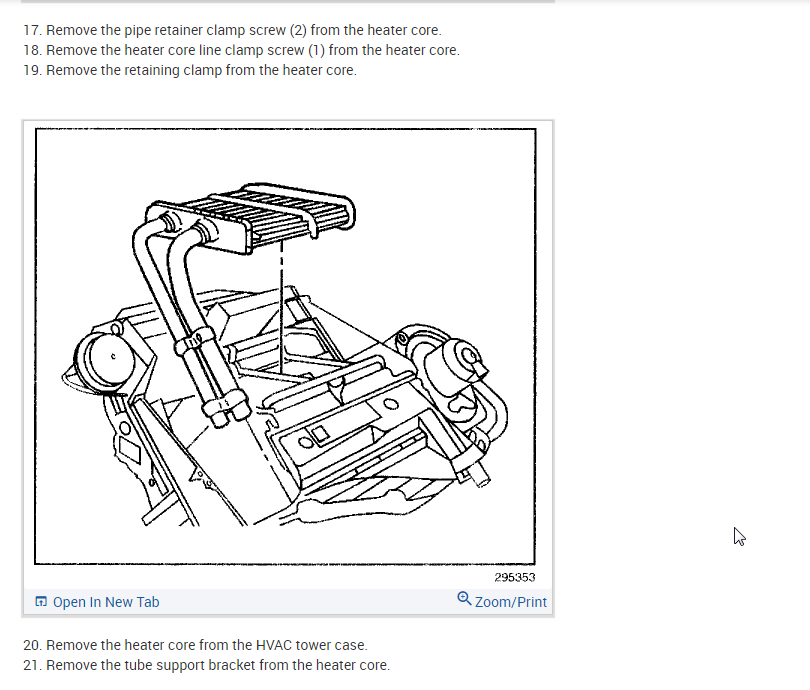
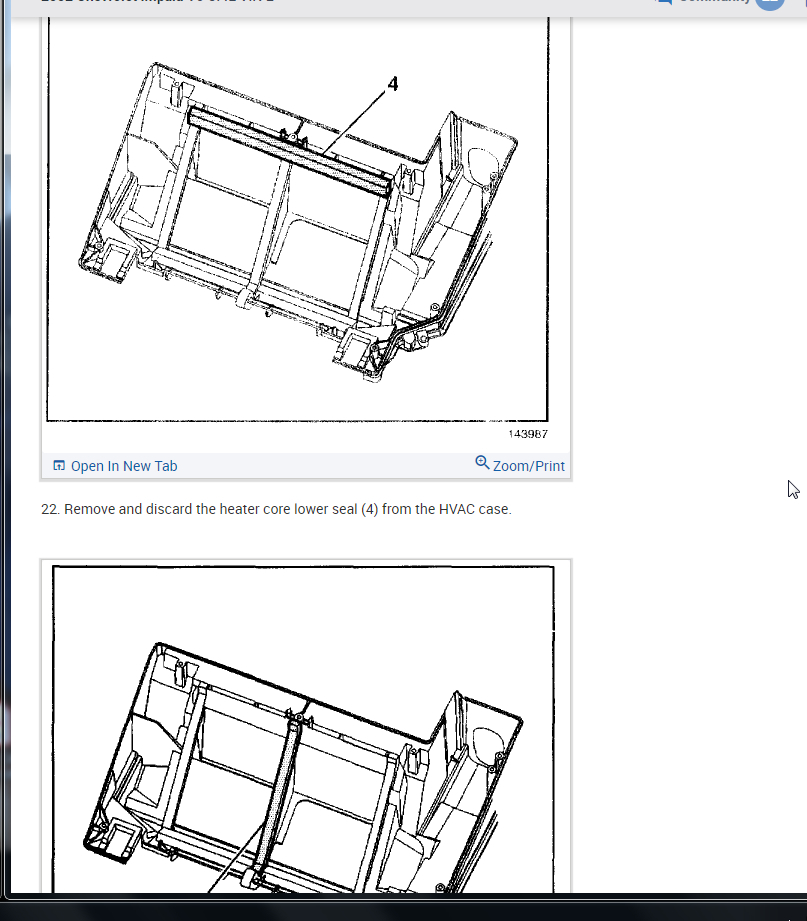
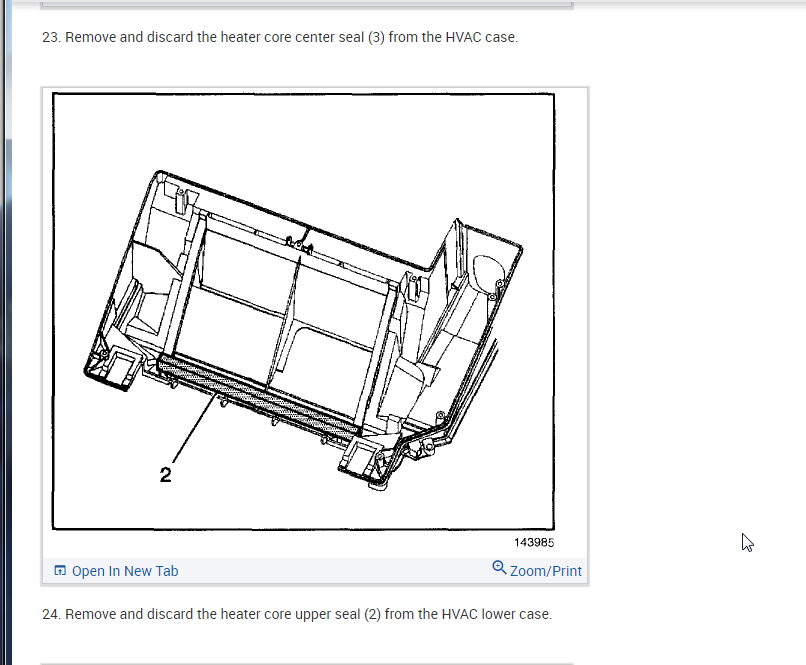
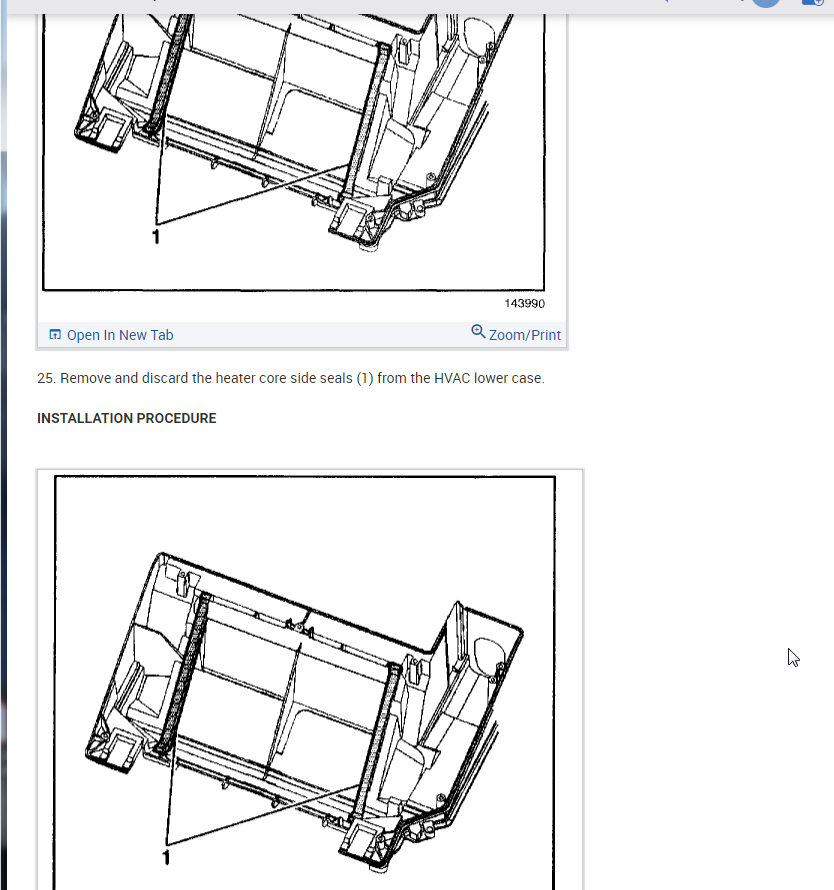
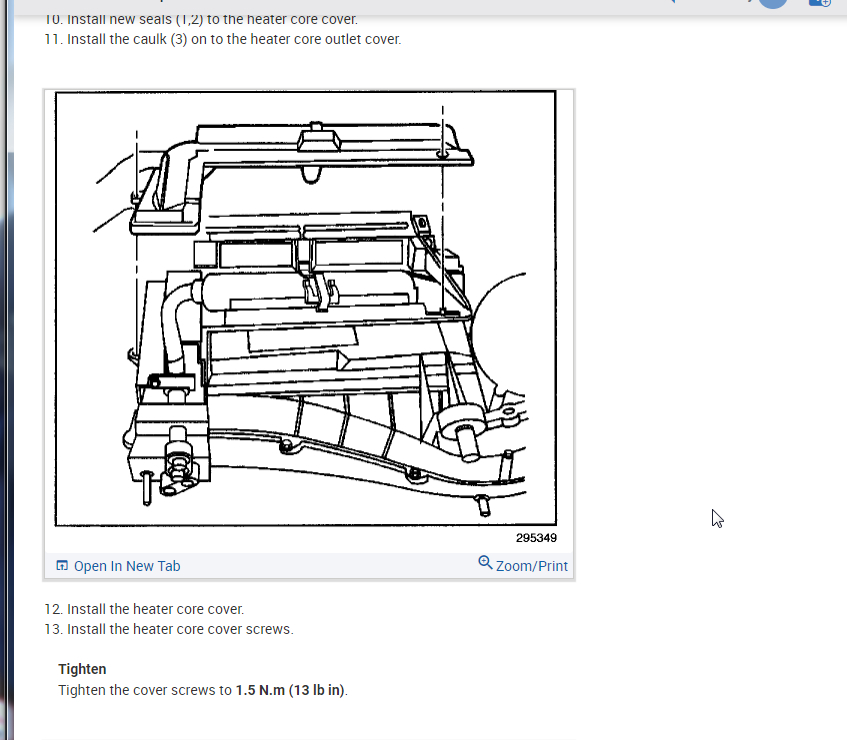
Heater core cover and discard the cover seals Heater core mounting clip and bracket
Heater core
INSTALLATION:
Install and connect the following:
Heater core in the vehicle
Heater core mounting clip and bracket
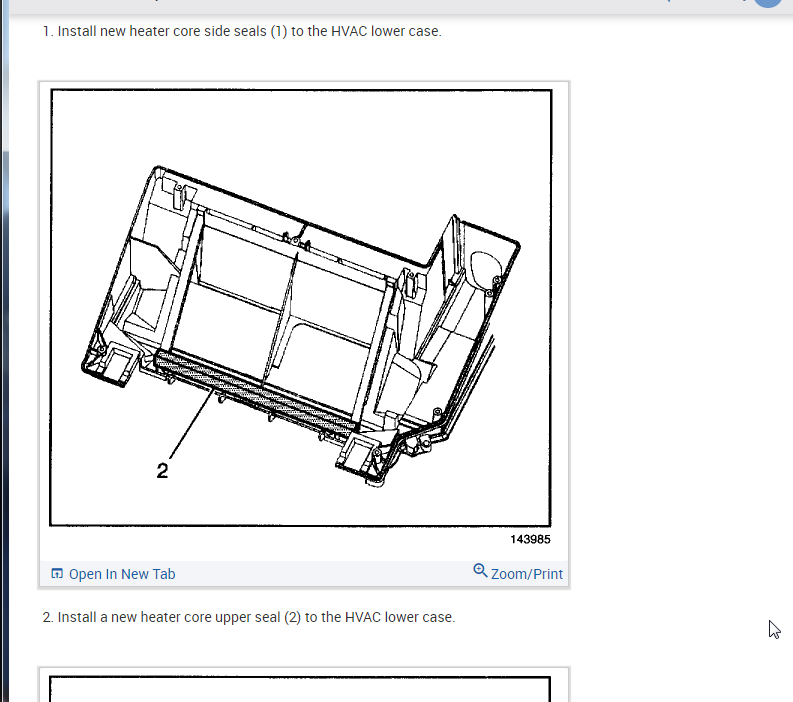
New seals on the heater core cover
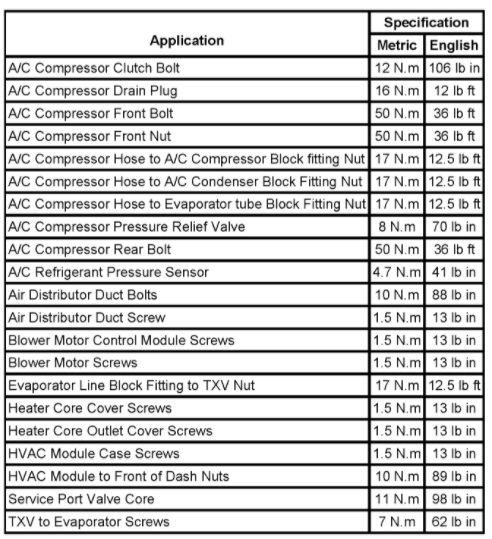
Heater core cover and torque the bolts to 13 inch lbs. (1.5 Nm)
Lower heater duct, if removed
Ashtray and bracket, if removed
Install the lower instrument panel lower by installing or connecting the following:
Electrical connector to the compartment
Slide the compartment into the instrument panel; then, secure it with screws and plastic clips Instrument panel compartment door and screws Compartment-to-panel bolts and screws, located under the instrument panel compartment
Lower right instrument panel insulator
If equipped, install the lower center console install or connect the following:
Console in the vehicle and connect the electrical connectors
Console-to-chassis bolts and screws, tighten in sequence beginning at the front right and continue in a clockwise order to 106 inch lbs. (12 Nm) Armrest compartment mat and lower the front floor console armrest C/D storage compartment into the front floor console
Electrical connectors to the upper console trim plate and snap the trim plate onto the console
Automatic transaxle shift handle and the cigarette lighter
Heater hoses to the heater core and secure with the clamps
Refill the cooling system by performing the following procedure:
Close the radiator drain valve.
If the air bleed screws (located at the top of the thermostat housing) is closed, open it by turning it 2-3 turns.
Slowly add coolant until it reaches the radiator neck.
Wait for 2 minutes and recheck the coolant level; then, add more coolant if necessary.
Fill the coolant reservoir to the COLD mark.
Close the air bleed screw.
WARNING
Do not over-tighten the air bleed screw for it is made of brass.
Install the radiator cap and make sure that the arrows align with the overflow tube.
If equipped with a 3.8L engine, install the fuel injector sight shield by performing the following procedures:
Remove the oil filler cap/tube assembly from the valve cover.
Slide the fuel injector sight shield into the rear engine bracket and lower it into place.
Reinstall the oil filler cap/tube assembly in the valve cover. Twist it clockwise to lock the detent on the tube into the notch in the valve cover.
If equipped with a 3.1L engine, install the air cleaner and duct assembly.
Connect the negative battery cable.
Thanks for using 2CarPros.com!
Feb 19, 2021 at 1:50 PM
(Merged)