Welcome to 2CarPros.
I have a feeling you aren't going to like these directions, but here they are. The attached pics correlate with the directions.
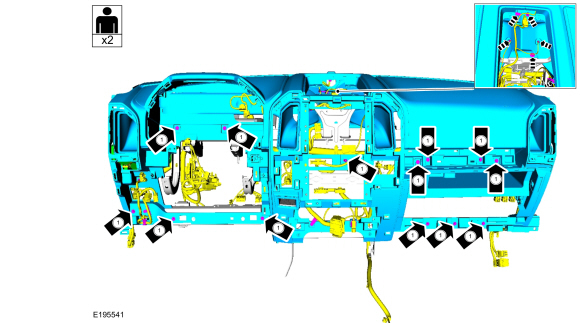
Instrument Panel Upper Section
Special Tool(s) / General Equipment
Interior Trim Remover
Removal
NOTE: Removal steps in this procedure may contain installation details.
All vehicles
Remove the instrument panel.
Refer to: Instrument Panel (501-12 Instrument Panel and Console, Removal and Installation) .
NOTE: Upper instrument panel storage tray with speaker shown, others similar.
If equipped, release the clips and remove the instrument panel speaker grille.
Use the General Equipment: Interior Trim Remover
image
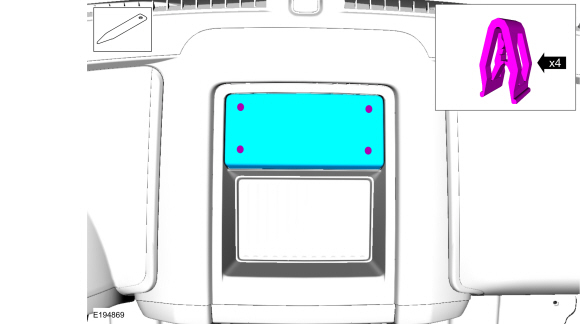
NOTE: Upper instrument panel storage tray with speaker shown, others similar.
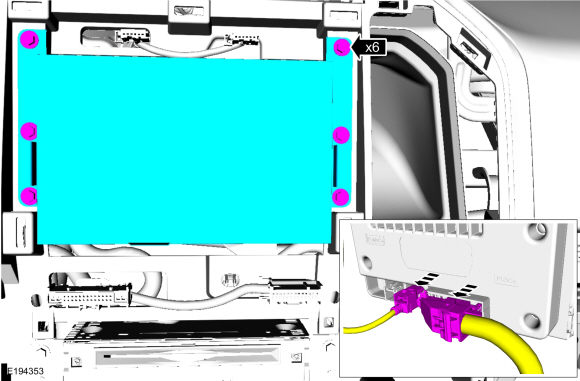
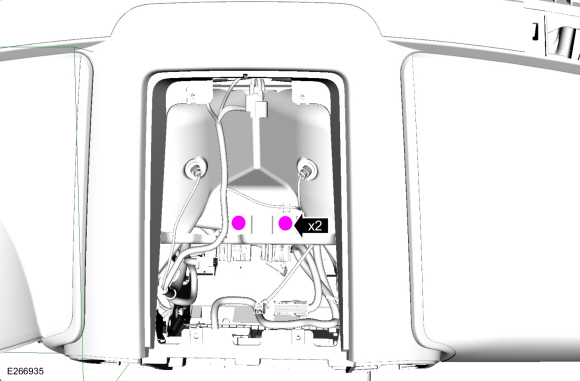
Remove the bolts, release the clips and remove upper instrument panel storage tray.
Use the General Equipment: Interior Trim Remover
Torque : 22 lb.in (2.5 Nm)
Pic 1
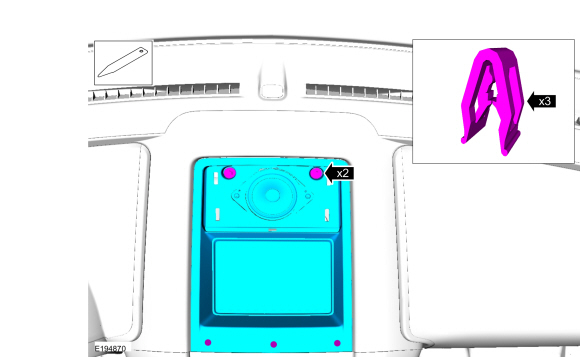
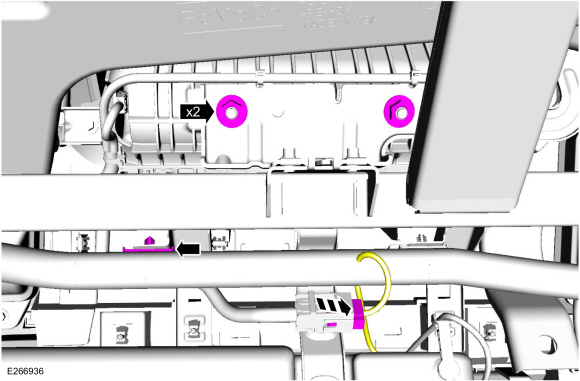
Release the clip and remove the GPSM .
Disconnect the electrical connector.
pic 2
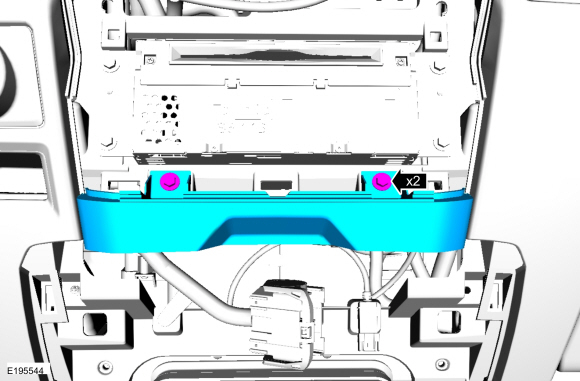
Remove the 2 bolts, release the clips and remove IPC trim panel.
Detach the gap hider from the upper steering column shroud.
Torque : 22 lb.in (2.5 Nm)
pic 3
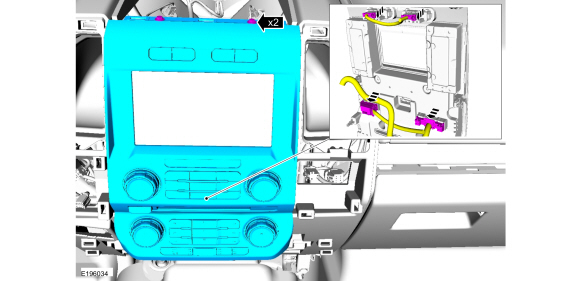
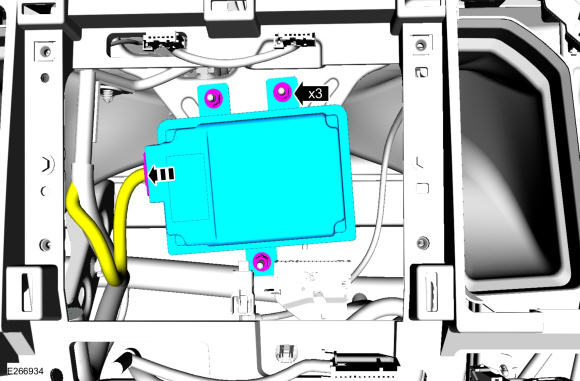
Remove the bolts and the IPC .
Disconnect the electrical connector.
Torque : 21 lb.in (2.4 Nm)
pic 4
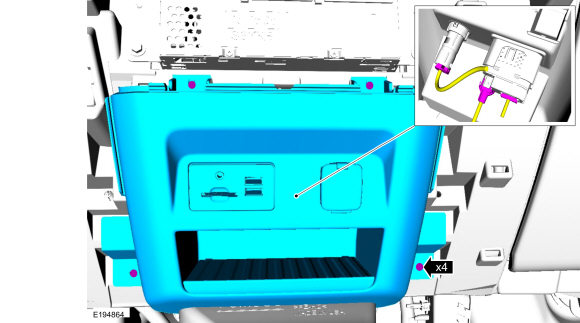
NOTE: FCIM with touchscreen shown. FCIM without touch screen similar.
Remove the bolts and the FCIM .
Disconnect the electrical connectors.
Torque : 22 lb.in (2.5 Nm)
pic 5
NOTE: Instrument panel center trim panel without floor console shown, with floor console similar.
Release the clips and remove the RH instrument panel center trim panel.
Disconnect the electrical connectors.
pic 6
NOTE: Instrument panel center trim panel without floor console shown, with floor console similar.
Release the clips and remove the LH instrument panel center trim panel.
Disconnect the electrical connectors.
pic 7
Vehicles without touchscreen
Remove the bolts and the FCDIM .
Disconnect the electrical connector.
Torque : 22 lb.in (2.5 Nm)
pic 8
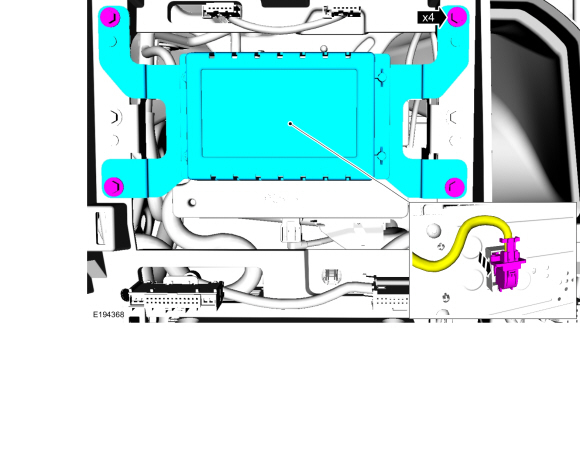
Remove the two bolts and the APIM .
Disconnect the electrical connectors.
Torque : 22 lb.in (2.5 Nm)
pic 9
Vehicles with touchscreen
Remove the bolts and the FDIM .
Disconnect the electrical connectors.
Torque : 22 lb.in (2.5 Nm)
pic 10
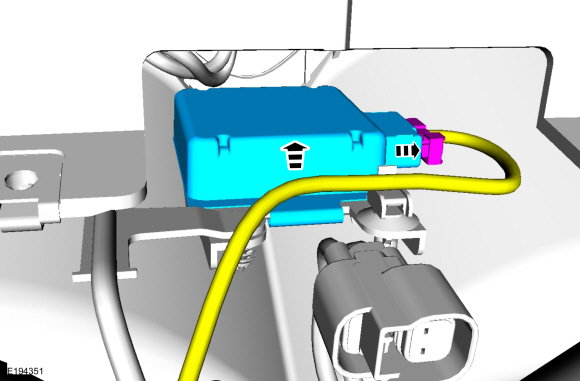
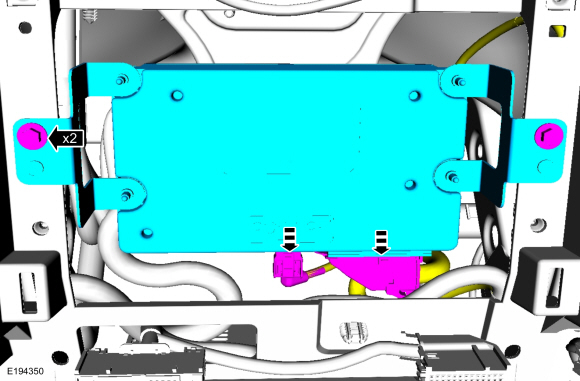
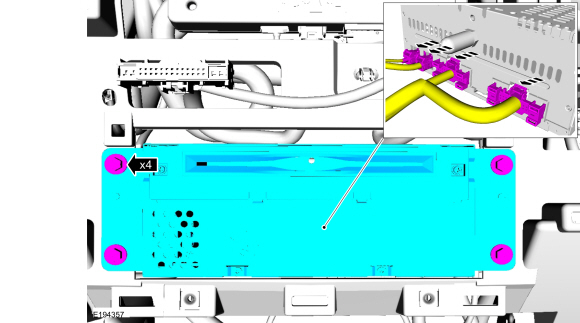
Remove the nuts and the module.
Disconnect the electrical connector.
pic 11
Vehicles without floor console
Remove bolts and the lower instrument panel finish panel.
Disconnect the electrical connectors.
Torque : 48 lb.in (5.4 Nm)
pic 12
Vehicles with floor console
Remove the bolts and the instrument panel lower finish panel.
Torque : 48 lb.in (5.4 Nm)
pic 13
All vehicles
Remove the bolts and the ACM .
Disconnect the electrical connectors.
Torque : 22 lb.in (2.5 Nm)
pic 14
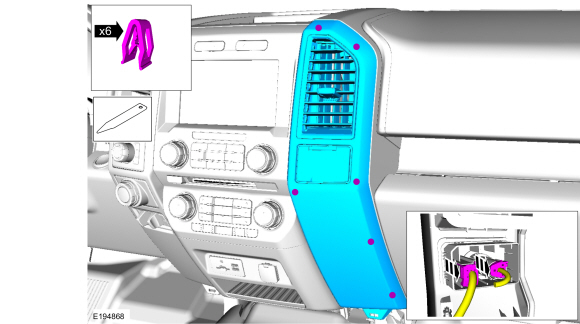
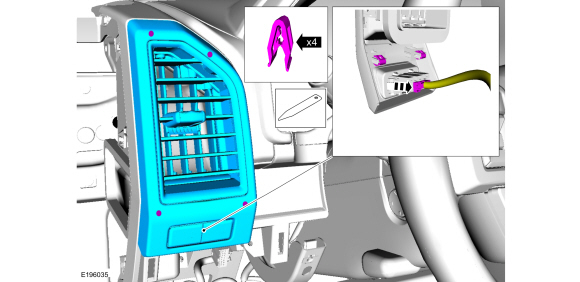
Release the clips and remove the RH register finish panel.
Use the General Equipment: Interior Trim Remover
pic 15
Release the clips and remove the RH finish panel.
Use the General Equipment: Interior Trim Remover
pic 16
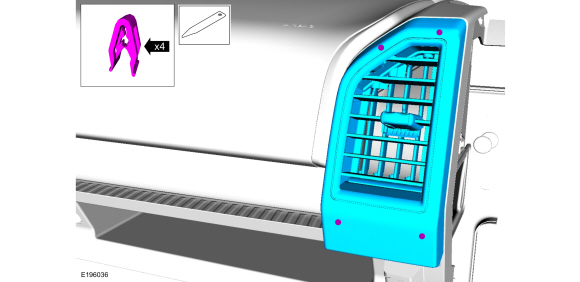
NOTE: Vehicle with spot light shown, without spotlight similar.
Release the clips and remove the LH register finish panel.
Use the General Equipment: Interior Trim Remover
pic 17
pic 18
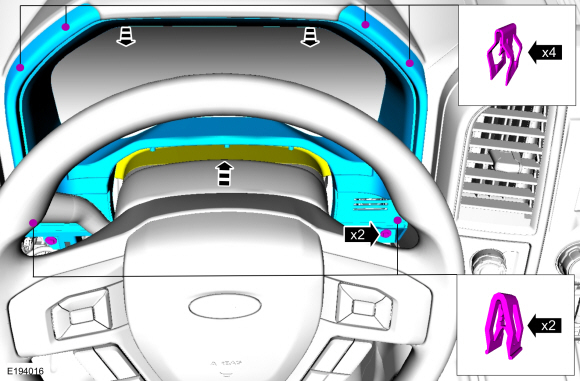
WARNING: Do not reuse steering column nuts. This may result in fastener failure and steering column detachment or loss of steering control. Failure to follow this instruction may result in serious injury to vehicle occupant(s).
Disconnect the electrical connectors, position aside the harness and remove the steering column.
Remove and discard the bolts.
Torque : 21 lb.ft (28 Nm)
Remove and discard the nuts.
Torque : 22 lb.ft (30 Nm)
pic 19
NOTE: The HVAC plenum may need to be positioned upward to access bolts.
Remove the bolts.
Torque : 49 lb.in (5.5 Nm)
pic 20
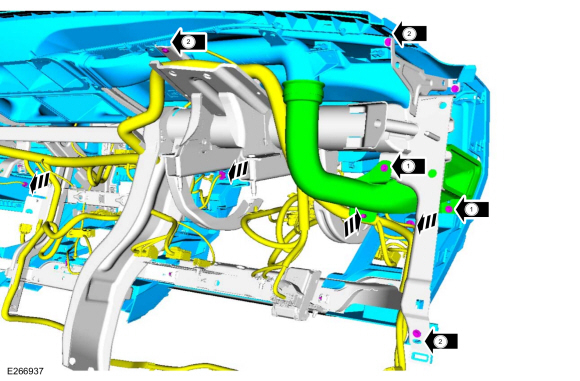
Remove the bolts
Disconnect the electrical connector and the harness retainer.
Torque : 80 lb.in (9 Nm)
pic 21
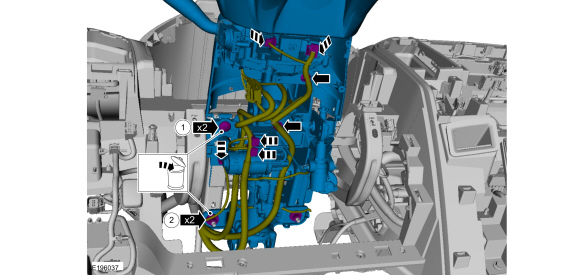
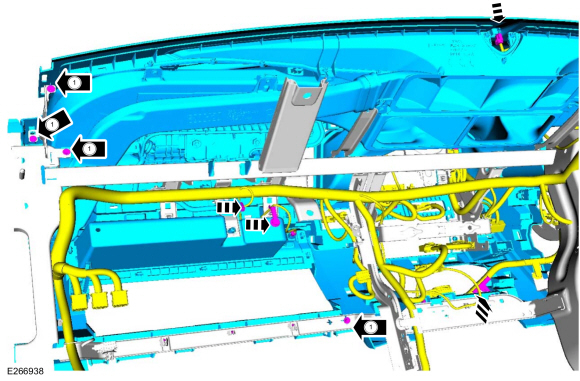
Disconnect the electrical connectors. release the harness retainers and position aside the electrical harness.
Remove the bolts and the HVAC duct.
Torque : 22 lb.in (2.5 Nm)
Remove the bolts.
Torque : 22 lb.in (2.5 Nm)
pic 22
Disconnect the electrical connectors, release the harness retainers and position aside the electrical harness.
Remove the bolts.
Torque : 22 lb.in (2.5 Nm)
pic 23
Disconnect the electrical connectors. release the harness retainers and position aside the electrical harness.
Remove the bolts.
Torque : 22 lb.in (2.5 Nm)
pic 24
Installation
To install, reverse the removal procedure.
I hope this helps. Let me know if you have questions.
Images (Click to enlarge)
May 13, 2019 at 8:46 PM