Welcome to 2CarPros.
Here are the directions for the rear. The attached pictures correlate with the directions.
Removal Procedure
Caution: Refer to Brake Dust Caution in Service Precautions
1. Raise the vehicle. Refer to Vehicle Lifting.
2. Remove the tire and wheel assembly.
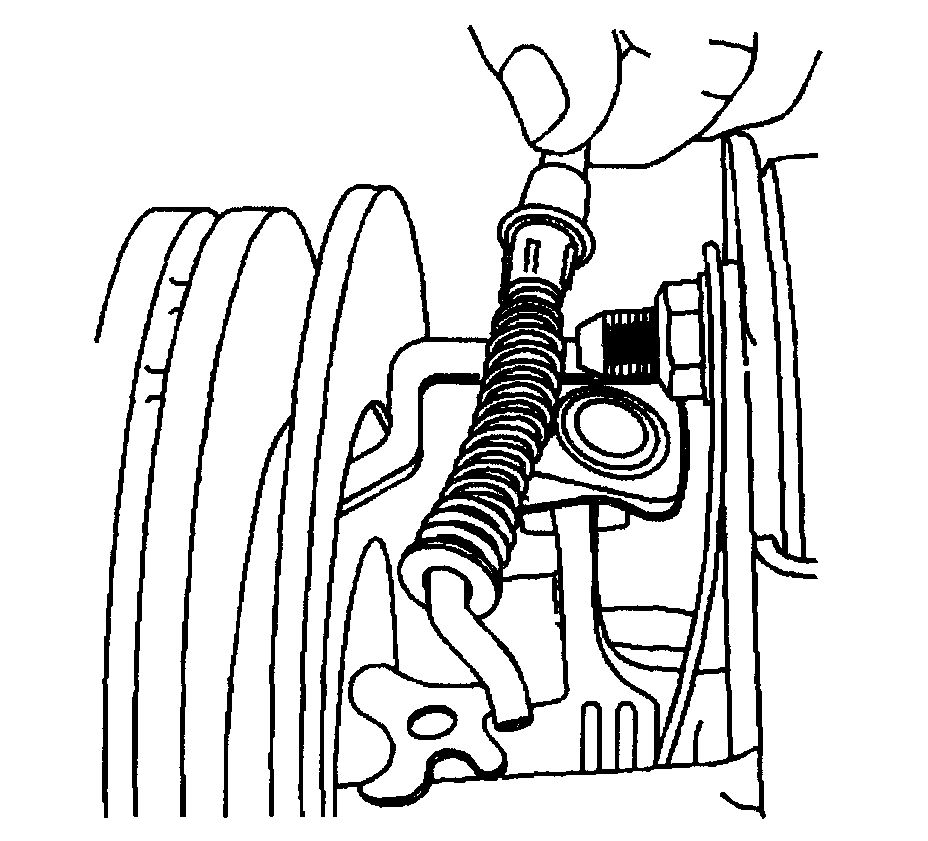
3. Remove the park brake cable from the rear brake caliper.
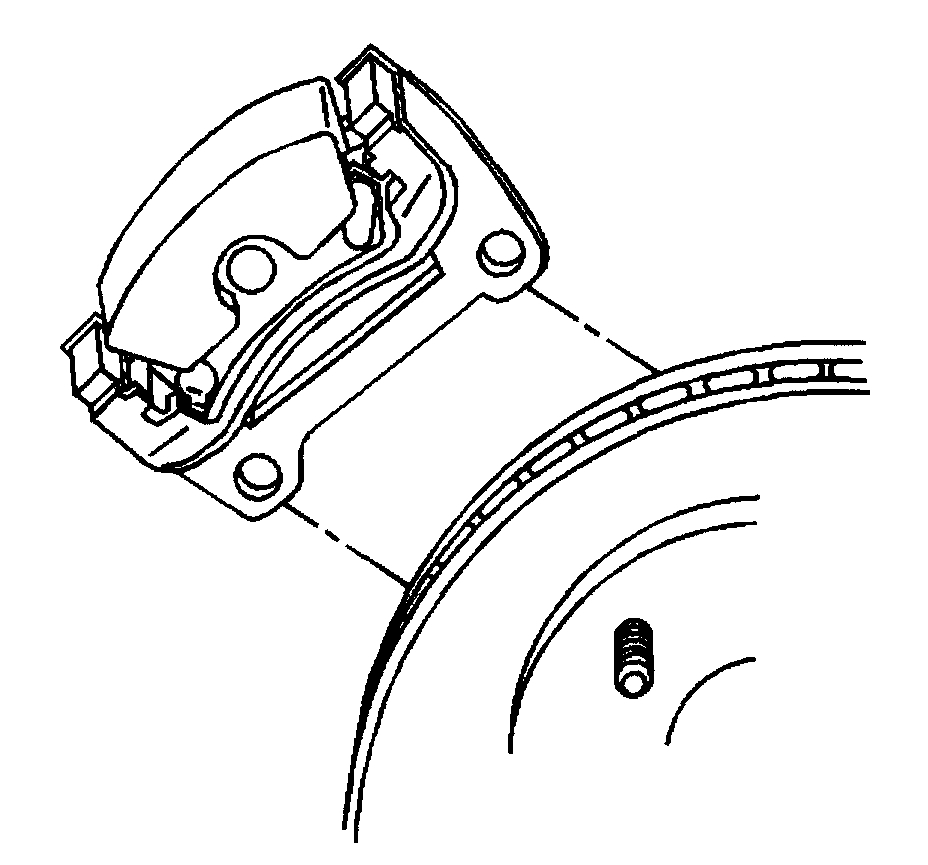
4. Remove the brake caliper and bracket assembly.
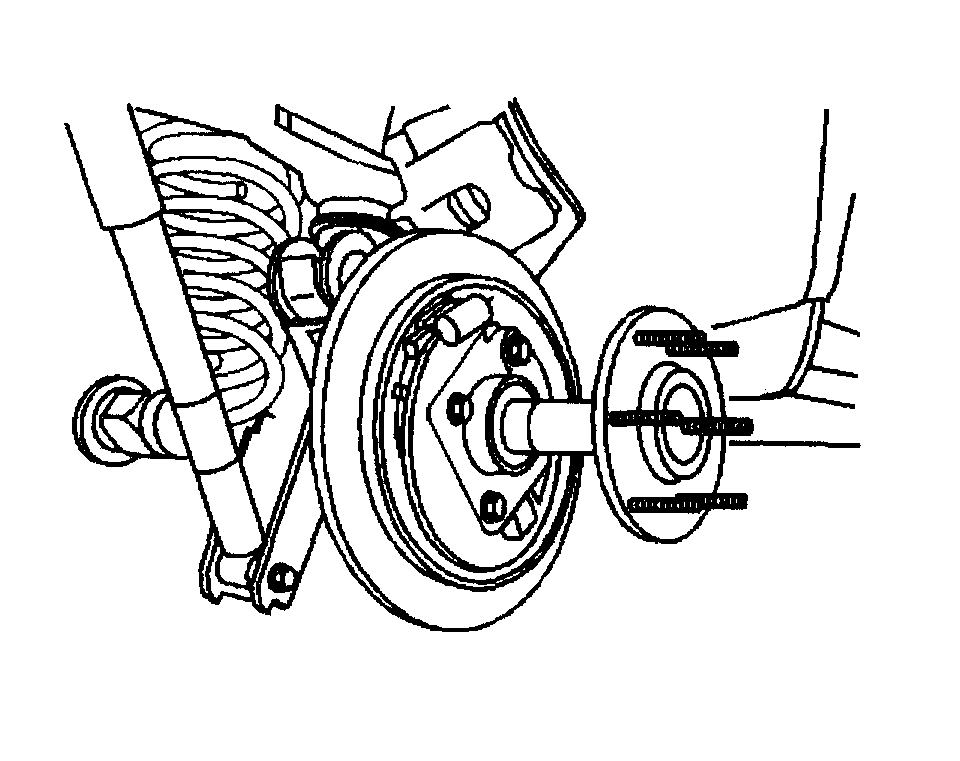
5. Remove the rear brake rotor.
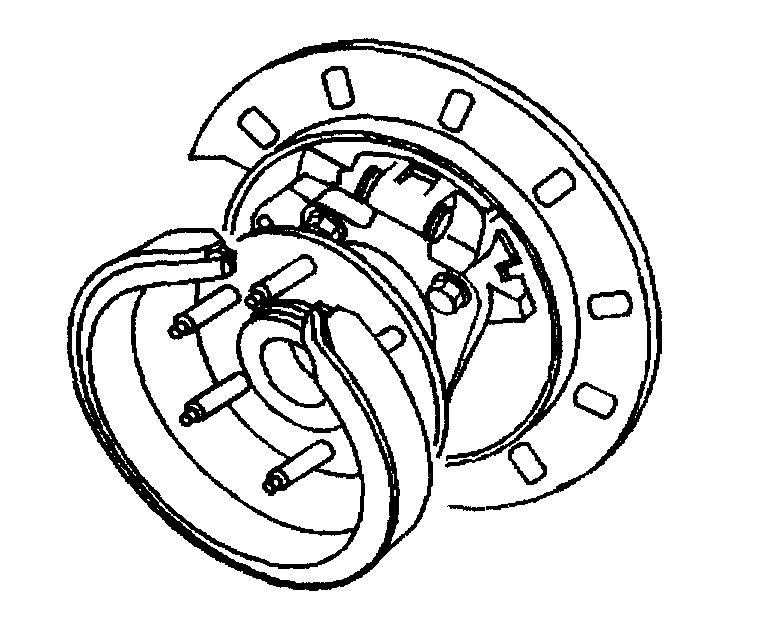
6. Remove the park brake shoe.
7. Remove the rear drive axle.
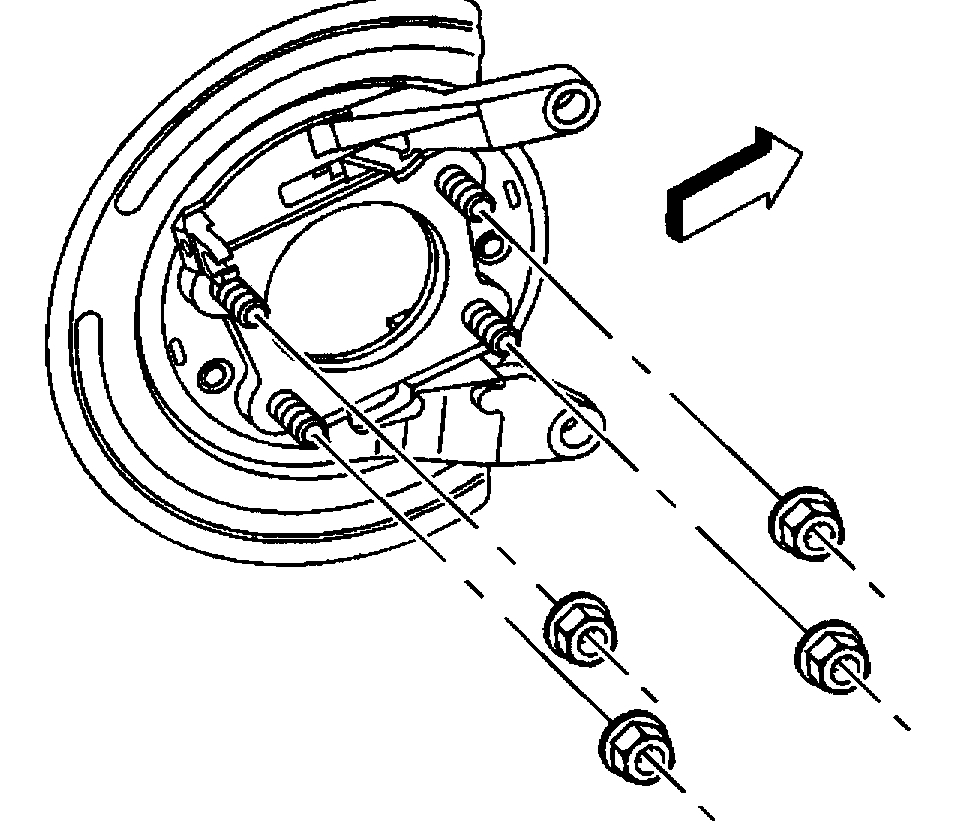
8. Remove the retaining nuts from the backing plate.
9. Remove the backing plate from the rear axle housing.
Installation Procedure
1. Install the backing plate to the axle housing flange.
Notice: Refer to Fastener Notice in Service Precautions.
2. Install the backing plate nuts.
Tighten the backing plate bolts to 135 Nm (100 ft. lbs.).
3. Install the rear drive axle.
4. Install the park brake shoe.
5. Install the rear brake rotor.
6. Install the brake caliper and bracket assembly.
7. Install the park brake cable to the rear brake caliper.
8. Adjust the park brake shoe.
9. Install the tire and wheel assembly.
10. Lower the vehicle. Refer to Vehicle Lifting.
________________________________
Front
Disc Brake Splash Shield Replacement- Front
Removal Procedure
Caution: Refer to Brake Dust Caution in Service Precautions
1. Raise the vehicle. Refer to Vehicle Lifting.
2. Remove the tire and wheel assembly.
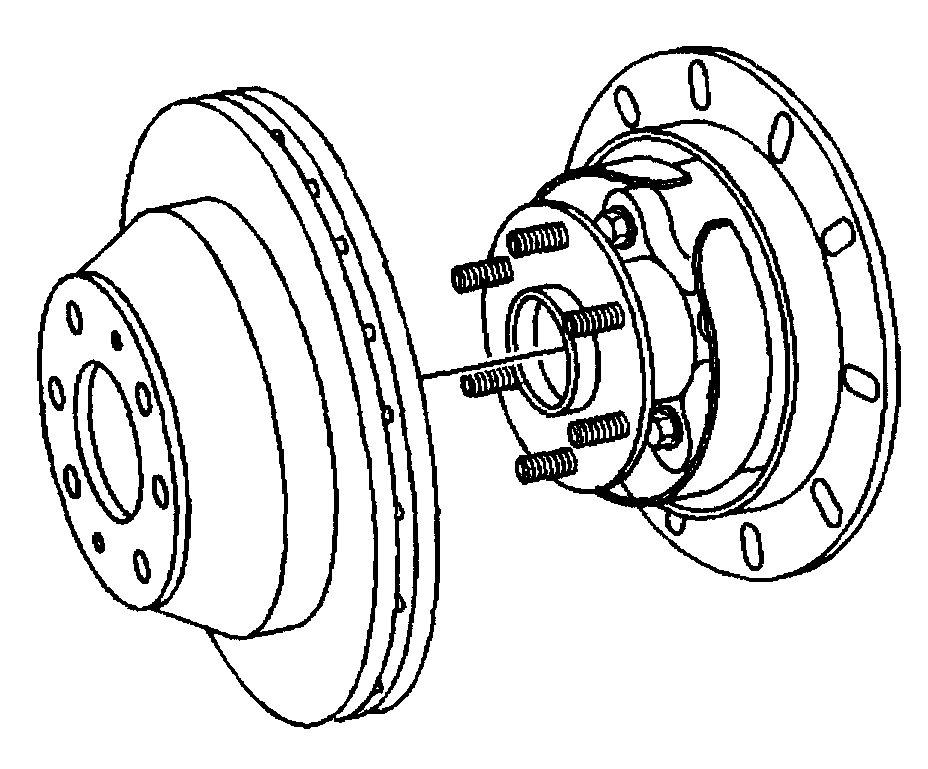
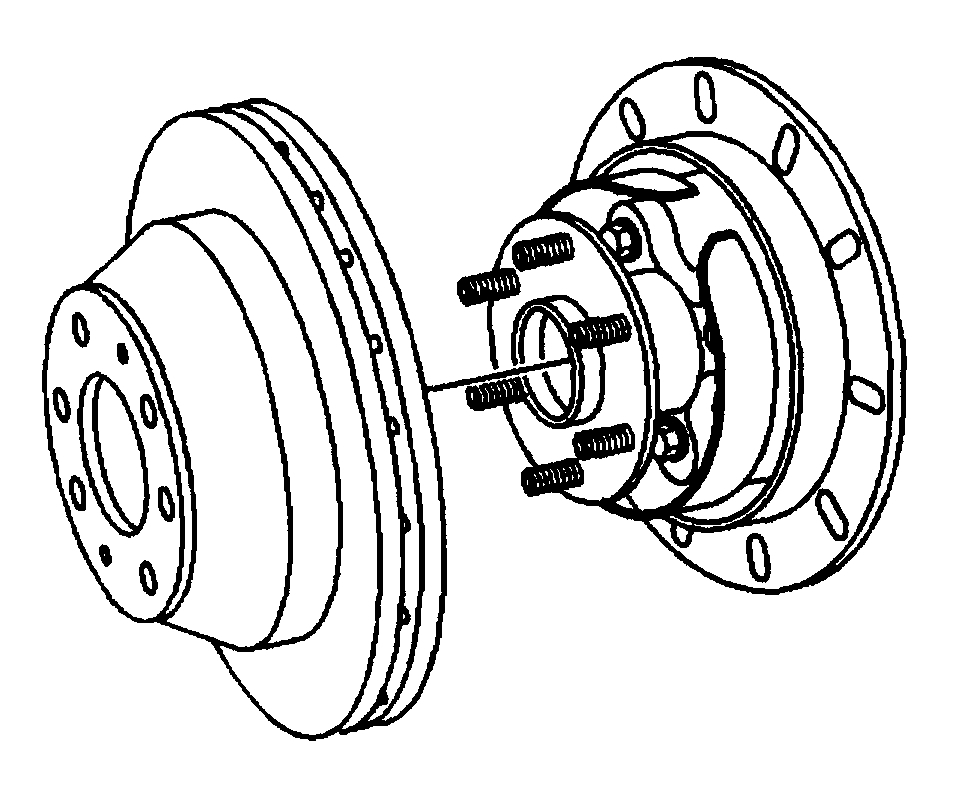
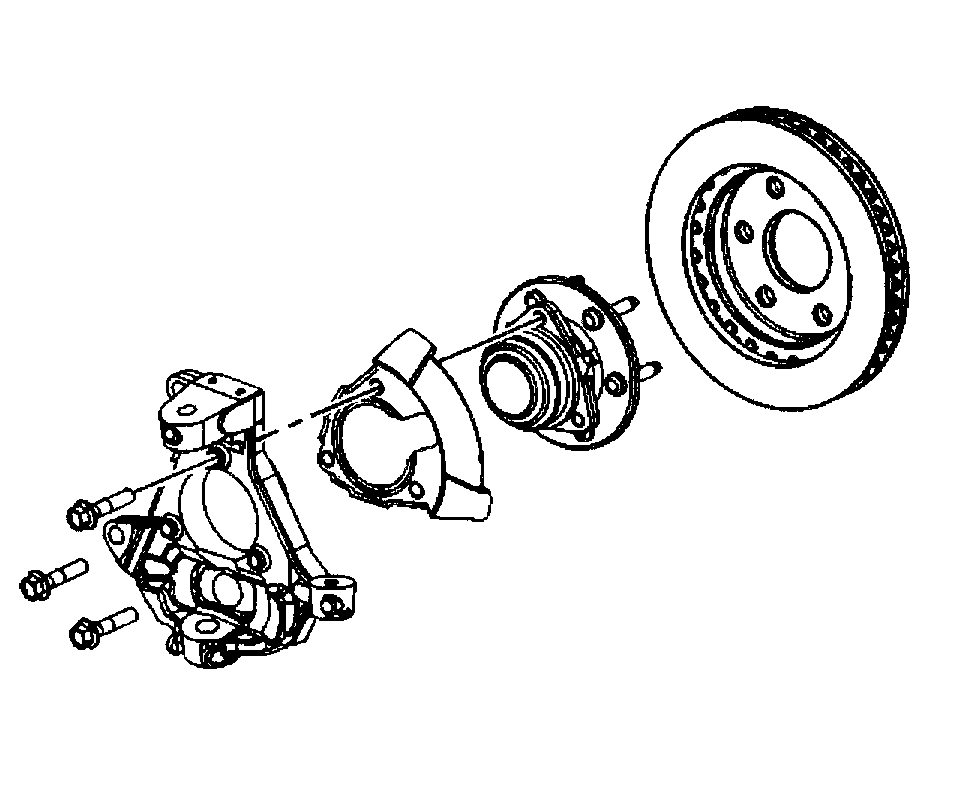
3. Remove the front hub and bearing assembly.
4. Remove the retaining bolts for the splash shield.
5. Remove the splash shield.
Installation Procedure
Picture 13 Again
1. Install the splash shield.
2. Install the splash shield retaining bolts, same as wheel hub and bearing.
3. Install the front hub and bearing assembly.
4. Install the tire and wheel assembly.
5. Lower the vehicle.
Check out the diagrams (Below). Please let us know if you need anything else to get the problem fixed.
Images (Click to enlarge)
Mar 27, 2019 at 7:54 PM