Good morning,
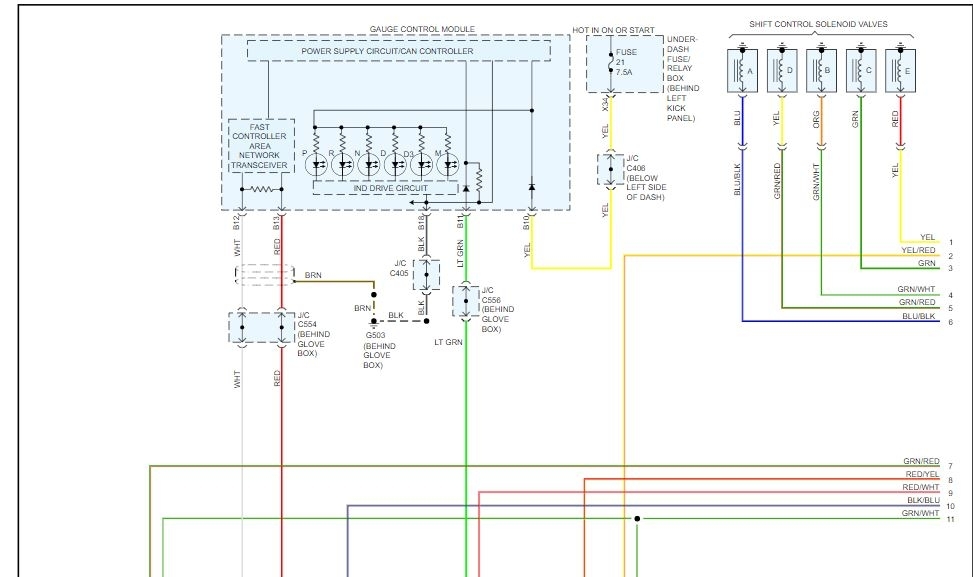
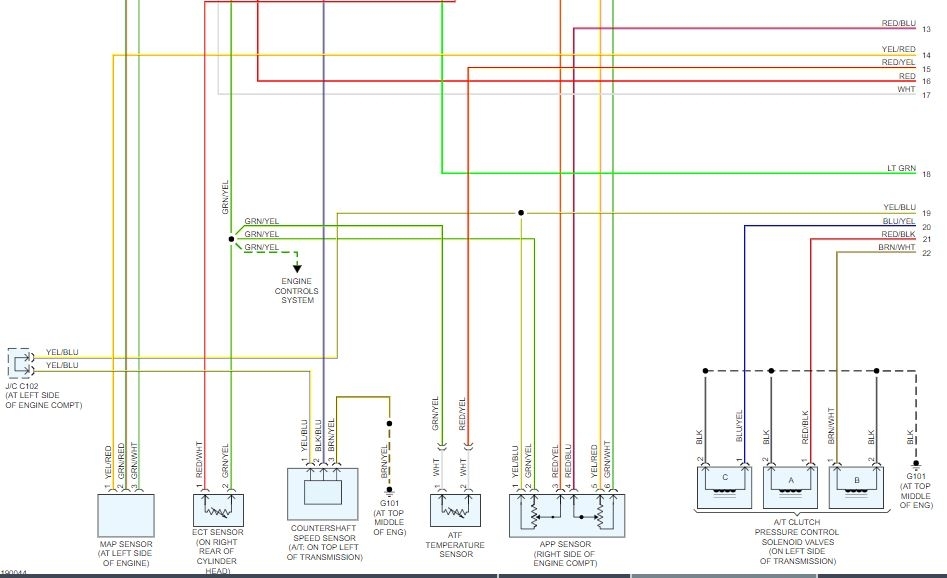
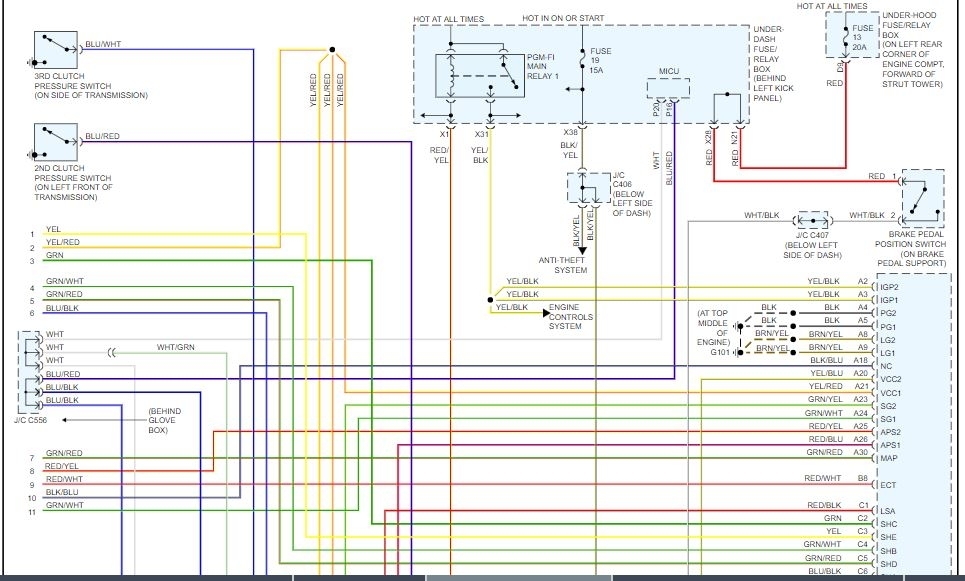
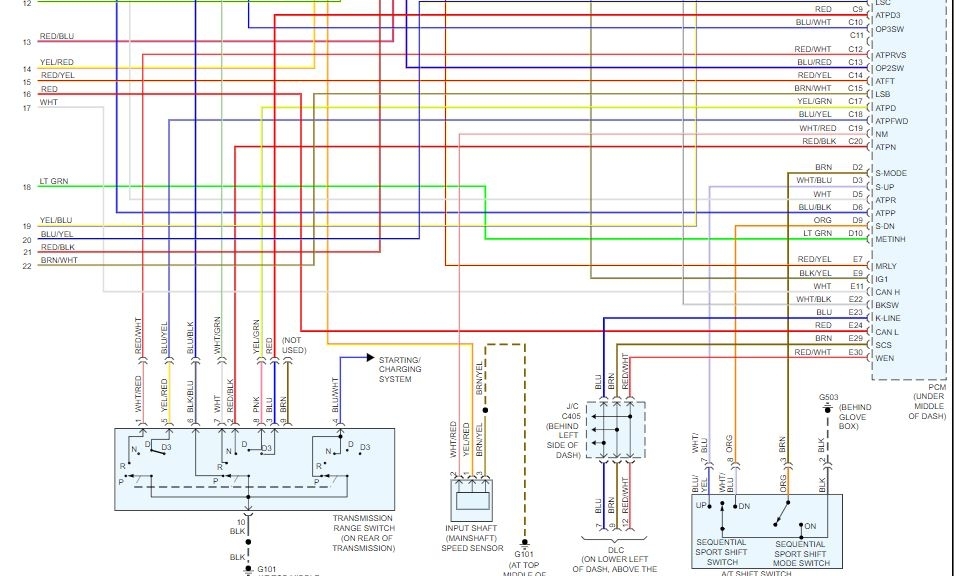
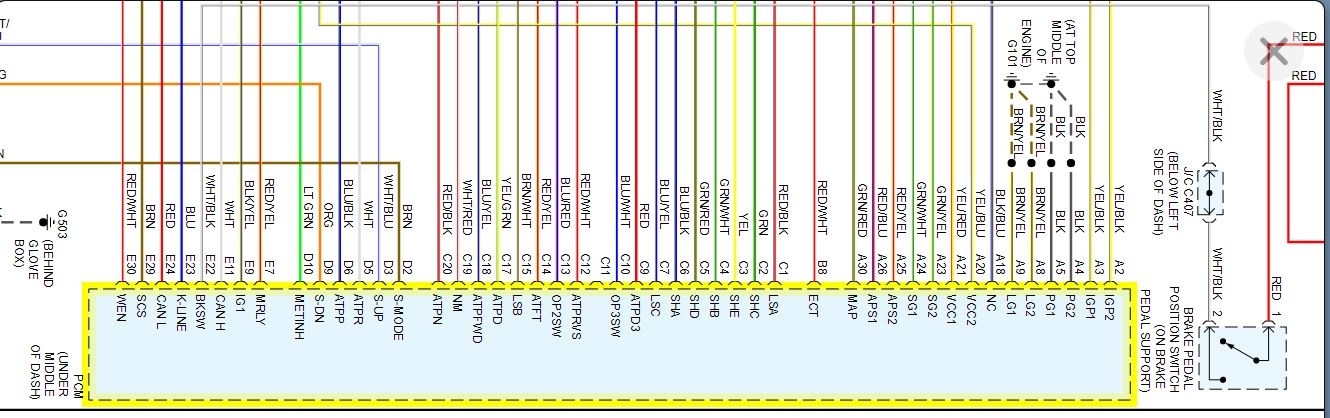
I attached the wiring diagrams for you for the transmissions. I singled out the PCM for you as well.
Most of the time, this is a mechanical issue not an electrical issue.
Do you have any codes in the system?
Roy
A/T Clutch Pressure Control Solenoid Valve A Replacement
1. Remove the intake air duct.
2. Disconnect the A/T clutch pressure control solenoid valve A connector.
imageOpen In New TabZoom/Print
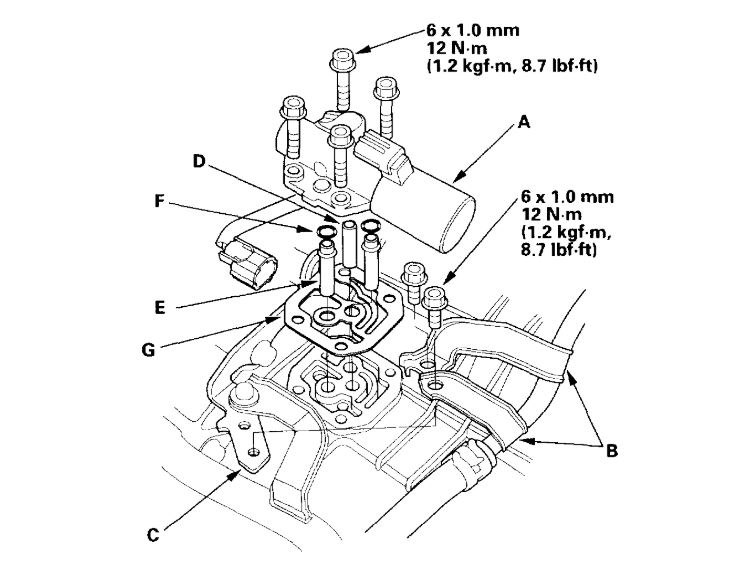
3. Remove the bolts securing the ATF cooler inlet line brackets (B) from the transmission hanger (C).
4. Remove the mounting bolts and the A/T clutch pressure control solenoid valve A.
5. Remove the ATF pipe (D), ATF joint pipes (E), O-rings (F), and gasket (G).
6. Clean the mounting surface and fluid passages of the transmission housing.
7. Install the new gasket on the transmission housing, and install the ATF pipe and ATF joint pipes.
8. Install the new O-rings over the ATF joint pipes.
9. Install the new A/T clutch pressure control solenoid valve A.
10. Secure the ATF cooler inlet line brackets with the bolts on the transmission hanger.
11. Check the A/T clutch pressure control solenoid valve A connector for rust, dirt, or oil, and clean if necessary, then connect the connector securely.
12. Install the intake air duct.
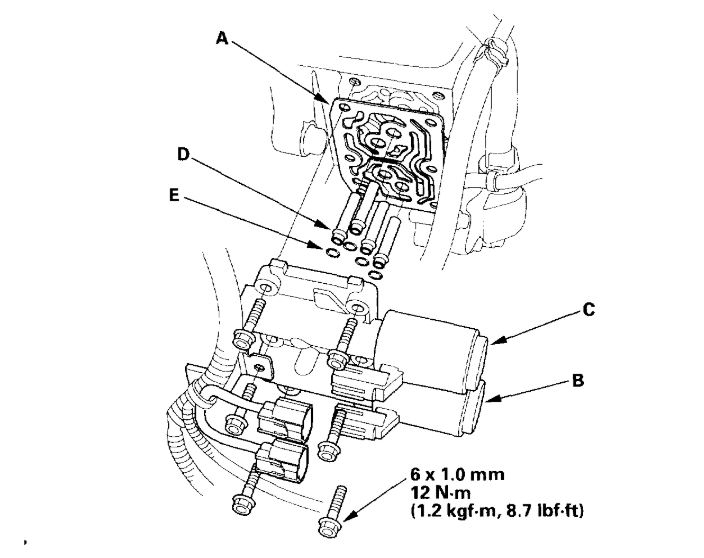
A/T Clutch Pressure Control Solenoid Valve B and C Replacement
1. Disconnect the A/T clutch pressure control solenoid valves B and C connectors.
imageOpen In New TabZoom/Print
2. Remove the A/T clutch pressure control solenoid valves B and C.
3. Remove the ATF joint pipes (D), O-rings (E), and gasket (A).
4. Clean the mounting surface and fluid passages of the transmission housing.
5. Install the new gasket on the transmission housing, and install the ATF joint pipes.
6. Install new O-rings over the ATF joint pipes.
7. Install new A/T clutch pressure control solenoid valves B and C.
8. Check A/T clutch pressure control solenoid valves B and C connectors for rust, dirt, or oil, and clean if necessary, then connect the connectors securely.
Images (Click to enlarge)
Jan 17, 2020 at 2:01 AM