Good morning,
First, never never add sealer to the system. That stuff causes more issues and never does anything for a leak. It most likely failed the expansion valve in the system.
https://www.2carpros.com/articles/air-conditioner-leak-detection
You need to get a full set of gauges and give me both the high and low side readings when it is not running and when it is running. Then I can help you with diagnosing this issue.
You can rent a set of gauges at a parts store.
You will need at least a expansion valve and a dryer to start.
https://www.2carpros.com/articles/re-charge-an-air-conditioner-system
Roy
Removal and Installation
NOTICE: Motorcraft(R) Electric Compressor Oil only must be used as a refrigerant system lubricant for hybrid vehicles. Addition of any oil other than Motorcraft(R) Electric Compressor Oil to the hybrid vehicle refrigerant system will damage the electric Air Conditioning (A/C) compressor and contaminate the refrigerant system. Refer to the Refrigerant Oil Adding procedure.
1. Recover the refrigerant.
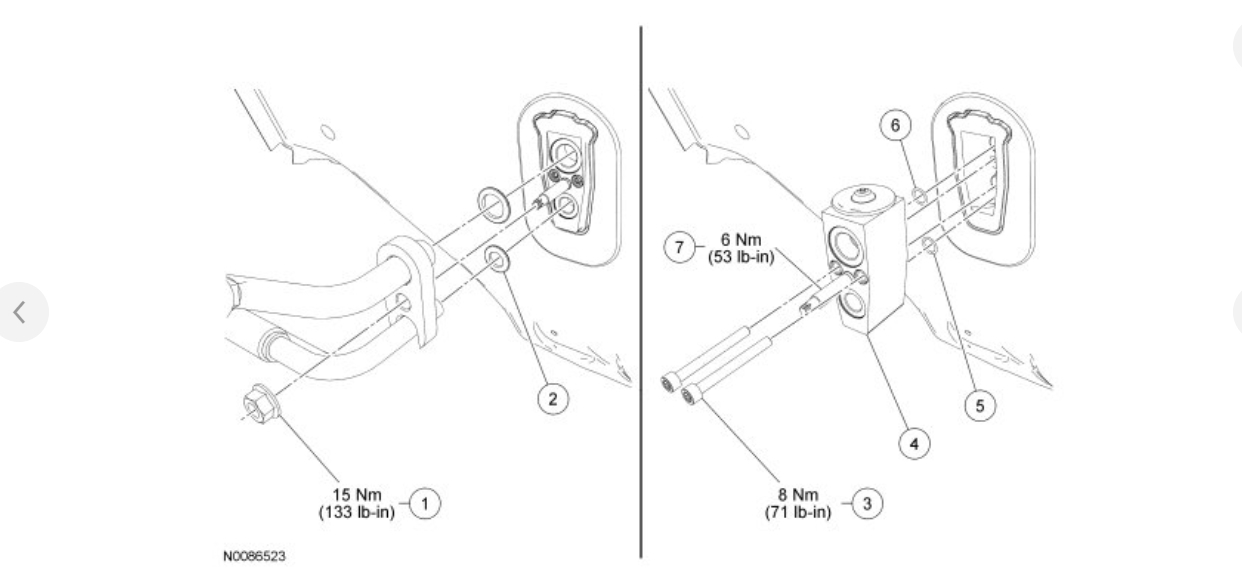
2. Remove the Thermostatic Expansion Valve (TXV) fitting nut and disconnect the fitting.
- Discard the gasket seals.
- To install, tighten to 15 Nm (133 lb-in).
3. Remove the 2 TXV (Thermostatic Expansion Valve) bolts and the TXV (Thermostatic Expansion Valve).
- Discard the O-ring seals.
- To install, tighten to 8 Nm (71 lb-in).
4. NOTICE: Motorcraft(R) Electric Compressor Oil only must be used as a refrigerant system lubricant for hybrid vehicles. Addition of any oil other than Motorcraft(R) Electric Compressor Oil to the hybrid vehicle refrigerant system will damage the electric Air Conditioning (A/C) compressor and contaminate the refrigerant system. Refer to the Refrigerant Oil Adding procedure.
To install, reverse the reverse the removal procedure.
- If the TXV (Thermostatic Expansion Valve) stud has become loose during removal, or has been removed for any reason, tighten the TXV (Thermostatic Expansion Valve) stud to 6 Nm (53 lb-in) before the TXV (Thermostatic Expansion Valve) fitting nut is reinstalled.
- Install new O-ring seals and gasket seals.
- Add the correct amount of clean PAG oil (non-hybrid) or electric A/C compressor oil (hybrid) to the refrigerant system. For additional information, refer to the Refrigerant Oil Adding procedure.
5. Evacuate, leak test and charge the refrigerant system.
Removal and Installation
NOTE: The receiver/drier fitting studs can be removed and installed separately from the receiver/drier and are available as service parts. If only the fitting studs are damaged, it is not necessary to install a new receiver/drier.
NOTE: Installation of a new receiver/drier is not required when repairing the A/C system, except when there is physical evidence of contamination from a failed A/C compressor or damage to the receiver/drier. Damage to the receiver/drier includes leaks, physical damage to the receiver/drier shell or desiccant, or moisture contamination. Moisture contamination results only from a complete loss of refrigerant, and equalization of the refrigerant system pressure with atmospheric pressure for a period longer than one hour. If even a slight amount of positive refrigerant pressure is present in the refrigerant system before repairs are carried out, a new receiver/drier should not be installed.
1. Recover the refrigerant.
2. Remove the front bumper cover. For additional information, refer to Section 501-19 See: Bumper.
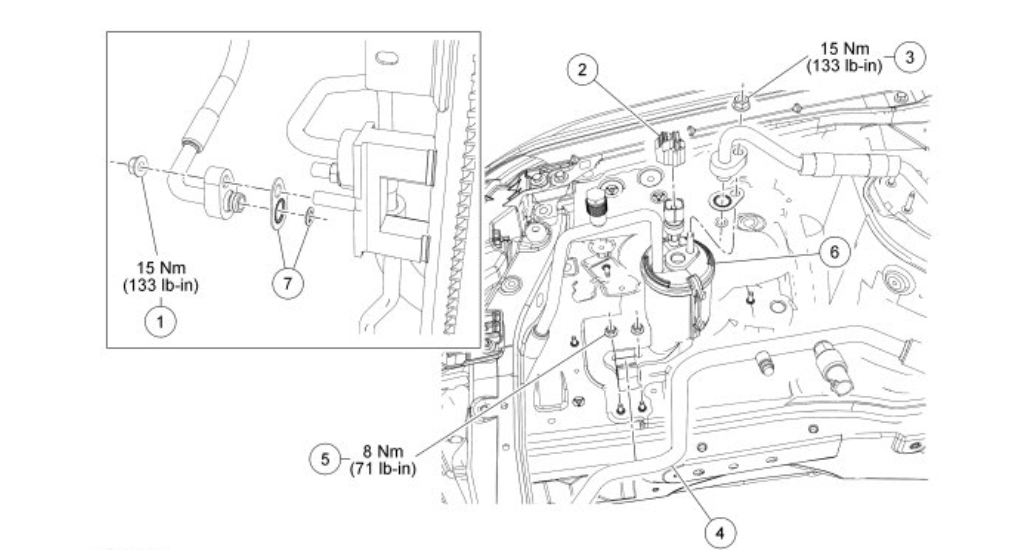
3. Remove the condenser outlet fitting nut and disconnect the fitting.
- Discard the O-ring seal and gasket seal.
- To install, tighten to 15 Nm (133 lb-in).
4. Disconnect the A/C pressure transducer electrical connector.
5. Remove the receiver/drier outlet fitting nut and disconnect the fitting.
- To install, tighten to 15 Nm (133 lb-in).
- Discard the O-ring seal and gasket seal.
6. Detach the evaporator outlet line from the receiver/drier bracket clip.
7. Remove the 2 receiver/drier nuts.
- To install, tighten to 8 Nm (71 lb-in).
8. Remove the receiver/drier.
9. To install, reverse the removal procedure.
- Install new gasket seals and O-ring seals.
- Lubricate the refrigerant system with the correct amount of clean PAG oil.
10. Evacuate, leak test and charge the refrigerant system.
Images (Click to enlarge)
Jun 29, 2019 at 5:27 AM