This is for belts with auto tensioners. Let me know if it is different or if it worked out for you?
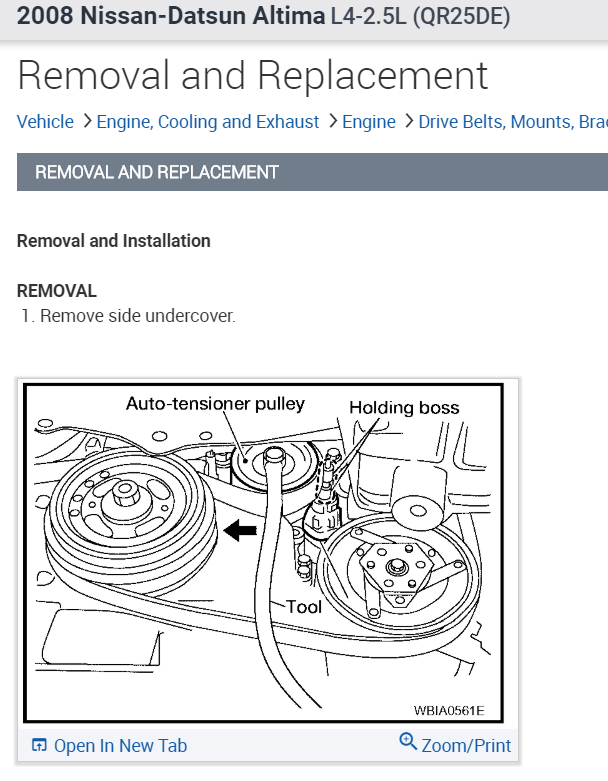
Remove side undercover
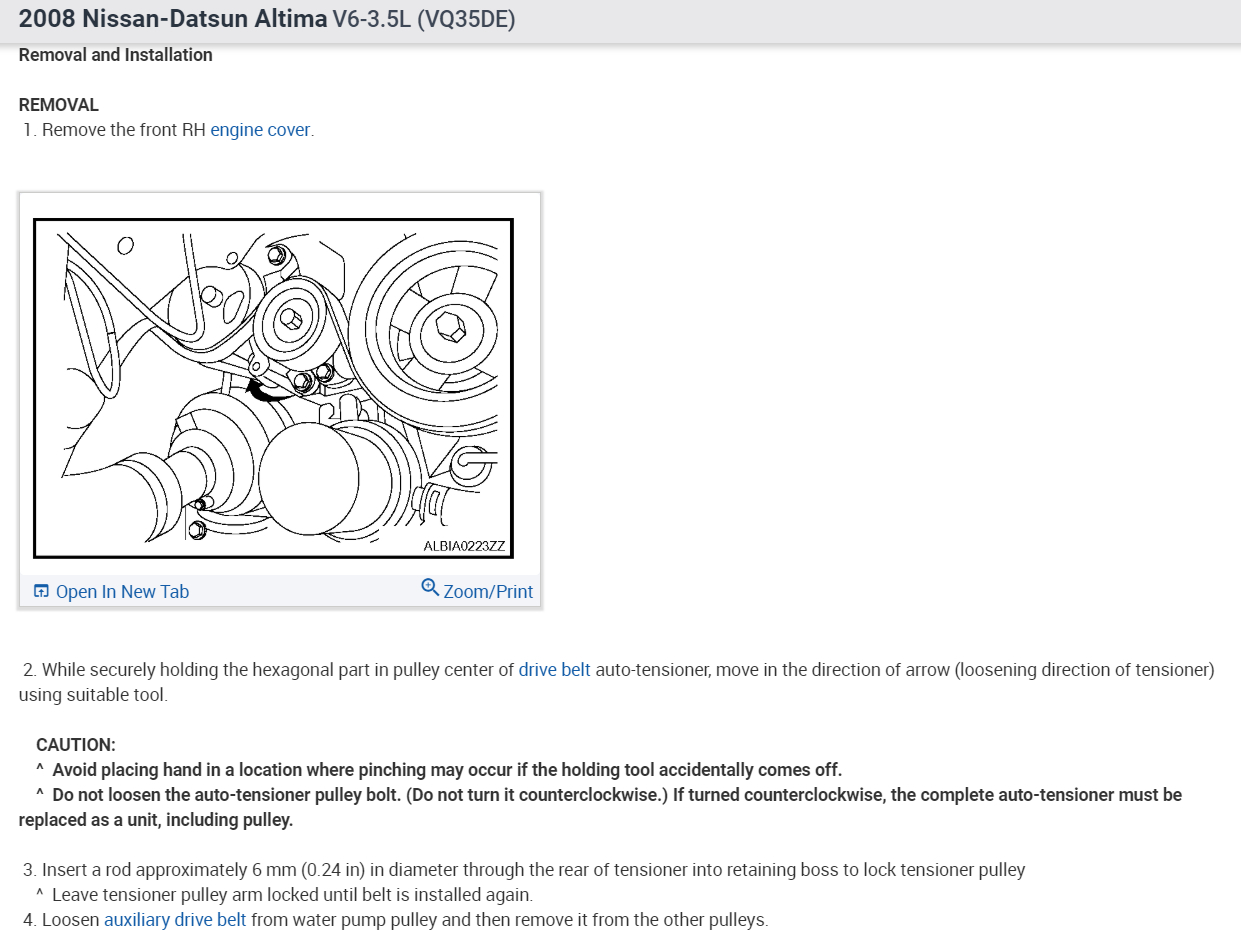
While securely holding the hexagonal part in pulley center of drive belt auto-tensioner, move in the direction of arrow (loosening direction of tensioner) using Tool. Tool number: - (J-46535)
CAUTION:
Avoid placing hand in a location where pinching may occur if the holding tool accidentally comes off.
Do not loosen the auto-tensioner pulley bolt. Do not turn it counterclockwise.) If turned counterclockwise, the complete auto-tensioner must be replaced as a unit, including pulley.
Insert a rod approximately 6 mm (0.24 in) in diameter through the rear of tensioner into retaining boss to lock tensioner pulley.
Leave tensioner pulley arm locked until drive belt is installed again.
Loosen drive belt from water pump pulley and then remove it from the other pulleys.
INSTALLATION
Install the drive belt onto all of the pulleys except for the water pump pulley. Then install the drive belt onto water pump pulley last.
CAUTION: Confirm belts are completely set on the pulleys.
Release tensioner, and apply tensions to drive belt.
CAUTION:
Avoid placing hand in a location where pinching may occur if the holding tool accidentally comes off.
Do not loosen the auto-tensioner pulley bolt. Don't turn it counterclockwise. If turned counterclockwise, the complete auto-tensioner must be replaced as a unit, including pulley.
Turn crankshaft pulley clockwise several times to equalize tension between each pulley.
Confirm tensions of drive belt at indicator is within the allowable use range. Refer to EM-16, "Checking Drive Belts". See: Testing and Inspection
Feb 4, 2019 at 6:34 PM
(Merged)