REAR DISC BRAKE PADS - VEHICLES WITH: STANDARD BRAKES, VIN RANGE: M45255->N52047 (70.40.03)
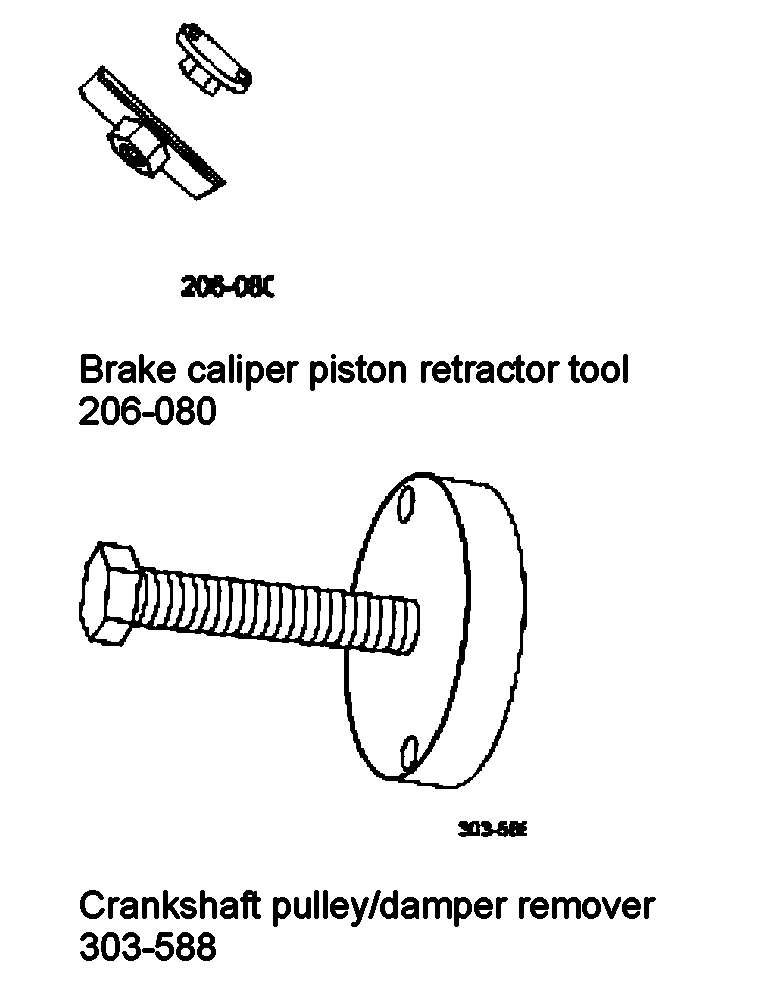
Special Service Tools
Removal
NOTE:Special tools required: Brake Caliper Piston Retractor Tool (206-080). See Fig. 39 . Crankshaft Pulley/Damper Remover (303-588). See Fig. 40 .
Remove both rear wheels and tires. For additional information, refer to WHEEL AND TIRE (74.20.05)
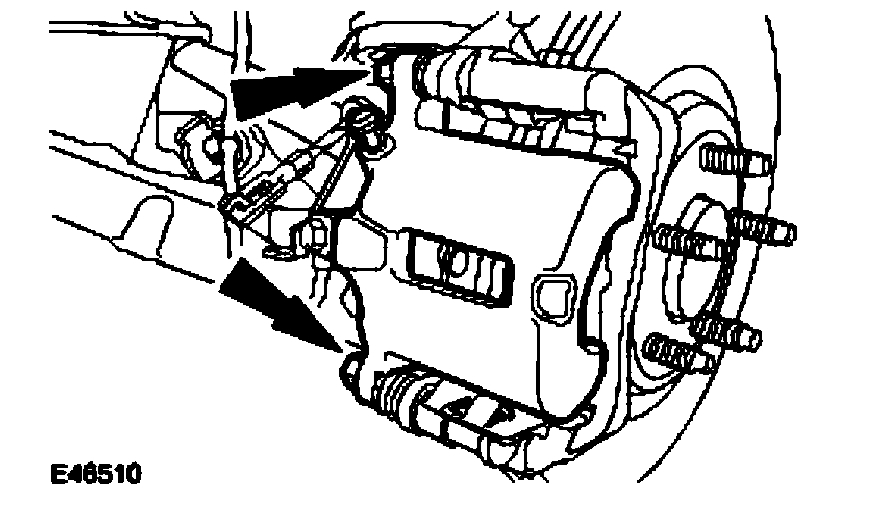
NOTE:Left-hand shown, right-hand similar.
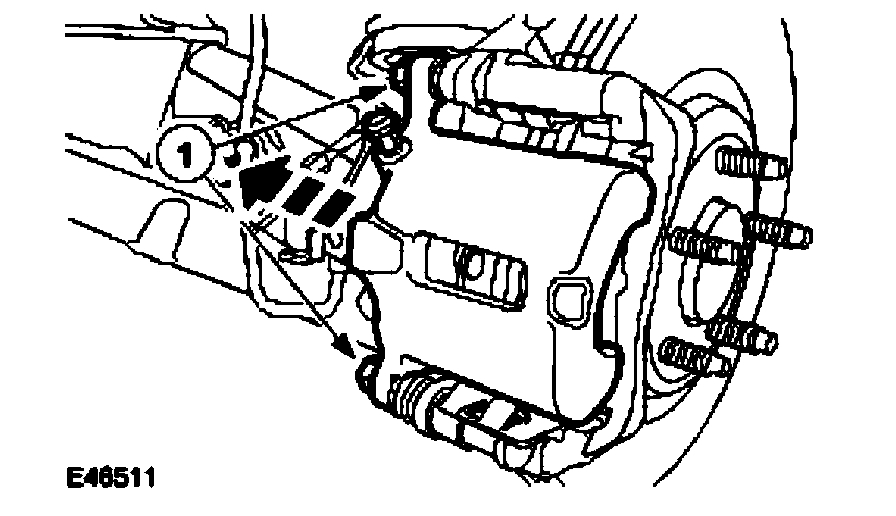
Detach the brake caliper.
Remove and discard the brake caliper retaining bolts.
Detach the brake caliper.
Fig. 22: Removing Brake Caliper Retaining Bolts
Courtesy of JAGUAR CARS, INC.
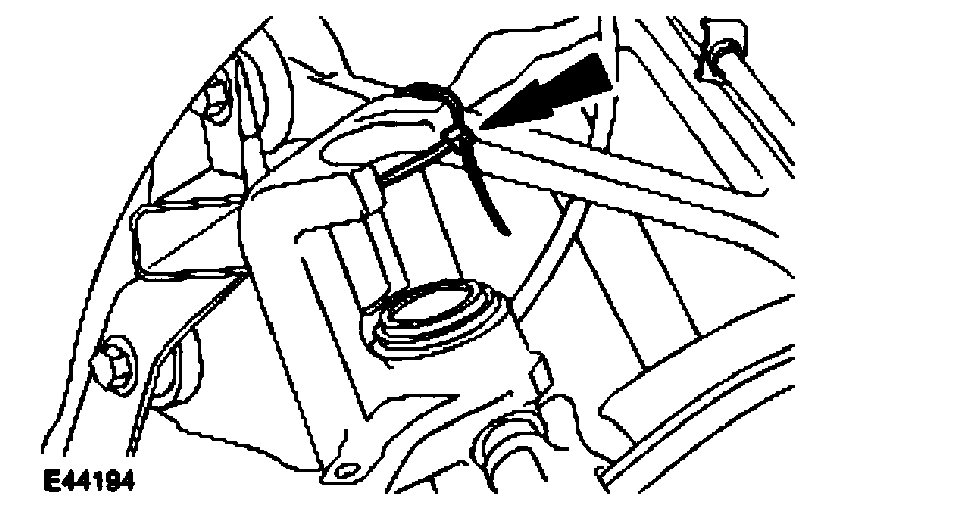
CAUTION:The brake caliper must be supported at all times.
NOTE:Left-hand shown, right-hand similar.
Fig. 23: Securing Caliper To One Side Using Suitable Tie Strap
Courtesy of JAGUAR CARS, INC.
Using a suitable tie strap, secure the caliper to one side.
NOTE:Left-hand shown, right-hand similar.
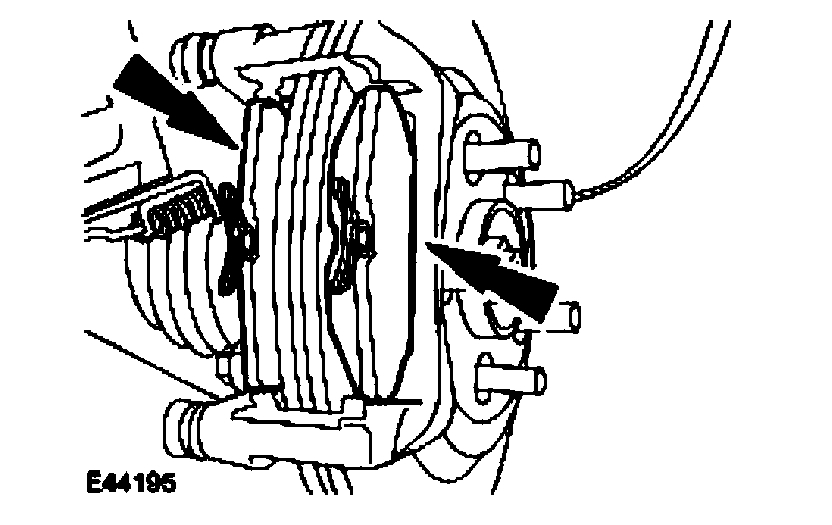
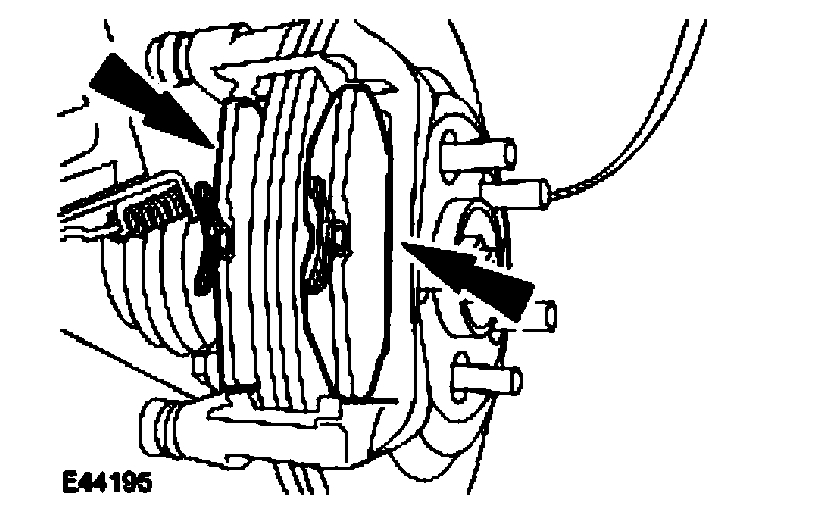
Remove the brake pads.
Remove the brake pad anti-rattle spring plates.
Fig. 24: Removing Brake Pads
Courtesy of JAGUAR CARS, INC.
Installation
WARNING:Do not use compressed air to disperse brake dust into the atmosphere.
CAUTION:If the pistons are pushed back into the housing, brake fluid will be forced back into the brake fluid reservoir.
CAUTION:Make sure that the brake disc faces are clean before installation.
CAUTION:Brake pads must always be replaced in axle sets.
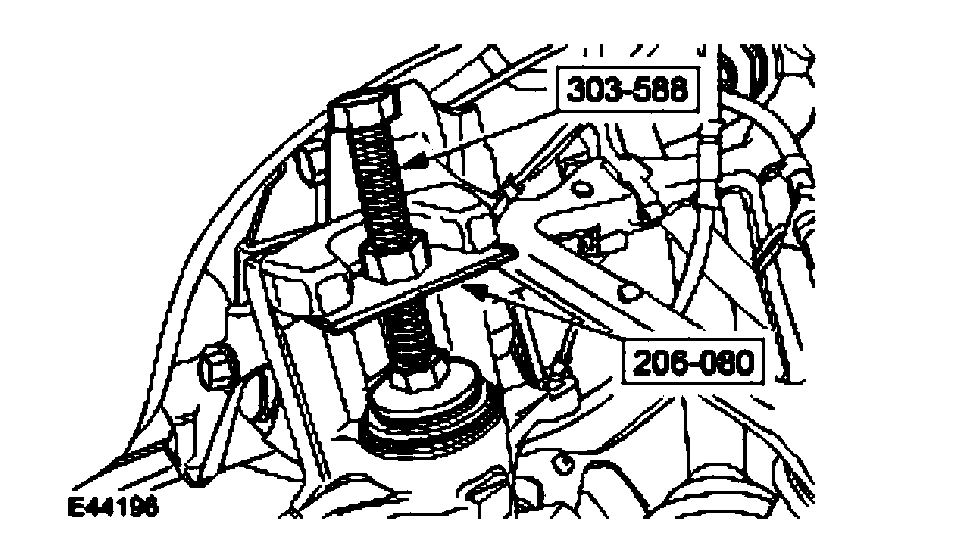
NOTE:Remove the forcing screw from the crankshaft pulley/damper remover and install to the brake caliper piston retractor tool.
Fig. 25: Retracting Brake Caliper Pistons Using Special Tools
Courtesy of JAGUAR CARS, INC.
Using the special tools, fully retract the brake caliper pistons.
NOTE:Left-hand shown, right-hand similar.
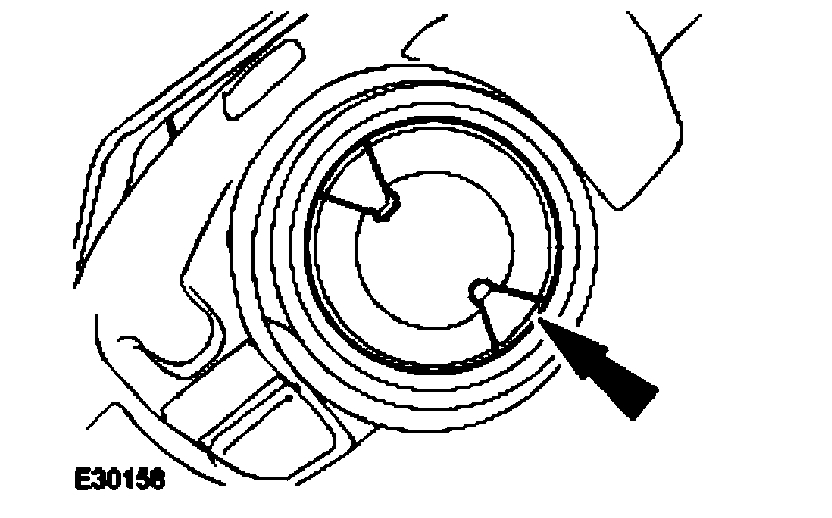
Fig. 26: Identifying Brake Caliper Piston Location Mark
Courtesy of JAGUAR CARS, INC.
Make sure the brake caliper piston location mark is in the correct position so that the locator pin on the brake pad locates correctly into the brake caliper piston.
NOTE:Remove the forcing screw from the brake caliper piston retractor tool and install to the crankshaft pulley/damper remover.
NOTE:Left-hand shown, right-hand similar.
Install new brake pads.
Install the brake pad anti-rattle spring plates.
Fig. 27: Installing Brake Pad Anti-Rattle Spring Plates
Courtesy of JAGUAR CARS, INC.
CAUTION:The brake caliper must be supported at all times.
NOTE:Left-hand shown, right-hand similar.
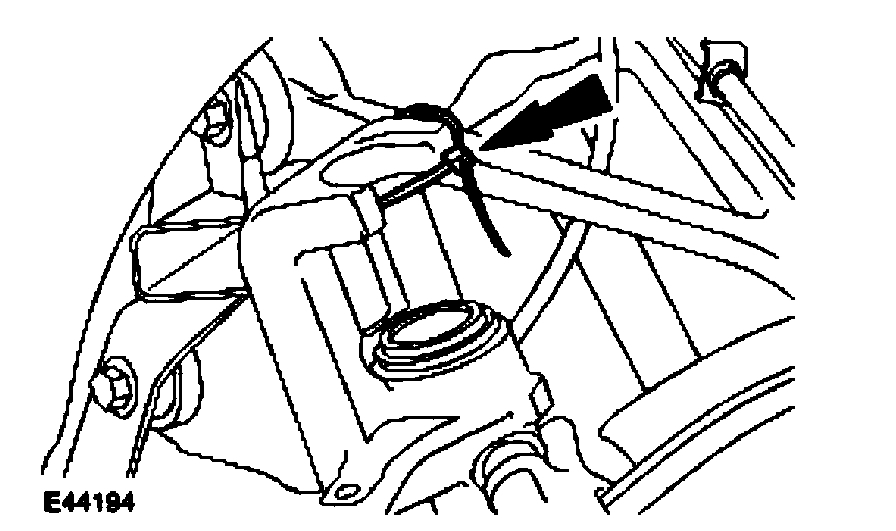
Fig. 28: Removing Tie Strap
Courtesy of JAGUAR CARS, INC.
Remove the tie strap.
NOTE:Left-hand shown, right-hand similar.
Fig. 29: Installing Brake Caliper Retaining Bolts
Courtesy of JAGUAR CARS, INC.
Attach the caliper.
Install new brake caliper retaining bolts.
Tighten to 34 N.m.
Install both rear wheels and tires. For additional information, refer to WHEEL AND TIRE (74.20.05)
NOTE:Do not start the engine or operate the electronic park brake before depressing the brake pedal.
Repeatedly depress the brake pedal until brake pressure is evident.
Mar 1, 2021 at 1:49 PM
(Merged)