Hi,
If the A/C compressor is working, then you should be getting cold air in the vehicle. If you're not, the first thing that comes to mind is a faulty blend air door actuator. The actuator is responsible for changing the air temperature entering the vehicle. If it is not moving, it could prevent cold air from getting in.
Take a look through this link. It explains how in general one is replaced. However, It also explains what to look for and what causes them to fail.
https://www.2carpros.com/articles/replace-blend-door-motor
Your vehicle has two of them. One controls the left side and the other the right. What I suggest is to remove them and see if they respond when actuated. I will provide directions for both sides.
_____________________________________
Left Side
2003 Buick Century V6-3.1L VIN J
Air Temperature Actuator - Left
Vehicle Heating and Air Conditioning Air Door Actuator / Motor Service and Repair Procedures HVAC System - Manual Air Temperature Actuator - Left
AIR TEMPERATURE ACTUATOR - LEFT
REMOVAL PROCEDURE
1. Remove the left instrument panel insulator.
2. Remove the knee bolster.
pic 1
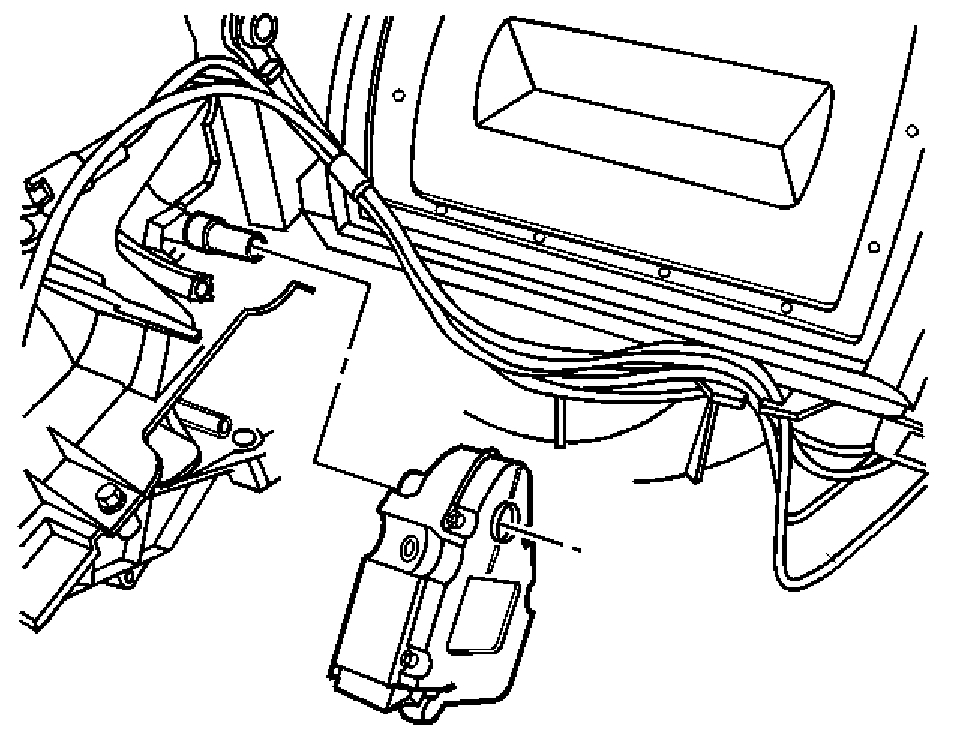
3. Disconnect the electrical connector from the left air temperature actuator.
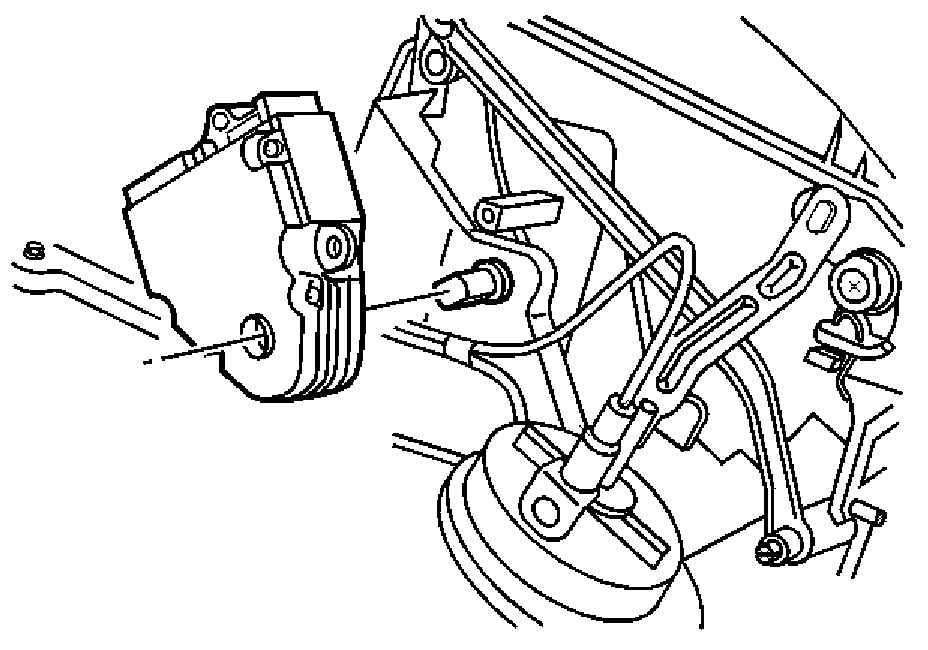
4. Remove the mounting screws from the left air temperature actuator.
pic 2
5. Remove the left air temperature actuator.
INSTALLATION PROCEDURE
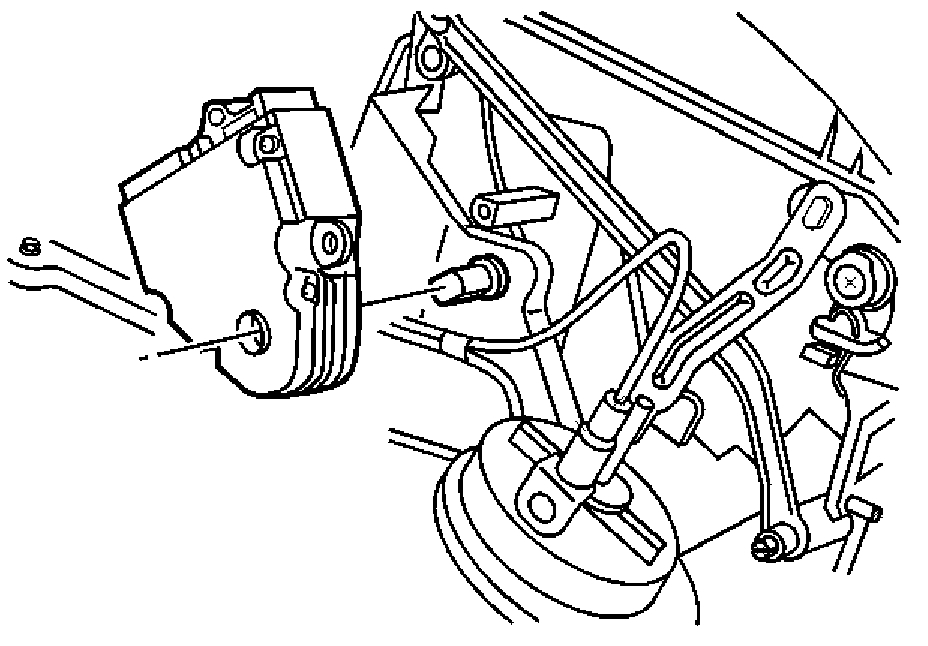
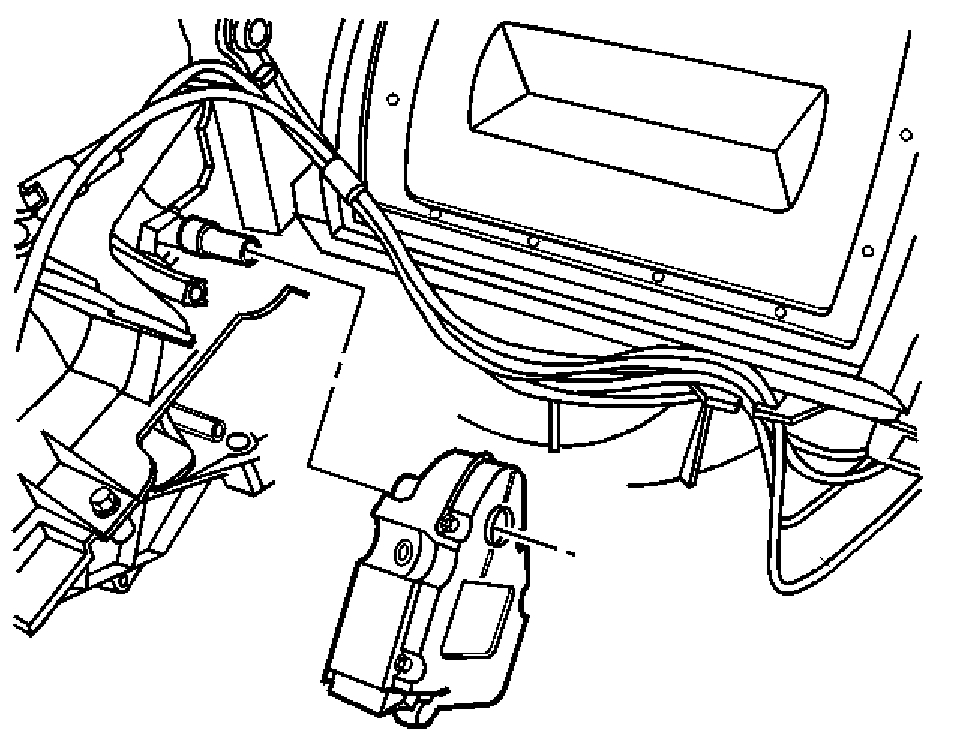
pic 3
1. Position the left air temperature actuator, then align the slots in the electric actuator driver to the flats on the shaft.
2. Align the locating hole to the alignment pin on the HVAC module case.
3. Slide the actuator driver on to the shaft. The actuator driver should set completely on the shaft and the mounting holes should be flush with the mounting bolts on the HVAC module case.
4. Install the mounting screws to the left air temperature actuator.
NOTE: Refer to Fastener Notice in Service Precautions.
Tighten
Tighten the screws to 1.5 N.m (13 lb in).
pic 4
5. Connect the electrical connector to the left air temperature actuator.
6. Install the knee bolster.
7. Install the left instrument panel insulator.
8. Calibrate the actuator.
______________________________
Right SIde
2003 Buick Century V6-3.1L VIN J
Air Temperature Actuator - Right
Vehicle Heating and Air Conditioning Air Door Actuator / Motor Service and Repair Procedures HVAC System - Manual Air Temperature Actuator - Right
AIR TEMPERATURE ACTUATOR - RIGHT
REMOVAL PROCEDURE
1. Remove the right side instrument panel insulator.
2. Remove the instrument panel compartment.
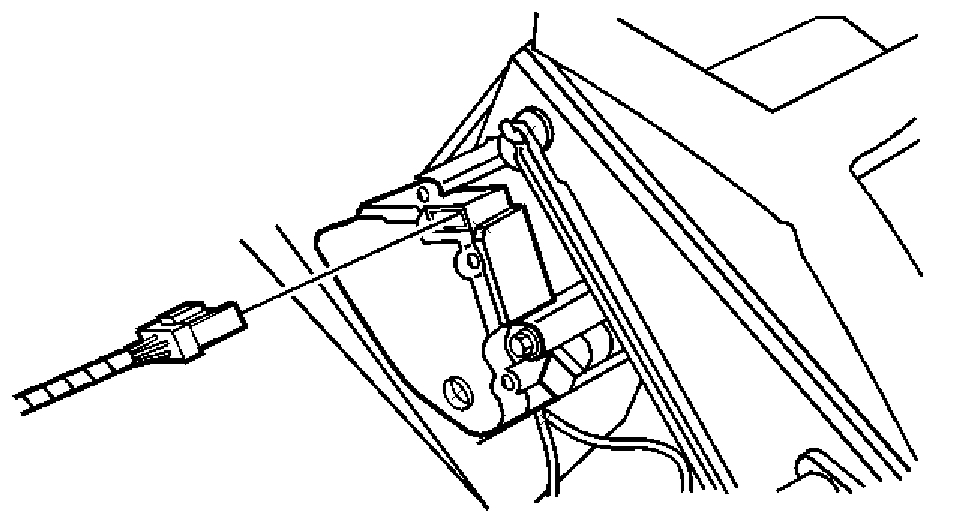
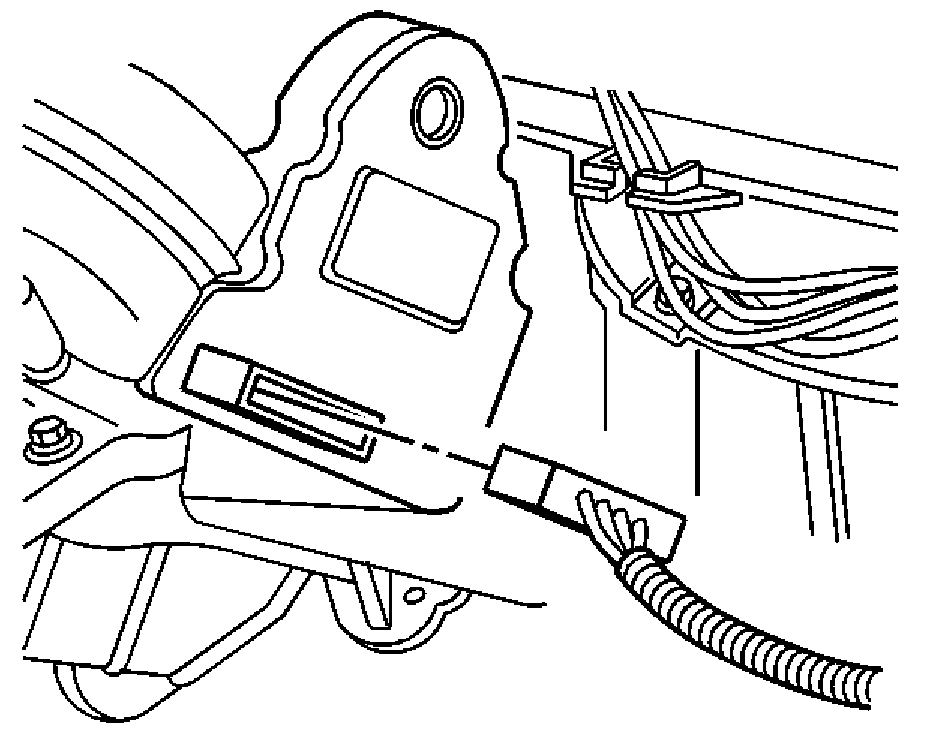
pic 5
3. Disconnect the electrical connector from the right air temperature actuator.
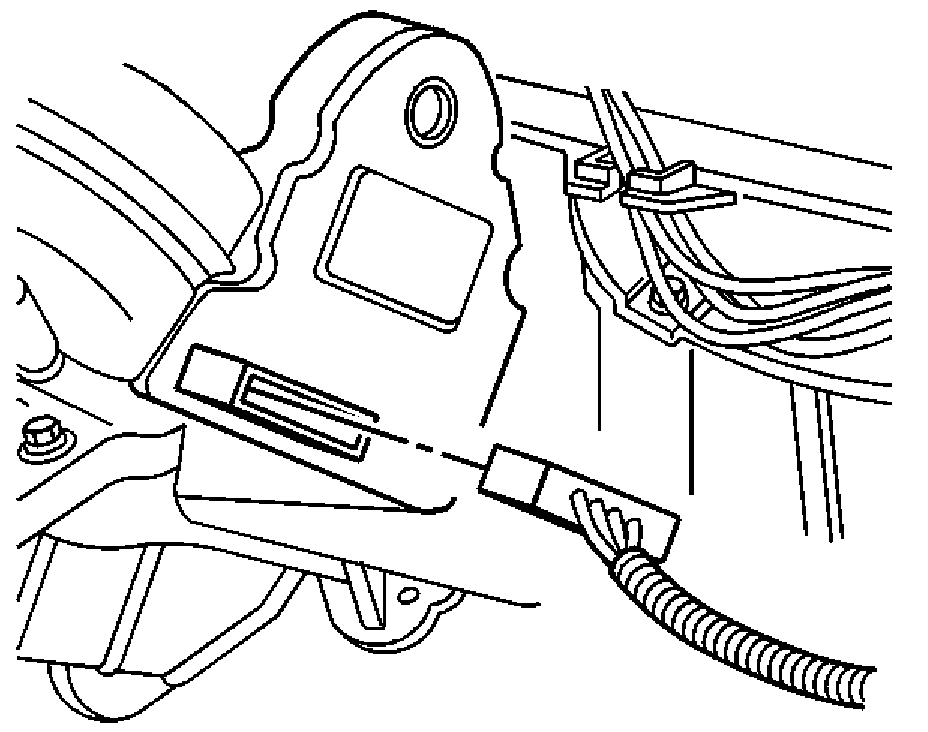
pic 6
4. Remove the screws which secure the right air temperature actuator.
5. Remove the electric actuator.
INSTALLATION PROCEDURE
pic 7
1. Position the right air temperature actuator, then align the slots in the electric actuator driver to the flats on the shaft.
2. Align the locating hole to the alignment on the HVAC module case.
3. Slide the actuator driver on to the shaft. The actuator driver should seat completely on the shaft and the mounting holes should be flush with the mounting bolts on the HVAC module case.
4. Install the screws to the right air temperature actuator.
NOTE: Refer to Fastener Notice in Service Precautions.
Tighten
Tighten the screws to 1.5 N.m (13 lb in).
pic 8
5. Connect the electrical connector to the right air temperature actuator.
6. Install the instrument panel compartment.
7. Install the right side instrument panel insulator.
8. Calibrate the actuator.
_____________________________________________
Let me know if this helps or if you have other questions.
Take care,
Joe
Images (Click to enlarge)
Nov 25, 2020 at 8:14 PM